Meet In Your Kitchen | Domberger Brot-Werk's Secret to German Bread

This post is part of my Meet in My Kitchen podcast: How did we get to where we are in life & what does food have to do with it
“Food is kind of everything. It’s a source of conflicts, of love. It connects, it’s sharing, it differentiates. It’s absolutely underrated in Germany.” - Florian Domberger
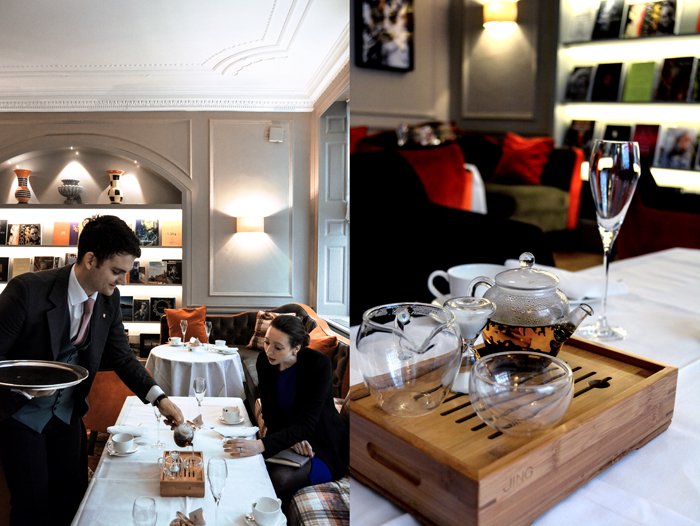
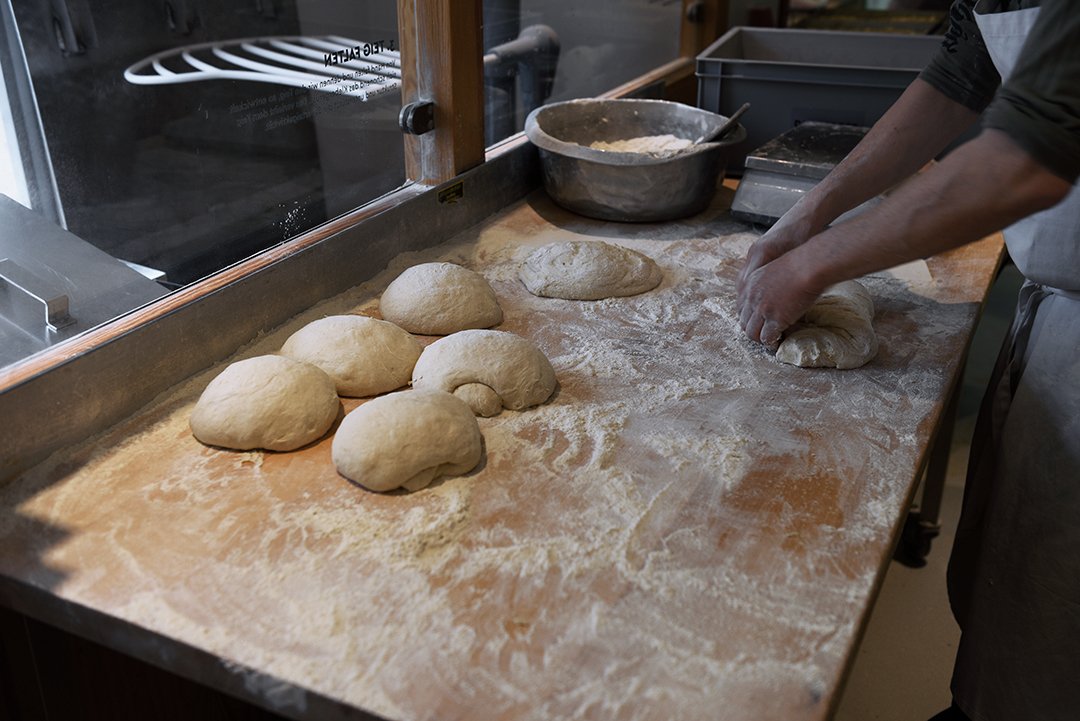
The first time I visited Florian Domberger's bakery, Domberger Brot-Werk, in Berlin's Moabit neighborhood I tried (almost) everything I saw on the wooden shelves: pretzels, croissants, fragrant loaves of crusty German rye and spice bread and traditional buns, such as Vinschgerl, Schrippen, Seelen, and Schusterjungs. All made with sourdough, all made with love. I was hooked. So I sat outside on a bench in front of the bakery in the golden late morning sunlight, all that baked deliciousness spread out in front of me, and every bite reminded me of how bread used to taste in my childhood.
Florian and his team master more than just savory traditional German baking, their sweets are also a generous gift to your palate and hips. His Butterkuchen (a yeasted sheet cake topped with lots of butter and sugar) and his Zimtschnecken (cinnamon rolls) are both the best I ever had in my life. So what is the secret behind this bakery? Florian says it's just "flour, water, salt, time - and love!", and I agree, he and his bakers truly understand the core of what their craft is about.

The craft of a baker demands a lot of fascination - and love - for the ingredients, for the flour, the process, the desire to approach perfection and improve each move every day. A baker needs the humble understanding of the importance of time, working and watching your dough slowly and attentively, you can't rush sourdough bread. And that's the tricky point where commercial bakeries lost the craft and with this loss they turned the taste of good bread into a faded memory. Commercial yeast and ready-made bread mixes replaced the elaborate simplicity of "flour, water, salt, and time" and paved the way for an industrialization that is conflicting when it comes to food that achieves its taste and quality from a slow process. An undertaking that could only fail and threaten the tradition and variety that once Germany became famous for.
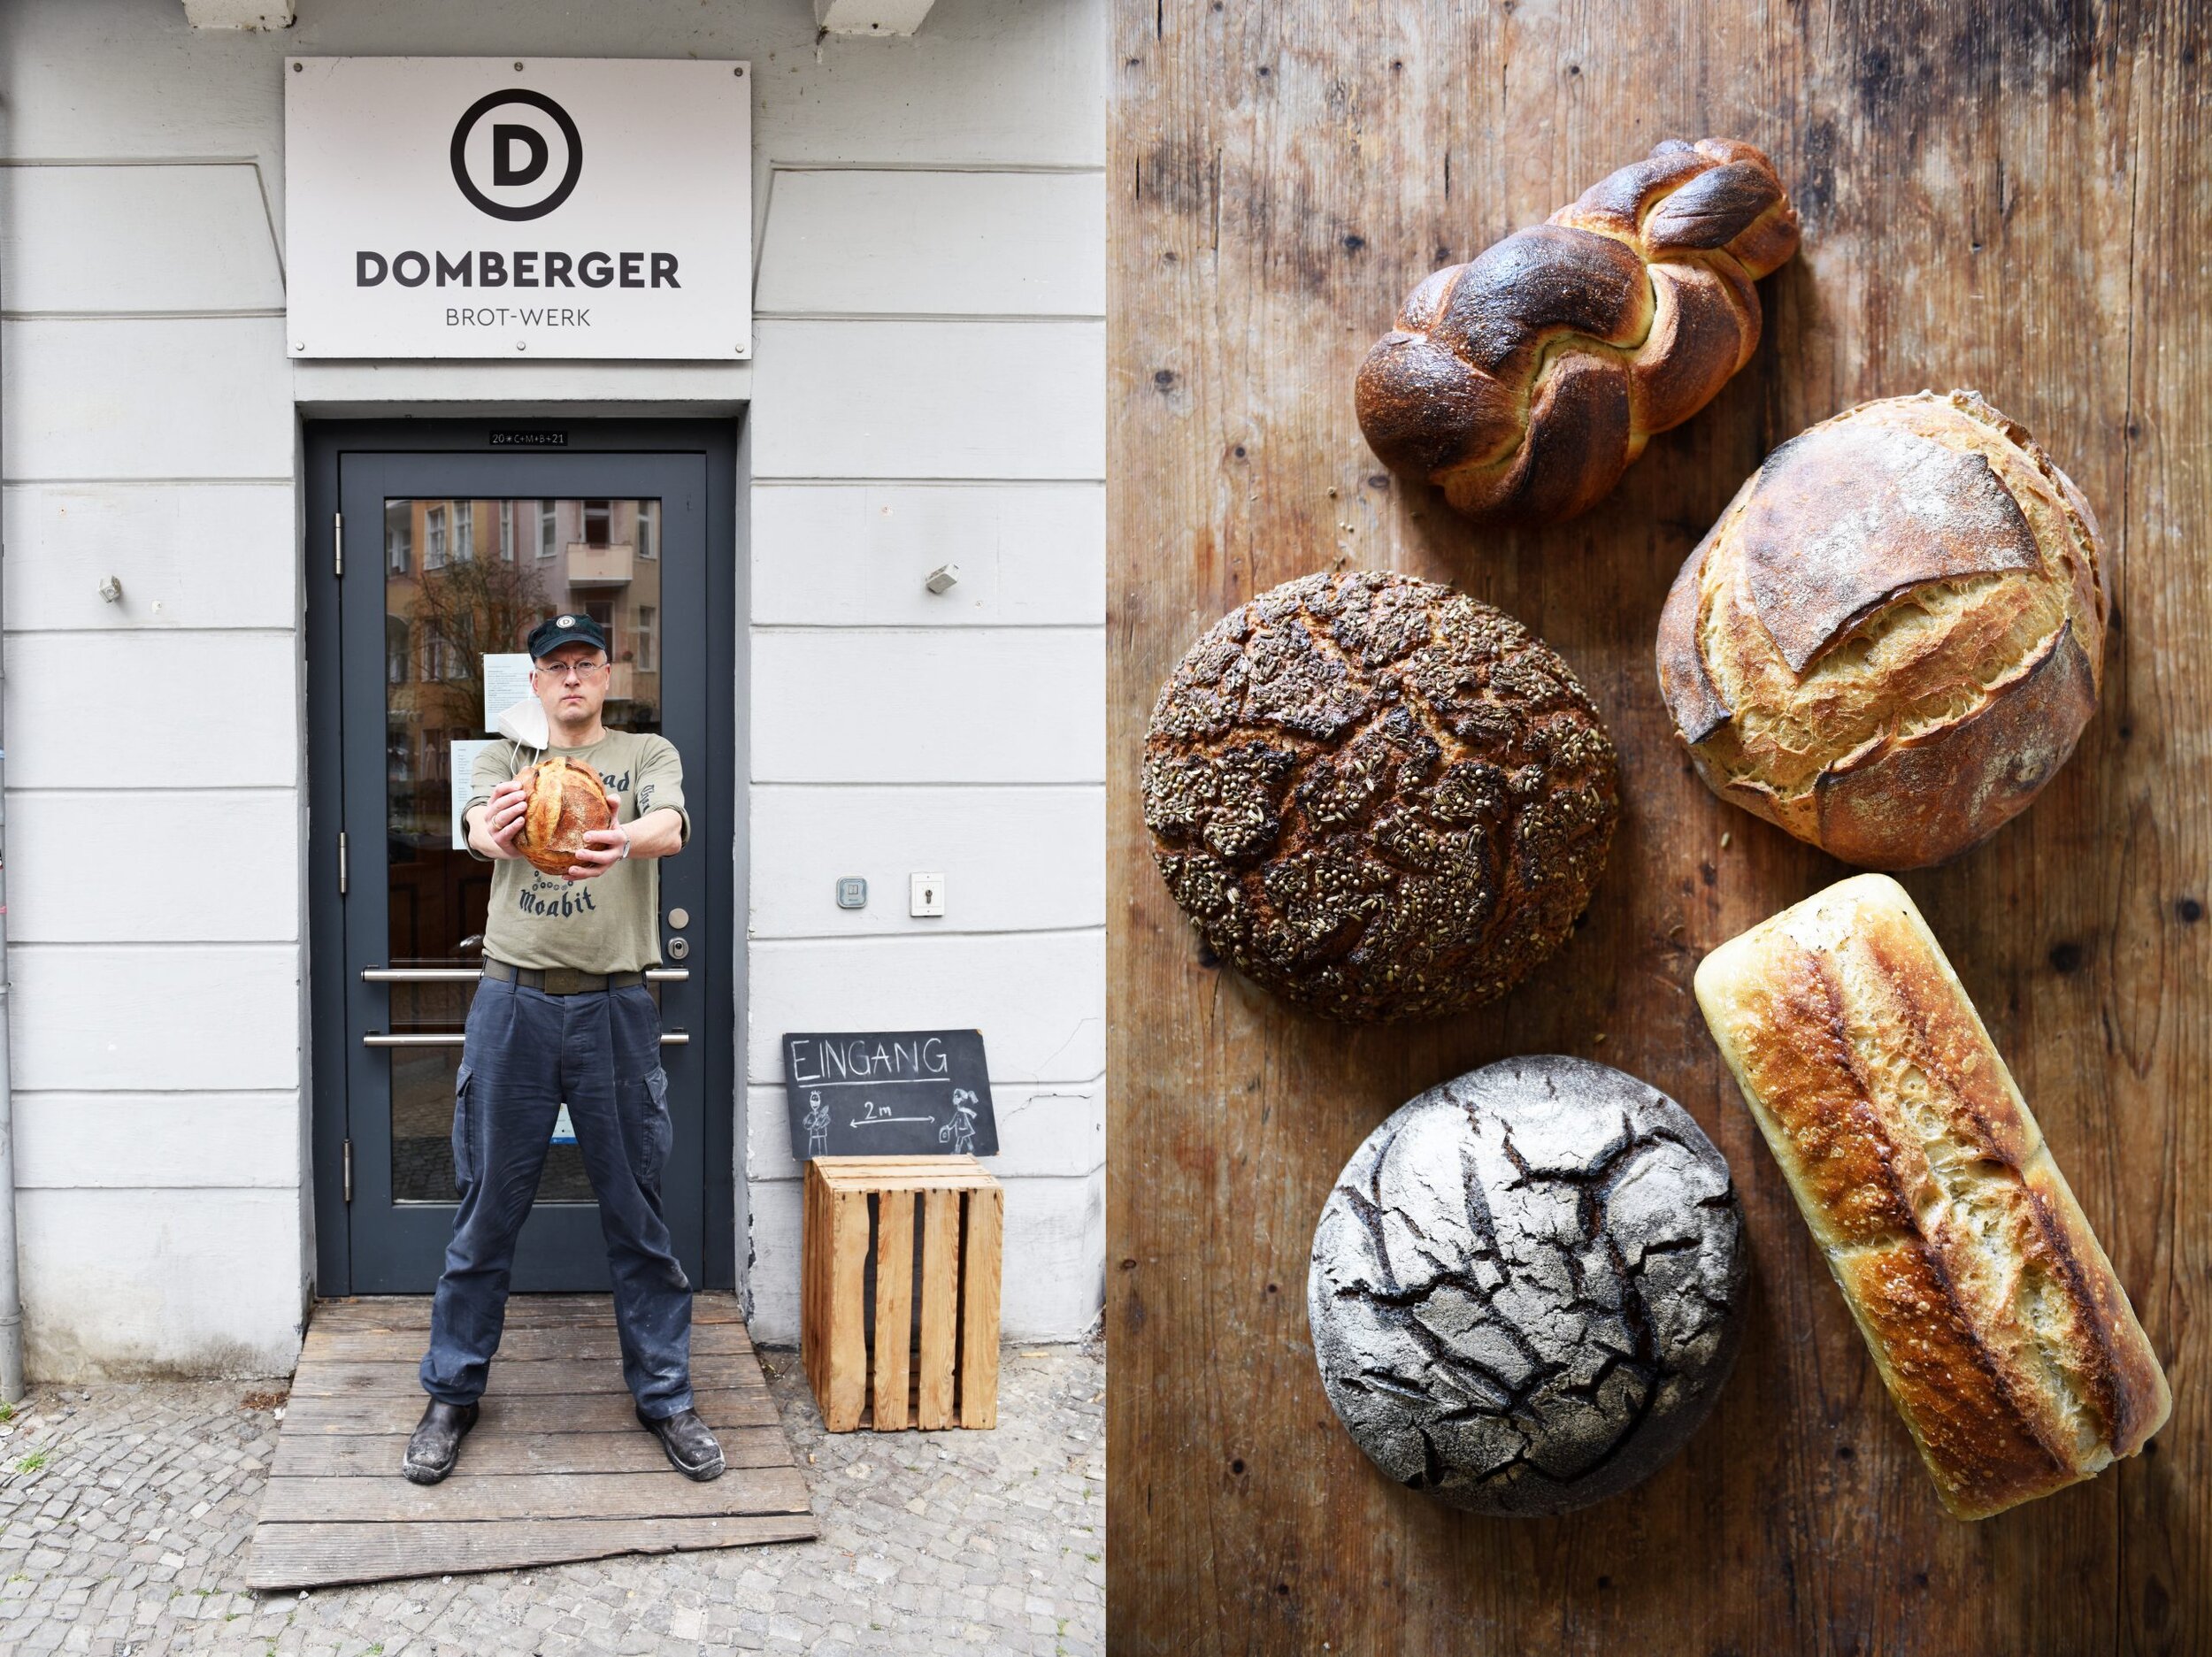
Twenty years ago, driving through my home country, I could stop at almost any bakery in any town, village, and city. Those were still individual bakeries who had their family name written outside on the shop's sign and inseparably connected to their name was the responsibility, and the pride, to only deliver quality to their customers. And that's where Florian decided to go back to. He put his name on the sign. After a successful international career in shipping and logistics, after leaving his family's business and telling his father he's not going to follow in his footsteps, he learned the craft of the baker with the goal to open his own bakery. Five years ago, his wife, Vanessa, and their two daughters followed their husband and father to Berlin and together they built up one of Berlin's most acclaimed bakeries.
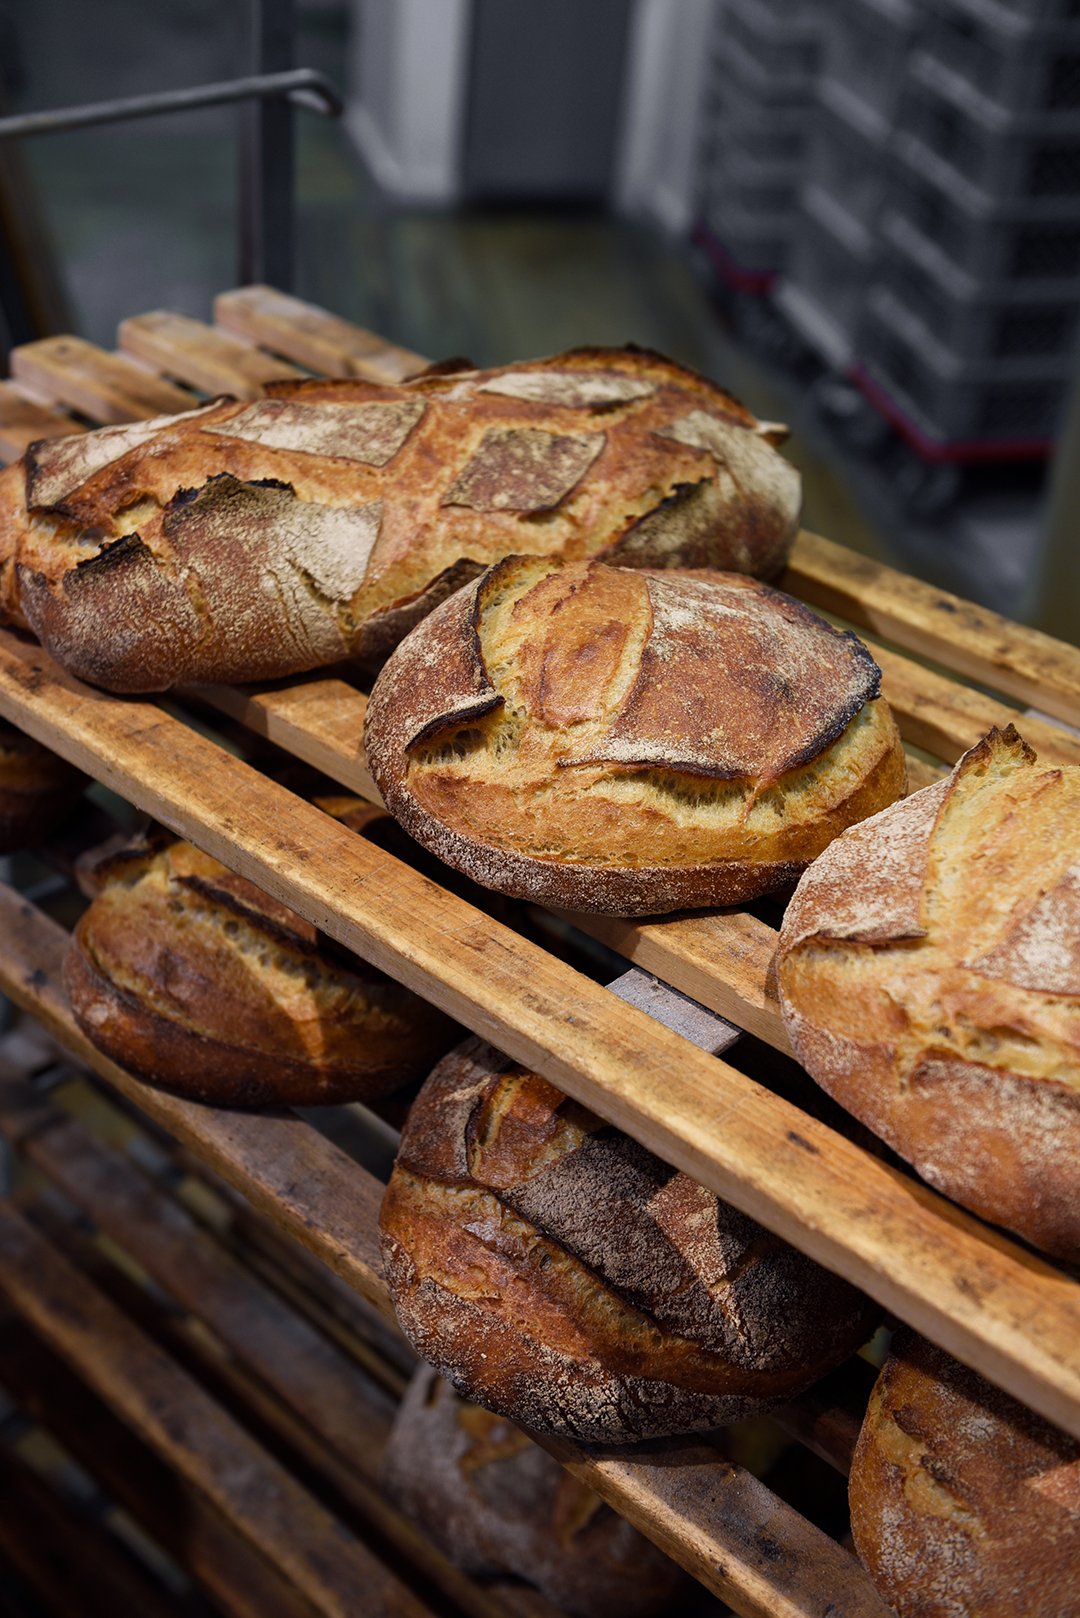
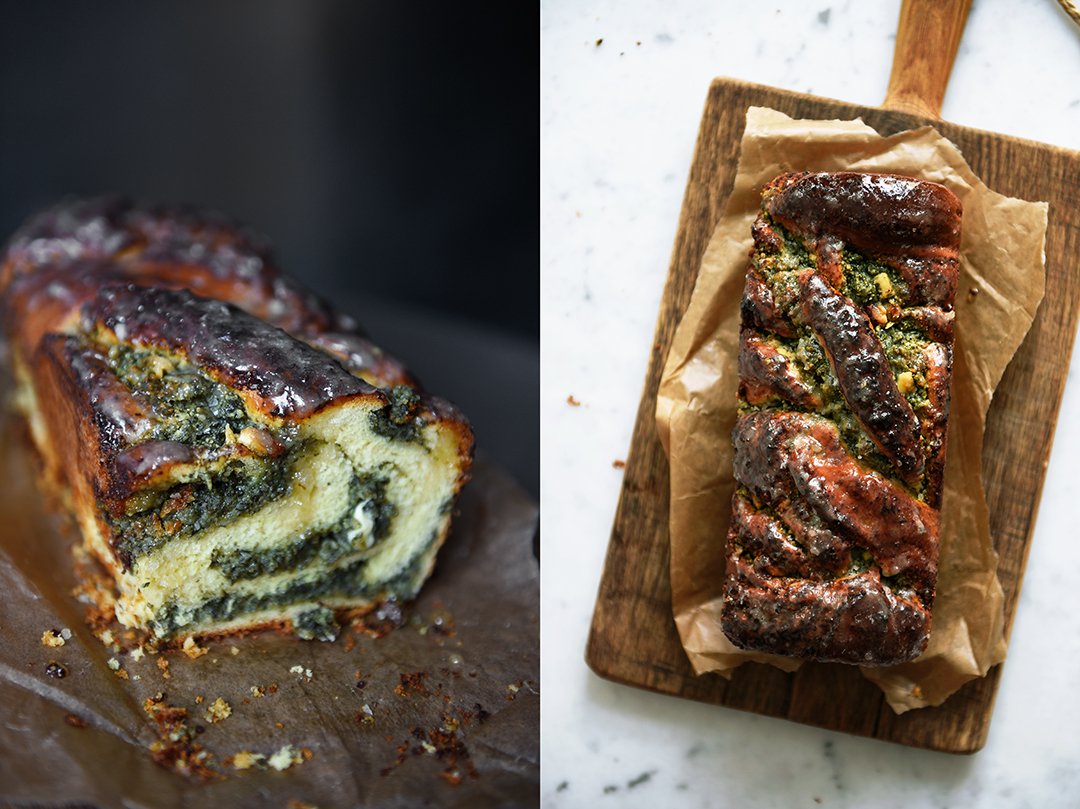
One of Florian's most popular breads - and the recipe that he shared with me (see below) - is his Beutebrot. A white sourdough bread made with wheat and a little spelt flour, with a firm crust and an open almost moist crumb (the double-picture at the bottom of this post showing the loaf cut in half is the bread that I baked in my kitchen, which worked out perfectly). If you happen to have an active sourdough starter in your kitchen you can enjoy Florian's Beutebrot in less than 24 hours and feel the sweet satisfaction of a real bread baker.
The podcast episode with Florian Domberger is in German. You can listen to the Meet in My Kitchen podcast on all common podcast platforms; there are English and German episodes. You can find all the blog posts about these podcast episodes including my guests' recipes here on the blog under Meet in Your Kitchen.
Listen to the podcast episode with Florian on:
Spotify / Apple / Deezer / Google / Amazon / Podimo
On Instagram you can follow the podcast @meetinmykitchenpodcast!
Beutebrot / Wheat and Spelt Sourdough Bread
by Florian Domberger / Brot-Werk
You will need a cast iron cocotte (Dutch oven) with a lid to bake the bread and a very sharp razor blade (bread lame / scoring knife) to score the loaves before baking - and of course, you will need an active sourdough starter.
Makes 2 loaves of sourdough bread
900g / 7 cups unbleached wheat flour (type 550)
100g / ¾ cup whole spelt flour
750ml / 3 cups plus 2 tablespoons lukewarm water
100g / 3 ½ ounces active sourdough starter *
25g / 5 teaspoons fine sea salt
* Your sourdough starter is active when you refresh it and it doubles its volume within roughly 4-5 hours. For this recipe, use the refreshed sourdough starter as soon as it has risen to its peak, before deflating. To test the activity of your starter, you can add a spoonful of it to a glass of water: it should float, it should not sink, then it's ready to be added to the dough. On my Instagram you see how I grew a sourdough starter from scratch, it's in the Highlight Story 'Sourdough', click here.
This is my bread baking schedule: On Day 1, I refresh my sourdough starter in the late morning/ around noon, I start mixing the dough at around 5 pm then, after folding and shaping the dough, I leave it in the fridge overnight and remove it from the fridge the next day at around 8:30am. On Day 2 at around 10am, I preheat the oven and bake one loaf after the other in a round cast iron cocotte (Dutch oven) with a lid.At the bakery, Florian shapes the loaves on Day 2, however I find that my schedule works easier for a home baker.
Day 1
In a medium bowl, combine the wheat flour and the spelt flour. In a large bowl, whisk together the water and sourdough starter. Add the flour mixture and, using your hands, mix for about 3 minutes until well combined; it will be a little sticky. Cover with a kitchen towel and let it rest at room temperature for about 40 minutes.
Sprinkle the salt on top of the dough and, using your fingers, push and rub the salt into the dough. Fold the dough on top of itself a few times then cover with a kitchen towel and let it rest at room temperature (about 21°C / 70°F in my kitchen) for 30 minutes.
Now the bulk fermentation starts, which will take about 3-4 hours: Every 30 minutes, wet your hands with a little water and , grabbing underneath the dough on one side, lift the dough and fold it on top of itself then turn the bowl by 90° and repeat folding the dough the same way on top of itself; turn the bowl by 90° and repeat folding the dough two more times so that the dough has been folded on top of itself from all 4 sides. Cover the bowl, let the dough rest at room temperature for 30 minutes then repeat folding the dough the same way (each time from all 4 sides) every 30 minutes. After 3-4 hours the dough will feel softer and smoother, more cohesive and less stretchy, and it will have risen by roughly 30%. This process will fasten when the room temperature is higher and take longer when the room is colder.
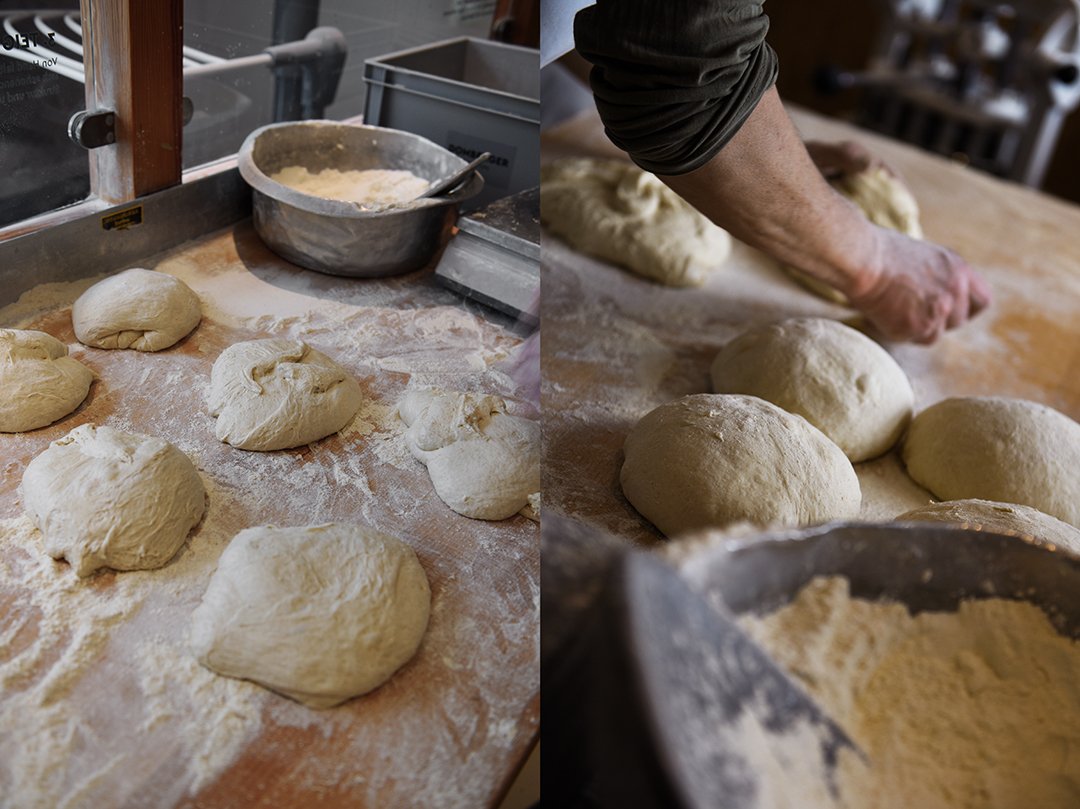
After the bulk fermentation, gently pour or scrape the dough out of the bowl and onto a work surface, dust the dough's top with a little flour then flip the dough and gently cut the dough into 2 pieces. Take one piece of dough, fold it onto itself so that the top and the bottom surface is dusted with flour. Using a bench knife or your hands, gently pull and turn the dough, giving it a round shape and building surface tension (you can find tutorials about shaping sourdough loaves online). The top should be round, smooth, and very taut. Shape the second piece of dough the same way then let both pieces rest for about 10 minutes.
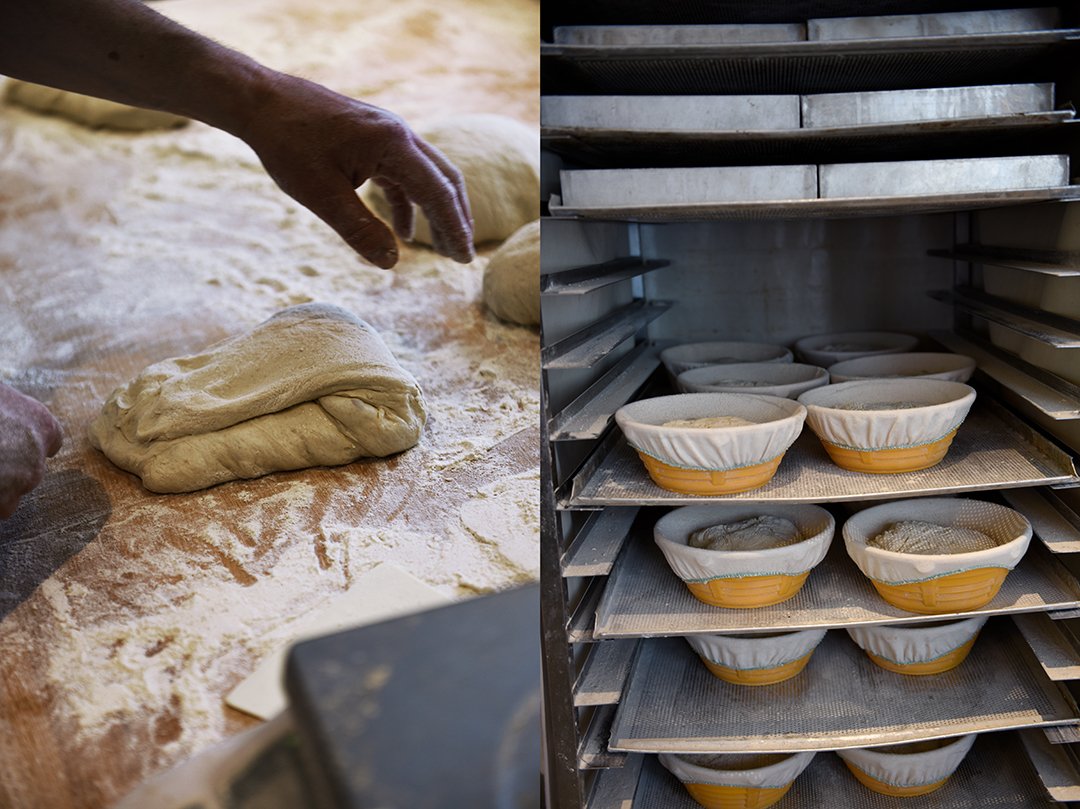
Line 2 bread baskets or bowls (about 20cm / 8" diameter) with kitchen towels and dust the towels with flour. For the final shaping, dust one piece of dough with a little flour and, using a bench knife, flip the dough. Gently stretch and pull the side of the dough that's lying closest to you a little up and fold it over the middle of the dough. Pull the right side of the dough up and fold it to the left generously over the middle of the dough then pull the left side up and fold it to the right generously over the middle of the dough. Now pull the side furthest away from you up and fold the dough onto itself towards you then lay your hands, shaped like a dome, on top of the dough and pull and rotate the dough, while the seams stay at the bottom, towards you. This builds surface tension and creates a taut, round top. Using a bench knife, lift the dough then transfer and flip it into the prepared basket; the seam should be at the top and the round surface at the bottom. Repeat the same way with the second piece of dough. Wrap both baskets with the loaves in large freezer or rubbish bags and transfer to the refrigerator. Leave the dough to rise in the fridge overnight (for about 11-12 hours).
Day 2
After 11-12 hours, remove both baskets from the fridge, leaving them in the bags at room temperature. After 2 hours, place a cocotte (Dutch oven) closed with its lid on the bottom rack of the oven and preheat the oven to the highest setting (at least 250°C / 475°F) for about 30 minutes. The cocotte should be very hot. Remove one basket from the bag. Line a large wooden board with parchment paper, place it on top of the basket, and flip the basket so that the loaf lies on the parchment paper. Quickly score the top of the loaf with the razor blade (you can find tutorials about scoring sourdough loaves and different scoring patterns online) then immediately, and very carefully (!), remove the hot cocotte from the oven, placing it onto a trivet. Be cautious and mind that the cocotte is very hot and can cause severe injuries! Immediately remove the lid from the cocotte then transfer the loaf (on the parchment paper) to the hot cocotte and quickly but carefully place the loaf (on the parchment paper) in the cocotte. Close with the lid, place the cocotte on the rack in the oven then reduce the heat to 230°C / 450°F and bake for 20 minutes. Remove the lid and bake open for another 20-25 minutes until golden brown. Transfer the bread to a cooling rack. Let the bread cool for at least 20-30 minutes before you cut it.
To bake the second loaf, raise the oven temperature to the highest setting again (at least 250°C / 475°F), place the cocotte closed with its lid in the oven, and heat for 10-15 minutes. Then repeat the steps described above but mind to reduce the heat to 230°C / 450°F when you transfer the scored second loaf into the oven (a step I often forget).
The bread tastes best in the first 3 days. It also freezes well, you just defrost the frozen loaf, sprinkle the defrosted (or partly defrosted) loaf generously with water then bake it at 200°C / 400°F for about 10-20 minutes.


Meet In Your Kitchen | Berlin's Best Bagel Baker

This post is part of my Meet in My Kitchen podcast: How did we get to where we are in life & what does food have to do with it
“Food is making other people love me, it’s very manipulative. That’s how I use food!”- Laurel Kratochvila
For months, a friend who knows how much I love to talk, question, and discuss has been bugging me to start a podcast. So thanks to my friend Anne's persistence, here's my new baby: the Meet in My Kitchen podcast!
For this new series, I invite guests to my kitchen in Berlin, people whose journey in life I find inspiring, to find out how they got to where they are in life, to learn about the struggles they had to overcome, how the highs and lows shaped them - and what food has to do with it. My guests are chefs and home cooks, farmers, bakers, and artists, they are all curious adventurers who share a deep zest for food and life. I also visit each guest in her or his kitchen, or restaurant, or bakery, where they share a recipe with me, which you can find in my blog's Meet in Your Kitchen series.
You can listen to the Meet in My Kitchen podcast on all common podcast platforms, there will be English and German episodes.

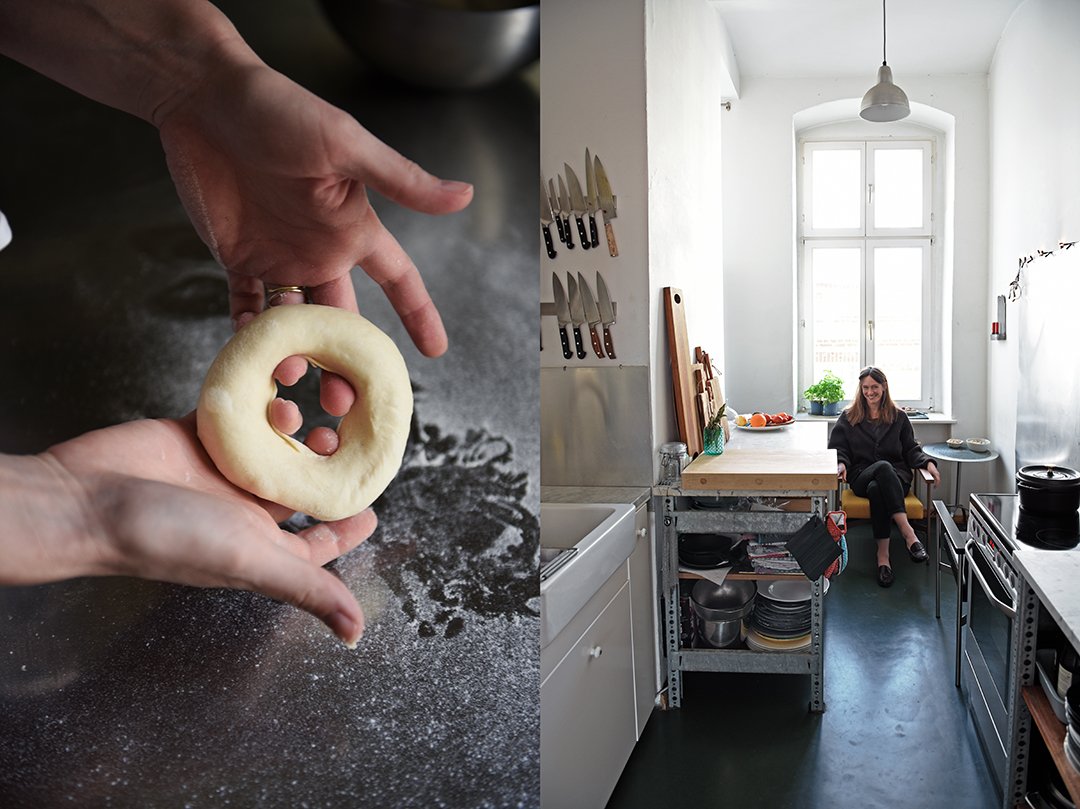
Many years ago, I discovered a small book shop in my Berlin neighborhood, specializing in English literature. It was a quiet, dark space with wooden floors and vintage furniture, and a little counter filled with the loveliest loaf cakes. I came back almost every week, mainly for the sweets, and soon found out that the shop was run by an American/ Czech couple: Laurel from Boston, responsible for baking, and her husband Roman Kratochvila from Prague, taking care of the books.
They left my neighborhood too soon, creating a void that could never be filled, but they re-opened a much brighter and bigger spot just as charming. This became the famous Shakespeare and Sons / Fine Bagels on Berlin's lively Warschauer Strasse, praised and loved for Jewish baking classics - and good books. Laurel's bagels, challah knots, and rugelach are known across town and get me to hop on my bicycle regularly to enjoy her sweet and savory treats.

I'm intrigued by Laurel's passion and dedication, and her irresistible smile that wipes away all sorrows. She started as a home baker and then deepened her knowledge and education in French bakeries, but she still has this relaxed aura of 'a friend who's just baking in her kitchen.' Laurel treats her dough like a baby, she knows it well, watches and works it precisely, until it unfolds its true beauty.
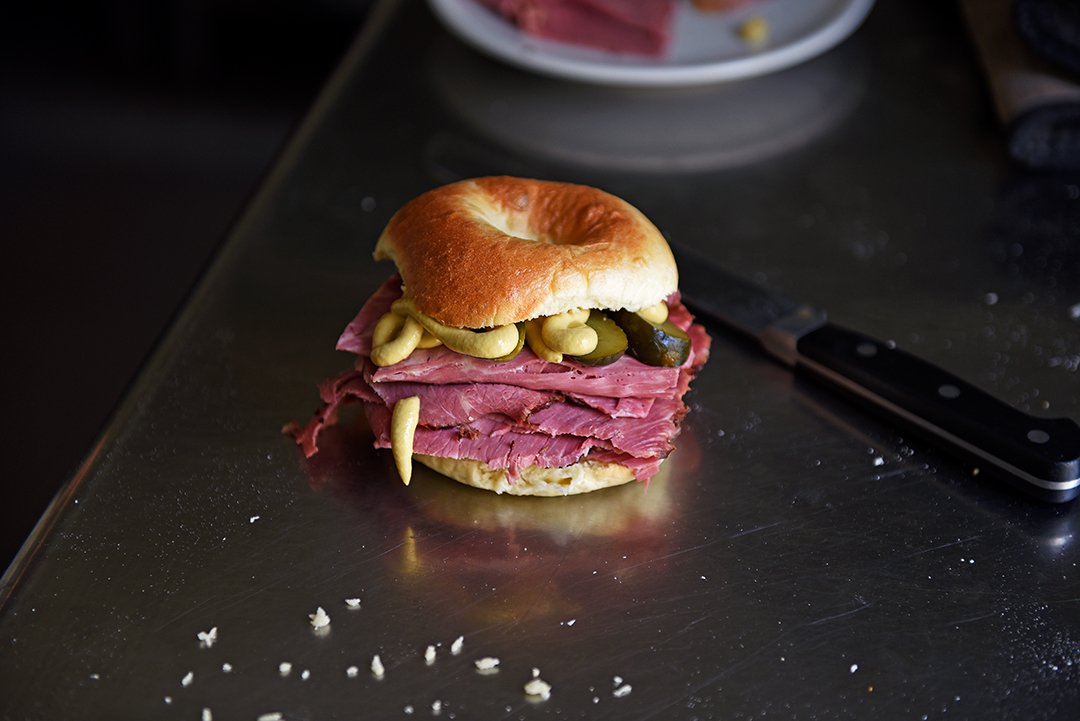
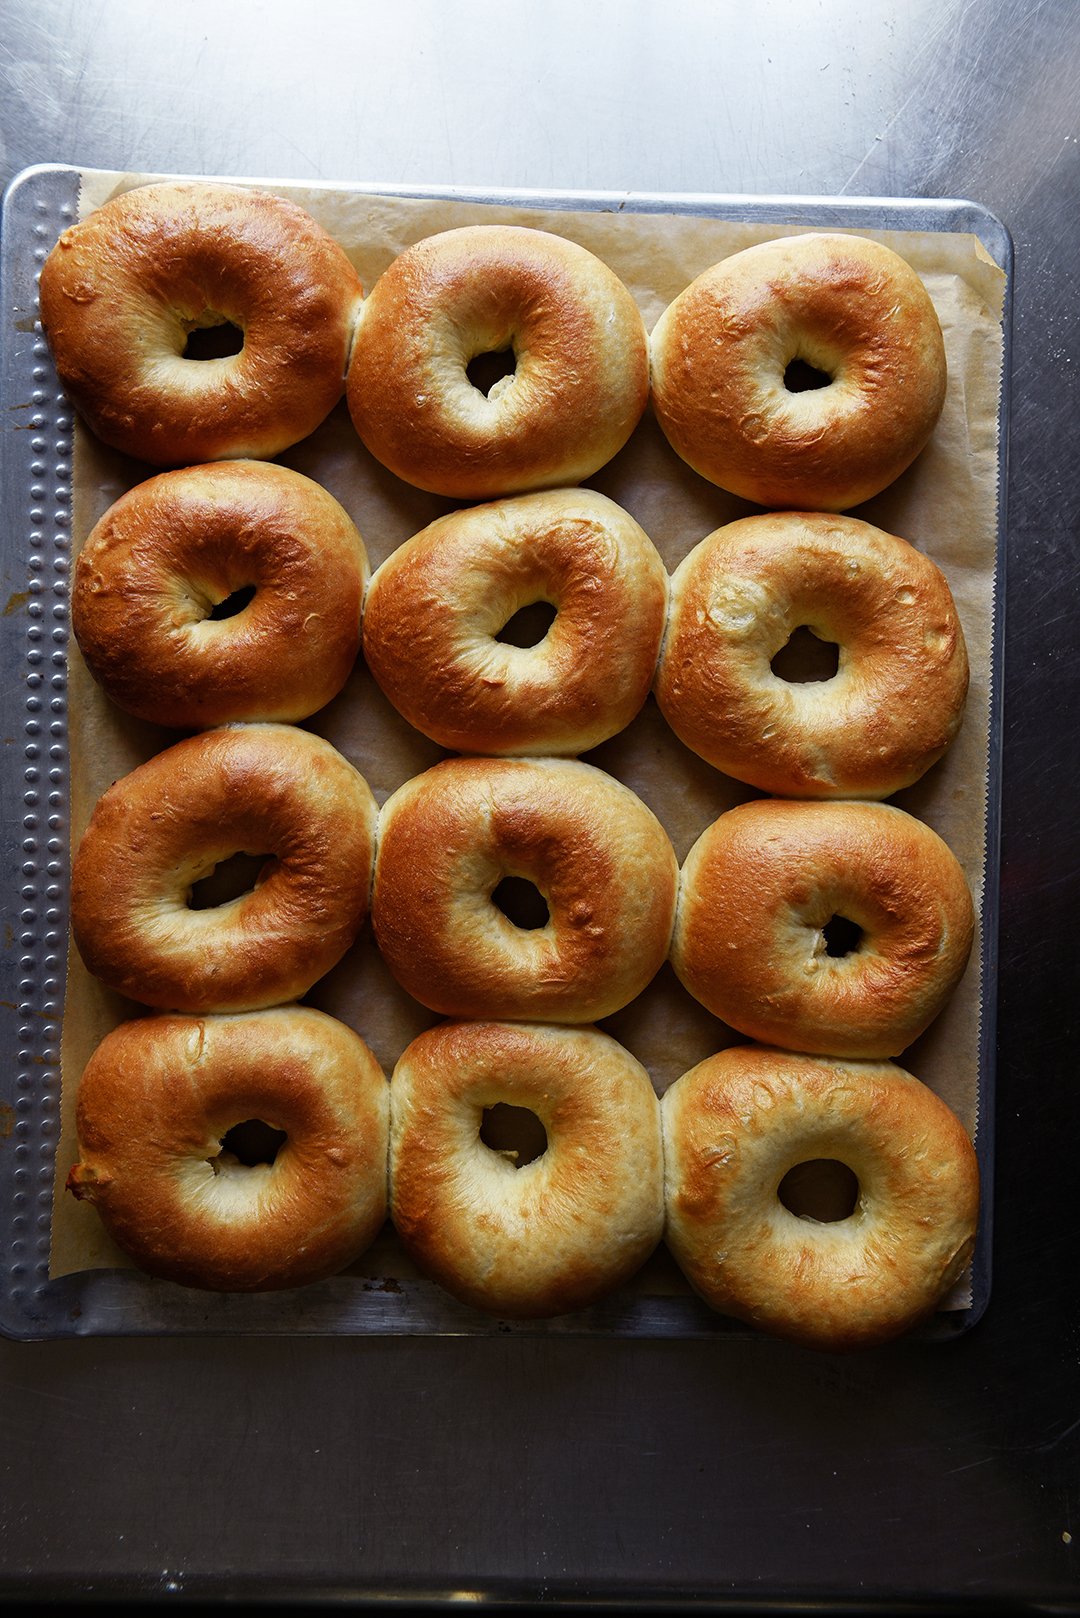
For this podcast episode, Laurel shared her recipe for Brick Lane bagels with me (named after London's famous Brick Lane Beigel bakery). She calls it a mix of a New York and a Montreal bagel. Quick to prepare, a little chewy, and perfect for a luscious sandwich filled with salt beef, mustard, and gherkins, you can now satisfy your bagel cravings in your own kitchen any time.
The podcast episode with Laurel Kratochvila is in English. You can listen to the Meet in My Kitchen podcast on all common podcast platforms; there are English and German episodes. You can find all the blog posts about my podcast episodes including my guests' recipes here on the blog under Meet in Your Kitchen.
Listen to the podcast episode with Laurel on:
Spotify / Apple / Deezer/ Podimo
On Instagram you can follow the podcast @meetinmykitchenpodcast!

Laurel’s Brick Lane Bagels
Makes 12 bagels
1 kg / 7 2/3 cups bread flour or all purpose flour (type 550 in Germany, T55 in France)
50 g / 1/4 cup white sugar
1 envelope (7 g / 1/4 ounce) fast-acting yeast or 18 g / 2/3 ounce fresh yeast
10 g / 2 teaspoons fine sea salt
420 ml / 1 3/4 cups lukewarm water
1 large egg
15 ml / 1 tablespoon vegetable oil
sugar for boiling the bagels
sesame and / or poppy seeds for the topping
For the sandwich
salt beef, very thinly sliced
mustard
gherkins, sliced
Preheat the oven to 230°C / 450°F (or the highest temperature setting of your oven). Line 2 baking sheets with parchment paper.
In a large bowl, whisk together the flour, sugar, yeast, and salt then, in a medium bowl, whisk together the water, egg, and vegetable oil, and add to the flour mixture. Mix into a shaggy mass by hand or with a wooden spoon. Then knead by hand for 10 minutes or until the dough is smooth. Avoid adding more flour as you knead it. Form the dough into a ball and set into a lightly oiled bowl. Cover with plastic wrap or a damp cloth and let rise for 30 minutes in a warm environment. Meanwhile, set a large pot of water on the stove to boil.
Divide the dough into 12 pieces and roll them into tight balls, cover with plastic wrap. After ten minutes, press a hole through the middle of each ball of dough with your thumb or elbow (see pictures below). Stretch out the bagel a bit and place on a lightly floured work surface.
Add a couple spoonfuls of sugar to the boiling water. In batches (2-3 bagels at a time), boil the bagels for 30 seconds to 1 minute, flipping them once. Don’t overdo it! Using a slotted spoon or spatula, remove the bagels from the water and transfer to the prepared baking sheets. Top with seeds of your choice. Bake the bagels for about 10 minutes or until golden.
To make the sandwich, cut a bagel in half, stuff it generously with thinly sliced salt beef, drizzle with mustard, top it off with a few slices of gherkins, and close the bagel with its top.
Enjoy!


Pumpkin Seed and White Chocolate Babka
Sundays are for sugar rushes
I'll be honest, my oven has been off most of the time in the past few months. There was a humble apple pie, a few quiche variations and the obligatory cookies in December to fill the jars - and to fill my apartment with that buttery smell - but apart from that I've been a lazy baker. Yet to compensate for the lean supply of baked goods from my own kitchen - and still satisfy my voracious sweet desires - I dove into a new old passion: regular visits to my trusted Berlin bakers.
My favorite bakeries in the city offer all I would need to never ever have to turn on my oven again (not to say that would ever happen!). Flaky pastries for the mornings, experimental cookie creations from Cookies & Co for my espresso break, and for the afternoons, there's a café/ bakery I've visited for almost 16 years, SowohlAlsAuch Kaffeehaus. They have a decadent hazelnut mascarpone torte, which often crowns my Sunday coffee table. And then there's Café Boulangerie, with their chocolate covered Bundt cake it is a favorite place to go to when I meet my girls for walks in the neighborhood.
Almost any time I'm up for a longer trip across the city just to nibble on Laurel's bagels, Challah knots and rugelach from Fine Bagels, or have my traditional Pfannkuchen (filled doughnuts without a hole, called Berliner where I come from) at New Years and carnival from KaDeWe.
And for sudden cravings, around the corner from my home is a small bakery particularly talented at yeast baked goods like Puddingbrezel (vanilla custard pretzel), tender brioche buns, sticky poppy seed twists and a relatively new discovery: a glorious pumpkin seed twist. I had never before thought of using squash seeds for sweet baking. For pesto, or crunchy salad toppings, yes, but it never occurred to me that it would make sense to mix it, for example, with white chocolate chunks and use that for a babka filling. So I just did that, loved it and here's (finally!) a new recipe on the blog.
It's a wintery variation of my blueberry lemon cheese babka and my poppy seed babka and it fits particularly well to gloomy Sundays in February, when the heart needs some sweetness to fill the gap until spring. And anyway, Sundays are for sugar rushes - doesn't matter if homemade or from your favorite neighborhood bakery.

Pumpkin Seed and White Chocolate Babka
Mind that the babka has to rise twice, the first time overnight (for about 8 hours) in the fridge.
Makes 1 loaf cake.
For the dough
275g / 2 cups plus 2 tablespoons all-purpose flour
50g / 1/4 cup granulated sugar
1 1/2 teaspoons fast-acting yeast
1/4 teaspoon fine sea salt
60ml / 1/4 cup whole milk, lukewarm
1 large egg
1 large egg yolk
75g / 1/3 cup butter, at room temperature, cut into cubes
sunflower oil, to grease the bowl
For the filling
240ml / 1 cup whole milk
50g / 1/4 cup granulated sugar
1 teaspoon cinnamon
150g / 5 ounces pumpkin seeds, finely ground in a food processor
110g / 4 ounces white chocolate, roughly chopped
For the glaze
45ml / 3 tablespoons water
50g / 1/4 cup granulated sugar
Day 1 – in the evening:
For the dough, in the large bowl of a stand mixer fitted with the dough hook attachment, whisk together the flour, sugar, yeast and salt.
In a medium bowl, whisk together the milk, egg and egg yolk and add together with the butter to the flour mixture. Mix with the hook for about 8 minutes then continue kneading and punching the dough with your hands for a few minutes until you have a soft and silky ball of dough. Transfer the dough to a clean, oiled bowl, cover with plastic wrap and leave it in the fridge overnight, or for about 8-10 hours (don't be alarmed, the dough will only rise a little).
Day 2 – in the morning:
Take the dough out of the fridge and let it sit in the bowl at room temperature for about 1-2 hours (this time I even let it sit for 4 hours and the babka rose beautifully).
For the filling, in a medium saucepan, bring the milk, sugar, cinnamon and ground pumpkin seeds to a boil and cook, whisking constantly, over medium-high heat (bubbling) for 5 minutes or until the mixture is spreadable. Let the filling cool completely (I put the pot in the snow on the balcony, whisking occasionally).
Butter an 23 x 10cm / 9 x 4″ loaf pan and line the bottom with a piece of parchment paper.
Punch the dough down, take it out of the bowl and knead for 30 seconds. Roll the dough with a rolling pin into a 40 x 28cm / 16 x 11″ rectangle. Spread the pumpkin seed filling on top, leaving a 2cm / 3/4″ border then sprinkle with the white chocolate. Starting from one long side, roll the dough up into a log (8th picture, below). Use your fingers to squeeze the overlapping dough then flip the roll over so that the seam is at the bottom. Using a sharp knife, cut the roll in half lengthwise (3rd picture, top). The cut sides facing up, place both pieces next to each other then quickly lift one half over the other, repeating to form a twist (4th picture, top). Using the blade of a large knife, gently lift the babka and transfer quickly to the prepared pan. Cover with a tea towel and let it rise in a warm place (I kept the bowl on the heater) for about 60-90 minutes or until puffy.
Preheat the oven to 190°C / 375°F (conventional setting).
For the glaze, in a small saucepan, bring the water and sugar to a boil and cook for 2 minutes or until syrupy then take the pan off the heat and set aside.
Bake the babka for 35-40 minutes or until golden brown and spongy, covering the top of the babka with tin foil after 30 minutes if it gets dark. After 35 minutes, check with a skewer, it should come out almost clean. Take the babka out of the oven and immediately brush the top with the syrup. Let it cool for 10-15 minutes then remove from the pan. Enjoy the babka warm or cold.


Swirly Peanut Butter Plum Buns and the blissful lesson of taking a break
I started writing a new book eleven months ago. Actually, eleven and a half months, it was Christmas Eve. The moment I decided to dive into this intense adventure again, I couldn't stop writing down one recipe after the other. It felt like the dishes had been inside my head, waiting impatiently to come out. And all this happened during Christmas 2017, my man thought I was crazy. At a time that's supposed to be calm and serene, surrounded by our sparkling Christmas tree and piles of cookies, listening peacefully to angelic carols, I stuck my head into my recipe notebooks and discussed undiscovered flavor combinations with my mother. By New Year's Day, I had an exaggeratedly long recipe list together and felt ready for a new book - and a holiday.
While I wrote my first book, Eat In My Kitchen, I often crossed my limits, I refused to respect them and felt totally squeezed out by the end of it. I didn't want to make the same mistake twice. So I asked for help and found the best kitchen assistant I could have asked for. He made the whole process of cooking and shooting a book far more smooth than I thought was even possible. He also took care of an impeccable playlist filling my kitchen with the most energizing tunes and making me dance around boxes of vegetables and bowls of cooked dishes. But most importantly, he taught me to take a break once in a while. We often went to a tiny coffee shop around the corner for an espresso and a chat to clear our heads. We started working on the book early February and since then I managed - more or less - to stick to this new ritual in my life: allowing myself to take a little break every day.
Sometimes, after an early morning cooking session followed by an extensive shopping tour for meat, fish, and vegetables, we'd get a bit more excessive and head over to a Berlin bakery famous for swirly buns. Whenever I felt tired and empty, a bite of their spongy cinnamon buns put me back on my feet and felt better than the most sumptuous meal in the world. That's the bliss that you can find in food - and in a break - it will always impress me how good it feels.
It's been a while since I cooked or baked for the blog, and for months now I had a flavor combination on my mind that I wanted to turn into a sweet treat and share: peanut butter and plums. We need to hurry, it's getting late, plum season reached its end, but you can still find some very ripe, sugary stone fruits at the markets. I decided to combine the duo with a recipe that Sofie Wochner from Marigold restaurant in Rome shared with me last summer. The Danish pastry chef treated me to the most wonderful, fragrant cinnamon buns in her kitchen, so I took her recipe for the yeast dough and turned it into Swirly Peanut Butter Plum Buns.
I will keep you posted about my new book, but it'll still take a lot of time until it comes out, as a book does when you want it to be a part of what you truly are. To be continued ...


Swirly Peanut Butter Plum Buns
Mind that the dough has to rise in the fridge overnight before you bake the buns.
Makes 10 swirly buns
For the dough
500g / 3 3/4 cups plus 1 tablespoon all purpose flour
75g / 1/3 cup plus 1 tablespoon light brown sugar
1 (7-g / 1/4-ounce) envelope fast-acting yeast
1 teaspoon ground cinnamon
1/2 teaspoon fine sea salt
255ml / 1 cup plus 1 tablespoon whole milk, lukewarm
1/2 beaten large egg (about 25 ml)
60g / 1/4 cup unsalted butter, at room temperature, divided into 6 portions
For the filling
250g / 1 cup creamy peanut butter
200g / 1 cup light brown sugar
300g / 2/3 pound pitted fresh dark plums
For the topping
1 large egg, beaten
1 tablespoon unsalted butter
In the bowl of a stand mixer fitted with the dough hook attachment, combine the flour, sugar, yeast, cinnamon, and salt. Add the lukewarm milk and 1/2 beaten egg and mix on medium speed for 10 minutes or until smooth. Let the dough rest for 15 minutes then continue mixing, adding the butter, 1 portion at a time, incorporating each portion of butter before adding the next one. Continue mixing on medium speed for another 3 minutes or until smooth. Transfer the dough to a clean bowl, cover, and let it rise in the fridge overnight.
Take the bowl out of the fridge and let the dough sit at room temperature for about 1 hour. Line a 24 x 18cm / 10 x 7 inch baking dish with parchment paper.
For the filling, combine the peanut butter and sugar. Cut the plums into small cubes.
Knead the dough for 30 seconds with your hands. Lightly dust a work surface and a rolling pin with flour then transfer the dough to the floured surface and, using the rolling pin, roll it into a 33 x 33cm / 13 x 13 inch square that's roughly 0.5cm / 1/4 inch thick. Spread the peanut butter mixture on top of the dough, leaving a 2cm / 3/4 inch border, then sprinkle the plums over the peanut butter, gently pushing them into the peanut butter. To fold the dough, divide it into 3 rectangles, don't cut the dough, just leave a thin mark on top of the peanut butter. Starting with the long side of one of the rectangles and dusting off excess flour, fold the first third of the dough up and over the middle third of the dough, then fold the other outer third of the dough up and place on top of the 2 layers of dough to end with 3 layers of dough. Using a very sharp knife, cut the layered dough into 10 slices.
Quickly pull and stretch each slice of dough then twist into a long spiral, close in a loose knot, and transfer to the prepared baking dish. It'll be massy, don't worry, you can sprinkle any peanut butter and plums that fall out on top of the buns once they are arranged in the baking dish. Cover the buns with a tea towel and let them rise in a warm place for 1 1/2 to 2 hours or until puffy.
Preheat the oven to 190°C / 375°F.
Brush the buns with the egg wash then bake for 25 minutes, cover the top with aluminum foil, and bake for another 10 minutes or until golden brown and firm. Rub the warm buns with 1 tablespoon of butter and let them cool for at least 20 minutes before serving.


Meet In Your Kitchen | David Kurtz & the best Cubano Sandwich in San Francisco

A food loving friend of mine who lives in San Francisco told me, if you come to California, you must (!) meet David Kurtz and visit his Homage restaurant in Downtown. I trust my friends, especially when it comes to food, so I emailed David that same evening, not only receiving an answer that he was looking forward to cooking with me, but also to showing me around his hometown and spending a day together to give me an insight into his charismatic city that has so many faces.
The first thing that people think of when it comes to San Francisco is the Golden Gate Bridge and – if you talk to bread obsessed foodies and Instagrammers – the famous Tartine Bakery. The bakery is a temple for baked goods that one shouldn't miss, the bridge, however, is a moody diva that is hard to catch. San Francisco is a place of extremes when it comes to the weather, a fact that I had totally forgotten about and wasn't really prepared for. You can be spoilt with blue skies, sunshine, and summery temperatures in one second, then walk two blocks and be swallowed by mist and end up shivering in the cold. It was a bright afternoon as we drove to the famous bridge, impatient excitement in our faces ready to capture its majestic elegance, yet to find ourselves fighting against thunder and rain as we arrived was sobering. Needless to say there was no bridge in sight, but seeing the clouds climbing the hills behind the bridge and filling the bay with darkness and lightning faster than one can run was just as impressive.
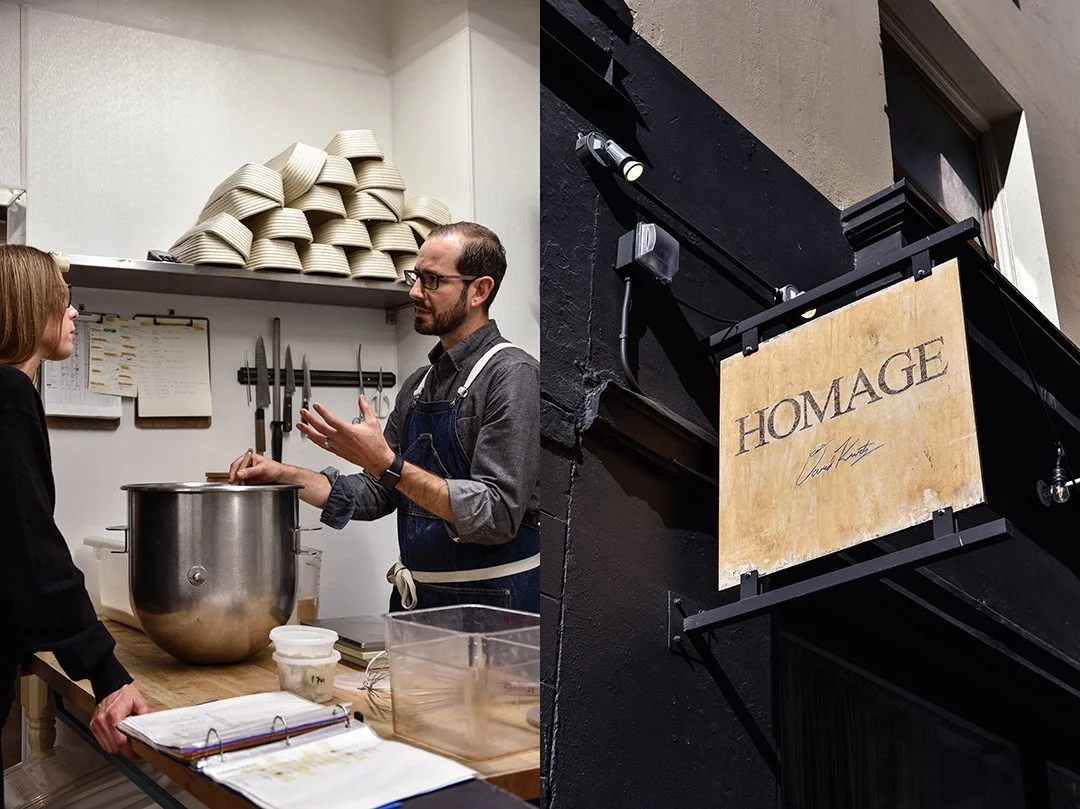
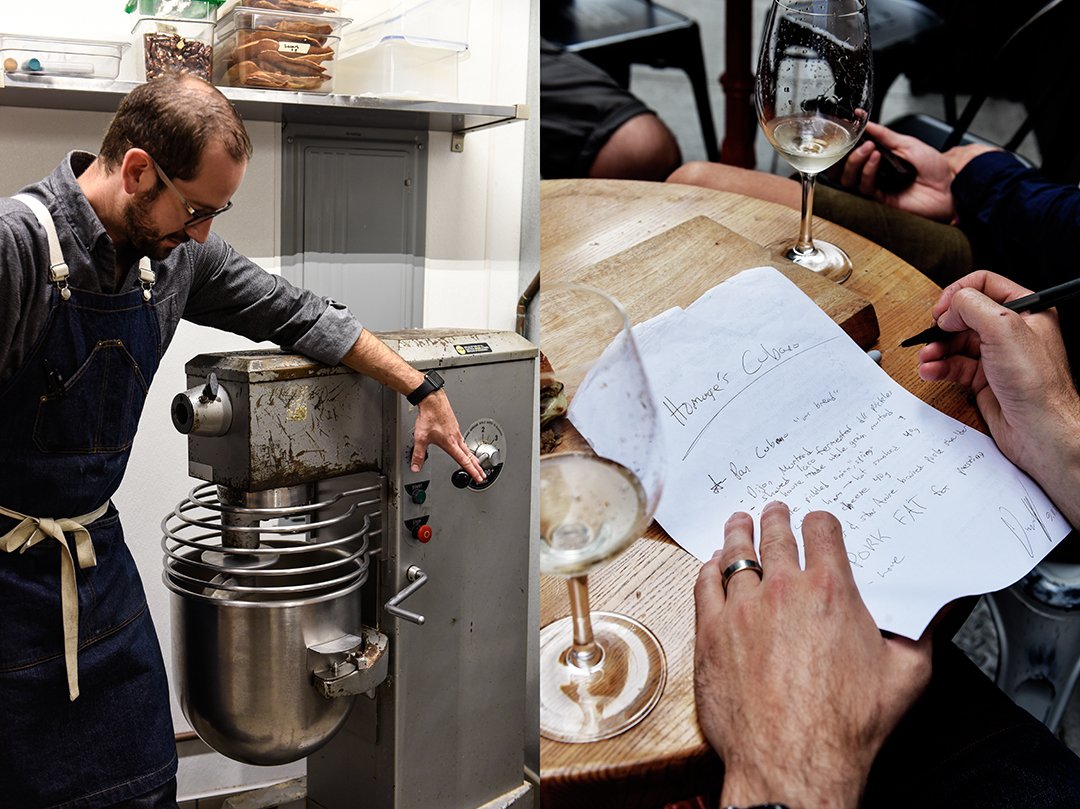
The day we met David offered this exact spectrum of experiences, in food, weather, and sceneries. We started at the chef's wonderfully relaxed, casual, yet elegant Homage restaurant, a culinary gem tucked in a little side road surrounded by high office buildings. It's a tranquil oasis in the center of the vibrating buzz of this city. Sitting outside at one of the bistro tables, with a glass of Californian wine in my hand and a scrumptiously dripping sandwich on a chopping board right in front of me, was one of the best memories that I took home with me from this trip. This sandwich, the Cubano, is truly addictive and so famous that, according to David, it would cause a riot if he ever dared to take it off the menu. Imagine the best homemade baguette brushed and grilled in tasty pork fat (homemade lard), filled with succulent anise braised pork shoulder, hot smoked ham, Swiss cheese, mustard, dill pickles, and even more pork fat. It's the best sandwich I ever had in my life.
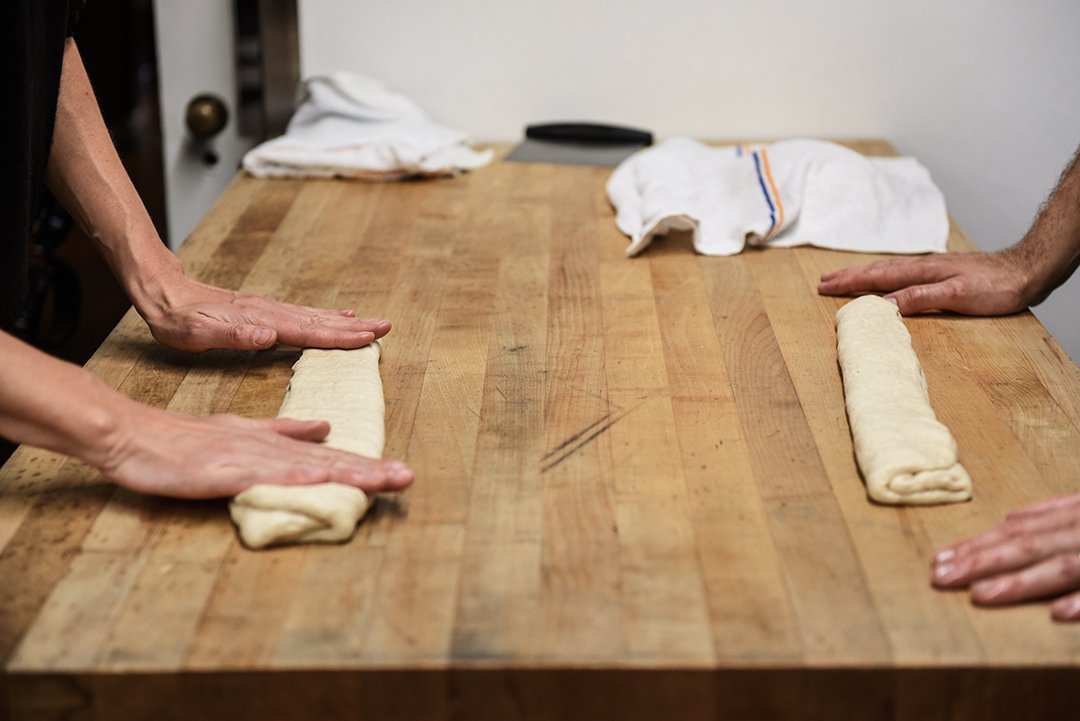
But before I could take a big bite of this unforgettably delicious lunch snack, David and I met two days before to prepare the dough for the bread in his kitchen and give it time to rise and rest. It was a Saturday morning and David and his lovely assisting, coordinating, and always helping 'right hand' Anja welcomed me and my film crew at Homage. David has the kind of voice and aura that calms you down immediately, whatever instructions he gave, I gladly obeyed and followed, enjoying to learn how to make the restaurant's beautiful baguettes and also being introduced to David and Anja's friends and suppliers at the utterly stunning Ferry Plaza Farmer's Market. The market is their weekly shopping date, it's a mecca for fresh produce. I've seen quite a few markets in my life, but this one is impressive, not only due to its setting right at the bay, but first and foremost because of the freshness and variety of the produce that the farmers offer at their stands:
Tomatoes kissed by the sun in all shapes, sizes, and colors; a sea of polished peppers; fragrant bundles of cilantro, basil, bay leaves, mint, and purslane; farmers' stands specialized in beans (like Romano and Cranberry Beans), or figs, 8 or 10 different kinds of figs gently laid out in baskets, or a stand putting the spotlight on plums, peaches, and nectarines, run by a woman with the sweetest smile, Aomboon Deasy. Each person, each stand at the market focuses on the prettiest crisp fruits and vegetables, celebrating its taste and beauty. One stand in particular left me in an awe: piles of Baby Curly Kale, Red Russian and Dino Kale, green and red dandelion, each leaf packed with so much pungent flavor that you want to nibble them straight out of the baskets (which we did).
I found the perfect partner for my market visit, David and I love food so much so that when Anja gave me a beautiful flower bouquet at the market, both David and I started eating the petals. Like I said, when he tells me in his trustful voice "Meike, you can eat this", I'll eat it! But apart from flowers and greens, I also tried the crunchiest spicy kimchi, candy-sweet September strawberries (a luxury for a German girl who's used to a rather short season of this fruit in her own country), ripe dates right off the vine, and the Rebel Within, a savory muffin filled with a soft boiled egg, sausage, Asiago cheese, and spring onions. It was heaven.

After the 'hard work' at the market and in the kitchen, we spoilt ourselves with a little feast at Nopalito, David's favorite Mexican restaurant. They cook delicious organic classics, like ceviche verde, enchiladas de mole con pollo (shredded tender chicken in a deep rich chocolaty sauce), and grilled fish tacos, all washed down with Michelada, Mexican beer with tomato, jalapeno, orange, lime, and salt – which was quite an experience. And after the meal we went for a walk at Golden Gate Park, where we were supposed to forage for forest snacks that one can find in a city if you keep your eyes open, but we chatted the time away. Wrapped in dense mist hanging heavily in the air, I was amazed by the beauty of the ever changing weather and the surprising scenes that it causes, and by David's philosophy and thoughts about the food that he celebrates at his restaurant.
Homage is a very, very special place that I'll always go back to when I'm in San Francisco, because of David and Anja, because of the food that's created and put together by the chef and his team with so much love and attention to detail in every single ingredient, because of this warm atmosphere that welcomes you as soon as you open the heavy door flanked by the restaurant's black facade, an atmosphere that makes you never want to leave again. And if you want to take a piece of it with you, you can grab a jar of the homemade pickles, jams, or a bottle of the wines and beers brought to Homage by David's friends, a bunch of people who find satisfaction in creating products of outstanding quality, just like David. And thanks to them we enjoy treats that taste so good - maybe because of the last ingredient that David listed in the recipe for his Cubano sandwich that he gave me: Love.
In the next months, I’ll share many new Meet In Your Kitchen features with you that took me to California, Italy, France, and Japan. Thanks to Zwilling for sponsoring these features for our culinary trip around the world!

David Kurtz' Baguette and Cubano Sandwich
David mills the grains for the flour that he uses for this recipe himself, however you can also use store-bought flour. It's recommended to work with grams instead of cups, as it's important to use precise measurements for this recipe.
For the baguette
Makes 3 baguettes
519g water (lukewarm)
30g honey
23g SAF instant yeast
875g all purpose flour
60g fresh whole wheat flour
Or if available (instead of the whole wheat flour)
23g hard red wheat flour
23g soft white wheat flour
14g rye flour
157g good quality lard (cold)
20g sea salt
In a large bowl of a stand mixer, using a fork, combine the water, honey and yeast, let it sit for a couple minutes.
In a large bowl, combine all the flours, add to the yeast mixture and, using the hook, mix for a few minutes or until well combined. Add the lard and, using the hook, continue kneading for a few minutes or until the dough has come together. Add a little more flour if it's too sticky or, if it's too firm, add a little (!) more water. Add the salt and continue kneading until well combined and firm. Form a ball, place in a clean bowl, and cover with a damp towel. Let the dough sit in a warm place for 1 hour. Turn the dough completely over releasing built up CO2 and let rise again for another hour, covered with a damp towel.
Line a baking sheet with parchment paper.Punch the dough down, take it out of the bowl, and divide equally into 3 pieces. Roll into smooth balls and let bench rest for 10 minutes under a damp cloth. When fully rested, take one piece of dough and stretch and pull it into a longish rectangular shape (about 14x5.5" / 35x14cm). Carefully flip 1 long side over until it reaches the middle of the rectangle, mind that no air is trapped in the fold. Then flip the opposite long side over, so that you end up with 3 layers of dough folded on top of each other. Using your fingers, pinch the fold all the way to seal well. Gently roll the dough into a long, thin sausage shape, then carefully, but quickly transfer to the lined baking sheet (the pinched fold should be on the bottom side). Continue forming the remaining 2 baguettes and transfer to the lined baking sheet. Cover with a damp kitchen towel, transfer the baking sheet to the fridge, and let the baguettes rest in the fridge overnight, further developing flavor and retarding the yeast activity.
Preheat the oven to 350°F / 175°C (convection setting). Take the baguettes out of the fridge when the oven is hot and ready.
Spray the baguettes with a little water and bake for 6-12 minutes or until the crust is golden, spraying them with water once or twice while baking. Internal temperature of the bread should be 210°F / 100°C when fully baked.
For the Cubano sandwich
Makes 1 sandwich
1 large piece of fresh baguette, cut in half
Dijon mustard
Whole grain mustard
2-3 thin slices hot smoked ham
1.5 ounces / 40g Swiss cheese (one that melts well), thinly sliced
2-3 anise pickled spring onions (or fresh spring onion), thinly sliced
2-3 dill pickles (gherkins), cut in half
5-7 ounces/ 150-200g braised pork shoulder (preferably cooked with anise and citrus), pulled or shredded
Good quality lard (pork fat)
Love, most importantly
Heat two heavy pans, preferably cast iron, over medium-high heat.
Spread the inside of the baguette with Dijon and whole grain mustard. Lay the ham on the bottom and topside of the opened baguette. Arrange the cheese, spring onions, and pickles on top of the ham. Spread the braised pork shoulder on top and close the baguette. Brush one pre heated pan with fresh lard, carefully place the Cubano onto the pan’s surface and brush more lard onto the top of the baguette. Squeeze, or press the Cubano with the other preheated pan directly on top of the sandwich. Cook in the pan, on medium heat, turning once, for a few minutes or until the cheese has melted and the crust of the bread is golden brown and crunchy.
Prepare with love and serve immediately with a large sliced pickle.


Watch my interview with David in San Francisco in September 2017:
Thank you, David!


Camembert, Pear and Thyme Challah
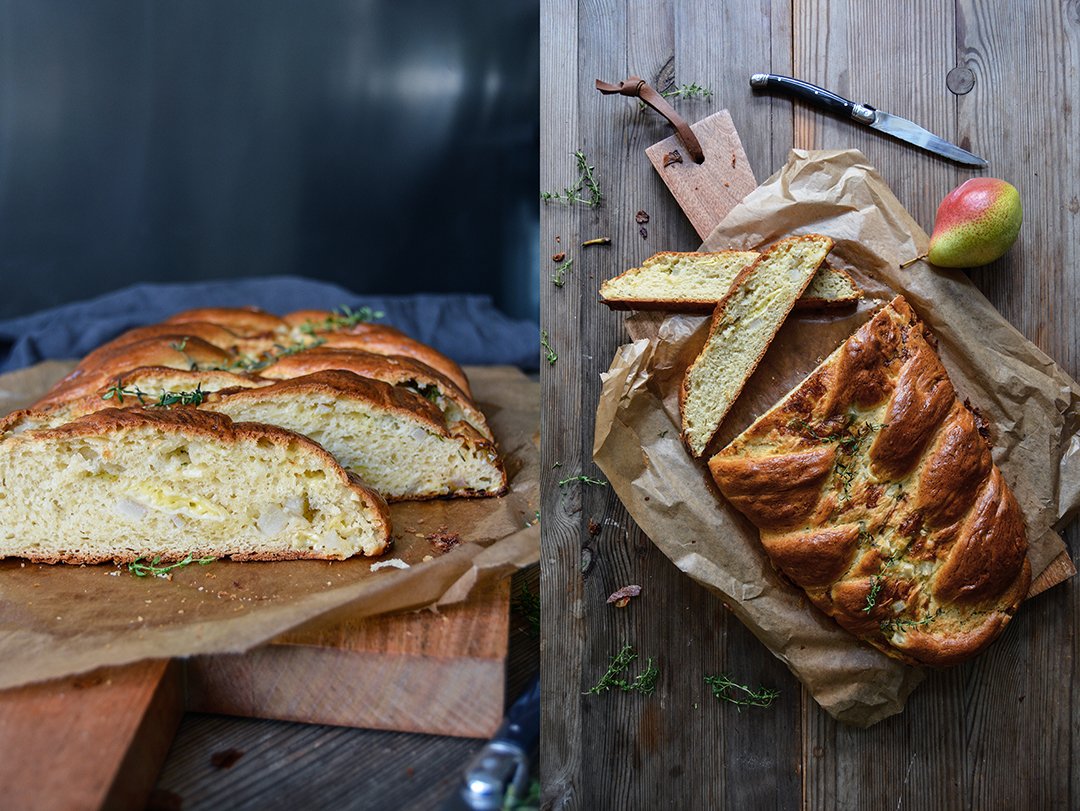
A lot of cracking and aching was going on in the oven while I watched my camembert, pear, and thyme challah bake. At one point I got worried that my braided bread was going to explode. It rose and expanded on all sides, it looked more like a challah pancake than the elegant breaded loaf I had in mind. Maybe I filled the single yeast dough strings a bit too generously with ripe - and stinky - cheese and chopped crisp fruit, but I had a feeling that the recipe needed it. So I trusted, which is always the only sensible thing a baker can do when the object of attention doesn't perform as expected.
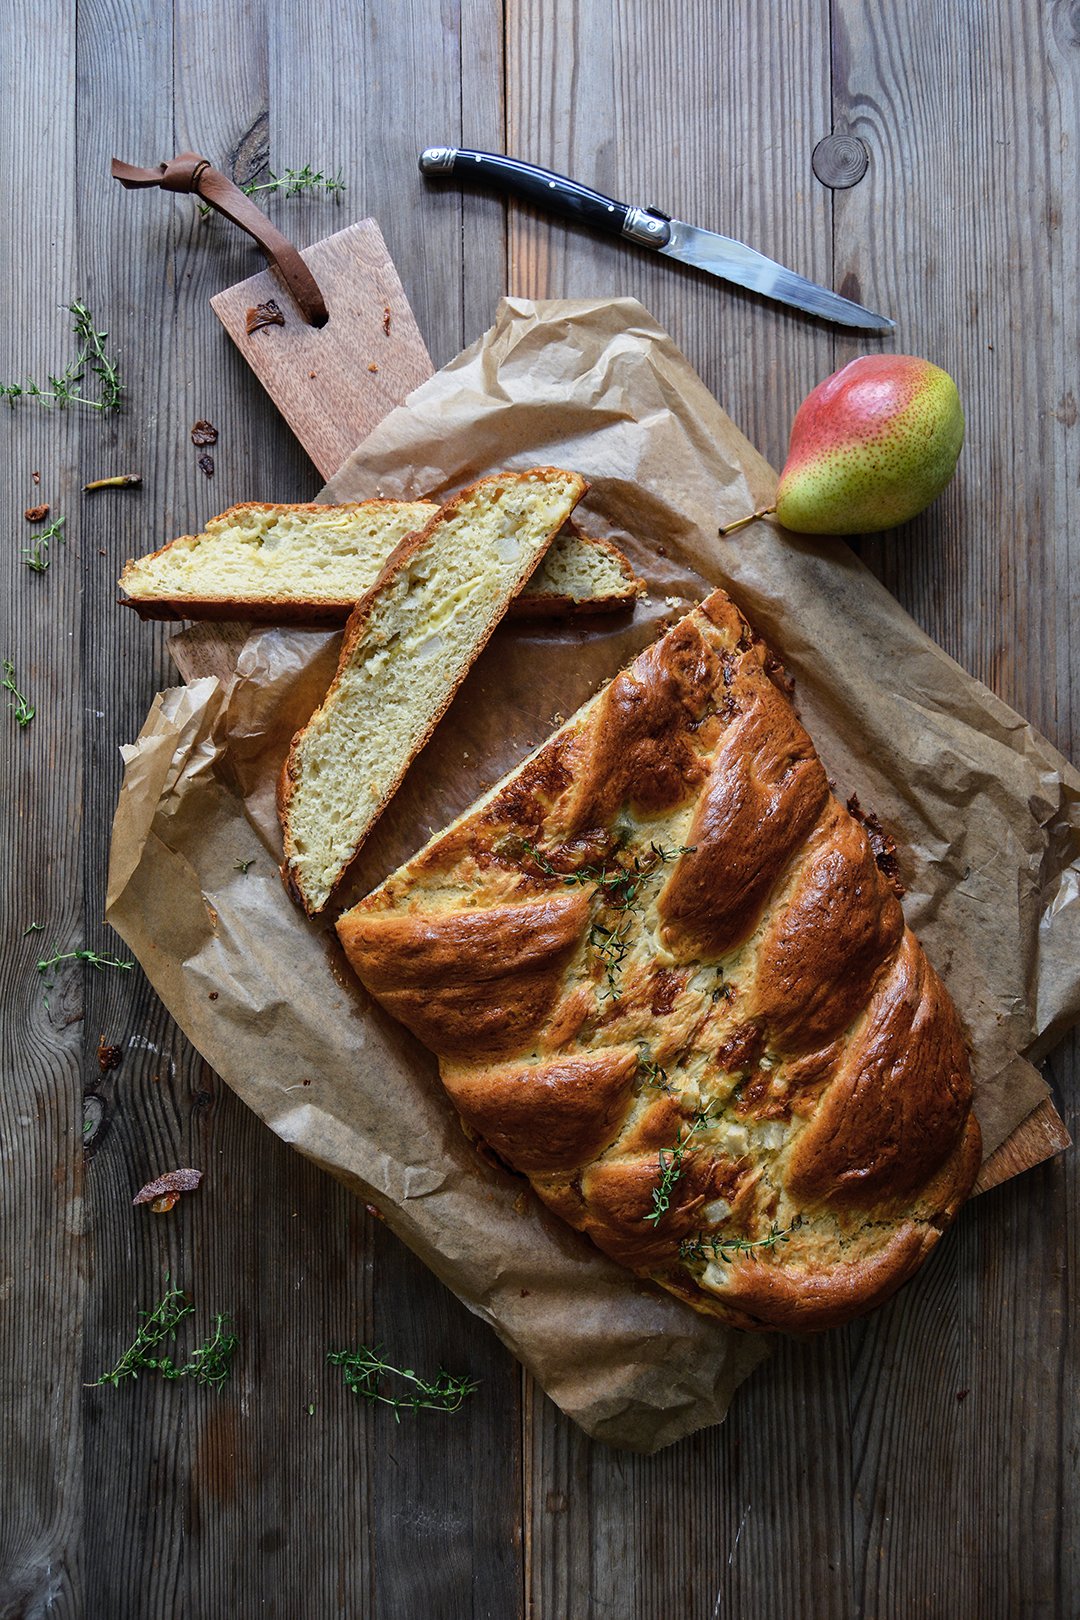
To my surprise, it worked out in the end and the shape still reminded me of a Hefezopf - the German name for challah. I used my classic plain challah recipe and replaced the sugar with honey. It's common in Germany to use butter and milk for this kind of bread, instead of water and vegetable oil, which you usually find in traditional challah recipes. I like the added richness coming from the dairy products, I find it tastier. Seeing as the fruit and cheese bring in even more juice and moistness, I could have made the dough a bit drier, added more flour to help it keep its shape. But the final texture was so nice, soft and spongy, that I'd rather accept the pancake-look than ending up with a dry Hefezopf.
If you don't feel like camembert, you can also go for any other aromatic cheese that melts well. I already have a raclette challah in mind, next time. And I'm sure that apricots or peaches would also do a pretty good job instead of the pear. So feel free to experiment, but keep in mind, the juicier the fruit, the more it'll soften your dough.
This challah is a perfect picnic, brunch, or Saturday lunch treat, preferably accompanied by fresh fruits, wine, and a selection of cheese and prosciutto. A green salad with juicy tomatoes also goes very well with it.

Camembert, Pear and Thyme Challah
When I baked my challah, it was a very hot day. So the butter in the dough literarily melted in my hands and turned braiding into a fiddly task. The single braids stretched quicker than I reacted, I was too slow. If you also happen to go for this recipe on a day with high temperatures, to avoid stress and frustration, try to work quickly when you braid the loaf. Keep the braids a bit shorter to begin with, due to the filling they'll expand in length.
Makes 1 large challah
honey 2 tablespoons
butter, melted, 100g / 1/3 cup plus 2 tablespoons
milk, lukewarm, 150ml / 2/3 cup
organic eggs 2
plain flour 520-550g / 4 cups - 4 cups plus 4 tablespoons
fast-acting yeast 1 sachet (7g / 1/4 ounce)
fine sea salt 1 teaspoon
For the filling
aged camembert, cooled and cut into thin strips (it'll be a mess if it's too soft), 250g / 9 ounces
medium to large firm pear, cored and cut into tiny cubes, 1
fresh thyme and a little rosemary (the needles, chopped), a large handful
For the glaze
organic egg yolk 1
water 1 tablespoon
Stir the honey into the hot melted butter and whisk until combined, let it cool until it's lukewarm. Add the milk and eggs and whisk, the mixture should be lukewarm.
In a large bowl of a stand mixer fitted with the hook attachment, combine the flour, yeast, and salt. Add the milk-butter mixture to the flour mixture and mix for about 5 minutes or until well combined and smooth. If it's too soft and sticky, add a little (!) more flour. Continue kneading and punching with your hands for about 3-5 minutes or until you have a soft and silky ball of dough. Place the dough back in the bowl, cover with a tea towel, and let rise in a warm place, or preferably in a 35°C (100°F) warm oven, for 60-70 minutes or until almost doubled in size. If it's a hot summer day, you can let the dough rise at room temperature (that's what I did this time).
Line a baking sheet with parchment paper.
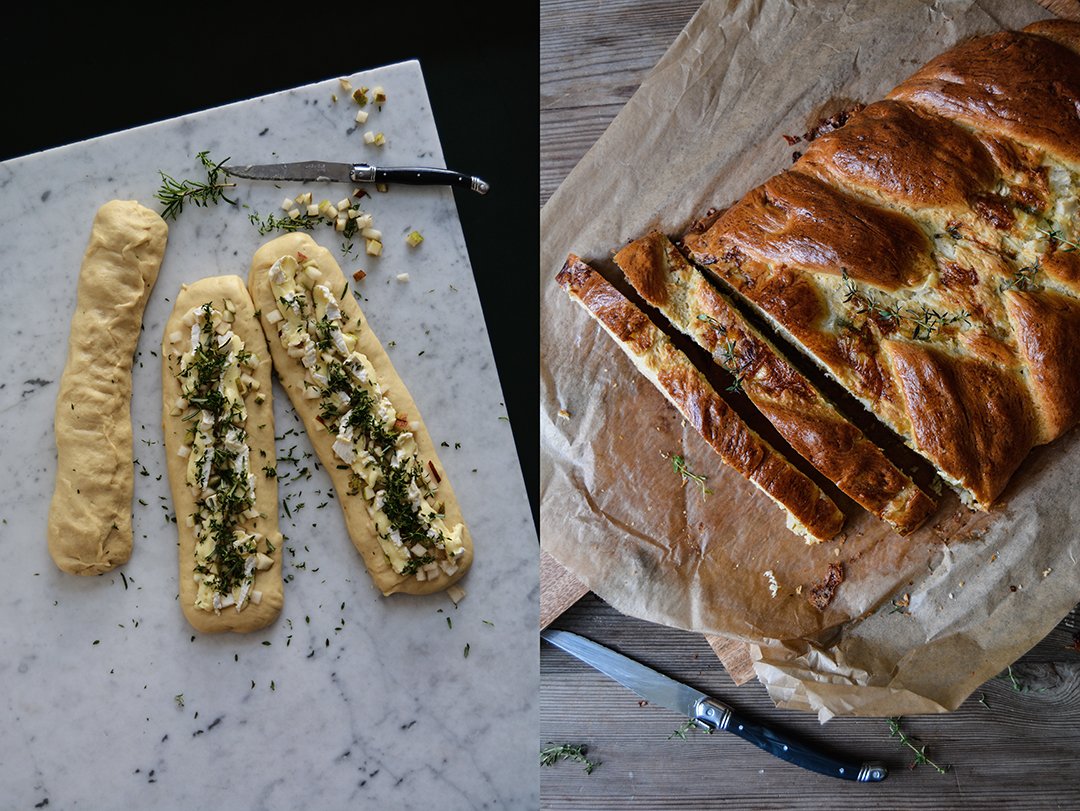
When the dough is puffy and almost doubled in size, punch it down, take it out of the bowl, and knead for about 30 seconds. Divide into 3 parts and roll them into longish, but not too thin sausage sausage shapes (see picture above). Flatten each piece of dough until it's roughly 7.5 cm / 3" wide. Divide the camembert, pear, and herbs between the 3 pieces of dough and spread, leaving a little rim all around the filling. Fold over each piece of dough, roll it gently, and seal the overlapping side and ends well. The filling should be completely wrapped inside the dough.
To braid the bread, work quickly, as the dough stretches. Lay the ends of the dough rolls on top of each other at one end and braid them tightly. If they become too long and thin, squeeze them together a little. Bend both ends of the bread under the loaf and quickly transfer to the lined baking sheet. Cover with a tea towel and let rise in a warm place for about 40-50 minutes or until fluffy.
Preheat the oven to 190°C / 375°F (conventional setting).
For the glaze, whisk the egg yolk and water and brush the top of the challah. Bake for about 25-30 minutes or until golden brown and spongy. When you knock on the challah's bottom, it should sound hollow. Let it cool for a few minutes before cutting the bread into thick slices.The challah tastes best on the 1st day.


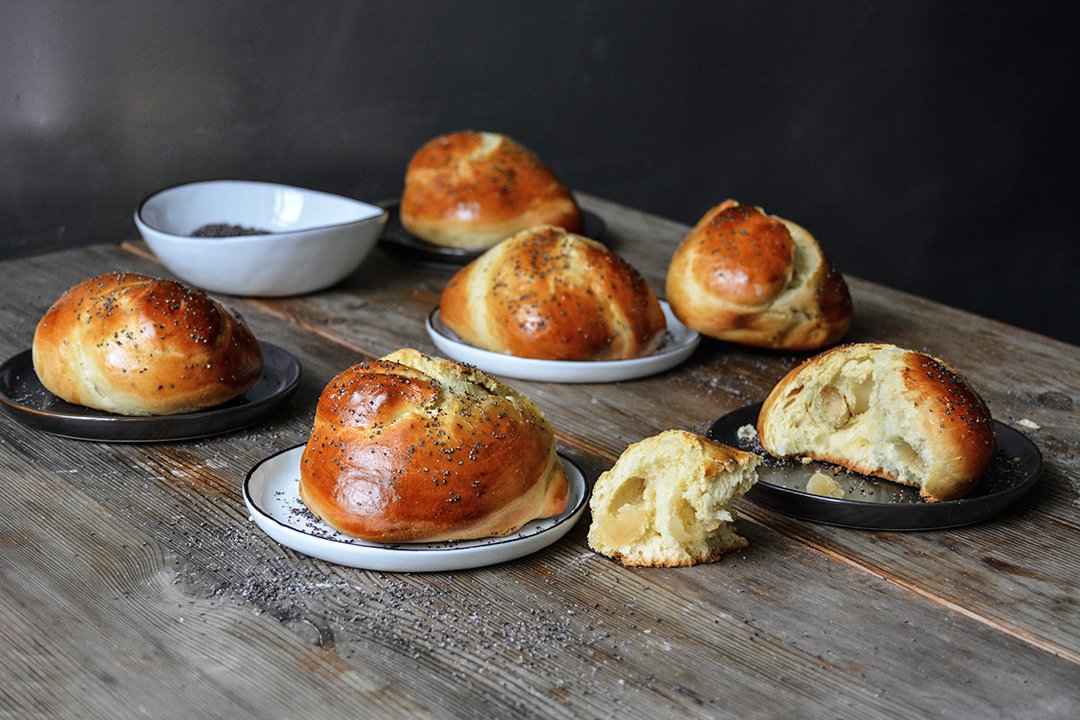
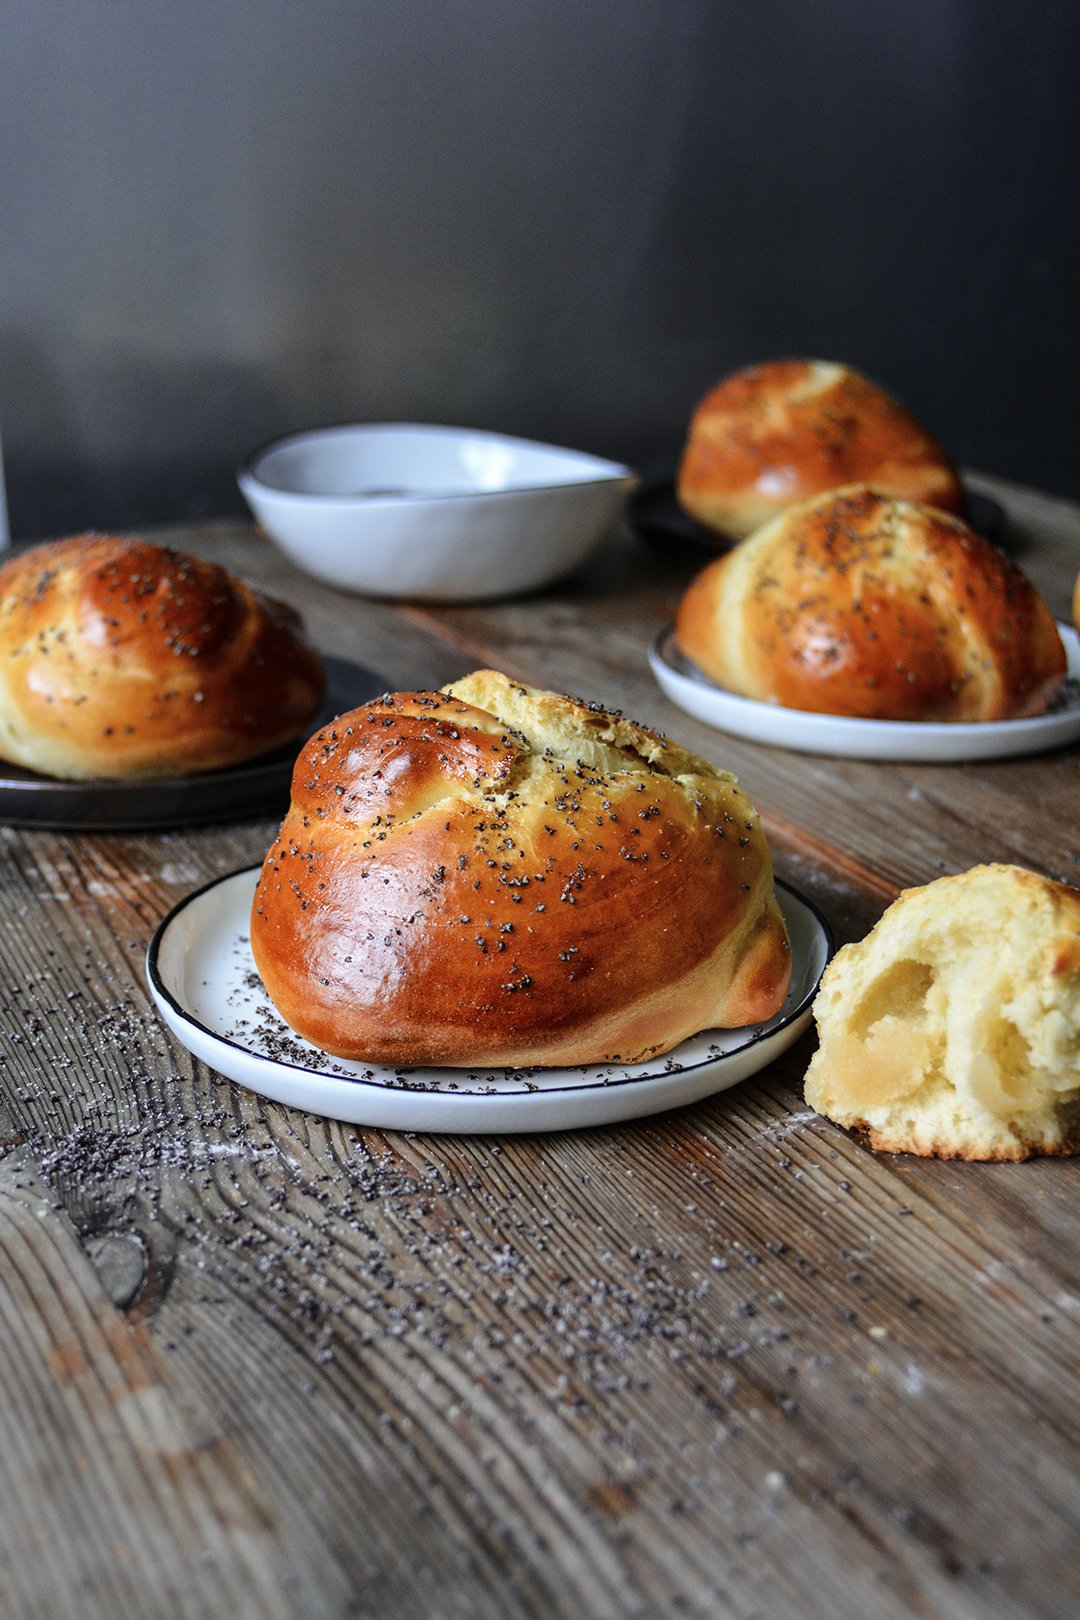
Laurel Kratochvila's Marzipan-Ribboned Challah Knots
I don't even remember how it started. It must have been a few years ago when my man and I welcomed a new tradition: coffee dates. Whenever we find time to take an hour off work, we squeeze in a dark Italian espresso or a creamy cappuccino, happily enjoyed in one of the countless cafés in our area. And on Saturdays - overly excited by the luxury of having plenty of free time - we often stretch it into a lunch-teatime-aperitif date. Just the two of us, chatting about whatever's on our mind, no plans or duties, just lingering until we decide to move on.
On one of these dates, we went to the new Shakespeare and Sons / Fine Bagels. The book shop and bakery used to be close to where we live, but the two owners, Roman and Laurel, had to transfer their cafe and literature business to a new location. That was the first time I tried Laurel's absolutely outstanding chocolate rugelach, which blew my mind and made me want (or rather have to) meet the woman behind this treat.
When we met, our chat led to a Meet In Your Kitchen feature (including my beloved rugelach recipe), but most importantly, I found a woman who's a great inspiration. Laurel loves food, she's obsessed with baking, she's gifted with an unbelievable amount of energy, and when you talk to her, you can see her beautiful soul. She's honest, critical, and crazy enough to overcome her fears and jump into the next adventure. Nosh Berlin is her new baby, a Jewish food week, starting March 17th. It'll be a week packed with talks, feasts, and Jewish food. I already booked my tickets for two events, Molly Yeh is coming on the 22nd and I didn't dare to miss The Gefilte Ball on Thursday. You can find the program of all the events below or on the Nosh Berlin website.
When I met Laurel for a coffee a couple weeks ago to hear everything about her exciting events, I nibbled on my obligatory rugelach and she chose a new creation, her current obsession: a marzipan-ribboned challah knot. She looked so happy whenever she took a bite of her yeast bun that I thought, I need this recipe. Laurel is a nice person who loves to share, I didn't even need to beg her. And here it is, fluffy yeast buns, not too sweet, generously filled with marzipan, and so good, that I ate five of them in a day and a half. Laurel only uses egg yolks, melted butter, and water in this recipe. She uses bread flour, however I replaced it with white spelt flour that comes to use in all of my baking recipes. I had to add a little more flour and I think that a bit more wouldn't have harmed the texture, but helped the knots to keep their shape a bit better and avoided cracks on the surface. As you can see in the pictures, my knots turned into roundish buns in the oven. I didn't mind, challah knot or bun, I love Laurel's latest creation.

Nosh Food Festival
- Friday, March 17th - Kiddush: North African Jewish dinner by Yuval Belhans and Mayaan Meir
- Sunday, March 19th - The Nosh Market at Markthalle Neun Oma and Bella: Movie and a Nosh at Babylon Berlin
- Monday, March 20th - The JCC Krakow presents Jewish Polish Food History. Talk and a tasting
- Tuesday, March 21st - What Jew Wanna Eat? Amy Kritzer, visiting chef from Austin, Texas, presents creative Passover cooking.
- Wednesday, March 22nd - Molly Yeh and Luisa Weiss: Cookbooks, Blogs, and Jewish Baking
- Thursday, March 23rd - Nosh Berlin and Shtetl Neukölln present The Gefilte Ball. Talk and demo with Jeffrey Yoskowitz of The Gefilte Manifesto followed by a klezmer ball.
- Friday, March 24th: Night of Shabbat Supper Clubs
There will also be a couple talks on various Jewish food topics at the Fraenkelufer Synagogue and a showing of Cafe Nagler with a presentation on pre-war Jewish cafe and restaurant life. Additionally, there are Jewish cookery classes all week at Goldhahn and Sampson in Charlottenburg.

Marzipan-Ribboned Challah Knots
If you decide to double the recipe, use only 9 egg yolks, which is Laurel's original recipe.
Makes 7 challah knots
organic egg yolks 5, plus 1 egg white, beaten, for the glaze
butter, melted and cooled, 40g / 3 tablespoons
water 175ml /3/4 cup
bread flour (or white spelt or unbleached wheat flour), 410-480g (3 cups plus 2 tablespoons - 3 2/3 cups), plus more if the dough is too sticky
granulated sugar 100g / 1/2 cup
fast-acting yeast 1 1/4 teaspoons
fine sea salt 1 teaspoon
marzipan, cut into 7 pieces, 150g / 5 ounces
poppy seeds 1 tablespoon, for the topping
In a medium bowl, whisk the egg yolks and butter. Add water and whisk until well combined.
In the large bowl of a stand mixer, whisk together the flour (410g / 3 cups plus 2 tablespoons), sugar, yeast, and salt. Add the liquid mixture and, using the paddle attachment, mix for about 1 minute until combined. Replace the paddle attachment with the dough hook and knead for about 10 minutes. I use setting ‘4’ on my KitchenAid. Add more flour if the dough is too sticky, but mind that it should stay soft. If you prepare the dough by hand, keep kneading an extra few minutes. Transfer to a clean, oiled bowl, cover with a kitchen towel and let rise in a warm place, or preferably in a 35°C / 100°F warm oven (conventional setting), for about 60-70 minutes or until spongy. When you poke the dough, the indentation of your finger shouldn't spring back.
Punch the dough down and then turn out onto a floured work surface. Give it a quick knead to form it back into a ball and then cut 7 equal pieces. Cover with a tea towel and let rest for about 15 minutes.
Line a baking sheet with parchment paper.
Once rested, roll the dough into logs (about 25cm / 10" long) and then gently press flat. Lay a strip of marzipan lengthwise down the middle of the flattened log (using my hands, I first rolled each piece of marzipan into a long log) and then fold the log lengthwise in half, so you have a marzipan-filled log (see first picture). To fold the log into a knot, make an overlapping circle and then wrap the upper end under and then up through the middle (see first picture).
Preheat the oven to 175°C / 350°F (convection setting).
Once all 7 knots are folded, transfer to the lined baking sheet and brush with the beaten egg white. Laurel puts a little simple syrup in the egg glaze to add some extra sweetness, I left mine plain. Let them rise for about 30 minutes or until puffy. Glaze the challah knots with egg whash a second time then sprinkle with poppy seeds.
Bake for about 20 minutes or until the challah knots are golden brown and shiny.


Poppy Seed and White Chocolate Babka
The past week has been crazy and the best way to put my weary mind at ease, is to dig my hands into a ball of yeast dough and knead, and knead, and knead. You can punch and roll it, letting all your energy out until you're exhausted; or you can knead it gently to calm down and feel the pale ball softening slowly between your fingers. Yeast dough is forgiving, it accepts whatever mood you’re in, and it gets better the longer - and harder - you work with it.
The dough for today's babka had to deal with a lot of energy, I must have looked like a boxer training in my kitchen. And it turned out to be the smoothest, silkiest yeast ball my marble counter tops have ever seen. To make babka, you have to be patient, the dough has to rise overnight in the fridge before it transforms into a braided beauty. But then, if you time it well and start early on the second day, you can enjoy the most fragrant cake on your Sunday breakfast or brunch table. And if you don't feel like hassling and hurrying, just take your time and bake it for teatime.
I already shared a babka recipe here on Eat In My Kitchen, last year's Blueberry Lemon Cheese Babka was a hit, not only on my table. This time I wanted to use poppy seeds for the filling to resemble the famous German Mohnstrudel. It used to be one of my childhood's favourites, preferably generously filled with the dark, black seeds. For my filling, I stirred in a handful of raisins, which is also very common in Germany, they make it a bit fruity. But we're not done yet, I have another addition: chopped white chocolate; divine! It's subtle, you can barely taste the little milky bites, but it makes the filling juicier, fudgy in some parts, which is a great contrast to the fluffy cake. For the shiny finish, I used a sticky sugar glaze and I didn't even wait for it to dry, the first slice of a warm yeast cake is always the best.
Update: Here’s the recipe for my Pumpkin Seed and White Chocolate Babka!

Poppy Seed and White Chocolate Babka
Mind that the babka has to rise twice, the first time overnight (for about 8 hours) in the fridge.
Makes 1 babka
For the dough
plain flour 275g / 2 cups plus 1 tablespoon, plus more if it's too sticky
granulated sugar 50g / 1/4 cup
fast-acting yeast 1 1/2 teaspoons
fine sea salt 1/4 teaspoon
milk, lukewarm, 60ml / 1/4 cup
organic egg 1
organic egg yolk 1
butter, at room temperature, cut into cubes, 75g / 1/3 cup
oil, to grease the bowl
For the filling
milk 210ml / 3/4 cup plus 2 tablespoons
granulated sugar 50g / 1/4 cup
ground cinnamon 1 teaspoon
orange zest 1 teaspoon
poppy seeds, cracked, 125g / 1 1/4 cup
raisins, soaked in warm water for 5 minutes and squeezed gently, 40g / 1/3 cup
white chocolate, chopped, 100g / 4 ounces
For the glaze
water 60ml / 1/4 cup
granulated sugar 100g / 1/2 cup
Day 1 - in the evening:
For the dough, in a large bowl, combine the flour, sugar, yeast, and salt.
Whisk the milk, egg, and egg yolk and add along with the butter to the flour mixture. Knead for about 10 minutes, starting with the dough hooks of a stand mixer and continue kneading and punching with your hands for a few minutes until you have a soft and silky ball of dough. If the dough is too sticky, add a little more flour, but mind that it stays soft. Transfer to a clean, oiled bowl, cover with cling film and put in the fridge overnight.
Day 2 - in the morning:
Take the dough out of the fridge and let at sit at room temperature for about 1-2 hours.
For the filling, in a medium saucepan, bring the milk, sugar, cinnamon, and orange zest to the boil. Take the pan off the heat, stir in the poppy seeds, and let it soak for 5 minutes. Stir in the soaked raisins and let it cool.
Butter an 11 x 24cm / 4 x 9″ loaf pan and line the bottom with a piece of parchment paper.
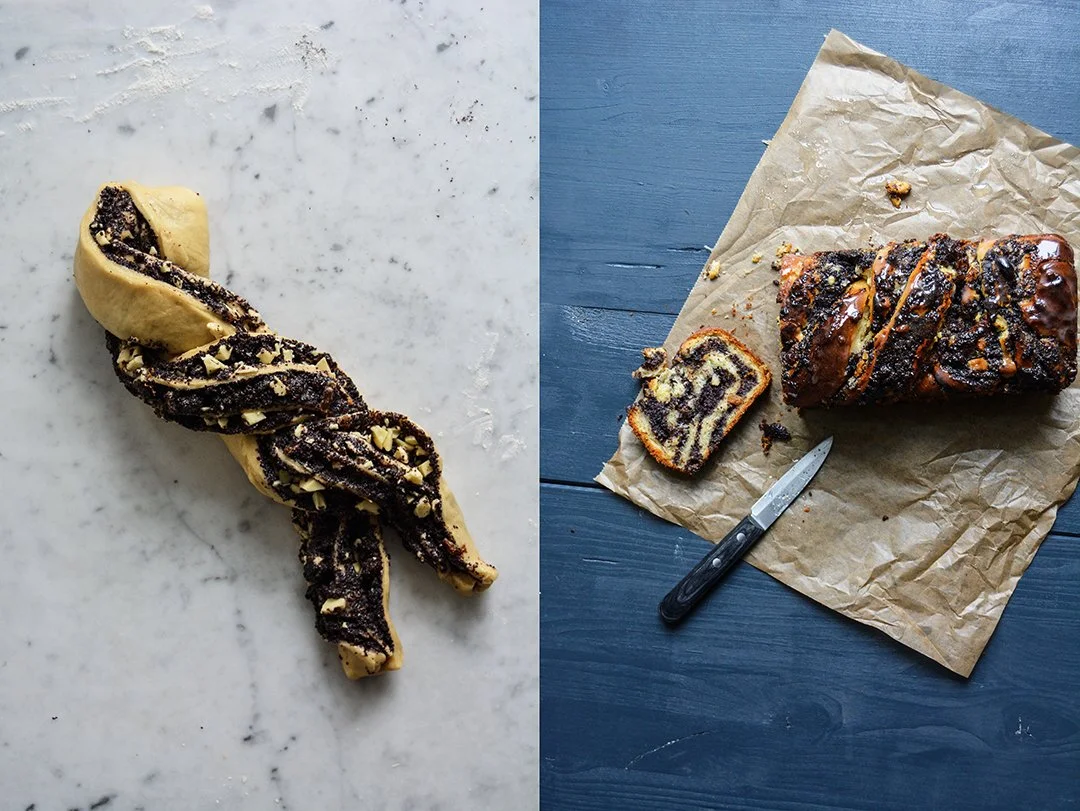
Punch the dough down, take it out of the bowl, and knead for about 30 seconds. On a floured counter top, roll out the dough with a rolling pin into a 28 x 40cm / 11 x 16″ rectangle. Spread the filling over the dough, leaving a 2cm / 3/4″ rim, and sprinkle with the white chocolate. Starting from one long side, roll up the dough tightly into a log. Pull and press to seal the end onto the roll and place the seam at the bottom. Using a sharp long knife, cut the roll in half lengthwise (see 5th picture). The cut sides facing up, press together two ends and lay one half of the log over the other, continue until you end up with a twisted plait (2nd picture). Push the end together. Tuck the ends underneath the babka and, using the large blade of a knife, lift the loaf and transfer quickly to the prepared pan. Cover with a tea towel and let it rise in a warm place (I keep it on the heater) for about 60-90 minutes or until puffy.
Preheat the oven to 190°C / 375°F (conventional oven). For the glaze, in a small saucepan, bring the water and sugar to the boil and let it cook for 2 minutes, take the pan off the heat and set aside.
Bake the babka in the oven for 30-35 minutes or until golden brown. Check with a skewer, it should come out clean. Mind that depending on where you push it in, there will be melted chocolate on the skewer. Take the pan out of the oven and brush the top immediately with the syrup (use all the syrup). Let the cake cool for about 10-15 minutes before you remove it from the pan. Enjoy slightly warm or cold.


Gruyère and Red Onion Focaccia

We spent our Christmas in the Mediterranean, a premier for me, we normally stay in the cold North. I decorate our tree and the rest of the apartment according to my annual passion for wintery kitsch, and I eat duck, German potato dumplings, and usually (always) too many cookies. 2016 was different, we decided to go to Sicily first and spend a few relaxing days in the heart of the Archaeological Park of Agrigento (I'll share my impressions with you next week). Malta was next on our itinerary, and with it came along lots of sunshine, rough seas, long walks in the countryside, and my wonderful, crazy Maltese family. It was loud and silly, we ate and drank too much wine in front of my Maltese Mama's gorgeous crib in Msida, and I was happy.
I learned that a proper crib is an important part of the Maltese celebration, and I'm talking about cribs of rather large dimensions, well equipped with colourful figures, various animals, a real stable setting made of rocks, and most importantly, an impressive light installation to represent the firmament. Every house leaves the main door open, so that passersby can peak through the glass door to admire the re-enacted scenes of Jesus' birth. I've seen impressive installations that leave no doubt that the Maltese take Christmas very seriously.
Being under the hot Mediterranean sun in the coldest season of the year has many advantages, my vitamin D resources are definitely recharged. Everything is fine as long as you stay outside the house, inside it's freezing cold. A country where the temperature barely drops below 16°C (60°F) doesn't really have to think about those few days of sharp chill. But a person who's used to central heating - me - has to get used to the fact that the bedroom (and the bathroom!) can actually feel much colder than the air outside. I coped and complained, but our sunny walks along the lush green Dingli cliffs definitely made up for it.
And I'll never forget our New Year's Eve in Gozo, we stayed at a beautiful farmhouse at the border of the village of Qala. We had a gorgeous room, with a large terrace and the most stunning views of the islands of Comino and Malta. We ordered 3 (!) pizzas from the local Maxokk bakery, bought a bottle of local red wine from my friends at Meridiana, and just sat on the sofa, amazed by the peace in front of our eyes.
I had never seen Malta like this, so green and in full bloom. My past travels covered everything from March to October, but I always avoided the winter months. I'd love to show you pictures, but I was on a mission, I didn't touch my camera, I stayed offline most of the time, and I slowed down my pace drastically. So there are no pictures, but lots of beautiful memories of time spent in nature, silent, without any disturbing technical devices.
However, when we came back to Berlin, I noticed a slight feeling of dissatisfaction, I missed my Christmas. To make up for my nostalgic longings, I decided to have a Christmas week in January. In the past few days, I baked Christmas cookies and my boyfriend had to listen to me singing along to Christmas carols. My celebrations found their festive peak in a Christmas dinner for two with slow roasted duck (I used the recipe from my book), red cabbage with spices and apples, and German potato dumplings. Now I'm cured and we can move on with our lives - also in the kitchen.
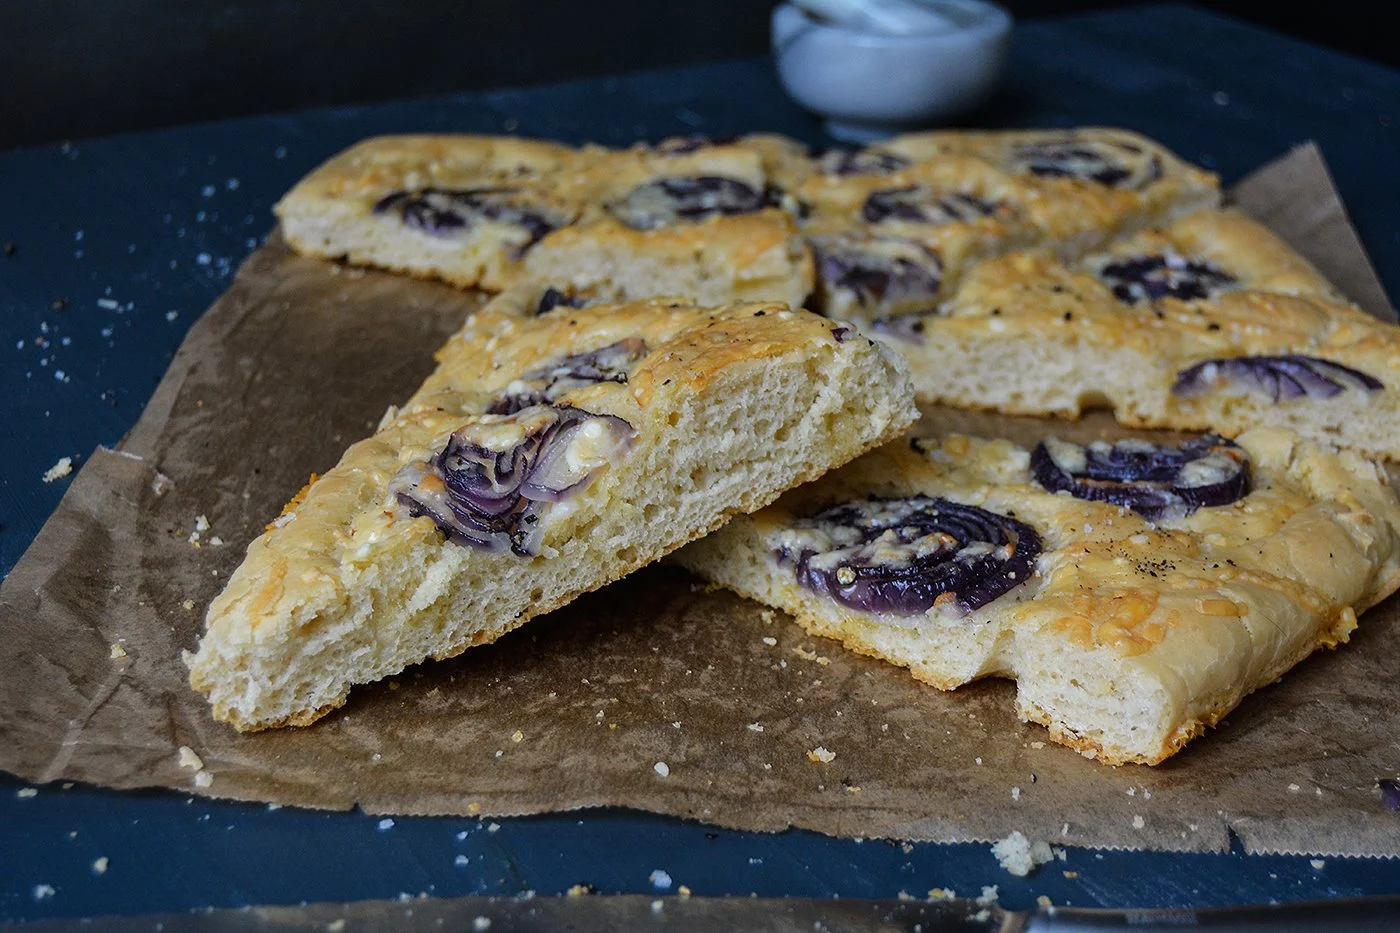
My latest post-Christmas kitchen project led to a hearty yet airy focaccia, topped with thickly sliced red onions roasted on top of the dough in lots of olive oil and a generous amount of aromatic Swiss Gruyère cheese. It's pure comfort food. I cut a thick slice off the warm bread and enjoyed it on a chair that I placed close to the heater. I doubt I ever appreciated central heating as much as I do now.
If you're looking for some more focaccia inspiration, take a look at these recipes:


Gruyère and Red Onion Focaccia
Makes a 25 x 32cm / 10 x 12 1/2″ focaccia
For the dough
plain flour 500g / 3 3/4 cups plus 2 tablespoons
fast-acting yeast 1 (7g / 1/4 ounce) envelope
fine sea salt 1 teaspoon
granulated sugar 1 heaping teaspoon
water, lukewarm, 260ml / 1 cup and 2 tablespoons
olive oil 120ml / 1/2 cup, plus 1-2 tablespoons to oil the baking sheet
For the topping
Swiss Gruyère cheese, or any aromatic hard cheese, coarsely grated, 100g / 7 ounces
red onions, thickly sliced, 2
flaky sea salt
black peppercorns, crushed in a mortar
For the dough, combine the flour, yeast, salt, and sugar in the bowl of a stand mixer fitted with the dough hook. Add the lukewarm water and half the olive oil (60ml / 1/4 cup) and knead on medium-high speed for a few minutes until well combined. I mix it on ‘4’ on my KitchenAid. If the dough is too sticky, add more flour. Transfer the dough to a table or countertop and continue kneading and punching it down with your hands for about 4 minutes or until you have a smooth and elastic ball of dough. Place the dough back in the mixer bowl, cover with a tea towel, and let rise in a warm place, or preferably in a 35°C / 100°F warm oven (conventional setting), for about 60 minutes or until doubled in size.
Oil a 25 x 32cm / 10 x 12 1/2″ baking sheet.
When the dough has doubled in size, punch it down, take it out of the bowl, and knead for 1 minute. Using your hands, stretch and spread the dough on the oiled baking sheet. Cover with a tea towel and let rise in a warm place for about 20 minutes or until puffy.
Preheat the oven to 220°C / 425°F (convection setting).
Using the round bottom of a wooden spoon or your finger, punch around 6 x 7 holes into the surface of the dough. Arrange the sliced onions on top of the dough, pushing the slices gently into the dough. Pour the remaining olive oil over the dough and onion and into the holes. Sprinkle with the cheese and a little flaky sea salt and bake for 20 minutes or until golden and light brown. Sprinkle with crushed pepper and enjoy warm or cold. The focaccia tastes best on the first day.


Lime Scones & my last book launch event in Washington D.C.

When we left our hotel in New York in the early morning it was still dark and I was too tired to realize that my Eat In My Kitchen book tour would soon come to an end. But after six weeks of being on the road in Europe and the US, I was somehow ready to close one of the most exciting chapters of my life in America's capital, in Washington D.C.
We celebrated the birth of my first cookbook with true feasts, in Berlin, Malta, London, New York, and Washington and there are no words to describe how I felt during this trip. It made me the happiest and - after a few weeks - the most tired person at the same time. To be able to write and publish a book, to travel and share my thoughts about these pages filled with my recipes makes me very thankful - and humble. I didn't know what to expect when my book was published on the 4th October, I didn't know if people would like or reject it. I just tried my best to create a collection of recipes that someone who loves cooking would pick up for inspiration. To see all the love, support, and positive response that this book keeps getting, is more than I ever dreamed of. I met so many incredible food-loving people at all my book launch events, we discussed with each other, we ate and drank Maltese wine together, and we gathered around the table, just like we do in my own kitchen. People keep asking me which event I enjoyed the most, but I can't even answer this question. Each celebration was unique, each of them was filled with countless magic moments, each event made my heart stop and jump, out of anxiety and pure happiness. Each celebration is a huge gift to my life.

Washington felt a bit like the calm after the storm (please keep in mind that it was the week before the sobering elections!). New York is restless and that's how we felt, but in D.C. we got treated to the relaxing amenities of the wonderful Kimpton Mason & Rook Hotel and a luxuriously elegant room. We also had more time than expected, so we decided to jump on the hotel's bikes to ride to the Embassy of Malta in Washington and meet the ambassador, Clive Agius, the generous host of the last Eat In My Kitchen book launch event. It was only a quick visit to the embassy before we drove on - this time in the ambassador's car - to his private residence where our celebration was going to take place the next day. When I saw his house from afar, I knew that we had yet another unforgettable launch ahead of us.
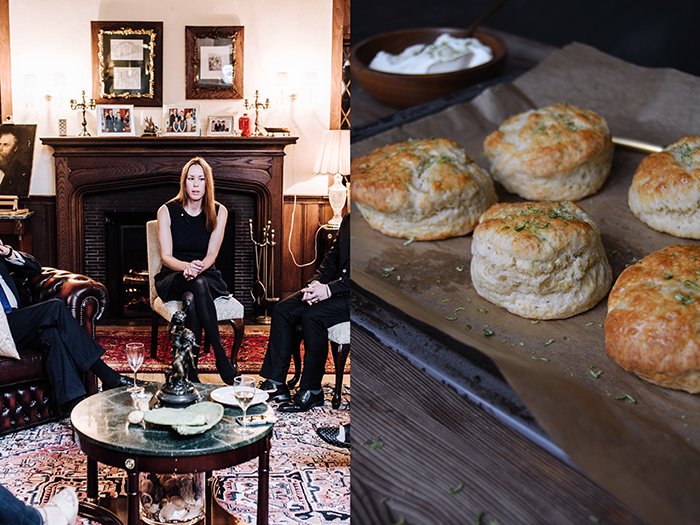
The ambassador's house is located in a picturesque residential area a little outside the center. The quiet streets lined with old trees, their leaves painted in gold, orange, and red, it was an Indian summer's dream, almost too beautiful to be true. The house could have been straight from a fairytale, I couldn't help but think of Little Red Riding Hood. The coziest cottage, warm and welcoming, just like Mr. Agius' lovely family who shared their home with us. Mrs. Agius was so kind to let me use her kitchen to prepare the dishes for our big night and Vs Adass, the sweetest man who's been the residence's indispensable helping hand for two decades, assisted me. It was the only launch where I cooked and it went more smoothly than expected.
That night we treated ourselves to a scrumptious dinner at Le Diplomate, a relaxed French style Brasserie serving classics of exquisite quality. A glass of Champagne, clams, burger (the best in town), and a nice bottle of wine from Crozes Hermitage made us forget about the struggles that you face once in while when you're on a book tour. It was heavenly. My culinary highlight was the bread served with our meal. Homemade sourdough bread, baguette, and a fruit and nut loaf that were so good that I ordered a bunch of them for next day's book launch.

One of the breakfast treats I enjoyed during my stay in D.C. inspired me to share today's recipe. It was a wonderfully crumbly, fragrant lemon scone. In my recipe, I replaced the lemon with lime and added vanilla. It's one of the best scones I ever made, delicious for breakfast and perfectly fitting for my Sunday teatime.
My last book launch event was the most intimate of all of them. We sat at the fireplace, it was warm and cozy, a glass of wine in our hands, and we spoke about food. First, we picked up on our tradition of having a talk between me and my interviewer - my boyfriend took on this role that night - and then we moved on to an open discussion. And Washington, you impressed me, your people like to talk and ask questions! In no other city was I asked so much about my book, but also about food in general, I loved it. Thank you for welcoming us with open arms, thank you for your curiosity!


This night wouldn't have been possible without the generous support of Clive Agius and his lovely wife and daughters. Thank you so much for sharing your home with us and our guests. Thank you Karl Chetcuti and Meridiana Wine Estate for filling our glasses, Marisa Dobson for helping me organize our event, and Corinne Thompson for capturing all the beautiful moments in your pictures.
So, the Eat In My Kitchen book is out and it made it onto several Best Cookbooks of Fall 2016 lists (New York Times, InStyle US, Epicurious), you can see all the reviews here. I'm happy, relieved, and I'll definitely need some time to process all the excitement that came over my life in the past few months. The best place to do this is my kitchen in Berlin and in Malta. I want to get back to my routine, my normal life. I hope you had fun joining my book tour here on the blog and on Instagram and Facebook. My post-book tour life will bring back recipes and posts from my kitchen, very relaxed, and a slower pace.


Lime Scones
Makes 6 scones
plain flour 260g / 2 cups
granulated sugar 2 tablespoons
cream of tartar 2 teaspoons
baking soda 1 teaspoon
fine sea salt 3/4 teaspoon
freshly grated lime zest 1 1/2 tablespoons, plus 1 teaspoon for the topping
unsalted butter, cold, 60g / 1/4 cup
freshly squeezed lime juice 2 tablespoons
milk a bit less than 120ml / 1/2 cup
vanilla bean, split in half and scraped, 1/2
organic egg, lightly beaten, to glaze, 1
crème fraîche, clotted cream, or butter, for serving
Preheat the oven to 220°C / 425°F (conventional setting) and line a baking sheet with parchment paper.
In a large bowl, combine the flour, sugar, cream of tartar, baking soda, salt, and lime zest. Add the butter and use a knife to cut it into the flour until there are just small pieces left. Quickly rub the butter into the flour with your fingers until combined.
Add the lime juice to a measuring cup and fill with milk until it measures 120ml / 1/2 cup. Add the vanilla seeds and whisk quickly. Add to the flour mixture and, using a large spoon, mix until just combined.
Scrape the dough onto a floured kitchen counter, dust your hands with flour, and flatten the dough until it's about 2 1/2cm / 1" thick. Using a 6 1/2cm / 2 1/2" round cookie cutter, cut out 6 scones, reshape the dough for the last 2. Transfer to the lined baking sheet, brush the tops with the egg wash, and bake for about 10 minutes or until golden and risen. Sprinkle with additional lime zest (optional). Enjoy preferably warm with crème fraîche, clotted cream, or butter.


Ricotta Beetroot Doughnuts, New York and my 4th book launch

New York, November 2016:
The monotony of clouds and waves kept me in a daze while I crossed the Atlantic, but then, when I finally spotted Nova Scotia from high up in the skies, I was as excited as a little girl. Soon we'd land in New York JFK, to open the last two chapters of my overwhelming Eat In My Kitchen book tour. New York and Washington DC had been on my itinerary for months, but to know that I'd be there in just a few hours gave me shivers.
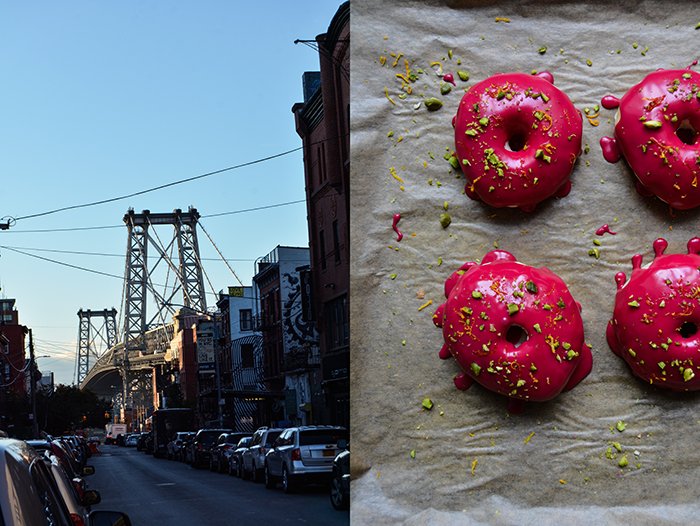
This trip was emotional, which I got used to after weeks of being on the road in London, Berlin, and Malta, my emotions seem to be tied to a rollercoaster. And now New York, this city filled with so many dreams and visions, vibrant, loud, and bright, it never rests. As I stumbled out of the subway, packed with all my bags and suitcases (I took a few pounds of Maltese sea salt with me), my view was drawn to the sky, along the shiny facades of the city's famous skyscrapers. Jet-lagged, happy, and with an espresso in my hands, I felt breathless as I stood on the vibrant streets of Greenwich Village.

Ten days on the East Coast allowed me to dive deep into this magical city, to meet and get to know so many people and to enjoy some of the most delicious treats. I hadn't seen my dear friend and editor Holly La Due in more than a year, and to step into her office on Broadway for the first time, to finally meet the entire team of Prestel Publishing that worked on my book, almost made me cry. And I ate - constantly! There was so much to discover, so much to try, it felt like traveling the world through food, but in one city. My palate enjoyed the most amazing Jamaican curry, Cuban stew and pies, Korean BBQ, Indian treats, and American classics. Breakfast was lush, every day: The richest Challah French toast, fluffy blueberry pancakes, huge muffins, crunchy cookies, fudgy brownies, perfect bagels, lobster roll, juicy burger, creamy clam chowder, and generously filled sandwiches.
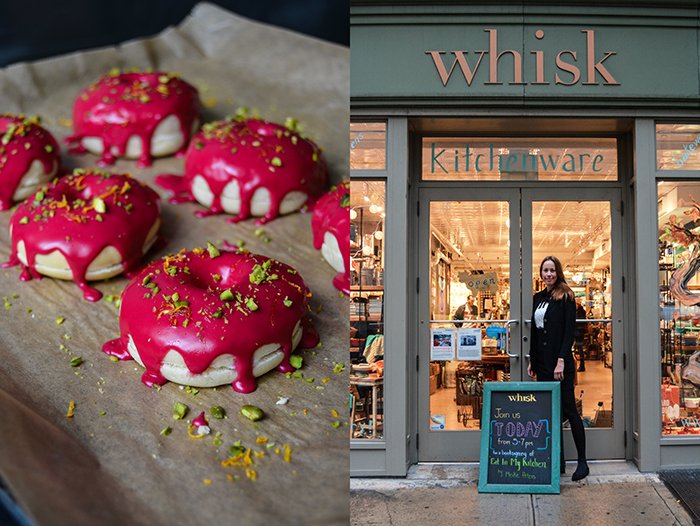
New York is heaven on earth if you love food. The quality is outstanding, proven by the fact that I didn't experience a single bad meal, I can recommend almost every restaurant I went to as you can see in my list below. One of the treats that struck me on our last day was a gorgeous pink doughnut at Bryant Park Holiday Market filled with ricotta and covered in sticky beetroot glaze. This combination is so good that I decided to come up with my own recipe and share it with you. My version is a soft and spongy oven-baked yeast doughnut refined with orange zest and sprinkled with pistachios. Next time I'll fry them in oil, which adds that extra rich flavor plus calories.

There's no better way to explore a city than on foot, so as I ate my way through Manhattan and Brooklyn, I also got to walk on the elevated High Line, a 1.5 mile long city garden. It's an impressive green oasis along the closed tracks of the West Side Line.
I managed to see a live performance and also Nan Goldin's Ballad of Sexual Dependency at MoMA, and a fantastic show at The Met Breuer, by James Kerry Marshall called Mastry. And visiting Kenzi Wilbur at Food52's holy test kitchen in Chelsea (picture above) was another highlight.

I came to New York to present the Eat In My Kitchen book, at a wonderful book launch feast at Maman NYC and at a cozy book signing event at the beautiful - and so tempting - Whisk kitchenware shop on Broadway. It's my first book, and to have had these two unforgettable celebrations in New York makes me feel very humble. I can't thank everybody enough who's been involved in both of the events. Maman is a stunning space with high ceilings in TriBeCa, founded by Michelin starred French chef Armand Arnal, Elisa Marshall, and Benjamin Sormonte. They are the sweetest team and they did everything possible to turn our event into a very special night. Chef Hetty McKinnon from Arthur Street Kitchen, and author of the cookbook Neighbourhood, prepared the recipes from my book for this special event. She's a precious gem, as a chef and as a friend.
My trusted partner Meridiana Wine Estate shipped their glorious Maltese wine over the Atlantic just for our event - our American guests are already thinking about how they can get hold of this wine from Malta in the future. Marisa Dobson is the power woman who helped me so much, organizing all my events in the US, and she introduced me to Baked (see the list below). Photographer Maria Midões is the lovely woman who captured the magic of our night at Maman in her gorgeous pictures. I had a dream team in New York, accomplished by the support of my wonderful publisher Prestel. You can't create a book on your own, but you also can't send it out into the world on your own. Thank you, my friends!


Here are some of my favourite food spots:
Manhattan
Baked TriBeCa, American bakery (they bake Oprah Winfrey's favourite brownies)
Maman TriBeCa, coffee, bakery, and events
Tina's Cuban Cuisine
Luke's Lobster East Village (the best lobster and crab roll and clam chowder)
Clinton Street Baking (New York Magazine voted: the best blueberry pancakes)
ABC Kitchen (their spinach, chèvre, and dill pizza is a revelation)
Stick With Me (Susanna Yoon's finest confectionaries)
Black Seed Bagels (delicious tuna melt and salmon bagel!)
Pondicheri New York (acclaimed Indian restaurant)
Food market at Bryant Park, especially
The Doughnut Project
Salumeria Biellese Deli (the best sandwiches lusciously filled with Italian prosciutto and cheese)
Blue Bottle Coffee
Eileen's Special Cheesecake
Jongro BBQ (Korean BBQ, be prepared for loud! music)
Russ and Daughters
Compagnie des Vins Surnaturels
Hot Pot Under de Tree in Harlem (Jamaican Diner on Frederick Douglass Boulevard)
Williamsburg - Brooklyn:
Khao Sarn (delicious Thai soups and papaya salad)
The Rabbit Hole (cozy breakfast spot, try the challah french toast with strawberry mscarpone!)
Extra Fancy (American restaurant, seafood and burger)
Peter Luger Steakhouse (reservation needed!)
Vanessa's Dumpling House
Ricotta Beetroot Doughnuts
Makes about 16 doughnuts plus doughnut holes
For the dough
plain flour 325g / 2 1/2 cups, plus about 2 tablespoons if the dough is too sticky
fast-acting yeast 1 1/4 teaspoons
granulated sugar 50g / 1/4 cup
fine sea salt 1/2 teaspoon
orange zest 1/2 teaspoon
milk, lukewarm, 155ml / 2/3 cup
butter, melted and cooled, 20g / 1 1/2 tablespoons
vanilla bean, scraped, 1/2
organic egg 1
For the filling
fresh ricotta, whipped, 250g / 9 ounces
For the glaze
icing sugar 200g / 2 cups
beet juice 4-5 tablespoons
unsalted pistachios, chopped, a small handful
orange zest 1 tablespoon
For the dough, combine the flour, yeast, sugar, salt, and orange zest in the bowl of a stand mixer fitted with the dough hook. Whisk together the milk, butter, vanilla seeds, and egg - the mixture should be lukewarm - and add to the flour mixture. Knead on medium speed for a few minutes until well combined. The dough should be soft and moist, but not sticky. If it's too sticky, add a little more flour. Transfer the dough to a table or countertop and continue kneading and punching it down with your hands for about 4 minutes or until you have a smooth and elastic ball of dough. Place the dough back in a clean bowl, cover with a tea towel, and let rise in a warm place, or preferably in a 35°C / 100°F warm oven (conventional setting), for about 60 minutes or until almost doubled in size.
Line 2 baking sheets with parchment paper.
When the dough has almost doubled in size, punch it down, take it out of the bowl, and knead for 1 minute. On a lightly floured countertop, using a rolling pin, roll out the dough until it's about 1cm / 1/2" thick. Using a 7 1/2cm / 3" round cookie cutter or glass, gently cut out circles and transfer them to the lined baking sheets. Using a 3 1/2cm / 1 1/2" cookie cutter or shot glass, stamp out the smaller inner circles and arrange them around the doughnuts on the baking sheet. If you use a smaller cookie cutter for the inner circles, the hole in the middle will close while baking. Cover with cling film and let rise in a warm place for about 25-30 minutes or until puffy.
Preheat the oven to 190°C / 365°F (conventional setting).
Bake the doughnuts and the doughnut holes for about 6-8 minutes or until light golden and still soft. If you're not sure, take out one doughnut and cut it in half to see if it's baked through. Transfer to a cooling rack and let cool completely. Cut the doughnuts in half and spread each bottom with about 1 heaping teaspoon of ricotta.
For the glaze, whisk the icing sugar and beetroot juice until smooth, the mixture should be quite thick. Using a teaspoon, sprinkle the glaze generously over each doughnut and doughnut hole. Immediately sprinkle with pistachios and a little orange zest.


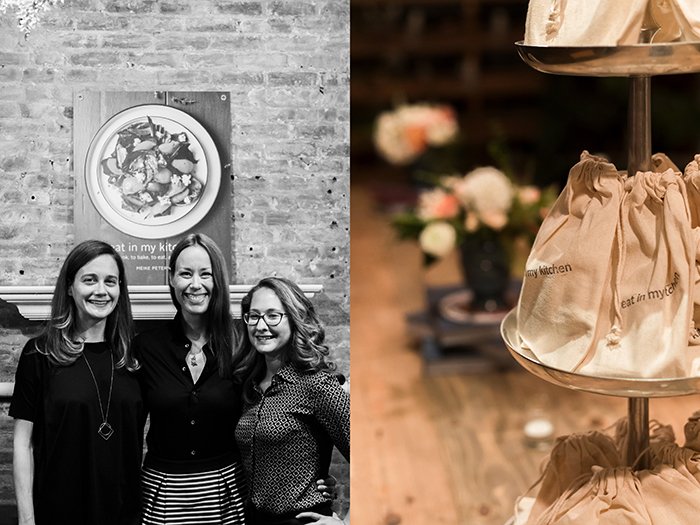

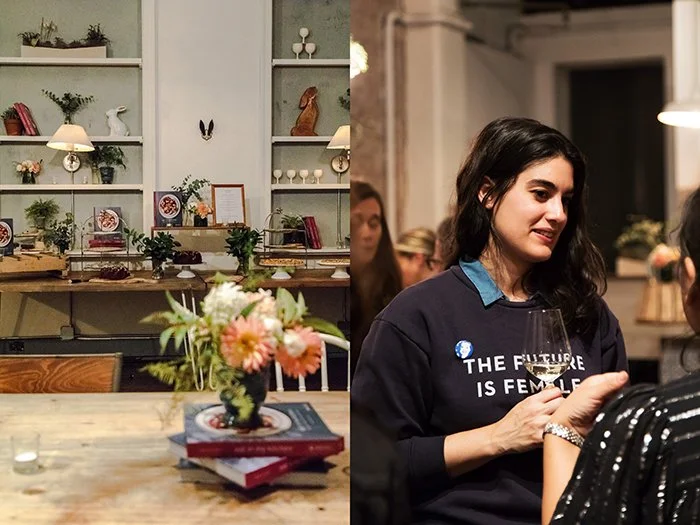


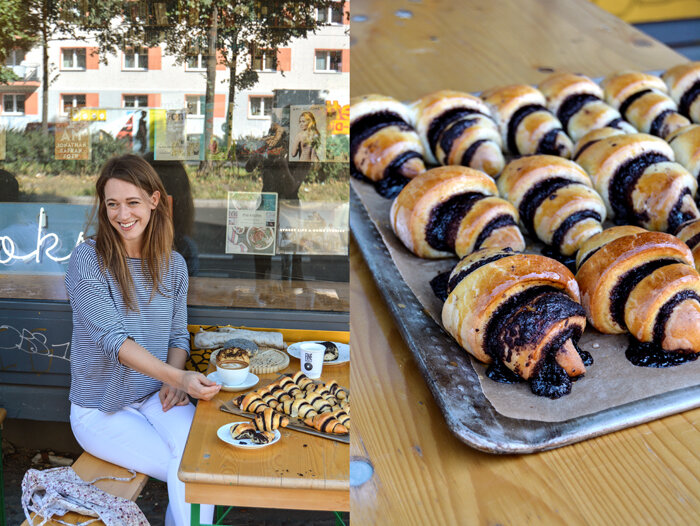
meet in your kitchen| Shakespeare & Sons, Berlin and Laurel's Chocolate Rugelach

"They both slow you down. They’re both transportive. They both smell good. They can both be enjoyed at the same time" - Laurel's words, when I asked her what she likes about the connection of food and books.
I've enjoyed sweet treats made by Laurel's hands for many years, but it took a while for us to meet personally. Together with her business partner Roman, the young woman from Boston runs Berlin's popular Shakespeare & Sons and Fine Bagels - a heavenly place for English books, bagels, cookies, rugelach, and cakes - all in one store! Originally, they started their Berlin business in a cozy space in Prenzlauer Berg that was, conveniently, quite close to where I live. But two years ago they had to move and I lost my dear store. A recent coffee date at their gorgeous new store in Friedrichshain brought back memories and awoke the idea to meet the stranger behind all these amazing sweet goods. It was actually a chocolate rugelach - possibly the best rugelach I ever ate - that made me get in touch with Laurel that same day. Her rugelach is gooey, chocolatey, sweet and juicy, it's so good that you basically have to order one after the other. When we met later, Laurel told me that her dear friend Sanam used to say that every rugelach sticks to your hips for seven years. If something tastes so good, I don't care about my hips, it's worth every pound!
Laurel is a self-taught baker with a weak spot for anything baked and sweet, a trait of her food loving family. Especially the women are quite gifted and know how to impress the hungry crowds at their kitchen tables with homemade cookies, cakes, and breads. Luckily, for generations, this passion has been passed on to the young ones.
Although she calls herself a shy bird who prefers to stay behind the scenes, when I saw her roll out the puffy yeast dough, dishing out stories about Israeli and American rugelach, I didn't believe it at all. Laurel sounds like a pro who must have a cooking show one day. I enjoyed watching her spread the dark chocolate filling lusciously over the orange flavoured dough so much, that I almost forgot how hungry I was. Luckily, it only took 15 minutes and she pulled out the most fragrant warm rolls in front of my camera - and then they went straight into my mouth.
Shakespeare and Sons also have the English Eat In My Kitchen book on their shelves!


Laurel's Chocolate Rugelach
For the dough
7 cups / 910g bread flour
2/3 cup / 130g granulated sugar
4 1/2 teaspoons instant yeast
2 teaspoons salt
1 cup / 225g butter
1 1/3 cups / 315ml milk
1 tablespoon vanilla extract
4 eggs
zest of 1 orange
For the filling
3 cups / 600g of sugar (this can be substituted for demerara or even muscavado for a stronger flavor)
2 1/4 cups / 270g unsweetened cocoa powder
3 tablespoons ground cinnamon
1 3/4 cups / 415g butter
For the egg wash
2 eggs, lightly beaten
In a bowl, whisk together flour, sugar and yeast. When that is mixed in, add salt and whisk again. In a saucepan, melt butter on low heat and then remove from heat. Add milk and whisk. Add vanilla and eggs and whisk. Pour liquid mixture into the flour mixture. If using a mixer, mix until incorporated with the paddle attachment, then switch to a dough hook. Knead with the dough hook for 5 minutes. If mixing by hand, mix well with a wooden spoon and then turn out onto a floured surface and kneed well for about 7 minutes. It's a very stick dough however, so it's best to use a machine. Put the kneaded dough into a well-greased bowl, cover with a wet cloth or plastic wrap, and let rise for about an hour or until your fingerprint in the dough doesn't spring back.
Preheat the oven to 175°C / 350°F. Line 2 baking sheets with parchment paper.
While your dough is rising, make the filling. Mix sugar, cocoa, and cinnamon. Melt butter and pour on while hot. Mix well. Set aside to cool. You can cool it faster in a refrigerator, but be careful not to let it sit in the fridge for too long. It will turn into a solid block.
Turn out your dough onto a floured surface and cut it into 3-5 balls, depending on how large you want your rugelach. There's no need to punch down the risen dough, as the rolling will do that for you. Roll out one of your dough balls into a perfect circle about 1/2cm / 1/4" thick. Spread your filling evenly and thinly across the dough, being careful not to tear the gentle dough. Use a pizza cutter to trim the edges and to divide the dough circle into about 12 triangles, like pizza slices. Now starting from the outside of the circle, roll up your rugelach so they look like little croissants. Place on a baking sheet.
When you've done this for all of your dough, brush your rugelach with an egg wash and bake for about 15 minutes. When you take them out of the oven, drizzle with simple syrup. Oh damn, now you get to eat them.
This recipe also freezes beautifully. I usually bake up as many as I want and put the rest of the unbaked rugelach in the freezer to take out and bake as I need them. (Think about the possibilities here. Seriously. Lazy winter weekend mornings in bed and then...poof...15 minutes later you've got gooey hot rugelach in your kitchen? This is a maximum pleasure recipe so it's a wise move to keep them on hand). Just give them a few minutes to thaw before you throw them in the oven.

How does an ex-physicist decide to start a bagel shop? When did you come up with the idea? Did this idea grow over years or was it a spontaneous decision?
Ha, I don’t know if I’d call myself an ex-physicist. I’d say I got the physics degree and ran. The bagel shop happened out of pure, selfish necessity. I found myself living in the first-class bagel desert of Berlin and, frankly, I was hungry. I tried to assimilate, I swear. Ate broetchens, croissants, muesli...you name it. What can I say? They weren’t doing it for me like a bagel and cream cheese does. I’ve always been a home baker, wasn’t particularly focused on anything else at that point in my life, and it just struck me as something to do. So pretty spontaneous.
At your peak, you baked 350 bagels every day on your own before you put your team together. You offer 25 different bagels at your shop, sweet and savoury. What fascinates you about this popular bun with a hole in the middle?
The bagel is a creature of the diaspora. At this point, it’s as much American as it is Polish-Jewish. It’s spent the last hundred years moving out of the basement-level New York bakeries, getting softer and bigger, and landing on breakfast plates the world over. At the same time, bagels are no longer created with the same reference point or even a nod to their history, and I think it’s important to maintain standards. What I like about a proper bagel is the deliberate chewiness and the impractical hole. The hole serves only to gush cream cheese and soil your clothes. And yet it’s got to be there. More surface area for the flavorful skin. So it’s not an easy food. But it’s such a good food.
Both of us share a passion for rugelach, can you tell us a bit about the difference between American style rugelach and the traditional recipes rooted in Israel?
Ok, so the kind of rugelach I’m familiar with from back home (Boston) are more of a gently flaky cookie made with a cream cheese or sour cream dough and a filling of jam, chopped nuts, raisins, and cinnamon sugar. The dough is a royal pain to work with, but worth it. Meanwhile the rugelach you’d find in Israel are generally from a yeasted dough and reach the level of chocolate-y gooeyness that solicits involuntarily obscene vocals from those eating them. Or maybe that’s just me. This is disloyal to my upbringing, but I’m just going to say it: there is nothing better than an Israeli rugelach. The clouds of bees in the shuk in Jerusalem agree with me.
What makes the Ashkenazi baking tradition so special to you?
A hundred years ago, my great-great grandmother and her sister made their living baking breads and challahs in a village on the outskirts of Warsaw. All the women in my family are wonderful bakers and this is a way of maintaining and honoring a longstanding food tradition. The mandelbread recipe I use in the store goes back at least four generations. I’m not sure how the ancestors would feel about the double-whammy of reverse migration and return to the kind of baking that for them was a tough necessity and for me a cutesy, artisanal hobby-turned profession, but that’s 21st century privilege for you.
What's the hardest part of running your own bakery?
Not eating all the cookie dough.
Are there any Shakespeare and Sons plans for the future, apart from books and bagels?
Right now I’m working with several other people to organize a Jewish food week called Nosh Berlin. It’ll be from March 19-26 2017. There’s never been an event like it here and people are really coming together. To kick it off, we’re partnering with The Breakfast Market at Markthalle Neun to have a Jewish breakfast market with everything from bagels to blintzes to jachnun to Ethiopian dishes, and more. The idea is to get as much wonderful Jewish food together in one place as possible. We’re drawing from local chefs and home-cooks as well as folks from abroad. Then throughout the week there will be events all over the city, from popup dinners to cooking classes to film showings to readings. So everyone should set aside a lot of tummy real estate for that week.
You grew up in Boston, you've lived in Kathmandu and in Prague, and you've called Berlin your adopted home for more than 5 years. What do you like about the capital? What inspires you in this city?
What I like about this city is how easy it is to do your own thing here. It’s a place with very little open judgement about life choices and success seems to be measured differently than where I grew up. And that has provided me and a lot of other people with the room to make slightly unorthodox dreams reality.
What do you like about the connection of food and books?
They both slow you down. They’re both transportive. They both smell good. They can both be enjoyed at the same time.
Can you tell us a little about the history of the house and store where you opened the new Fine Bagels/Shakespeares and Sons shop?
So the building in Friedrichshain where we’re currently located was built in 1962 as a bookstore and apartment building. Since it was in East Germany, it was a state-run bookstore until the fall of the wall, at which point it was privatized. To this day, old Berliners are always popping in to wax nostalgic about their memories of the bookstore from back in the day. If you walk into the store, you’ll noticed a raised portion to your left. It sits on top of a Cold War bunker that was built-in. Meanwhile, all of the built-in bookcases are original. They were covered in terrible particle board from the early ‘90s and when we tore it down, there was the beautiful original wood shelving. It’s a big space so we’re able to accommodate the bakery kitchen, the cafe, and the bookstore. It was a stroke of luck to get it.
You say that many women in your family are passionate home bakers, what did you learn from them? And what about the men in your family?
We’ve got some sort of cruel genetic predisposition to a sweet tooth running down both the paternal and maternal branches of my family. So there was always someone baking sweets. Cookies, cakes, quick-breads. My mother in particular is a home-made obsessive and passed that on. Particularly chocolate chip cookies, kugel, and zucchini bread. One grandmother was always making the most divine Toll House Cookies you’ve ever tasted and the other one was all about blueberry pies and cheesecakes. Would you believe it if I told you my maternal grandmother was an early adopter of the Weight-Watchers program? Shocking.As for the men, well, at least a lot of them are good dish washers. That’s all I’ll say.
If you had to name one dish from where you grew up, back home in Boston, that you miss the most, what would that be?
Honestly, just an onion bagel and cream cheese from Rosenfeld’s in Newton Center. I’m absolutely devoted. They’re the best. And good seafood, of course.
Which are your favourite baking cookbooks and why?
My absolute favorite is Inside the Jewish Bakery. There are no pretty pictures, but it’s the most accurate and comprehensive survey of Jewish-American bakery recipes I’ve ever seen. It’s full of history and storytelling and extraordinarily detailed instructions. And that’s what it should be. The authors, Norman Berg and Stanley Ginsberg, both made their careers in these very bakeries and know better than anyone what they’re talking about. It’s my ultimate reference point.
Where do you find inspiration for new recipes for the Fine Bagels' menu?
Mainly I try to wheedle old family recipes out of the elderly. Other than that, I go home and visit the old-school bakeries and delis around where I grew up. I’m not really trying to do anything so innovative. I’m more interested in preservation.
Who is your biggest inspiration in the kitchen?
Meike, this is entrapment! If I told you it was someone outside of my family, what would the family say? If I told you it was someone within my family, they’d think I was playing favorites. I’ll whisper it in your ear, but you can’t tell the internet. It’s my own neck I’ve gotta think about.
What was the first dish you cooked on your own, what is your first cooking memory?
Chocolate chip cookies with my mother. You hang around hoping to lick out the bowl long enough you inadvertently learn to bake.
What are your favourite places to buy and enjoy food in Berlin?
The fairly new Bread Station on the Maybach Ufer does the best sourdough loaves I’ve ever had. They’ll schmear up a hot broetchen with salted butter and comte for you and it’s heaven. Merle’s Roti and Rum near Yorkstrasse is divine...piles of hot roti, spicy curries, and homemade ginger beer. Heno Heno in Charlottenberg is worth the trip across town. Homey don buri, sour plum onigiri, and herring nigiri appetizers. Lon Men’s Noodle House on Kantstrasse and Agni on Prenzlauer Allee are two other favorites.
If you could choose one person to cook a meal for you, who and what would it be?
Joan Nathan. She’s the queen.
You're going to have ten friends over for a spontaneous dinner, what will be on the table?
A proper Nepali dal bhat tarkari. It’s the most wonderful food in the world. I bothered a lot of people into teaching me to cook while I lived over there and it’s still my favorite thing to make. A shout out of gratitude here to Saraswati Pangeni, Sudeep Timalsina, and Nirajan Tuladhar.
What was your childhood's culinary favourite and what is it now?
Childhood favorite? French toast. Grown up favorite? French toast.
Do you prefer to cook on your own or together with others?
I’m a kitchen misanthrope. Mainly because I’m clumsy. My ideal cooking scenario is having a friend hang out a safe 4 feet away from the cooking. They will gossip to me and drink wine while I make everything. Some days, like yesterday, this is not far off from the reality of my professional kitchen. Can’t say if that’s a good thing or not.
Which meals do you prefer, improvised or planned?
Planned. I live in permanent fear of not making enough food for my guests. This has never happened, but I gotta stay vigilant.
Which meal would you never cook again?
Latkes for 100 people. I smelled like a fry trap that fell into an onion field and my skin broke out in zits like a pubescent boy. Brutal.
Thank you Laurel!


meet in your kitchen | Emiko Davies' Grape Focaccia & her life in Tuscany

Our long wooden dining table has seen many luscious lunches and dinners. It has its scars and scratches and I'm sure that a few of them came from an unexpected meal with friends a few months ago. It must have been spring, I was still busy proof reading my book and I was rather stressed. What was supposed to be a one hour snack with a friend from Malta turned into a little Friday feast, with three friends, salads, cheese, and salami, and with a few more bottles of white wine than one should open (and empty) on a Friday afternoon - but who cares, we had a wonderful time. We laughed so much that I managed to relax and forget my duties for a few hours - and it was the start of this meet in your kitchen feature.
One of the friends who sat at my table that day was my dear Heilala. Whenever we meet, we get lost in long conversations. Between nibbles of cheese and sips of wine, she told me about a friend from her school days who just published her first cookbook and had also gone through all the excitement that comes with the adventure of being a book author. Her friend lives in the heart of Tuscany, in Florence, once the breeding ground of breathtaking Renaissance art and architecture. If you've seen it once, you'll never forget its magical beauty. So Heilala told me that her friend lives right there, in this Italian paradise with her Italian husband and their little daughter, she writes a food blog and as I found out later, she's already at work on her second cookbook - she's called Emiko Davies.
I knew Emiko, not personally, but I've been a huge fan of her work for quite a while. Her recipes, her writing, and her photography have depth, every single aspect of her work shows that she's knows what she's talking about. Every picture she shares speaks of the beauty that surrounds her. If you live in a place that's so full of history, culture, and evolving traditions, where the fine arts have flourished for centuries, you can only grow. The former art and history student dug deep into Florence's culinary traditions. Like a scientist, she observed, read, and learned about the original cooking and baking of this part of Tuscany, a region that's so versatile and rich. Florentine, The True Cuisine of Florenceis a declaration of love, of someone who has experienced the city from the outside and has now become a part of it.
The curiosity and persistency of this food loving woman fascinated me - even more so after I found out that we share a beloved friend. We only got in touch last week, but I immediately knew that I wanted to meet Emiko in her kitchen. For know it's just a virtual meeting, but I'm planning to visit her next year, in real life - to be continued.
All pictures in this post are taken by Emiko Davies.


Schiacciata all'uva | Grape focaccia
from 'Florentine: The True Cuisine of Florence' by Emiko Davies, published by Hardie Grant Books
For one or two fleeting months of the year from September to October, the appearance of schiacciata all'uva in Florence's bakery shop windows is a sign that summer is over and the days will begin to get noticeably shorter. This sticky, sweet focaccia-like bread, full of bright, bursting grapes, is a hint that winemakers are working hard at that moment harvesting their grapes and pressing them.
These days, it is usually made with fragrant, berry-like concord grapes (uva fragola) or the more traditional sangiovese or canaiolo wine grapes. These grapes stain the bread purple and lend it its juicy texture and sweet but slightly tart flavour. They are also what give the bread a bit of crunch, as traditionally the seeds are left in and eaten along with the bread. Avoid using red or white seedless table grapes or white grapes for this – they just don’t do it justice in terms of flavour or appearance. If you can’t get concord grapes or it’s the wrong season, try replacing them with blueberries. It’s completely unorthodox, of course, but it’s a very good substitute, giving you a much closer result than using regular table grapes.
Makes 1 large schiacciata, serves 6–8
500 g (1 lb 2 oz) plain (all-purpose) flour, plus extra for dusting
20 g (3/4 oz) fresh yeast, or 7 g (1/4 oz/2 1/2 level teaspoons) active dry yeast
400 ml (131/2 fl oz) lukewarm water
75 ml (21/2 fl oz) extra-virgin olive oil, plus extra for greasing
600 g (1 lb 5 oz) concord grapes (or other black grape)
80 g (23/4 oz) caster (superfine) sugar
1 teaspoon aniseed (optional)
icing (confectioners’) sugar (optional)
Preparing the dough
This can be done the night before you need to bake it, or a couple of hours ahead of time.
Sift the flour into a large bowl and create a well in the centre.
Dissolve the yeast in some (about 1/2 cup or 125 ml) of the lukewarm water.
Add the yeast mixture to the centre of the flour and mix with your hand or a wooden spoon. Add the rest of the water little by little, working the dough well after each addition to allow the flour to absorb all the water.
Add 1 tablespoon of extra-virgin olive oil to the dough and combine.
This is quite a wet, sticky dough. Rather than knead, you may need to work it with a wooden spoon or with well-oiled hands for a few minutes until it is smooth. Cover the bowl of dough well with some plastic wrap and set it in a warm place away from draughts until it doubles in size, about 1 hour. If doing this the night before, leave the dough in the bowl to rise in the fridge overnight.
Assembling the schiacciata
Separate the grapes from the stem, then rinse and pat dry. There’s no need to deseed them if making this the traditional way.
Preheat the oven to 190°C (375°F).
Grease a 20 cm (8 in) x 30 cm (12 in) baking tin or a round pizza tray with olive oil. With well-oiled (or wet) hands, divide the dough into two halves, one slightly larger than the other. Place the larger half onto the greased pan and with your fingers, spread out the dough evenly to cover the pan or so that it is no more than 1.5 cm (1/2 in) thick.
Place about two-thirds of the grapes onto the first dough layer and sprinkle over half of the sugar, followed by about 30 ml (1 fl oz) of olive oil and 1/2 teaspoon of aniseed.
Stretch out the rest of the dough to roughly the size of the pan and cover the grapes with this second layer of dough, stretching to cover the surface. Roll up the edges of the bottom layer of dough from underneath to the top, to seal the edges of the schiacciata. Gently push down on the surface of the dough to create little dimples all over. Cover the top with the rest of the grapes and evenly sprinkle over the remaining aniseed, sugar and olive oil.
Bake for about 30 minutes or until the dough becomes golden and crunchy on top and the grapes are oozing and cooked.
Remove from the heat and allow to cool completely. Cut into squares and enjoy eaten with your hands. If you like, dust with icing (confectioners’) sugar just before serving – although this isn't exactly traditional, it is rather nice.
This is best served and eaten the day of baking, or at the most the next day.
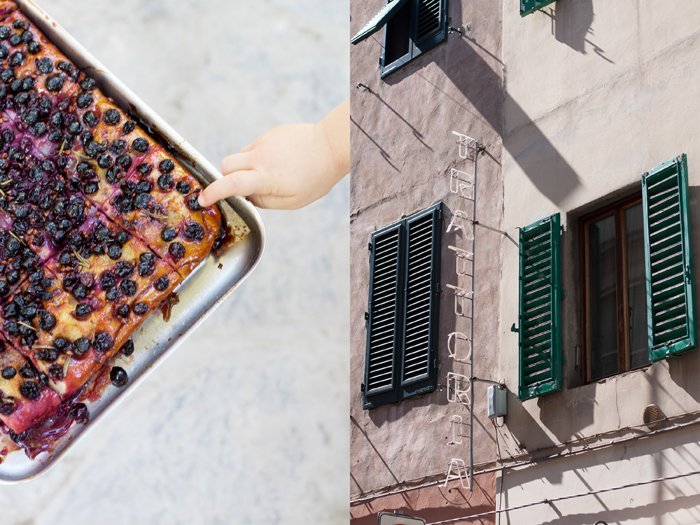
You've lived in many countries and experienced a variety of cultures in your life, your mother is Japanese, your father is Australian, your husband is Italian and you grew up in Beijing. How has your diverse cultural identity influenced your life and cooking?
Moving around a lot and identifying with different cultures, I grew up not feeling like I was particularly attached to just one place. I think this made it very easy (perhaps even necessary – at least that's how I felt about it when I was 20!) for me to pick up a suitcase, buy a plane ticket and move to a new country to learn a new language and discover the new culture. I am also pretty sure this travel and experience partly contributed to me being an adventurous eater – always willing to try anything once. From the beginning, I understood that food is a way to connect with and understand a new culture – if, for Florentines, their number one beloved comfort dish is a warm panino made with the fourth stomach of the cow (it's known as a panino al lampredotto), then you can be sure it's one of the first things I tried – and fell in love with too!
What do you love the most about Florence? Do you find anything difficult to connect with?
There are many sides to Florence and the longer I live here, the more I discover another aspect! When I first moved here, it was so easy to fall head of heels for Florence – especially for someone who studied art and art history as I did! Everywhere you look, the place is touched with the Renaissance and the most important artists in history, it's like one giant museum. That's what drew me in. And it's what drew a lot of expats to Florence, so there is a large expat community with many similar-minded people, who are all here for similar reasons (love, food or art, usually!). I made friends easily here and felt really at home, ironically (as I always feel more at home amongst expats). But having said that, I find it's really difficult to make friends, really good friends, with Florentines. That's been a struggle. I ended up meeting and marrying one, but I have to say, he's quite different from the typical Florentine man!
Was it easy to become a part of the Florentine way of life?
I think yes and no. Living it the historical centre of Florence, visiting the local butcher or fruit vendor or bakery for your shopping, the same bar for coffee every morning, you begin to get to know your neighbourhood and they begin to know you, it becomes your little world. I've met some wonderful people this way, and this feeling of a neighbourhood or quarter is something I love about Florence – something that I hope everyone who still lives in the centre continues to cling on to, as tourism tends to take over in a city like Florence. On another aspect, since having a child, I can see the cultural differences coming out more than ever! My parenting ideals are much more anglo-saxon and more often than not they seem to clash with the 'norm' here!
Your husband is head sommelier at the Four Season's Michelin-starred Il Palagio, do you find it inspiring that both of you work in the fields of the culinary pleasures of life?
Always. We work in two quite different worlds – I write about and cook homely, traditional food, while he has, for the past five years or more, worked solely in fine dining and wine. But at home we always cook together and we have a similar appreciation for good food and good ingredients, cooked properly. He inspires me and helps me in ways he probably doesn't know.
You say that "Italian cuisine doesn't exist, there are many cuisines". Why do you think regional cuisine is so diverse in Italy?
There are many theories, but the simplest answer is history. Italy is actually a very young nation – it was unified in 1861, that's little more than 150 years ago! But the traditions, dialects, dishes and ways of life of each region are ancient. In many cases, even the differences you'll find from town to town are huge. This is what makes Italy such a fascinating place – it's not really one country to discover but so many different places, which means it's almost a new cuisine in every town you visit.
On your blog, you mention an author called Pellegrino Artusi and his cookbook, known in English as Science in the Kitchen and the Art of Eating Well, published in Italy in 1891. Can you tell us a bit about this book and why it fascinates you?
Italy had only been unified for 30 years when this book – documenting 790 “Italian” recipes – was published. It became the sort of cookbook every household acquired and had sitting on the shelf. Artusi himself was from Emilia-Romagna but he spent much of his life in Florence, so many of the dishes are Tuscan, or familiar to Tuscans. But it wasn't meant to be a regional cookbook, it was more like an encyclopaedia of recipes for the “modern” housewife. I love it because it's not only a snapshot into what Italian food was when the country was newly unified, but also because many of the recipes are still made the same way, so it's a fantastic reference for traditional recipes. It's a good read, too, Artusi is witty and at times hilarious in his anecdotes that accompany recipes.
Why do you think that there are many Florentine dishes that didn't change much since medieval times?
Traditions change very slowly in Florence! They have this saying here, la squadra che vince non si cambia, or the don't change a winning team. It's a bit like the phrase, if it ain't broke, don't fix it. Partly there's that at play, it's the proud nature of Florentines to continue to prepare and eat their all-time favourite dishes more or less the way they've been prepared for centuries. There's also the philosophy to cook the local ingredients that have always been available for Florentines, and to use the long-time staples of the cuisine – bread and olive oil being two of the most important! These have been around for a long time and are still what humble, earthy Florentine cuisine is based on.
Can you imagine living in Tuscany for the rest of your life?
For the same reason that I've always found it easy to pick up and move, I can't really imagine being in one place forever! But I've lived in Florence longer than any other single place on the planet, so that's already quite an achievement! Italy is not an easy place to live in, despite the romanticism and beauty. I think that we are lucky to have the option to be able to live in two wonderful countries – Australia and Italy – whenever we want. For now, it's Italy's time.
Florentine, your first cookbook, came out in March this year. At the moment you're working on your next book, Acquacotta, which will be about the cuisine of the southern Maremma area of Tuscany. It will be published exactly a year after the first one. Why did you decide to start working on the new book immediately and what feels different now, after the experience of the first book?
It came about quite quickly because we were living in Porto Ercole, in southern Tuscany for six months last year, well before Florentine came out, and it was just such a beautiful place I knew it had to be shared in the form of a cookbook! So I contacted my publisher and we talked about the pitch for a couple of months and came up with Acquacotta. She was aware that starting to work on it while I was living there would be the best way to bring it to life, so essentially I started working on Acquacotta while I was still finishing Florentine. It's been difficult to juggle between the two and 'switch' from one to the other when Florentine finally came out, but the experience of the first book has helped me feel much more confident about the second one – from the recipe testing to the writing to the photographs, even how the recipes were made and shot. It really helped that I have the exact same wonderful team from Florentine working on this book too, it felt really good and seemed to just make itself, almost!
Your photography is stunning, do you prefer taking the pictures of your dishes yourself?
Thank you! I still feel like I have a long way to go – my background is in analog film photography, and I still feel like I struggle with digital photography, especially the editing part. I'm self-taught for the most part. For my blog, I take all my own photographs, but for the cookbook I took the location photographs, leaving the recipe shots to a wonderful photographer Lauren Bamford. In Australia, a cookbook is really a team effort, with one professional looking after each and every aspect of the book. For the recipe shots, I wanted to make sure the dishes looked completely authentic and real – just like how you'd find them in Florence. So I cooked them myself (with some help from my husband Marco and a home economist) and while I was busy in the kitchen, Deb Kaloper, an absolute magician in food styling, styled the dishes and Lauren Bamford took the photographs. It was a dream to work with them.
How do you develop new recipes for your book and your blog? What inspires you?
What inspires me most is travel and seeing how a place – its landscape, its history – is so strongly connected to the food that is made there and vice versa. It's why I am so interested in regional Italian food. In Florentine I wanted to share how the food in this city belongs entirely to Florence – not just Tuscany. It's not Tuscan food. It's Florentine food. And for Acquacotta, which is still about Tuscany, I wanted to show people how different Tuscan food is when you come to a place like the Maremma – more isolated, less touristy, hidden, and full of beautiful, rugged landscapes, mountains and the sea, which inspire the food. For the blog, I talk about not only dishes that I've found in old cookbooks or tasted in a new place, but also create some travel pieces for people who might be coming to Italy on holiday and want to avoid touristy food and know where to taste the real deal.Who is your biggest inspiration in the kitchen?In every day cooking, it's probably my husband. Everyone who likes to cook for other people knows that the best thing about cooking is making something that you know someone else will love! In developing recipes for the blog and my books, it's usually some old cookbooks that inspire me to try new dishes – aside from Artusi, I also love Ada Boni's 1921 cookbook, Il Talismano della Felicita' (known as The Talisman in English) and Elizabeth David's Italian Food. I've discovered some other older cookbooks recently that I have at my bedside table too, like Patience Gray's Honey from a Weed and Jane Grigson's Vegetable Book.
What was the first dish you cooked on your own, what is your first cooking memory?
I can remember a few mud pies when I was very little, but from memory the first real food I made was scrambled eggs. My grandmother in Sydney taught me how to make them, using real butter and showing me how to take them off the heat when they're still soft and wobbly, just before they look ready so you don't risk overcooking them. I still make it the exact same way.
What are your favourite places to buy and enjoy food in Florence?
My favourite food market is Sant'Ambrogio. It's a local market on the eastern edge of town. It's not huge but it's got everything you'd ever need and more. Plus there's always a nice neighbourhood vibe there, and we have a little ritual of stopping off at the news stand, then going to a pastry shop for coffee and a mid-morning treat. It's the little things. Many of my favourite restaurants are in the same square as the market – Caffe Cibreo is a really pretty spot for coffee or lunch, and the buffet lunch at Teatro del Sale is one of my favourite food experiences in Florence. Pasticceria Nencioni a little down the street is a wonderful, tiny pastry shop and right next to the market, Semel, a little hole in the wall panino shop, makes a fantastic quick lunch – a crunchy roll with maybe some anchovies, fennel and orange (my favourite one) and a small glass of wine.
If you could choose one person to cook a meal for you, who and what would it be?
It'd probably be my mum, I'd ask her to make me my favourite Japanese dishes – cold somen noodle salad and chargrilled baby eggplants if it's summer, miso soup with clams, her sushi and sashimi platters. Whenever I'm home I always request sukiyaki or shabu-shabu (a hot pot dish where each diner cooks their own food in the bubbling pot in the middle of the table) at least once.
You're going to have ten friends over for a spontaneous dinner, what will be on the table?
Food that is unfussy to make (i.e. easy for the cook) and easy to share (i.e. fun and informal for the guests) – a creamy chickpea soup or a steaming pan of freshly tossed vongole and spaghetti, a roast of some sort (a whole roast fish or chicken are my favourites), stuffed with lots of herbs on a bed of roast potatoes and cherry tomatoes so you have the main and side dish in one. Dessert, either an after-dinner stroll to the gelateria or some whipped, coffee-laced ricotta with homemade lady finger biscuits to dip.
What was your childhood's culinary favourite and what is it now?
I loved everything as a child, but in particular I loved Japanese food and Japanese sweets – anything with sweet red bean paste is my weakness! They're still my favourite, most comforting foods, but it's very hard to get good Japanese food in Italy so I wait until I'm visiting my mother to indulge in it.
Do you prefer to cook on your own or together with others?
I like the social aspect of cooking together, when you've got something special planned and there's a lot to do, it's nice to have someone to chat to while you're chopping, or kneading or stirring all day. But when I get the chance to have some time to myself (rare these days, with a three and a half year old around!), I like to be alone in the kitchen, cooking is very therapeutic and relaxing, almost meditative, for me. That's one of the reasons I'm looking forward to the cooler weather, so I have a good excuse for long, slow cooking and baking, my favourite ways to cook.
Which meals do you prefer, improvised or planned?
I do like both, but I think I might be rather good with improvising a meal! One of my best food moments was pulling together a totally improvised meal for my very new boyfriend (so new I probably couldn't even call him that!) from a practically empty fridge. I made him pasta with broccoli and garlic. He took one bite and said “I'm going to marry you.” And he did.
Which meal would you never cook again?
I don't know if there's something I'd never do, but probably things I'd change the next time I tried it. For me, right now, being a mother and writing cookbooks, I have to be a bit picky with what I cook when I have the time to do it, so I tend to lean towards low maintenance, unfussy, simple dishes. Things that are fiddly and require every minute of my attention are things I avoid lately – caramel, for example, is something I may not try for a while!
Thank you Emiko!


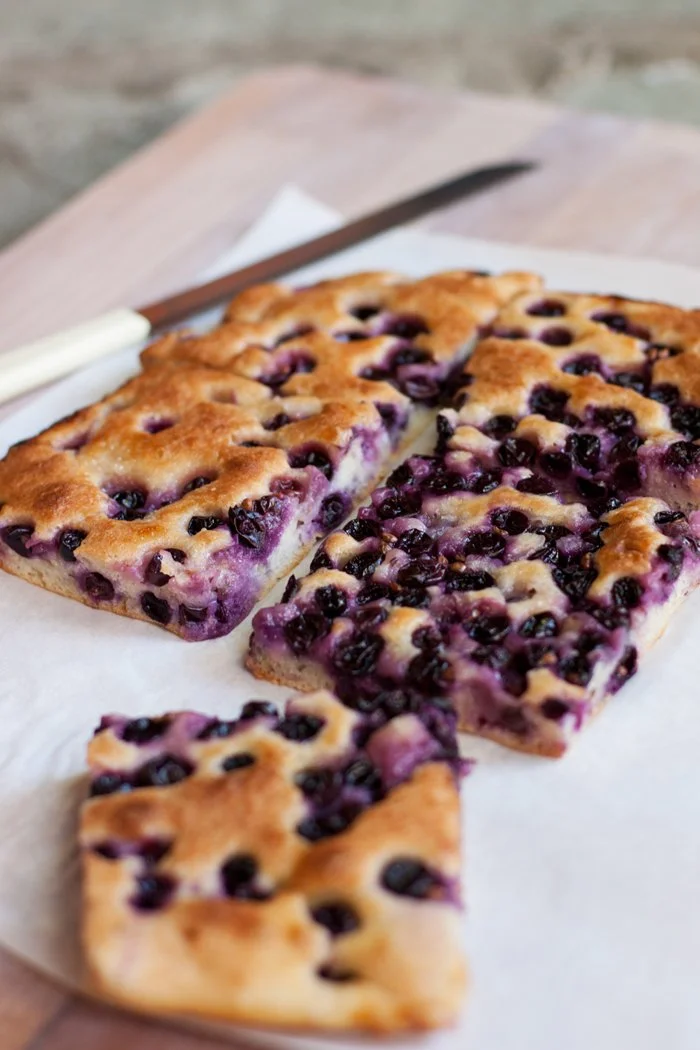

Fig, Chèvre and Honey Focaccia with Rosemary
My kitchen in Berlin faces a quiet backyard. In summer, I love to leave the windows wide open, hear the birds sing, and then it's often just me, alone with my thoughts and ideas, imagining ingredients, remembering old classics or coming up with new recipes. I get the cooker or oven started and my meditation begins: I just cook in silence.
Seeing that the weather hasn't shown the slightest hint of summer, I concentrated on rather hearty pleasures. I made cheese spaetzle (Southern German egg noodles with lots of melted cheese and golden onions), pasta with sautéed radicchio, chicken liver, and mustard butter, and enjoyed my obligatory Sunday pizza night. I also tried out a new cake recipe with the sweetest greengage plums, which was great, and I experimented with some dip variations. It was all very relaxing, calming, and put my mind at ease.
I also pulled one glorious - and much appreciated - dish out of my oven that combines all the fun of summer: a spongy, oily focaccia topped with ripe figs, soft chèvre, honey, and rosemary. It's perfect for breakfast, lunch, dinner or for a picnic - I could even have it at teatime with a cup of Darjeeling.

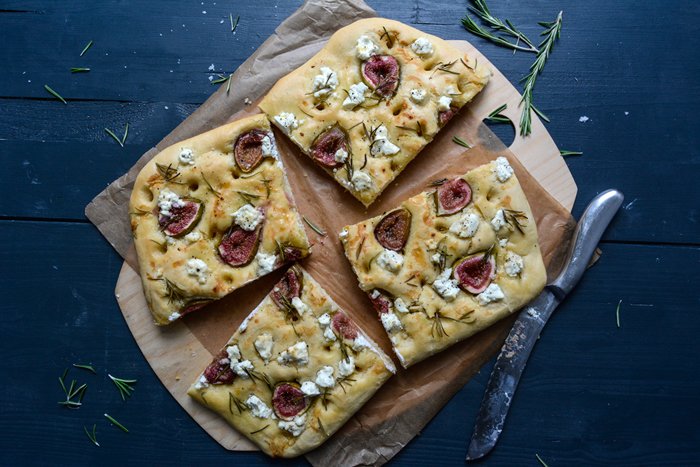
Fig, Chèvre and Honey Focaccia with Rosemary
Makes a 25 x 32cm / 10 x 12 1/2″ focaccia
For the dough
plain flour 500g / 3 3/4 cups plus 2 tablespoons
fast-acting yeast 1 (7g / 1/4 ounce) envelope
fine sea salt 1 teaspoon
granulated sugar 1 heaping teaspoon
water, lukewarm, 260ml / 1 cup and 2 tablespoons
olive oil 120ml / 1/2 cup, plus 1-2 tablespoons to oil the baking sheet
For the topping
honey 2 tablespoons
ripe figs, cut in half, 6
soft chèvre, torn into pieces, 150g / 5 ounces
fresh rosemary needles, a small handful
flaky sea salt
black peppercorns, crushed in a mortar (optional)
For the dough, combine the flour, yeast, salt, and sugar in the bowl of a stand mixer fitted with the dough hook. Add the lukewarm water and half the olive oil (60ml / 1/4 cup) and knead on medium-high speed for a few minutes until well combined. I mix it on '4' on my KitchenAid. If the dough is too sticky, add more flour. Transfer the dough to a table or countertop and continue kneading and punching it down with your hands for about 4 minutes or until you have a smooth and elastic ball of dough. Place the dough back in the mixer bowl, cover with a tea towel, and let rise in a warm place, or preferably in a 35°C / 100°F warm oven (conventional setting), for about 60 minutes or until doubled in size.
Oil a 25 x 32cm / 10 x 12 1/2″ baking sheet.
When the dough has doubled in size, punch it down, take it out of the bowl, and knead for 1 minute. Using your hands, stretch and spread the dough on the oiled baking sheet. Cover with a tea towel and let rise in a warm place for about 20 minutes or until puffy.
Preheat the oven to 220°C / 425°F (convection setting). Heat the honey in a saucepan over low heat for about 1 minute or until liquid.
Using the round bottom of a wooden spoon or your finger, punch around 6 x 7 holes into the surface of the dough. Pour the remaining olive oil over the dough and into the holes. Spread the figs (cut side up) over the focaccia and push them gently into the dough. Sprinkle with the chèvre, rosemary, and a little flaky sea salt, and drizzle with the warm honey. Bake for 20 minutes or until golden and light brown. Sprinkle with crushed pepper and enjoy warm or cold.


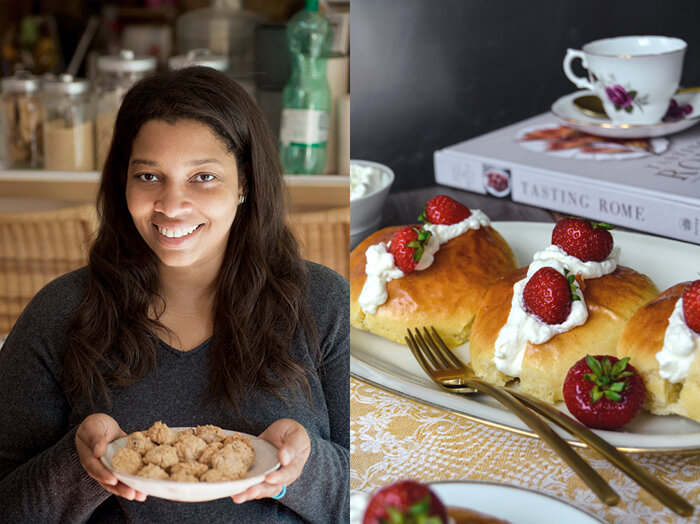
meet in your kitchen | Tasting Rome with Kristina's Maritozzi con La Panna

As soon as the air is filled with flickering heat and the sky over Berlin is painted in the deepest sparkly blue, my mind tends to travel to the South, I'm desperately lost in Mediterranean daydreaming. One of my favourite imaginary destinations - apart from Malta - is Italy. Take me to the soft hills of Tuscany, the Renaissance statues at Florence's Piazza delle Signora, or to the ancient city of Rome and my heart is filled with joy. My schedule doesn't allow me to travel in person, but thanks to two American girls and their gorgeous cookbook Tasting Rome I can travel without having to leave (although I wouldn't mind moving south for a few days).
The first time I was in touch with Kristina Gill, she asked me to come up with a sandwich recipe for her In the Kitchen With column on DesignSponge.com. She was happy with my creation, a lusciously stuffed Mediterranean Baguette, and we stayed in touch. I always assumed that Kristina lives in the US, Design Sponge is an American site. But the girl from Nashville moved to Rome almost two decades ago and dug deep into la dolce vita - into the culture, food, and history of her newly adopted hometown.
Years of walking down Rome's cobblestoned streets, soaking up the loud scenes on the piazzas, and passing by baroque fountains and silent palaces also made her aware of the city's vivid contrasts. To see the past and present meet, old buildings taken over for unconventional use, kitchen traditions being respectfully transformed into contemporary dishes - this lively process fascinated Kristina. When she met her pal, Katie Parla, who's a New Jersey native, the two girls realized that they explore and experience their city in a similar way. Katie, who has a master's degree in Italian gastronomic culture, and Kristina, the photographer and food and drinks editor, both loved documenting Rome's lost recipes and contemporary innovations. So they decided to use their vast insider knowledge to write a cookbook together.
Tasting Rome is a collection of traditional Roman recipes and their modern interpretations. You can find pasta, vegetable, and meat classics side by side with scrumptious pizza variations and sweet Italian treats. I was impressed - and also glad - that the authors didn't skip the city's peasant tradition of using the whole animal, including offal, like sweetbread, liver, or tongue, and the more simple cuts of meat. It's a tradition that corresponds with the great movement of eating sustainably and with respect for our environment.

The two women developed the recipes together and asked the city's great chefs for advice when it came to pizza and cocktails. The colourful pictures in the book that make you want to pack your bags and go straight to the airport - or at least to a Roman restaurant for dinner - were all taken by Kristina. Together, Kristina and Katie manage to share a taste of Rome through their words and delicious dishes.
I chose to share their recipe for Maritozzi con La Panna with you, tender sweet yeast buns filled with whipped cream. Apart from enjoying 4 (!) of these little temptations in one go with great pleasure, I was quite impressed to learn about a very simple technique that they use to roll the buns to give them a tight surface. Usually, I roll yeast buns between my two hands, holding one like a dome and the other one flat, rolling the dough about 20 times. Tasting Rome taught me to use only one hand, rolling the piece of dough and pressing it against a lightly floured kitchen counter until it's a firm ball. It works perfectly!
The beautiful Rome pictures are by Kristina Gill, the food pictures are taken by me.
Update, June 13th, 2020:
Statement by Kristina Gill about the work on Tasting Rome "... my editor forced my voice and views on the book to be subordinate to my co-author's.", click here and here for Kristina's full statement.

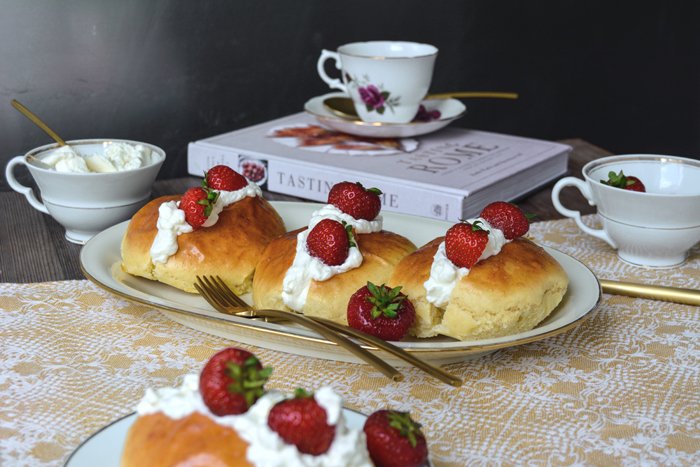
Maritozzi con La Panna - Sweet Buns with Whipped Cream
Makes 12 maritozzi
For the sponge
warm milk (between 40-45°C / 105-115ºF) 120ml / 1/2 cup
active dry yeast 1 1/4 tablespoons (I used fast-acting yeast)
bread flour 130g / 1 cup (I used white spelt flour)
granulated sugar 1 tablespoon
For the dough
unsalted butter, at room temperature, 100g / 7 tablespoons
granulated sugar 100g / 1/2 cup
fine sea salt 1/8 teaspoon
large eggs, at room temperature, 4
bread flour, plus more for dusting, 325 g / 2 1/2 cups (I used white spelt flour. I added 90g / 2/3 cup to the dough)
For the egg wash
large egg 1
whole milk 1 tablespoon
For the filling
heavy cream 480ml / 2 cups
granulated sugar 1 tablespoon
my addition: ripe strawberries
Make the sponge: In a medium bowl, whisk the yeast into the milk, then add the flour and sugar and stir to combine. Cover the mixture with plastic wrap and set aside until it becomes puffy, about 20 minutes.
Make the dough: In the bowl of a stand mixer fitted with the paddle attachment, combine the butter, sugar, salt, and eggs on low speed.
Replace the paddle with the dough hook. Pour in the sponge, mix for a few turns, then add half of the flour. Mix on low until the dough is smooth, about 5 minutes. Add the remaining flour and mix again on low until the dough is smooth, about 2 minutes, scraping down the sides of the bowl as necessary. When the dough was smooth, but still too sticky, I added 90g / 2/3 cup of flour and mixed it for another 2 minutes on '4' on my KitchenAid.
Allow the dough to rest in the bowl for 10 minutes, then run the mixer on low for 10 minutes to stretch the gluten. Meanwhile, line two rimmed baking sheets with parchment paper.
Turn the dough onto a lightly floured surface and divide it into twelve equal-size pieces (each approximately 70g / 2 1/2 ounces). Using one hand, roll each piece into a tight ball, pressing it against the counter to ensure a smooth, tight surface. Next, using both hands, roll each ball into an elongated loaf shape, fatter in the middle and tapered on the ends, about 4 inches long, similar to a small football.
Place the maritozzi on the prepared baking sheets, spacing them (at least) 4cm / 1 1/2" apart. Cover with plastic wrap, then a kitchen towel, and allow to rise in a warm place (20-25°C / 70-80ºF) until doubled in size, about 2 hours.
Preheat the oven to 175°C / 350ºF.
Make the egg wash: Whisk the egg with the milk in a small bowl. Immediately before baking, brush the tops of the maritozzi with the egg wash.
Bake until deep brown, 12 to 15 minutes. Remove from the oven and allow to cool for 5 minutes on the baking sheet before transferring to a wire rack.
While the maritozzi cool, make the filling: Whip the cream and sugar to firm peaks.
Slice each maritozzo open without cutting all the way through. Fill with the whipped cream, dividing it evenly, and serve immediately. Optionally: serve with fresh strawberries.
From Tasting Rome: Fresh Flavors and Forgotten Recipes from an Ancient City. Copyright (c) 2016 by Katie Parla and Kristina Gill. Published by Clarkson Potter/Publishers, an imprint of Penguin Random House LLC.

When and why did you move to Rome?
I moved to Rome in October 1999 for work. I was in the US diplomatic corps.
What fascinates you about Roman culture? Was it easy to adapt, to become a part of it?
Roman culture was a bit different then than now - internet was far less diffuse, and people were still pretty insular. It is hard to break into a ‘friendship’ culture in which bonds are created from childhood and don’t really change. Luckily, one summer several years before I moved here for work, I stayed in an apartment in Rome with other students, and they introduced me to their friends, so when I subsequently studied in Florence and Bologna, their parents made sure I was introduced to families in both cities with children my age. I guess you could say I adapted well because I was adopted! I spent a lot of time with these families - I was never alone on holidays. As time went on, the internet brought more curiosity about other places and people, and provided a way for Romans to cultivate their interests more - people wanted to connect more and that sped up forming relationships, especially around common interests, that their traditional network didn’t provide, so I’ve seen over time that Romans have become much more open to expanding their friendships beyond that childhood crew.
What do you miss about your life in the US?
Where to start? The cheeseburgers, the supermarkets, the variety of food available from different cultures, the variety of food available period, gourmet ice cream, parking, airconditioning, well-heated homes in winter… The ability to realize a dream with your own two hands. There’s a sense of freedom in the US that I don’t feel here - young people are leaving Italy in droves so that they can pursue their dreams. I’m lucky that I am able to be a part of both places.
What is your favourite spot in Rome and why?
My Savoir Bed is my favorite place…sleeps like a dream! But if you mean in the city, there are so many public squares to sit in and soak up thousands of years of history, which I find so mindblowing and relaxing. But lately, I think my favorite place is the MAXXI Museum, designed by Zaha Hadid, where I can check out contemporary art exhibitions. Just a small modern parenthesis in the middle of an otherwise gorgeous ancient landscape.
Can you see yourself living in Rome for the rest of your life?
I would like to move back to the United States to be with my family after so many years of being away and missing everyone. Seems like my cousins’ children were born last year, but are already studying at university!! I’ve missed out on a whole generation!
You wrote your book, Tasting Rome, together with Katie Parla. How long have you known each other and who came up with the idea to write this book together?
I can’t remember how long, however, we met over Twitter, a few years back. I already had the full proposal written when I met Katie, and a couple years after we knew each other, she mentioned that she had written a proposal, a memoir I think, that had been unsuccessful and was a bit down so I said - well, I have one that you might be interested in that we could do together! I sent it to her and asked her if she thought she saw herself in it. We added her name and bio to the proposal, and worked on some refinements with an agent I had already been in contact with. I approached Katie because I thought her knowledge of the history of Roman dishes and food culture would be a valuable addition to the book that would help ground it in fact and set it apart from the typical expat book that is written more from a personal perspective and is often an adaptation of cuisine. I wasn’t wrong!
How did you develop the recipes in your book?
From the proposal and through signing the deal, I was originally going to do all of the recipes and photography in the book, and Katie the features and headnotes, but once we started working on the book and came up with the list of recipes, there were clearly items that I had never eaten, like the offal chapter, and items for which I had no capacity to develop recipes, like the baking chapter and the cocktails chapter. Also, for the classics: Amatriciana, Gricia, Carbonara, and Cacio e Pepe, since Katie spends a lot of time eating out and had written numerous articles on which restaurants’ versions were the best in Rome, we agreed that she was in the best position to identify those recipes. That left roughly half of the book for me to develop, which I did over the course of four and a half months. Sometimes I did eat out to test recipes against my memories, but for the most part, I had clear ideas of how I liked the food I was working on, I knew the elements and knew more or less how to prepare. I had to check technical books for proper frying temperatures as starting points, or baking science (sweets). I did also consult with a friend who is a pastry chef for guidance on the maritozzi because I knew I wanted a rich soft brioche dough for that, and wanted to explore various options. I also talked with a couple of chefs to find out their views on the “proper” way to prepare certain dishes. Interestingly enough, they went over both the tradition and their variations. This gave some latitude and discretion in determining an approach for the book which remained authentic. For the other half, Katie procured recipes from local mixologists, local chefs and restaurant owners, and a good friend of hers who is an amazing baker for the baking chapter. When I look at the book, I think it represents the perfect mix of everything you would encounter in Rome today that defines Rome.
Who is your biggest inspiration in the kitchen?
On a personal level, Lucia, the mother of the family I stayed with when I studied in Florence. She has since passed away. She grew up in a town called Ristonchi a little outside of Florence, with chickens and a garden and the usual rural life. She could make the best food out of any ingredients you gave her. I loved the food made from leftovers the most. Her ribollita was the best on the planet, and her mother’s chicken broth which was liquid gold (and pure fat) made an indelible mark on my palate! She introduced me to Alessandra from Padova, whose mother, Gianna, took the cooking crown (and still wears it). Lucia, Alessandra and I both agreed that Gianna is the best - and between the three of us, we have eaten a lot of Italian cooking. Eating at Gianna’s house was better than any restaurant - and she took ‘orders’ in the morning before each meal so that when lunch or dinner came around, you had anything and everything you wanted. My inspiration from Gianna and Lucia came from their knowledge of how to prepare food, and how to be resourceful, and really how to eat. Gianna’s father was a baker. Food was always a central part of both households and you could tell that each meal was to be savored.
Has food always played an important role in your life? Do you come from a family of foodies?
Not really in the way you would think. I grew up in a household which consumed its fair share of whatever junk food was popular at the time - but which also shopped at the farmer’s market for weekend meals. My grandmother kept her own garden and fruit trees, and three freezers to keep all the produce throughout the year. I used to think she was a magician because this amazing feast appeared on the dinner table from food I hadn’t seen in the refrigerator during the day. It wasn’t until I was older that I learned about the other freezers!!
You took all the pictures in your book, when and how did you discover your passion for photography? What do you love about it?
I started taking pictures to be able to produce the In the Kitchen With column on DesignSponge, in 2008 I think. I think I started to love photography when I started taking more than just food pictures and found that capturing my environment was a way to see all the things I overlooked when I just passed through on my daily routine. It was like discovering a new world.
Do you prefer to capture the atmosphere of a city with your camera or delicious food?
Both. I love to explore a culture through its food, why certain ingredients or cooking techniques play the role they do, how the cuisine of one city differs from another and why. I love to capture the mundane and everyday of a city with my camera.
What was the first dish you cooked on your own, what is your first cooking memory?
I can’t remember! But in high school I think I used to make pizza from ready made pizza dough, and at university, I prepared a meal from an African cookbook, featuring mostly Ethiopian food and my friends and I all liked it a lot!
What are your favourite places to buy and enjoy food in Rome?
My Saturday routine is concentrated in one neighborhood. Before the market I have a pastry (made in house) from Fabrica, a cafe near the market. Then at the Trionfale market I buy fish, produce, and a lot of Asian food staples (lime, rice noodles, bok choy, tamarind paste, palm sugar, ginger, galangal etc). I get cheese and nduja from La Tradizione (which is near Trionfale market). I pick up wine and alcohol from an enoteca named Costantini. I pick up oatmeal (flakes) from the healthful store around the corner from my office. It is a chain called Il Canestro. When I don’t have time for breakfast at home, I stop by Bar Benaco on the way to work because they make all their pastries in house and I can get them while they are still warm. I don’t eat out a lot because I have a bazillion cookbooks and am always excited to try new recipes, but when I do, I eat most often at Cesare al Casaletto because they always find me a table, or takeaway pizza from a place near my house or at pizzeria Tonda.
If you could choose one person to cook a meal for you, who and what would it be?
Bryant Terry, anything he’d like. I would love it all. Unless it had beets in it.
You're going to have ten friends over for a spontaneous dinner, what will be on the table?
I learned about Bo Ssam pork at a meal at Matt Armendariz and Adam C. Pearon’s house. I would prepare Bo Ssam, and a selection of Asian-inspired salads. For dessert, a maple hazelnut cookie by Nigel Slater, and a selection of chocolates and coffee.
What was your childhood's culinary favourite and what is it now?
This is tough because I have no memory of a favorite food… Meatloaf maybe! Now… I have too many favorites, but cheeseburgers are top of my list. And dumplings. Chinese, Korean, Japanese…
Do you prefer to cook on your own or together with others?
I’ve spent a lot of time over the past two years working on the book alone - not just developing the recipes, but also preparing food for the photography. I styled about half of the recipes in the book, and Adam C. Pearson did the other half and the cover. When I was in the studio shooting, I did a lot of food prep as well, and enjoyed the atmosphere and working with Adam and his team of stylists. It’s definitely easier working with others! But sometimes, cooking is therapy and being alone is great.
Which meals do you prefer, improvised or planned?
As long as it’s good, either is fantastic!
Which meal would you never cook again?
I made some dog biscuits for my dog once that were made of like chopped liver and garlic or something. When they started to bake, the smell was SO BAD, I thought I’d have to move out of my apartment. He loved the cookies, but that smell stayed around for a LONG time and it was AWFUL.
Thank you Kristina!

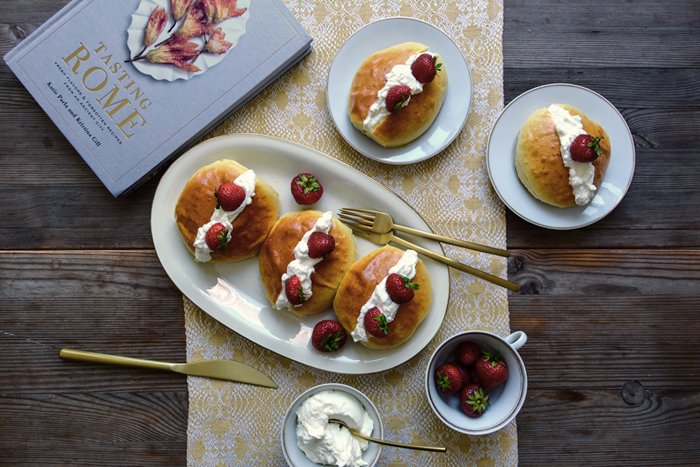


Tsoureki - Greek Braided Easter Bread with Aniseed and Orange Blossom Water

Patience is a tricky thing, I feel it growing with every year I gain, but it still manages to drive me crazy at times. After about one year of working on my cookbook, eat in my kitchen, developing the recipes, cooking, baking and shooting them all by myself, then going through a long process of filling the pages with my little stories connected to each and every dish, I feel a rising impatience to bring this project to an end. Month after month of working closely with my fantastic team in New York, Munich, Berlin, and London, having a daily exchange and constant flow of ideas between me and my editors, photo retoucher, and book designer; all this leaves me hungry. I want to hold the fruit of our work in my hands so badly. My friends constantly make little jokes about me as they only see me with my laptop, glued to my chair at our long wooden dining table, which I turned into my office, or busy in the kitchen. To them, it seems like I, the chair, and the table have become one in the past year.
In German, there is a beautiful word called Vorfreude, which you could translate to the happy excitement you feel connected to a positive event lying in the future. This Vorfreude keeps me going. Sometimes I just feel my heart jump, when I think of the dedication I wrote on one of the first pages of my book for someone who means a lot to me, when I virtually thumb through the pages of my book which is still a file on my computer, or when I first saw the cover design, which I'll share with you soon! And I'm willing to wait for these moments, I'm willing to wait to make this book better and better with every correction, addition, and change we make, and then one day, it will be printed and I'll look at it and remember all the excitement, happiness, and frustration that's woven into every single page of it.
Baking can be a good teacher for life and a master when it comes to patience, especially baking with yeast. It will be Easter Sunday in a week and a sweet braided yeast bread is one of the most delicious and fragrant treats that one can have on the breakfast or coffee table on this special day. But this bread takes its time, you can't really rush - although I still try and succeed by letting the dough rise in the warm oven. It's a little quicker but you still have to be patient.
This year I go for a traditional Greek Easter bread called Tsoureki. It's soft and fluffy, enriched with butter and eggs, and flavoured, often refined with mahlep, a ground spice made of wild cherry seeds, and mastic, sun-dried resin. More modern variations feature vanilla and cardamom but I was after a different flavour combination: aniseed and orange blossom. Years ago, I spent a couple weeks on the Greek island of Naxos and I enjoyed one of the fluffiest yeast buns with aniseed and orange in the shade of an old chapel high up on a hill. This picture in mind, I knew what my Tsoureki would taste like. It smells so beautiful and aromatic like the air in the Mediterranean, anise and orange merged in a scrumptious breakfast bread sprinkled with nutty sesame. I only left it in the oven for a little too long, just a couple minutes, but I have an excuse. Two of my cousins stopped by for an unexpected quick visit, a family chat at the table and the bread was forgotten. At one point I thought "Wow, it smells so good!", so I ran to the oven and pulled out this nicely risen beauty (with a dark bottom).
Here's another sweet braided bread I made and shared 2 years ago.
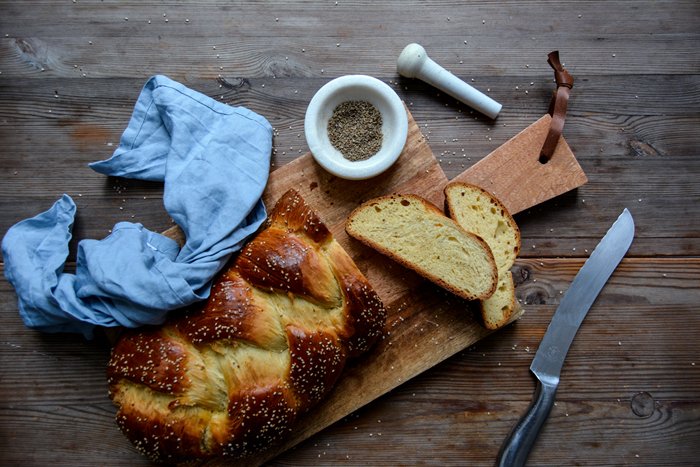
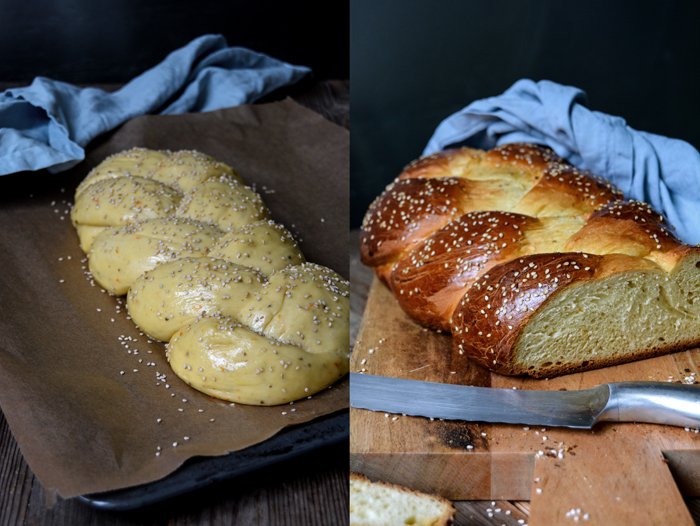
Tsoureki - Greek Easter Bread with Aniseed and Orange Blossom Water
Makes 1 large loaf
plain flour 520g / 4 cups
granulated sugar 100g / 1/2 cup
fast-acting yeast 1 sachet (7g / 1/4 ounce)
fine sea salt 1/2 teaspoon
aniseed, lightly crushed in a mortar, 2 teaspoons
zest of 1 small orange
milk, lukewarm, 150ml / 2/3 cup
unsalted butter, melted, 100g / 1/3 cup plus 2 tablespoons
organic eggs 2
orange blossom water 2 tablespoons
sesame seeds, for the topping, 1-2 tablespoons
For the glaze
organic egg yolk 1
water 1 tablespoon
In a large bowl, combine the flour, sugar, yeast, salt, aniseed, and orange zest. Whisk together the milk, butter, eggs, and orange blossom water - the mixture should be lukewarm - and add to the flour mixture. Using the dough hooks of an electric mixer, knead for about 5 minutes until well combined and smooth. Continue kneading and punching with your hands for about 7 minutes until you have a soft and silky ball of dough. Place the dough back in the bowl, cover with a tea towel, and let rise in a warm place, or preferably in a 100°F (35°C) warm oven, for 100 minutes or until well risen (it won't double in size). Rising at room temperature prolongs the process.
Punch the dough down, take it out of the bowl, and knead for about 30 seconds, then divide into 3 parts and roll them into long sausage shapes. Lay the ends of the rolls on top and braid them tightly. Bend both ends of the bread under the loaf and transfer to a baking sheet lined with parchment paper. Cover with a tea towel and let it rise in a warm place for 50 minutes or until fluffy.
Preheat the oven to 180°C / 350°F (conventional setting).
Whisk the egg yolk and water for the glaze and brush the top of the loaf, sprinkle with sesame. Bake in the oven for 40-50 minutes, cover the loaf with aluminium foil after 15 minutes to prevent it from getting too dark. When the bread is done, it should be golden brown, knock on its bottom, it should sound hollow. Let it cool for a few minutes before cutting it into thick slices, and enjoy with butter.
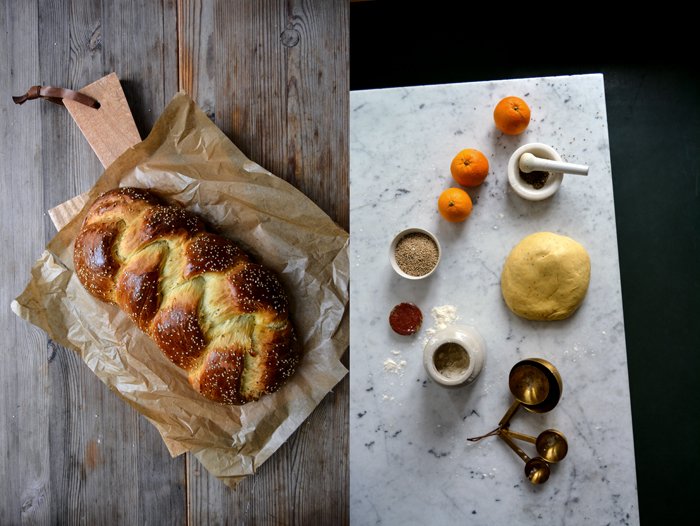


Sticky Banana Ginger Bread
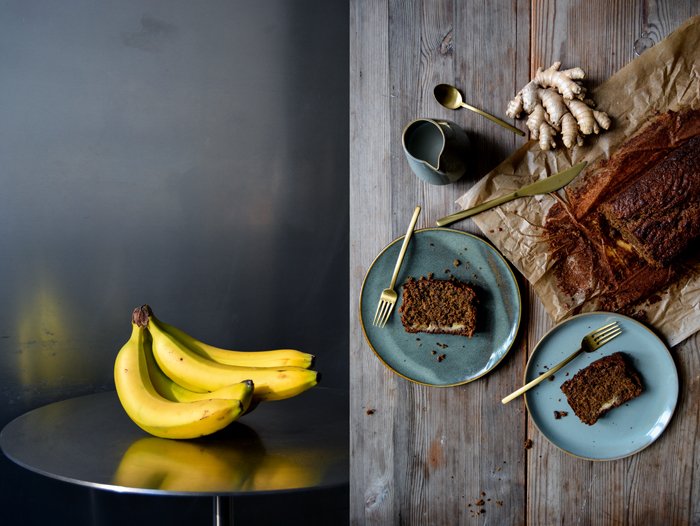
This cake tested my nerves - I needed two attempts to bring it to perfection. The first version tasted divine but was far too soggy and didn't bake through. I didn't mind and still ate half of it. But it didn't help, my pride as a baker made me go back to my kitchen and work on the texture.
Apart from its unsatisfyingly undone center, cake no. 1 had the advantage of the banana halves lying perfectly on top of the baked cake and the batter rising around it - quite dramatic. It was beautiful, but unfortunately, slightly burned as the temperature was too high from the start. Cake no. 2 decided to swallow the fruit and let it sink to the bottom. Not as pretty as the former but it had a scrumptious concentrated banana taste once you got to the sunken fruit.
The cake itself was inspired by Nigella Lawson's wonderful Fresh Gingerbread from her Domestic Goddess book, it's a recipe I truly adore. However there isn't much left of her original recipe, I only aimed for the stickiness, which she mastered to perfection. I added butter, more eggs and spices, and mashed bananas to my ginger bread. And some baking powder for more sponginess. After my disastrous first attempt, I decreased the amount of milk and turned down the heat. It looked completely different but tasted so, so good. The cakey bread (it's actually more of a cake than bread) is infused with the honey-sweet aroma of bananas, lots of freshly grated ginger, and warming cinnamon. It's so good that I forgave the bananas for their disappearing act.
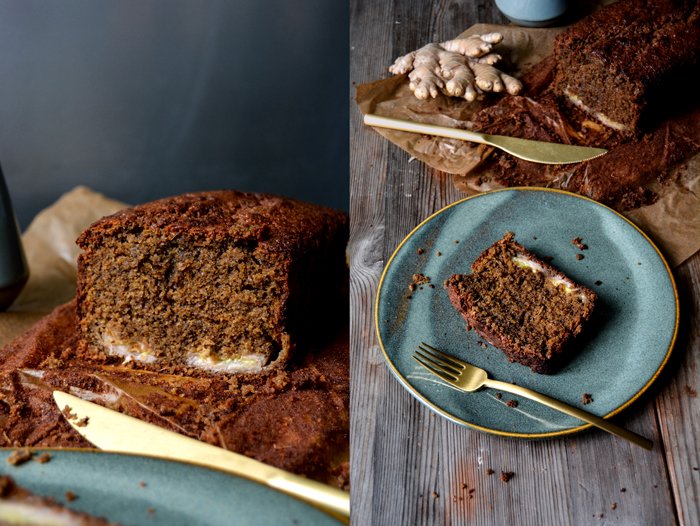
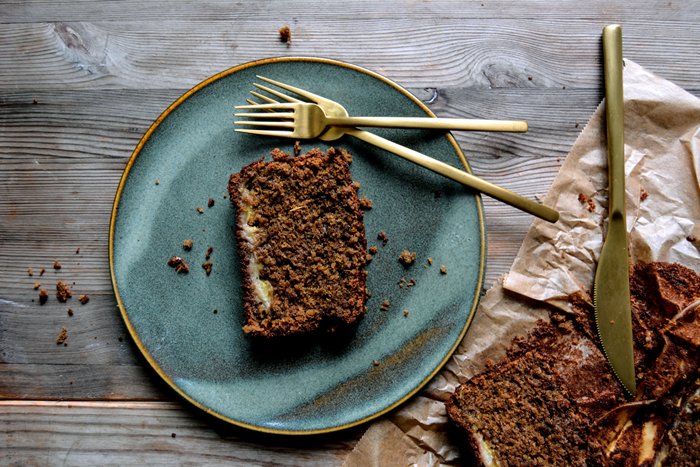
Sticky Banana Ginger Bread
This recipe is also in my 2nd book, 365: A Year of Everyday Cooking & Baking (recipe no. 34).
Update March 16th, 2024 (last picture of this post): Today, I decided to decrease sweetness and go for
180g / 1/2 cup plus 1 tablespoon sugar beet syrup (or dark molasses)
50g / 1/4 cup brown sugar (or granulated sugar)
The other ingredients / measurements didn’t change. I baked it for 60 minutes (so a bit shorter).
Makes 1 loaf
260g / 2 cups plain flour
1 teaspoon baking soda
1 1/2 teaspoons baking powder
1/8 teaspoon fine sea salt
120g / 1/2 cup butter, at room temperature
3 ripe bananas (2 mashed bananas, about 180g / 6 1/2 ounces, and 1 cut in half lengthwise)
200g / 1/2 cup plus 2 tablespoons sugar beet syrup (or dark molasses)
100g / 1/2 cup brown sugar (or granulated sugar)
1 generous tablespoon freshly grated ginger
2 teaspoons ground cinnamon
3 organic eggs
60ml / 1/4 cup whole milk
Preheat the oven to 160°C / 325°F (preferably convection setting). Line a 11 x 26 cm / 4 x 10" loaf pan with parchment paper.
Combine the flour, baking soda, baking powder, and salt.
In a large bowl, using an electric mixer, beat the butter until creamy. Add the mashed bananas, sugar beet syrup, sugar, ginger, and cinnamon and continue mixing until well combined. Add the eggs, one at a time, mixing well in between. In batches, add the milk and the flour mixture, alternating, about 1/3 at a time. Mix until just combined and no more flour is left. Scrape the batter into the prepared pan, lay the banana halves on top (cut side up), and bake for about 65-70 minutes (slightly longer if using a conventional oven) or until golden brown and firm on top. Insert a skewer, it should come out clean when the cake is done. Let the cake cool for at least 15 minutes before you take it out of the pan. Let it cool on a wire rack for another 15 minutes before taking it out of the parchment paper.

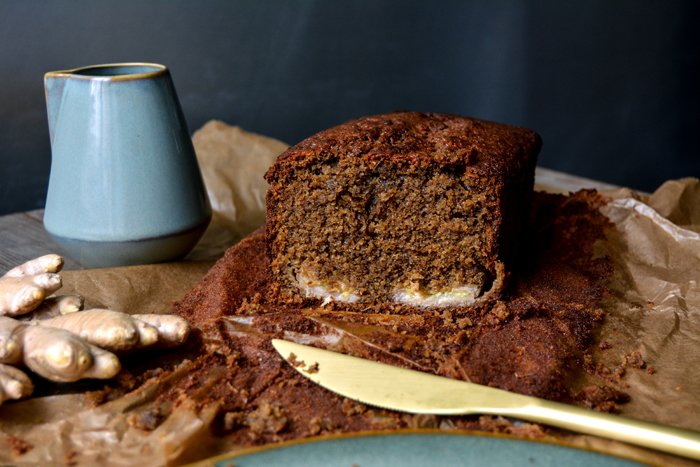
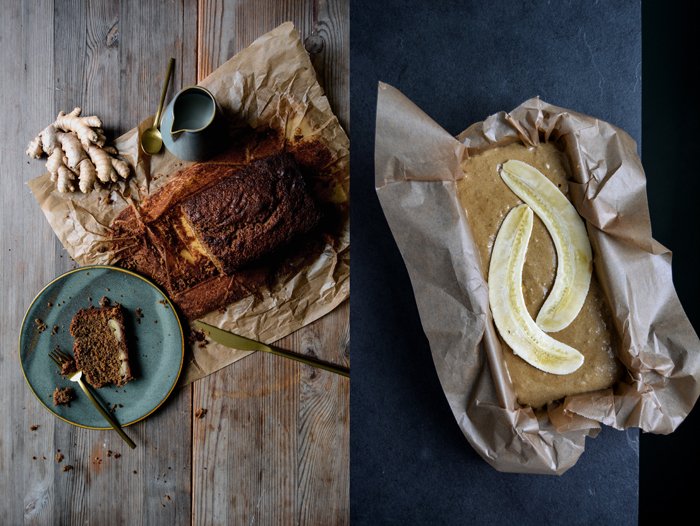
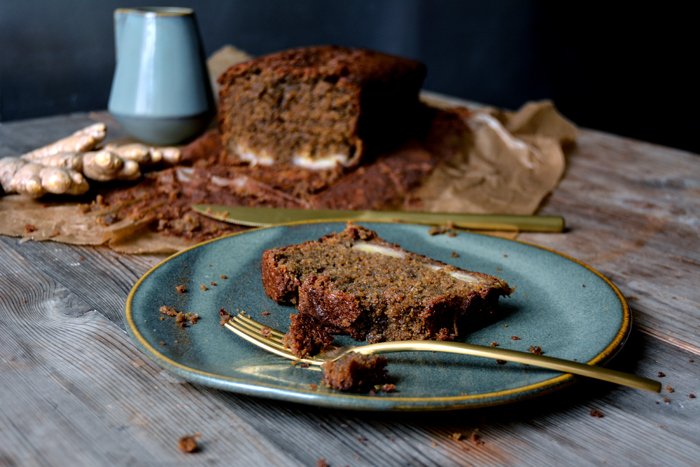
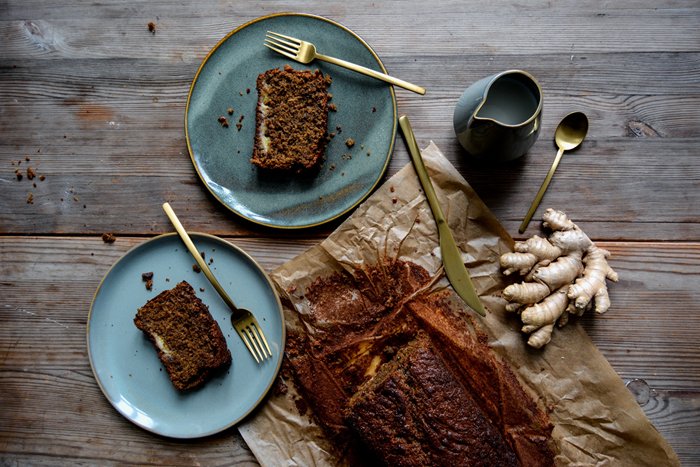


Blueberry Lemon Cheese Babka
One of the first recipes that caught my attention as I thumbed through the pages of Yotam Ottolenghi and Sami Tamimi's book Jerusalem, was their gorgeous looking chocolate krantz cake - also known as babka. It's a Jewish classic - a sweet, soft twisted yeast cake that can be filled with chocolate, ricotta, cream cheese, almond paste, nuts, poppy seeds, or fruit butter. I knew this cake from Cynthia Barcomi's German book Backen, she sprinkles the loaf with crumbles and adds marzipan to the filling. I never tried it but the pictures in both books looked so tempting that I decided to give babka a go. I didn't even mind the overnight-preparation that Ottolenghi recommends - if you time it well, it's not a big deal. Yotam and Sami use water for the dough, Cynthia goes for milk, which I also did. It makes it rich like a brioche.
However, I didn't feel like dark chocolate but cream cheese, blueberries, and lemon zest. A bit of spring feeling packed in a Sunday breakfast treat. The cheese makes the yeast dough nice and juicy, the berries make it fruity and fresh. I can only imagine how wonderful this would be at an early summer picnic in May but let's not think about that for now. I made the dough in the evening before I went to bed and gave it a good 10 minutes of kneading until the soft butter, eggs, and milk were well combined and I held a silky, smooth ball of dough in my hands. After a night in the fridge it had risen slightly by the next morning, but hadn't doubled in size. Rolled out thinly and spread with the filling, it was a bit fiddly to roll it up into a log without loosing the blueberries. I wanted to add even more berries but it would have made it too stressful to keep them inside - so I went for less fruit and a chilled out mood instead. Twisting was next: If you have Ottolenghi's Jerusalem book at home, you can see how he does it, his technique is too complicated to explain and impossible if you want to fill your babka with cream cheese enriched with stiff egg whites and fruit. I followed Cynthia's method instead: I closed the roll into a ring and twisted it about seven times. When it comes to this kind of fragile kitchen projects, it's best to transfer your piece of art quickly and with confidence to a buttered pan - insecurity and hesitance would just make it harder to succeed. When this is done, the cake has to rise for an hour once again, so if you want to enjoy it for breakfast, you should get up in time. Once it's nice and puffy, the babka bakes in the oven for about 1 hour, but then it smells and tastes so wonderful that you don't mind the hours of work.


Blueberry Lemon Cheese Babka
Mind that the babka has to rise twice, the first time overnight (for about 8 hours) in the fridge.
Makes 1 loaf cake
For the dough
plain flour 260g / 2 cups
granulated sugar 50g / 1/4 cup
fast-acting yeast 1 1/2 teaspoons
fine sea salt 1/4 teaspoon
milk, lukewarm, 60ml / 1/4 cup
organic egg 1
organic egg yolk 1
butter, at room temperature, cut into small pieces, 75g / 1/3 cup
oil, for the bowl
For the filling
organic egg whites 2 plus 1 egg yolk
a pinch of fine sea salt
cream cheese, drained, 250g / 9 ounces
granulated sugar 30g / 2 tablespoons
vanilla pod, scraped, 1/4
freshly grated lemon zest 1 heaping teaspoon
fresh blueberries 150g / 5 1/4 ounces
For the glaze
organic egg yolk 1
milk 1 tablespoons
For the yeast dough, in a large bowl, combine the flour, sugar, yeast, and salt. Whisk the milk, egg, and egg yolk and add along with the butter to the flour mixture. Knead for about 10 minutes, starting with the dough hooks of an electric mixer and continue kneading and punching with your hands for a few minutes until you have a soft and silky ball of dough. Transfer to a clean, oiled bowl, cover with cling film and put in the fridge overnight.
The next morning, for the filling, beat the egg whites and salt until stiff. In a large bowl, whisk the cream cheese, egg yolk, sugar, vanilla seeds, and lemon zest until creamy. Gently fold in the beaten egg whites until combined.
Butter a 11 x 24cm / 4 x 9" loaf pan and line the bottom with a piece of parchment paper.Punch the dough down, take it out of the bowl, and knead for about 30 seconds. On a floured counter top, roll out the dough with a rolling pin into a 28 x 40cm / 11 x 16" rectangle. Spread the filling over the dough, leaving a 2cm / 3/4" rim, and sprinkle with the blueberries. Brush 1 of the shorter sides with cold water. Starting from the other short side, roll up the dough tightly into a thick log. Press to seal the end onto the roll and place the seam at the bottom. Gently stretch the roll a little and close into a ring, pushing the dough of both ends together to seal the filling inside (see the 5th row of pictures). Leaving the ring lying on the counter top, push the ring gently together, and, starting from the middle, carefully twist the roll about 3-4 times on the left side and then on the other side. The more you twist it, the more layers it will have, don't worry if it tears a bit. It should look like a thick spiral (see the 2nd row of pictures). Lift the roll with a large knife and quickly transfer to the prepared pan. Cover with a tea towel and let it rise in a warm place (I put it on the heater) for about 60-90 minutes or until puffy.
Preheat the oven to 190°C / 375°F (conventional oven).
For the glaze, whisk the egg yolk and milk.Brush the loaf with the glaze and bake in the oven for 35 minutes, then cover loosely with aluminium foil and bake for another 30 minutes or until golden brown and almost firm on top. Check with a skewer, it should come out almost clean. Take the pan out of the oven and let the cake cool for at least 10-15 minutes before you remove it from the pan. Enjoy slightly warm or cool.


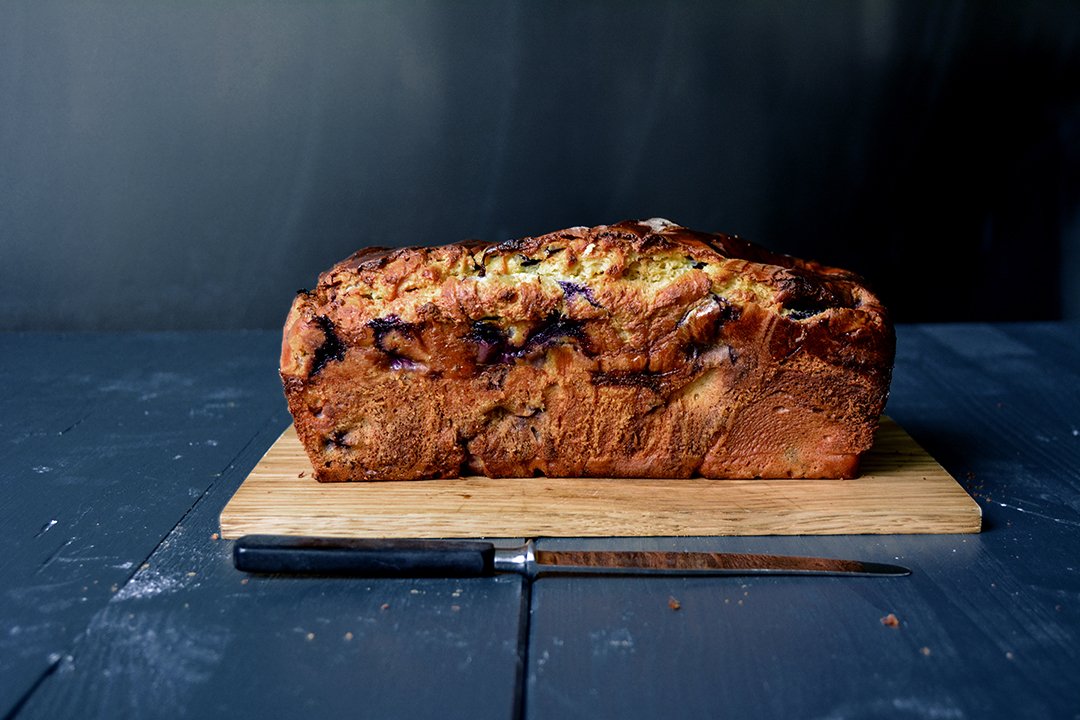


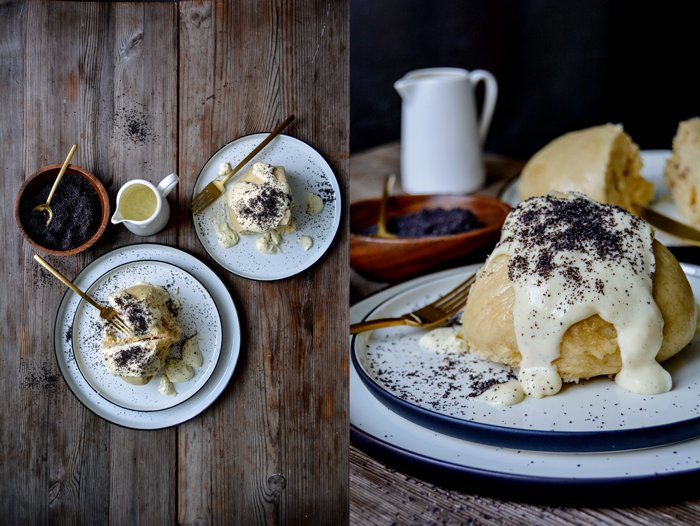
Germknödel - Austrian Yeast Dumplings with Plums, Poppy Seeds & Vanilla Custard

Somewhere in the snowy mountains in northern Italy, is a tiny village that you can only reach through a dangerously narrow road. Winding up higher and higher, dark fir trees on one side and deep gorges on the other, it makes you pray with gratitude once you get to the village safely. I used to spend a lot of time there, skiing and walking through the woods, through knee-deep snow until I reached one of the cosy wooden huts that are luckily spread all over to offer the frozen wanderer a bit of warmth, rest, and food. The culinary treasures of this region - in South Tyrol - are outstanding and one of the best things you can give your body when the temperatures are freezing.
One of these treats actually originated in Austria but crossed the border and became a staple in the local cooking: wonderfully fluffy Germknödel. It's a yeast dough dumpling, usually filled with plum butter (thick and sticky plum jam) and topped with melted butter, poppy seeds, and icing sugar. It's one of those dishes that you can easily eat for breakfast, lunch, and dinner. I used to enjoy it so often on the terrace of a very old hut, it had a breathtaking view over icy-white mountains, often framed in a sparkling blue sky. The chef used to serve it with thick vanilla custard instead of the melted butter and that's what I do in my kitchen as well. I also replace the plum jam with whole plums for a bit more fruitiness. The only difficult task I had to solve, was to decide how I would steam the dumplings (I don't have a steam cooker in my kitchen). You could also blanch them in water but the results aren't as nice. A quick phone call with my mother and my problem was solved. I did it the way my granny Lisa used to cook dumplings: on a cotton tea towel tightened with clothespins over a wide pot filled with simmering water - old-fashioned, cheap, and my Knödel were perfect. I could have steamed them one after the other to give them a pretty round shape, but I was impatient. I cooked all at once, up against each other, and broke their fluffiness apart when they were done. Warm, tender, and fragrant, you don't want to eat anything else ever again.

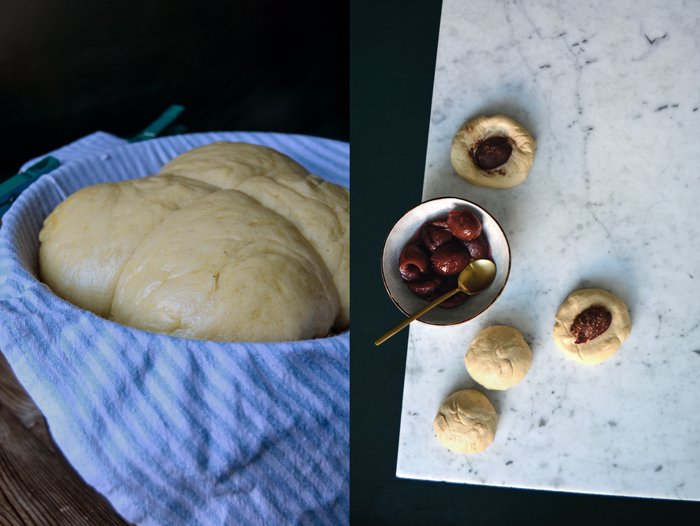
Germknödel
Makes 4 large dumplings
For the dumplings
plain flour 270g / 2 cups plus 1 heaping tablespoon
granulated sugar 25g / 2 tablespoons
ground cinnamon 1/2 teaspoon, plus more for the plums
fast-acting yeast, scant 2 teaspoons
fine sea salt 1/4 teaspoon
milk, at room temperature, 120ml / 1/2 cup
butter, melted and cooled, 40g / 3 tablespoons
organic egg 1
jarred plums, cut in half, 2
For the topping
ground poppy seeds 2-3 tablespoons
For the vanilla custard
whole milk 500 ml / 2 cups plus 2 tablespoons
organic egg yolks 4
granulated sugar 100 g / 1/2 cup
cornstarch 30 g / 1/4 cup
fine sea salt 1/8 teaspoon
vanilla pod, split lengthwise, 1
To steam the dumplings, you need a large, wide pot (mine is 24cm / 9 1/2" wide), a cotton or linen tea towel plus 4 clothespins to fix the towel, and a metal (or heat-resistant) bowl, large enough to cover the pot as a domed lid.
For the dumplings, combine the flour, sugar, cinnamon, yeast, and salt in a large bowl.
Whisk together the milk, butter, and the egg - the mixture should be lukewarm. Add to the dry mixture and mix with the dough hooks of an electric mixer for a few minutes or until well combined. Continue kneading with your hands for a few minutes until you have a soft and silky dough ball. Place the dough back in the bowl, cover with a tea towel, and let rise in a warm place, or preferably in a 35°C / 100°F warm oven, for about 70 minutes or until doubled in size.
Punch the dough down, take it out of the bowl, and knead for about 30 seconds. Divide the dough into 4 equal portions and use your hands to form each one into a 10cm / 4" disc. Lay 1 plum half in the middle of each dough disc and sprinkle with a little cinnamon. Fold the dough up and use your fingers to squeeze the dough together to close the dumplings and seal the plums tightly inside. Roll into balls with your hands and transfer the dumplings to a lightly floured baking dish or baking sheet. Cover with a tea towel and let rise in a warm place for about 20 minutes until puffy.
While the dumplings are rising, fill about 1/3 of the pot with water and bring to the boil. Take the pot off the heat and lay a cotton or linen tea towel over the pot (mind the hot steam). Fix the towel with clothespins at the handles so that the towel can hang in the pot without touching the water. Lay the dumplings - 4 at once or in batches, if you want to have round shaped single dumplings - onto the towel, they shouldn't touch the water. Cover with a tight fitting metal bowl (upside down) and transfer the pot back to the heat. Turn the heat down to a low simmer (medium to medium-low) and steam the dumplings for 20 minutes without lifting the top (!).
While the dumplings are cooking, make the custard: In a small bowl, whisk 4 tablespoons of the milk with the egg yolks, sugar, cornstarch, and salt until well combined. In a medium saucepan, bring the remaining milk and the vanilla pod to the boil. Take the vanilla out and scrape the seeds from the pod into the milk. Whisking constantly, add the egg yolk mixture to the hot milk and bring to a boil. Take the saucepan off the heat; continue whisking for 2 minutes and set aside.
After 20 minutes take the pot off the heat and the top off the dumplings - mind the hot steam. Carefully transfer the towel with the dumplings to a table, wait for about 2 minutes then use a knife to peel the dumplings off the towel. If you cooked all of them at once, break them into 4 pieces. Serve immediately with the warm vanilla custard, sprinkled with poppy seeds.
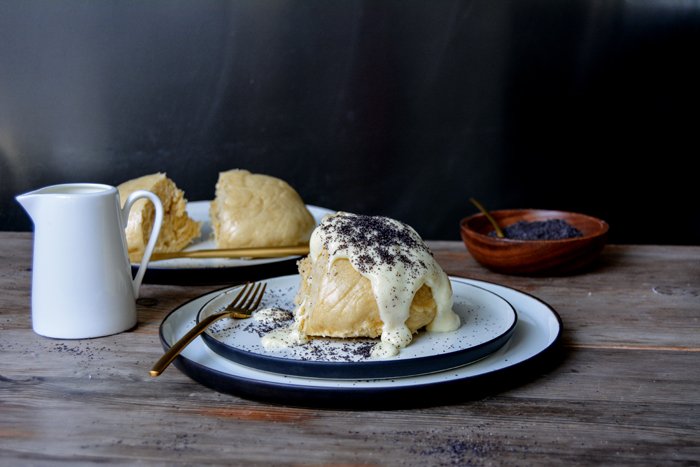
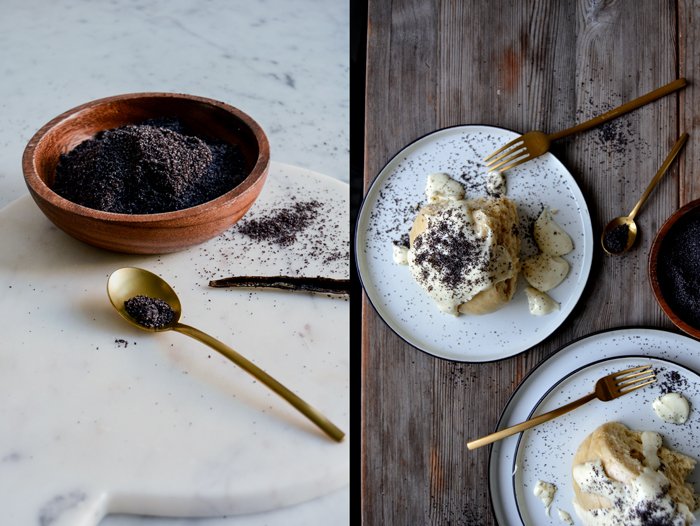
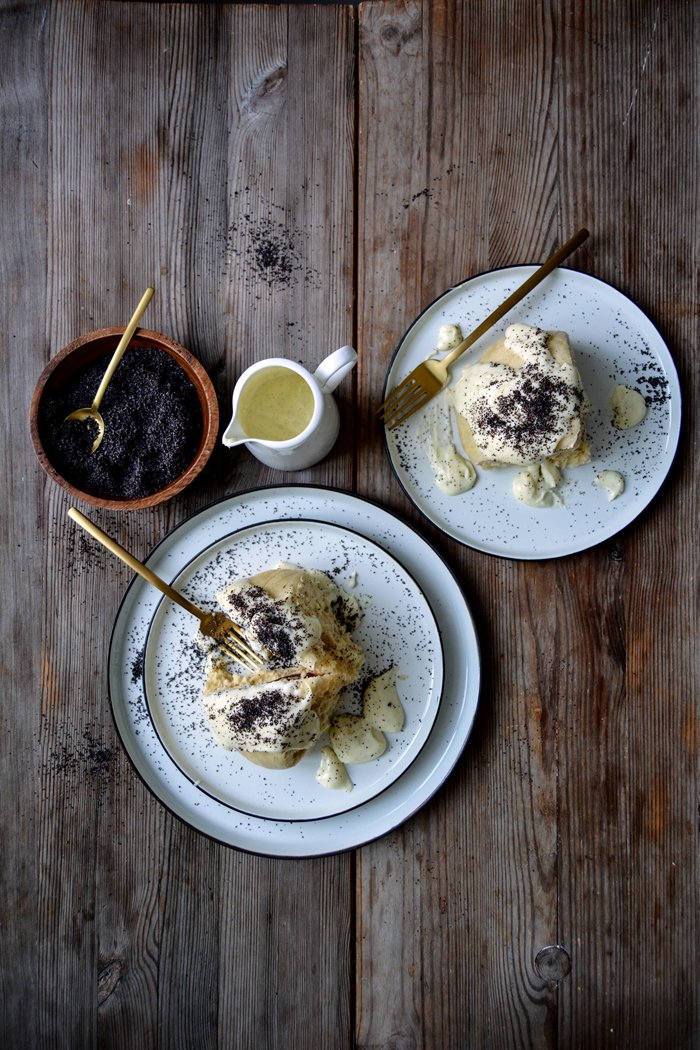
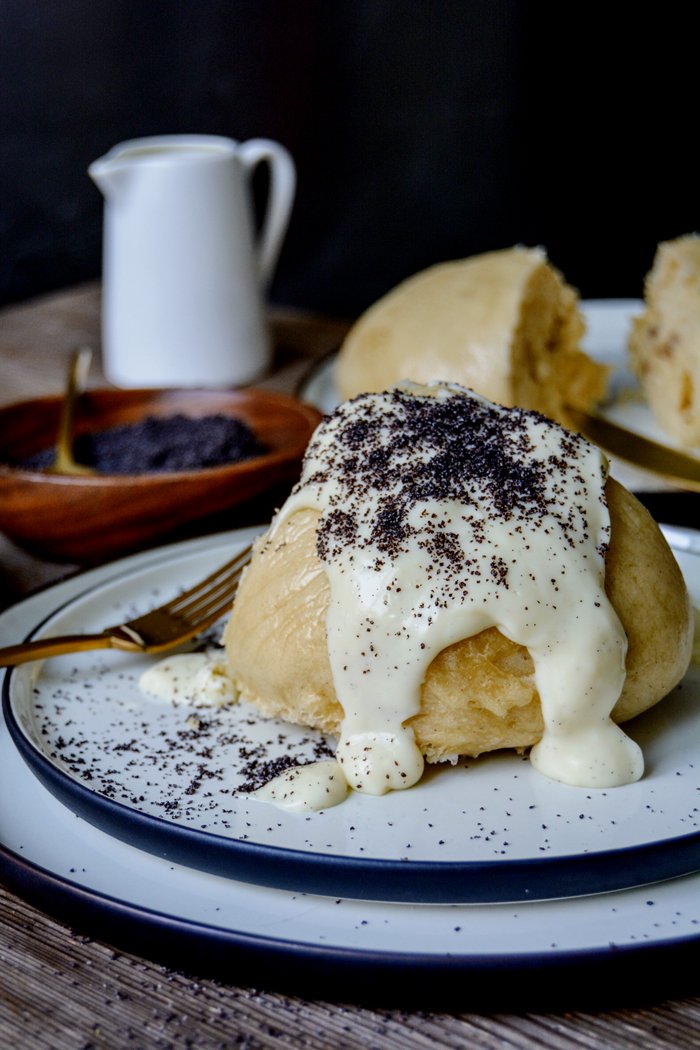
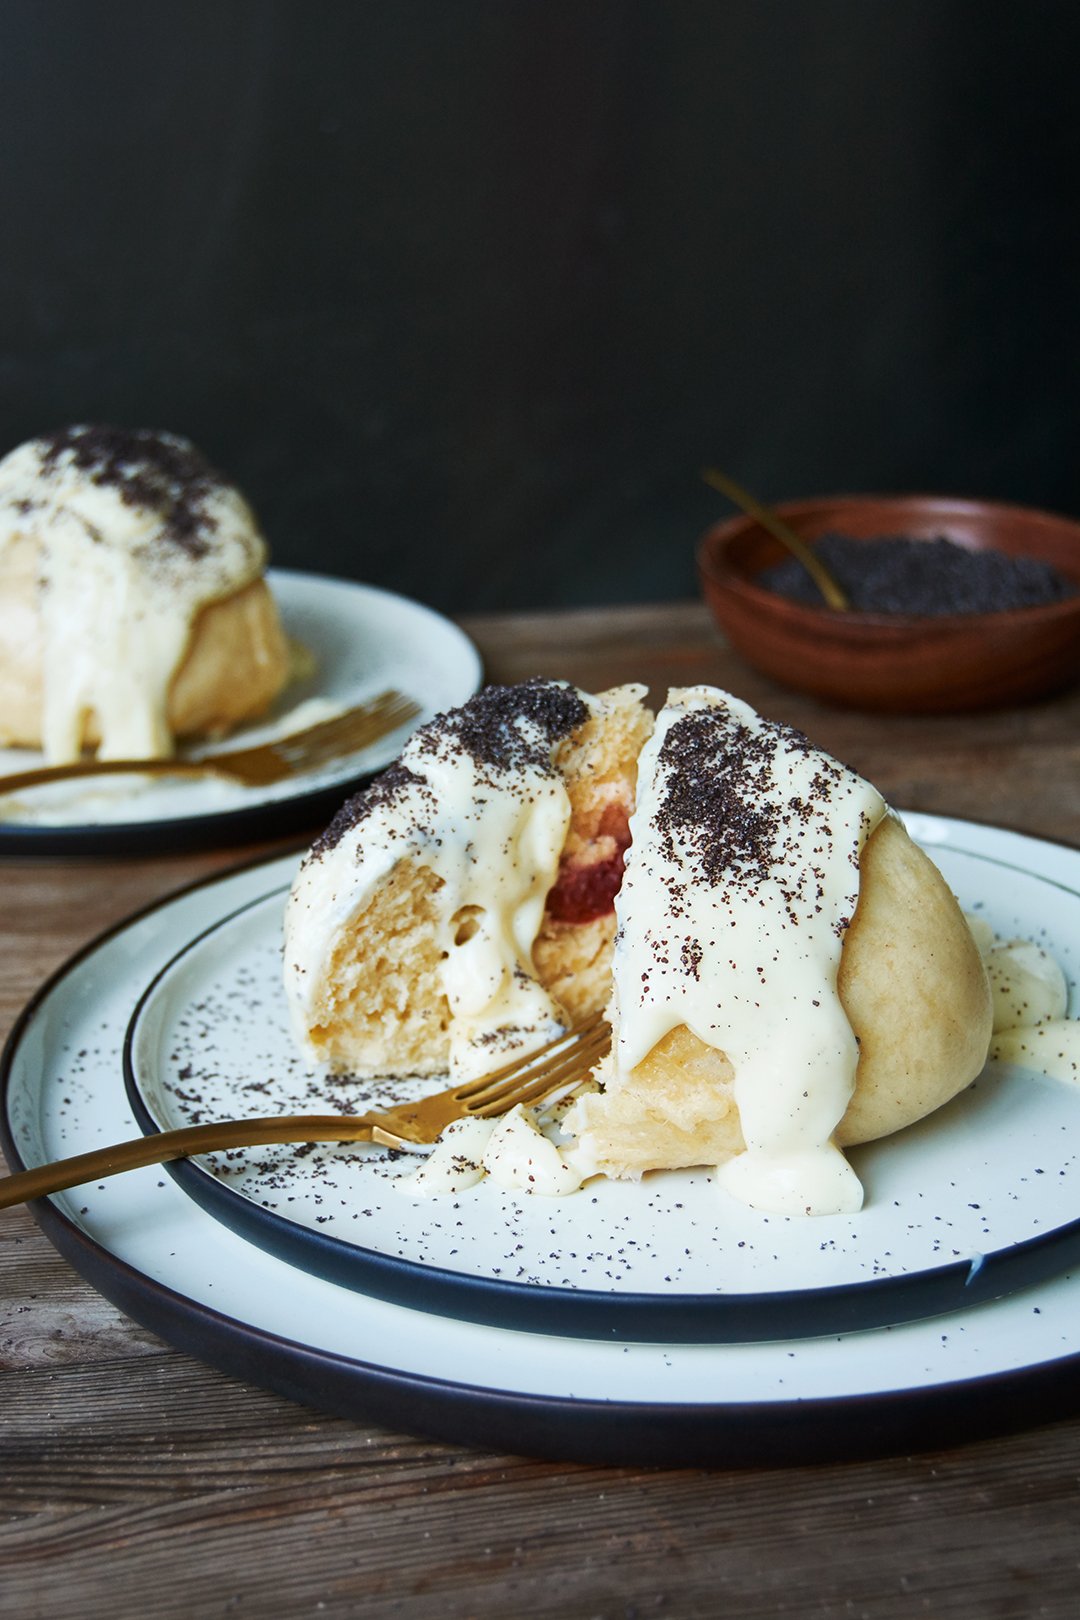

meet in your kitchen | Scones & Tea Time at Brown's Hotel in London

As soon as the charming doorman George opened the wooden framed glass door of the elegant Brown's Hotel in the heart of Mayfair, I found myself in another world - in old Britain. Brown's is London's oldest hotel, it was opened in 1837 by James Brown and his wife Sarah. It was here that the first UK telephone call was made by Alexander Graham Bell, President Roosevelt enjoyed the house's quiet luxury during his honeymoon, and it inspired Agatha Christie and Rudyard Kipling to many of their novels. With no doubt, this house has a glamorous history.
I celebrate my own little tea time at home every day, but for quite a while I've been in the mood for the complete English ceremony in all its extravagance at a traditional hotel in London. The stunning English Tea Room at Brown's Hotel - renowned and awarded for serving one of the best tea ceremonies in the city - seemed like the perfect choice and I happily accepted an invitation by the hotel. It was an unforgettable Afternoon Tea of almost Roman proportions. Sophie and her fantastic team at the hotel treated me heavenly from the moment I set foot on the hotel's beautiful black and white mosaic floors.

While I sat at a long table, decadently filled with delicate pastries, scrumptious scones with clotted cream and jam, delicious sandwiches, Christmas fruit cake and calamansi chocolate yule log, I got the chance to chat with Lee Kebble, the hotel's Executive Chef, and Thomas Coly, the French Pastry Chef and the master of one of the best scones I've ever eaten in my life. Thomas Coly stole my heart with an outstanding Mandarin Chestnut Tart and a fine composition of blood orange and saffron - and of course, with his French charm. He learnt under the guidance of Alain Ducasse and praises his strict regiment in the kitchen. Thomas follows his patron's culinary philosophy: Respect the produce and focus on just a few dominant flavours, three at most. If you work with a ripe peach in the kitchen for a composition, you should be able to see a peach in your mind's eye with your first bite. The French chef misses his family in Toulouse but he loves the diversity of food in London where the culinary landscape is influenced by so many cultures from all over the world. He sees his role as a chef as that of an ambassador, to present his guests with the best produce, transformed into delicious dishes in his own style. Very British but with French finesse, like his scone recipe which Thomas graciously offered to share with us.
My splendid tea ceremony started with an introduction to the tea room's selection of 17 teas by a tea sommelier who helped me with my choice: the fine Jing's Gong Fu Tea. I also tried a few nibbles from the Tea-Tox, the healthy sister of the traditional afternoon treat, and although I don't mind dairy and sugar in my own diet, I enjoyed these treats just as much. But in the end, Thomas and I agreed that butter, eggs and sugar cause too much fun in the kitchen to cut them out of our lives.

When Lee Kebble came into the room I was more than impressed by his calm and kind nature, he seems like a rock in the kitchen. Leading a brigade of 24, he takes care of the famous HIX Mayfair restaurant, The English Tea Room, The Donovan Bar, private events and in room dining at the hotel, and despite all my expectations, he doesn't come across as a man who needs to raise his voice. He spreads an aura of confidence and competence, which is easy to trust. Lee's love for food started early, at the age of ten, when he used to meet with a friend on Sundays at one of their houses to cook extravagant meals - such as Coq au Vin - for their parents, with recipes from their personal bible - the Hamlyn cookbook. His own kids seem to follow his passion, they already love their family tradition of baking pancakes or waffles with their dad on Saturdays, or preparing pizza, bread or homemade pasta together. Lee learnt in the kitchen of the award-winning chef Anton Edelmann at The Savoy who had as much of a strong influence on his cooking as Mark Hix. He says he was thrilled by the vibrance of restaurant kitchens since he first stepped in at the age of 16. Mark Hix introduced Lee and his team to a special tradition that is held in the kitchen every two weeks: His suppliers fill a huge table with the best seasonal produce and Mark himself cooks and experiments with it all morning. He then invites the chefs from all his restaurants to compete with him in a 20-minute-cooking challenge. This way, they develop new recipes, learn from each other and evolve their skills. When I asked what happens to the unlucky ones who have a bad day or can't work under this kind of pressure, Lee gave a very British answer: "Their food will go to the staff's table, and that's also where they'll have to sit", and laughed. I love the British!
The five-star Brown's Hotel is one of ten Rocco Forte luxury hotels, and a stay in this house located at one of the city's most prestigious addresses is one of those special treats that you should allow yourself once in a while, even if it's just for one night. It's the kind of luxury that puts your mind at ease and let's you relax immediately. The hotel's wonderful team does an excellent job of fulfilling all your wishes - even the ones you weren't aware of.
Thank you Sophie, Lee, Thomas, and the rest of the Rocco Forte family!
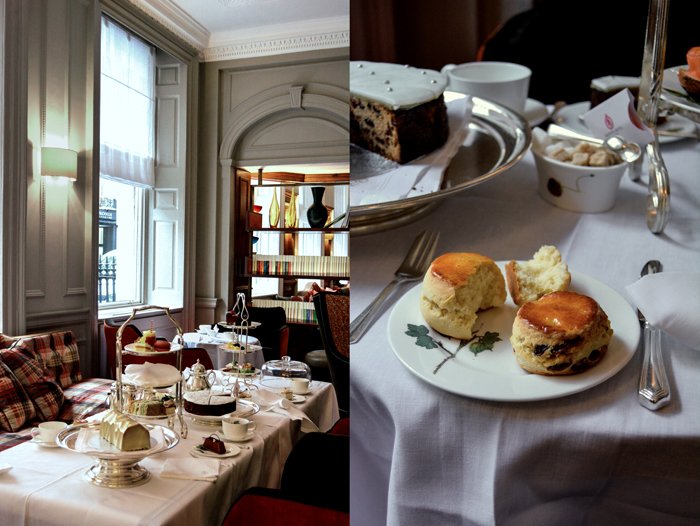
Brown's Hotel Scones
Mind that the dough for the Brown's scones has to rest twice, for 4 hours, before you can bake the scones in the oven.
For about 12 scones
plain flour 500g / 3 3/4 cups plus 2 tablespoons
fine sea salt 1/2 teaspoon
baking powder 1 tablespoon
granulated sugar 100g / 1/2 cup
butter, cold, diced, 100g / 1/3 cup plus 2 tablespoons
whole milk 250ml / 1 cup plus 1 tablespoon
sultanas 60g / 2 ounces (optional)
eggs, beaten, 2, for the egg wash
In a large bowl, combine the flour, salt, baking powder and sugar, and beat in the butter with the dough hooks of an electric mixer or rub it in with your fingers. Gently mix until just combined.
Slowly pour in the milk and mix with the dough hooks of an electric mixer, mix in the sultanas (optional) before the milk is completely mixed into the dough. Leave the dough to rest in the fridge for at least 2 hours.
Line a baking sheet with parchment paper.
Roll the dough on a floured surface to a thickness of 2 1/2 cm / 1". Flip the dough upside down and cut the scones with a round 4cm / 1 1/2" cutter. Transfer the scones to the lined baking sheet, leaving space in between for the scones to rise. Brush the top of the scones with half the egg wash and leave to rest for 2 hours.
Preheat the oven to 200°C / 390°F.
Brush the top of the scones with the remaining egg wash and leave to rest for 5 minutes.
Bake the scones for about 8 minutes, then turn the tray and add another 6 minutes, or until golden brown. Enjoy warm.

Lee, you've been working with renowned chefs since the beginning of your career, first under the guidance of Anton Edelmann at The Savoy and now with Mark Hix at Brown's Hotel as the hotel's Executive Chef. What are the most important lessons you've learnt from these two mentors?
Firstly, with Anton Edelmann I developed a passion for food that wasn’t very prominent as I embarked on my career. At 16 I had no idea of what to expect, but was very quickly wrapped up in the atmosphere of The Savoy Hotel kitchens and especially in the presence of Anton Edelmann himself. Under his guidance I learnt and perfected classic culinary skills, but most importantly the respect for ingredients in their storage, preparation and cooking. This philosophy and care will never leave me.Working with Mark Hix has had a major impact on my career. The philosophy of food has a massive impact on the way I cook. Also working with Mark and his team has taught me a lot about organisation and developed me in areas that are generally not taught in other kitchens. The structure and organisational systems that are in place have helped me tremendously over the last 8 years. Mark has a different view of what is happening in every situation and it has been amazing watching and learning the thought processes he uses.
Thomas, being the Head Pastry Chef, you're also responsible for the sweet treats for one of London's most famous Afternoon Teas at The English Tea Room. What's so fascinating about this old English tradition?
The Afternoon Tea is the showcase of an English tradition and is an institution, which is being realised with different interpretations. The concept of Afternoon Tea is fascinating, you can spend time as a couple, with family or on business, by being relaxed. I am personally proud to represent this tradition.
What are the main differences between working in the kitchen of a hotel or a restaurant?
Lee Kebble: Working in a hotel is an ever changing environment. There needs to be control over every outlet, at all times. The structuring of this is very important to ensure consistency over every area. That’s where the fun is in hotels though. No two days are ever the same, there’s always a request, a bespoke event, an afternoon tea promotion to look after.I think that in a restaurant you have what’s in front of you and the focus can be very clear, on the opposite hand in a hotel you have many angles to channel that focus.
Thomas Coly: Everything, the organisation, the quantity of production and the flexibility.
What do you love about the British cuisine, sweet and savoury?
Lee Kebble: I love the energy in British cuisine now, the demand chefs are putting onto UK suppliers to source and grow produce that has previously been ignored and left for our friends all over the world. The whole style is taking on a new approach and shedding the heavy, stodgy image of the past and pushing the boundaries with fresh, light and modern techniques using new ingredients. This really applies to sweet and savoury. I like the foraged and wild ingredients popping up, for example sea buckthorn which has allowed us to have desserts that mirror passion fruit and citrus flavours.
Thomas Coly: I’m French and like most French people I used to have a bad vision of the British cuisine, but I discovered, in England, we have excellent products.
How important is seasonal and local produce for your creations?
Lee Kebble: Our philosophy is all about seasonal and local produce. At HIX Mayfair we only use British produce. Elsewhere we use a more international array of ingredients but still keeping to the seasonal core values.
Thomas Coly: It’s very important, seasonal first and foremost, to make use of the products at their peak, when the quality is best, and local because we are the ambassadors of British food and it's our duty to represent and show all the local products to ours guests.
How do you develop new recipes? Where do you find inspiration?
Lee Kebble: Our suppliers are the true inspiration for our recipes and ideas. It all starts with them and we take their ingredients or products to where we want. They provide the sparks that create menus, keeping us at the forefront of seasonal changes and new / un-used products.Then secondly, the Hix team provides a huge and important part of generating ideas and working on new recipes. We have a bi-weekly challenge where we all cook for 20 minutes as many new and experimental dishes as possible, alongside Mark Hix. From here menus can be written, dishes tried and developed for later dates.
Thomas Coly: I start with the season first, the combination of flavours and then the textures. I find inspiration everywhere - in my experiences, my childhood, memories, travels …
Who has been your biggest inspiration in the kitchen? Who or what inspired you to start a career in food?
Lee Kebble: My family, no one in particular but all were equally supportive when I decided to take on a profession that was unknown and unheard of in past generations.Once I was in the kitchen it was Anton Edelmann and the Savoy kitchens that stoked the fire for me. I always remember my first week. I watched the sauciers working away in awe and knew I wanted to be like that.
Thomas Coly: My biggest inspiration in the kitchen was Alain Ducasse and his chefs with whom I learnt respect and sensitivity towards the product. I think it was my nanny when I was a kid who used to cook everything fresh, I still remember her making jam in the morning during my breakfast.
What was the first dish you cooked or baked on your own, what is your first cooking memory?
Lee Kebble: Coq au vin from the Hamlyn cookbook. Each week when I was around 10, a friend and I would go to each other's houses and cook for our parents. The Hamlyn cookbook was our bible and we tried many of the recipes.
Thomas Coly: The first dish I cooked was an omelette with my dad. My first cooking memory is when my mother baked a tart on a Sunday afternoon, it was amazing.
What advice would you give someone who wants to become a chef?
Lee Kebble: Be prepared for hard but extremely rewarding work. Adopt a can do attitude. Work with a smile because if you love your job you will never do a day’s work in your life.
Thomas Coly: My advice for those who want to become a chef is to have a passion above everything as it’s a very hard job and without the passion you can’t do this for sure.
What are your favourite places to buy and enjoy food in London?
Lee Kebble: I have always had a soft spot for Borough market and often go picking up goodies to cook for friends and family. Here, there is a real array of producers and treats to feast on.Other than that, I enjoy many varieties of restaurants. I like fresh and exciting flavours.Thomas Coly: I love Borough market, under the train station, and all different types of food. I love London for its diversity of restaurants, you can eat Chinese, English, Italian, French, Peruvian, Polish...
If you could choose one person to cook a meal for you, who and what would it be?
Lee Kebble: My Mum and it would have to be Christmas dinner! She makes the best!
You're going to have ten friends over for a spontaneous dinner, what will be on the table?
Lee Kebble: Lots of salads, probably homemade breads. I cook in the garden for most of the year so something from the BBQ is always on the go.
What was your childhood's culinary favourite and what is it now?
Lee Kebble: There’s a family lemon cheesecake recipe that was always the winner when I was younger, only ever for special occasions.Nowadays just simple seasonal fruits at their prime. You really can’t go wrong when at their peak.
At home, do you prefer to cook on your own or together with others?
Lee Kebble: I always involve my children as much as I can with cooking. I try to teach them to make pizza and homemade pasta. We bake a lot of fresh bread at home and it’s good to do this together.
Which meals do you prefer when you cook privately, improvised or planned?
Lee Kebble: There is fun in all aspects here. Sometimes the best meals are created with minimal ingredients at short notice.On the other hand there is such a reward in planning and executing a meal that has been carefully created.
Which meal would you never cook again?
Lee Kebble: Anything with tripe, sorry it’s just not for me.
Thank you Lee and Thomas!