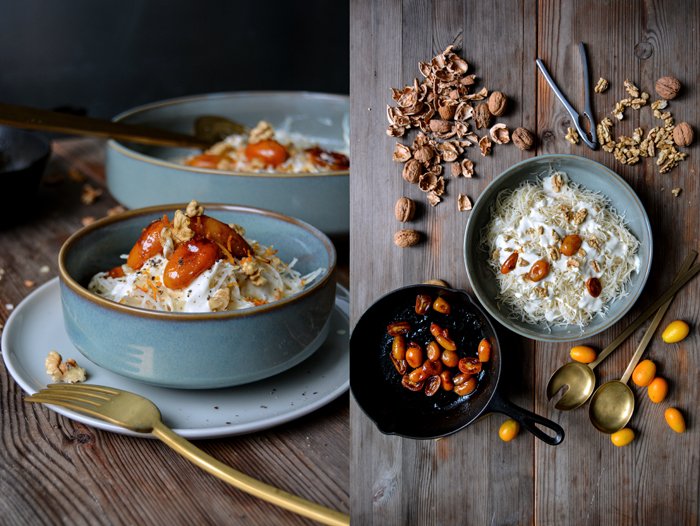
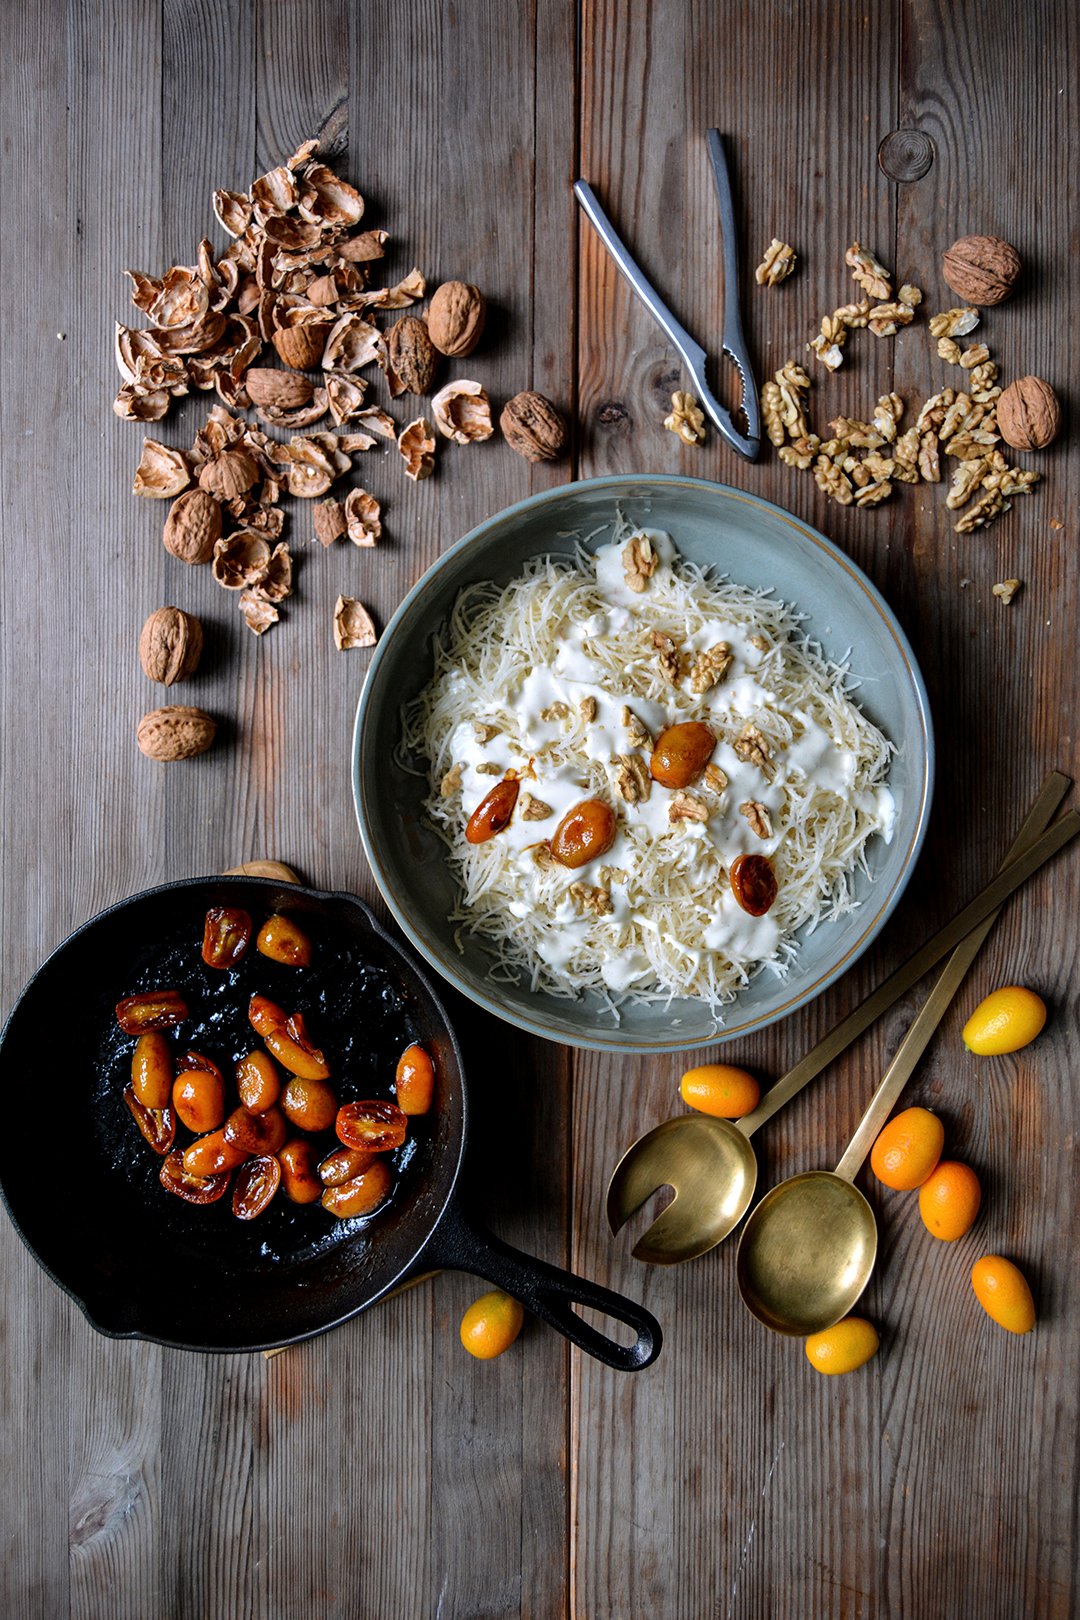
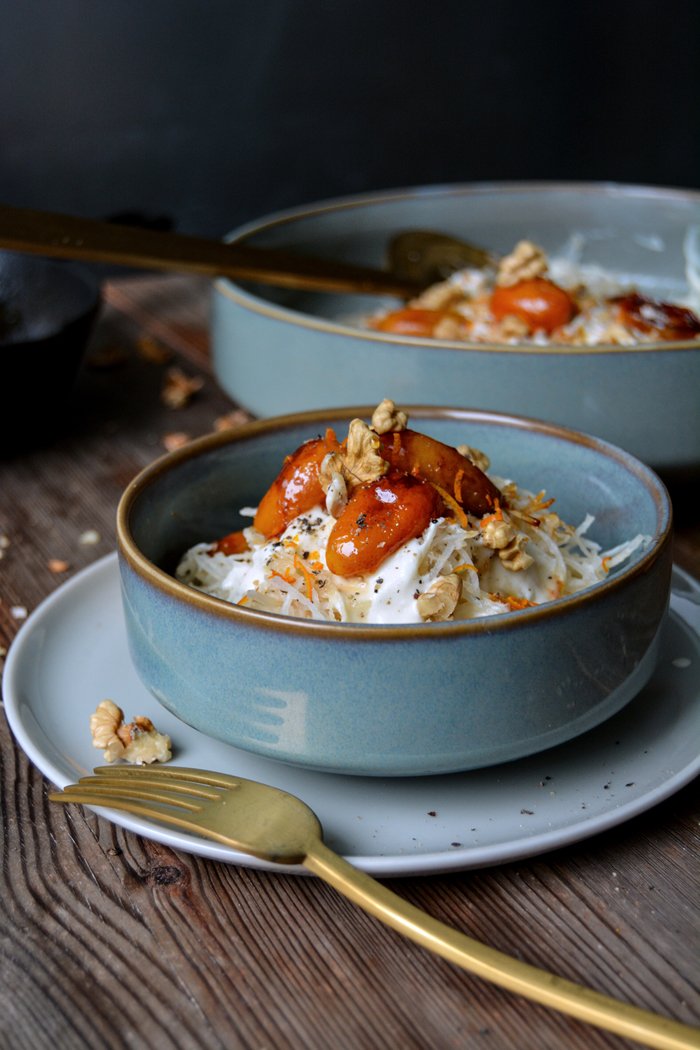
Celeriac Salad with Caramelized Honey Kumquats and Walnuts

Berlin, January 2016:
My little cookbook library got extended by a few amazing recipe collections. Santa was so kind to leave a few gems under the tree: Nigel Slater's new The Kitchen Diaries III, Jerusalem by Yotam Ottolenghi and Sami Tamimi (finally!), Vegetarian India by Madhur Jaffrey, and the fantastic Anatolia by Somer Sivrioglu and David Dale. The latter blew me away! This book is gorgeous, the pictures are mouthwatering and the dishes inspired me as soon as I laid my eyes on the first page. I'll definitely write about it again in the next few weeks, I already tried one of the recipes for a Turkish pizza and it was divine.
Madhur is a new find for me, I haven't had much time to thumb through the pages of her book but what I've seen so far looks divine. Nigel's book is a cooking bible with 250 (!) recipes - and I'm already struggling with the amount of work I have with the 100 recipes in my Eat in My Kitchen book! I love his approach to creating recipes, the way he writes about them and the beautiful photos taken by Jonathan Lovekin who's also been responsible for Nigel's former kitchen diaries, which I'm equally obsessed with. I'm sure I'll spend quite some time with this book in the next few years.
One of Nigel's creations, which is the 248th recipe in the book, struck me right away: a gorgeous celeriac and blood orange salad sprinkled with nigella seeds and capers. I haven't tried it yet - but I will soon - however, it made me think about celeriac salads. I like the addition of citrus, especially my beloved blood orange, but so far they haven't been in sight at the market. Kumquats came to mind, caramelized and softened in sizzling honey, I used these sweet, sour, and bitter bites for my luscious Orange Blossom, Ricotta, Kumquat, and Pistachio Tartine last April. It was quite a beauty. For my salad of grated celeriac, I also added a creamy yet light yoghurt-cardamom dressing, and sprinkled it with walnuts. Some honey drizzled on top to enhance the sweetness and my first winter salad of 2016 was born. Thank you Nigel!
If you're not that fond of kumquats, you can replace them with orange fillets.

Celeriac Salad with Cardamom-Yoghurt, Caramelized Honey Kumquats, and Walnuts
Serves 3-4
For the dressing
yoghurt 200g / 2/3 cup
olive oil 2 tablespoons
freshly squeezed orange juice 1 tablespoon
ground cardamom 1/4 teaspoon
freshly grated orange zest 1/2 teaspoon plus 1 teaspoon for the topping
fine sea salt
ground pepper
For the salad
peeled celeriac, grated, 250g / 9 ounces
freshly squeezed lemon juice 1 tablespoon
liquid honey 1 tablespoon plus 1-2 tablespoons for the topping
freshly squeezed orange juice 4 tablespoons
kumquats, cut in half lengthwise, 12 (or 12 orange fillets)
walnuts, 1 large handful
a few black peppercorns, crushed in a mortar
For the dressing, whisk together all the ingredients until smooth and season to taste with salt, pepper, cardamom and orange juice.
In a large bowl, mix the grated celeriac and lemon juice, using your fingers. Sprinkle with the dressing.
Heat 1 tablespoon of the honey in a small, heavy pan on high heat, add the kumquats and the orange juice and cook for about 2-4 minutes or until soft and caramelized, turn them once or twice and mind that they don't burn. Take the pan off the heat and arrange the kumquats on top of the salad.
Sprinkle the salad with walnuts, crushed pepper, and additional orange zest, and drizzle with honey. Enjoy immediately or let it sit for a few hours. It won't look as pretty anymore but tastes just as good.


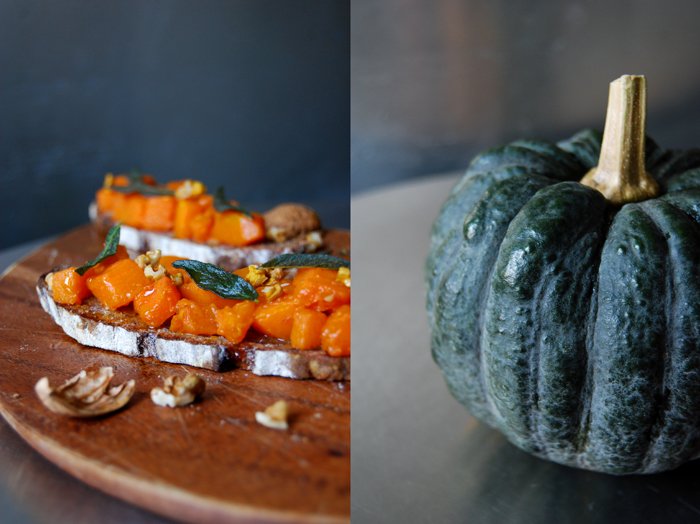
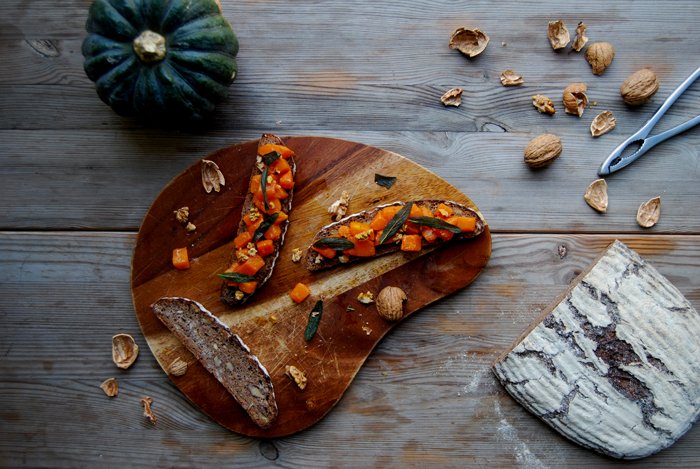
Maple Syrup and Orange Pumpkin Tartine with crisp Sage and Walnuts
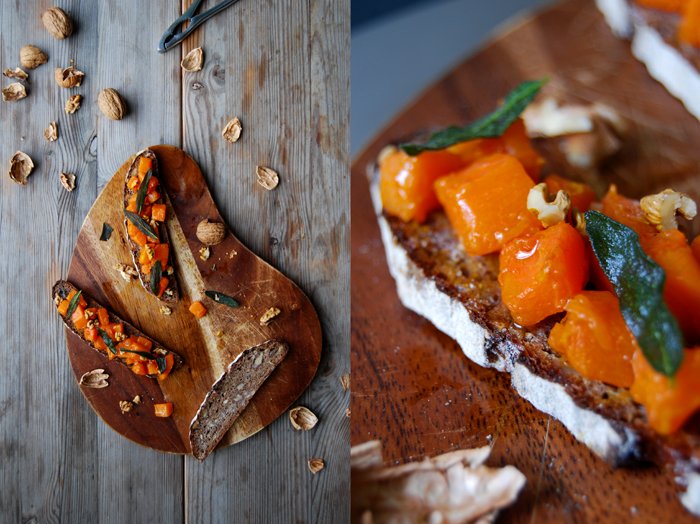
This sandwich started with a dark loaf of rye bread full of crunchy walnuts. When I held it in my hands I knew this would be the right basis for a sweet pumpkin tartine! This has been on my mind since the season began and I started piling different kinds of squash on my kitchen window sill every week. Hokkaido, butternut or Musquée de Provence (fairytale pumpkin), they are all great for a fruity sandwich!
I aimed for some contrast to the heavy bread, a light and fruity topping complemented with fried crisp sage leaves and some walnuts. I sautéed the orange meat of a Musquée de Provence for a few minutes in olive oil before I mixed it with freshly squeezed orange juice and maple syrup. The pumpkin soaked up the sweet juices within seconds and turned into soft and sticky bites. It tasted so good in combination with the strong herb I used for the topping that I decided to brush the dark slices of bread with the sage infused olive oil. The walnuts on top brought in the right crunch, hearty and nutty!
Tomorrow, I'll write about the exciting adventure in my mother's kitchen that I mentioned yesterday - it's about deer!

Maple Syrup and Orange Pumpkin Tartine with crisp Sage and Walnuts
For 4-6 tartines you need
dark rye bread (with or without walnuts) 4-6 slices
pumpkin (squash), peeled, without seeds and cut into small cubes, 350g / 12.5 ounces
freshly squeezed orange juice 50ml / 2 ounces
maple syrup 2 tablespoons plus more to taste
a pinch of salt
fresh sage leaves 12-18
olive oil 4 tablespoons plus more for the pumpkin
walnuts, broken into pieces, 4
Heat 4 tablespoons of olive oil in a sauce pan and fry the sage leaves until golden (1-2 minutes) but not dark!
In a large pan, heat a splash of olive oil and sauté the pumpkin on medium heat for 5 minutes or until al dente. Deglaze with the orange juice, add the maple syrup and season with a little salt. Take the pan off the heat when the juices are almost soaked.
Brush the slices of bread with the sage oil and put the pumpkin on top. Garnish with the crisp sage leaves and some walnuts. Enjoy!


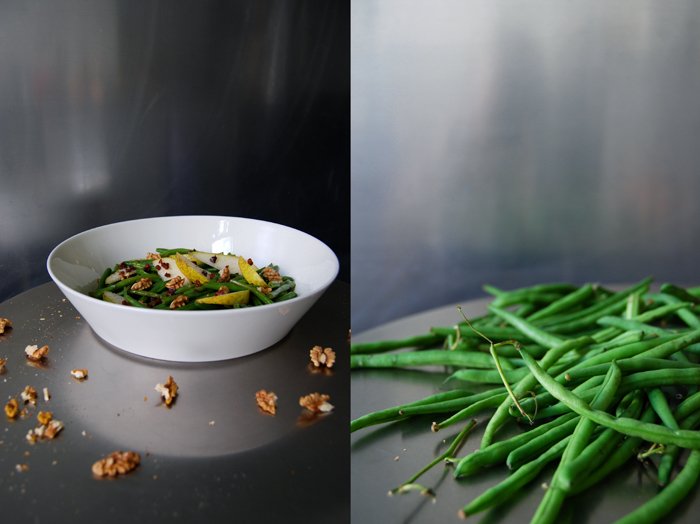
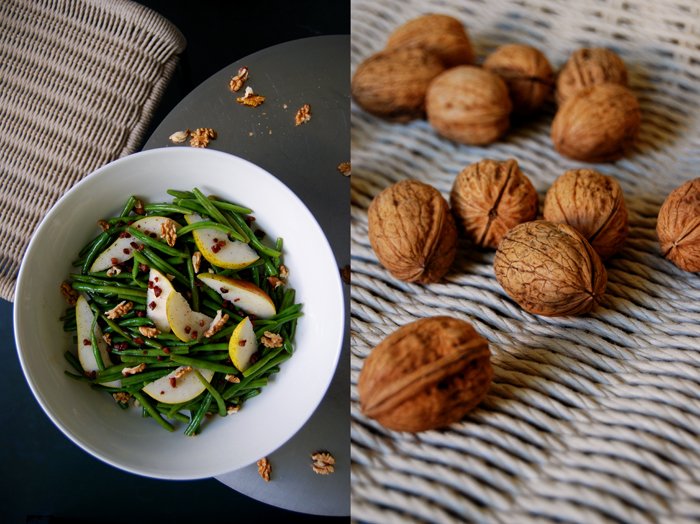
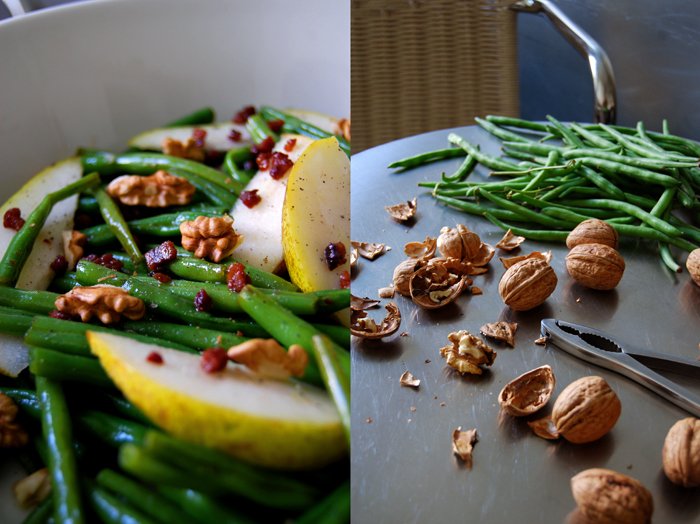
Green Beans, Pear and Walnut Salad with Bacon Bits
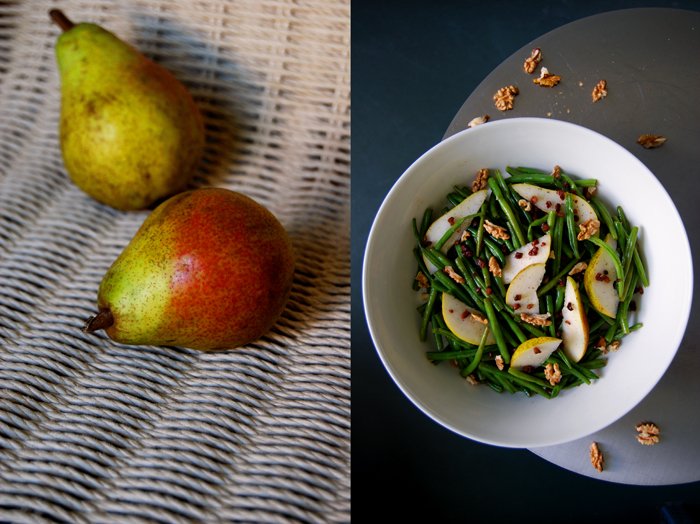
Pears and walnuts are not only visually a perfect match, be it mixed in a salad with chicory or on a sandwich with melted Stilton, this sweet and nutty combination is the start of many great dishes!
For today's salad I mixed in some local green beans before their season finishes. As much as I like them sautéed with some wine, thyme and summer savory, I almost prefer them in salads. I blanche the beans until they are al dente to keep their freshness and leave them quite crisp. The dressing for my salad comes from the juices of the crunchy bacon bits which I added as a topping. I fry the tiny cubes in their own fat until they turn into crumbly crisps and deglaze them with white Balsamico vinegar. The vinegar's smooth acidity combines perfectly with the oily juices and makes a hearty dressing, a bit salty but fruity!
Green Beans, Pear and Walnut Salad with Bacon
For 4 people you need
green beans, ends cut off, 500g / 1 pound
crisp pear, cored and cut into slices, 1
bacon, cut into small cubes, 100g / 3.5 ounces
walnuts, broken into pieces, 10
balsamic vinegar 40ml / 1.5 ounces
olive oil 1 tablespoon
salt and pepper
Blanche the beans in lots of salted water for about 5 minutes until al dente, drain and rinse for 1-2 seconds with cold water.
In a large heavy pan, heat the olive oil and cook the bacon on medium-high temperature for a few minutes until golden brown and crunchy, stirring in between. Deglaze the bacon with vinegar, stir and take off the heat.
In a large bowl, mix the beans with the bacon and vinegar juices and season with salt and pepper to taste. Arrange the pear, bacon and walnuts on top.


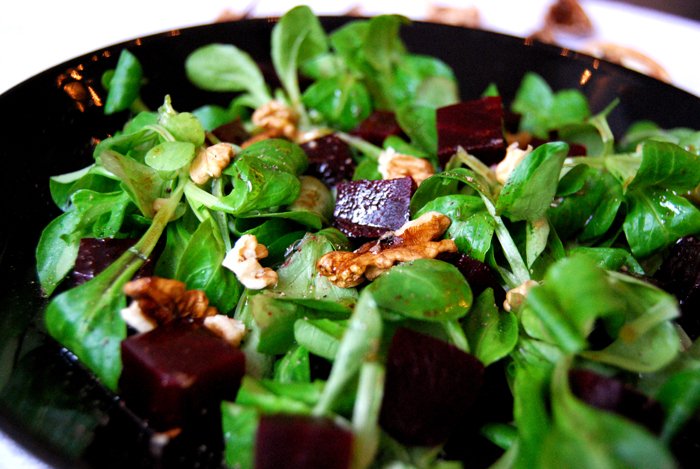
A Wintery Salad with Beetroot and Walnuts

I must confess that I literally lived in my cookie boxes the past weekend but - at least for today - I will take a sweet break (as much as I love them). My body needs something light and healthy, a salad. In winter I love to get boxes of organic field salad, its nutty taste is great to combine with roots, fruit and nuts. You just need to throw a handful of these little leaves in a bowl, add whatever you feel like and drizzle some olive oil and balsamico on top. It makes a great lunch or dinner even with some cheese and bread on the side. As this salad is so easy to prepare and looks and tastes so good, it is also a very nice starter for a wintery dinner party.
Sometimes I arrange this lettuce with mango or apple slices but my favourite combination is cooked beetroot and walnuts. I cooked a few beetroots a couple days ago and still have some left. I chop up one medium sized beet in little cubes and mix it with two handful of field salad. My dressing is simple but matches the beetroot perfectly: 3 tablespoons of olive oil mixed with 2 tablespoons of balsamico vinegar, seasoned with salt and pepper, that's all it needs. I pour the thick dressing on top of the salad and drizzle 5 chopped walnuts on top. Today there are two of us enjoying this tasty and healthy treat!
We eat beetroot quite often, I buy 3 or 4 of them every week and cook them with 2 bay leaves in salted water for 45 minutes (more or less depending on their size). This way they keep their strong and unique taste. I love them sliced thinly as a carpaccio or cut into cubes in wintery salads.

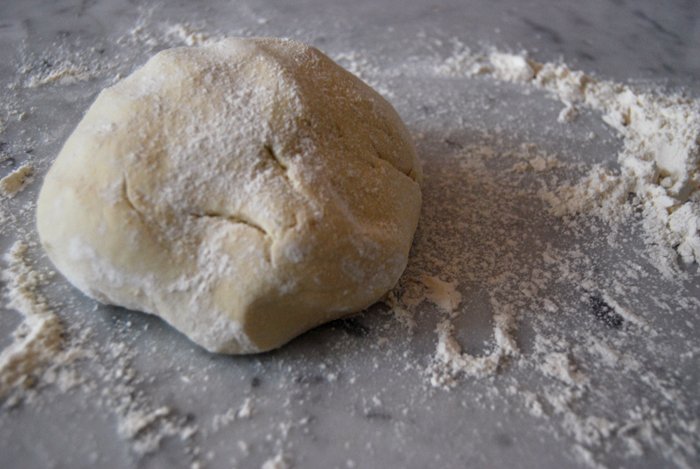
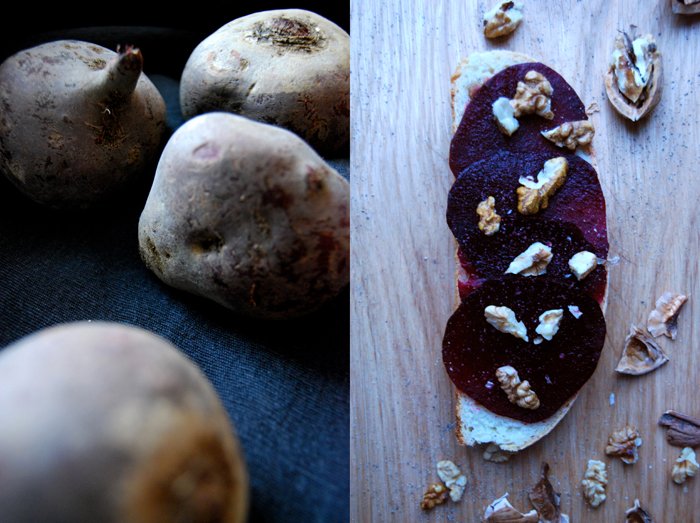
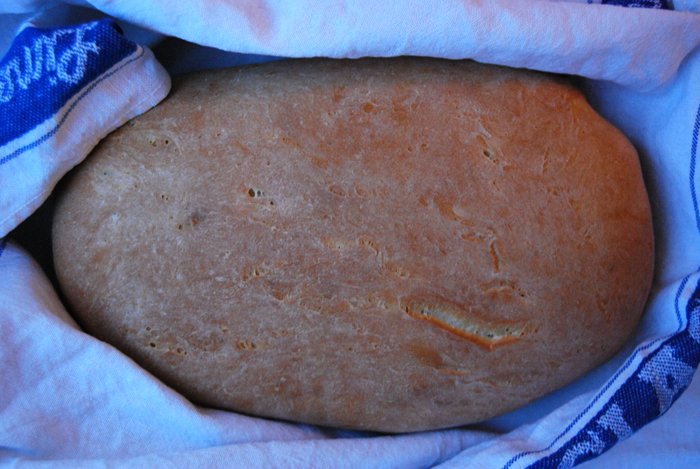
Juicy Potato Bread with Beetroot and Walnuts
I love bread, I'm virtually obsessed with good bread and I need my daily dose of this wonderful, ancient invention. Every culture has their own bread tradition all over the world and it is so important to keep this up and to support traditional bakeries.
Potato bread has a nice crust and is very juicy inside. The kitchen smells divine when the loaf is freshly out of the oven. I love to cut it into thick slices and then let some butter melt on it. With the first bite I know why I love to bake my own bread!
Today I want to prepare a little sandwich with cooked beetroot slices. I drizzle some balsamico and olive oil on top and sprinkle with walnuts. This makes a wonderful snack or starter for a dinner party.
Beetroot
Cook 1 or 2 beetroots together with 2 bay leaves in salted water for 45 minutes (more or less depending on their size). Check with a skewer, it should come out easily, and rinse under cold water. Let them cool, peel and slice very thinly.
Potato Bread
For this bread I used spelt flour type 630 which I love to bake with but you can use any other flour. I chose dry yeast as it is a bit quicker to prepare but you can change to fresh if you prefer.
Sometimes I prepare the dough in the evening and let it rise overnight. This is convenient for the weekend if you want some warm fresh bread on the table for breakfast.
This makes 1 loaf of bread
potatoes, cooked, peeled, cut in cubes, cold, 150g / 5 ounces
potato water (the water the potatoes got cooked in), lukewarm, 150ml
plain flour 450g / 16 ounces
sour cream 3 teaspoons
olive oil 1 tablespoon
dry yeast 1 1/2 teaspoons
salt 2 teaspoons
Grate the potatoes or press through a ricer (mashing works as well).
Mix the potato water with the sour cream and olive oil.
Combine 350g / 12 ounces of flour with the salt in a big bowl. You will add the rest of the flour while kneading the dough. Add the lukewarm water to the flour together with the yeast. Mix with the dough hook of your mixer until everything is combined, add the potatoes and continue mixing for around 10 minutes. After a few minutes you can start adding the rest of the flour. Put the dough ball on a floured working surface and continue kneading with your hands. You can put all your energy in this which is good for you and for the fluffiness of the bread.
When I prepare the dough in the evening I place it in a clean, oiled and covered bowl in the fridge and let it rise overnight. You will have to take it out of the fridge 30 minutes before you can continue with the next steps.
In case I want to bake my bread the same day, I put the dough in a clean and oiled bowl, cover it with a tea towel and let it rise in the 35°C / 95°F warm oven for 60-90 minutes. This works really well but make sure that your oven is set to top/ bottom heat and not to fan.
When the dough is bigger and puffy punch it down and knead for a couple minutes. This one doesn't rise as much as dough without potatoes but you should notice a change in size. Now place your future bread on a lightly oiled baking sheet giving it the shape you want and cover with a tea towel. Give it another 30 minutes to rise in the warm oven again.
Set your oven to 230°C / 445°F (for bread it works best to use top / bottom heat and not the fan setting). Bake your bread for 10 minutes, take the temperature down to 190°C / 375°F and bake for another 20 minutes. Test by knocking on the bottom side of the bread, it should sound hollow. Let it cool on a rack before you start cutting it. I minimise this to a few minutes as I can't wait to try it. Not with this smell in my kitchen.