
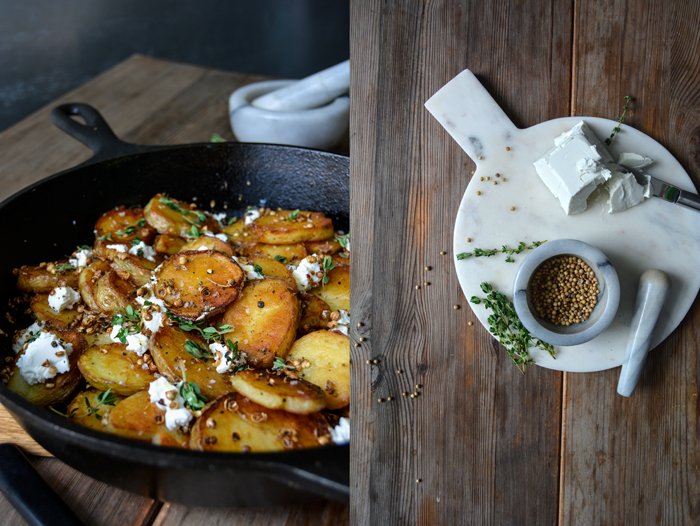
Crispy Pan-Roasted Coriander Potatoes with Chèvre and Lemon Thyme

Golden roasted potatoes eaten straight out of the pan are an unbeatable culinary delight. Spice it up with crushed coriander seeds, mild fresh chèvre, and aromatic lemon thyme and you'll have an easy summer lunch (or dinner) that won't disappoint you. It's a rustic side for barbecued sausage, steak or ribs, you could even serve it as a cold or warm salad. But don't forget to cook the potatoes a few hours, or preferably a day, in advance. To create crispy potatoes, they have to be cold and dry from the start.
I often enjoyed pan roasted potatoes with my mother when I visited her for a one-night sleep over while I still went to university. We would open a nice bottle of red wine, fry some onions and Tyrolean prosciutto, and mix in the crispiest potatoes. These were the perfect girls' nights, just us, chatting and cooking, and enjoying the simple treats of life, which my mother mastered to perfection!
If you're looking for more inspiration for roast potatoes, here are a few scrumptious recipes:

Crispy Pan-Roasted Coriander Potatoes with Chèvre and Lemon Thyme
Serves 2-3
olive oil
waxy potatoes, peeled, boiled, and rinsed, about 700g / 1 1/2 pounds
flaky sea salt
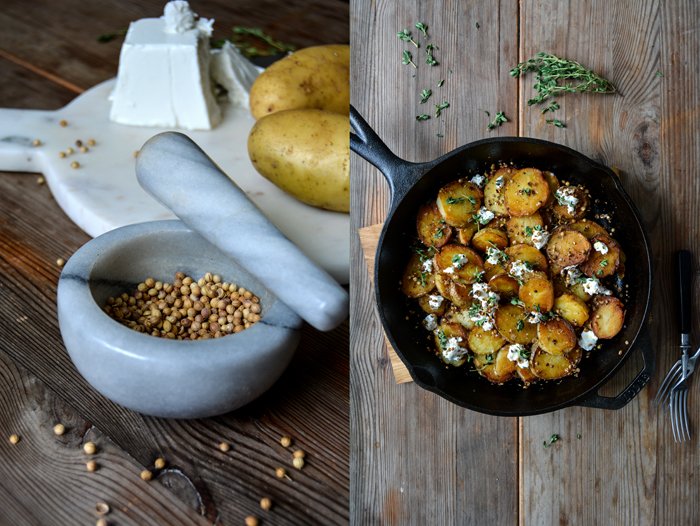
black peppercorns, crushed in a mortar
quality coriander seeds (preferably organic), lightly crushed in a mortar, 2 tablespoons
fresh chèvre, crumbled, 100-150g / 3 1/2-5 ounces
fresh lemon thyme leaves (or regular thyme and a little lemon zest) 2-3 tablespoons
Let the potatoes cool and dry on a wire rack for at least 1 hour or a day and cut them into thick slices. In a large, heavy pan, heat a generous splash of olive oil and roast the potatoes on medium-high for a few minutes on each side until golden brown. Cook them in batches and turn them one by one with a fork. Season with flaky sea salt and crushed pepper to taste and transfer to a plate. Cover them with a lid to keep them warm.
Heat a splash of olive oil in the pan used to roast the potatoes and cook the coriander seeds on medium heat for 1 minute (they shouldn’t get dark). Add the roasted potato slices to the pan, mix gently with the coriander, and sprinkle with crumbled chèvre and the lemon thyme. Season with salt and pepper to taste and enjoy warm.


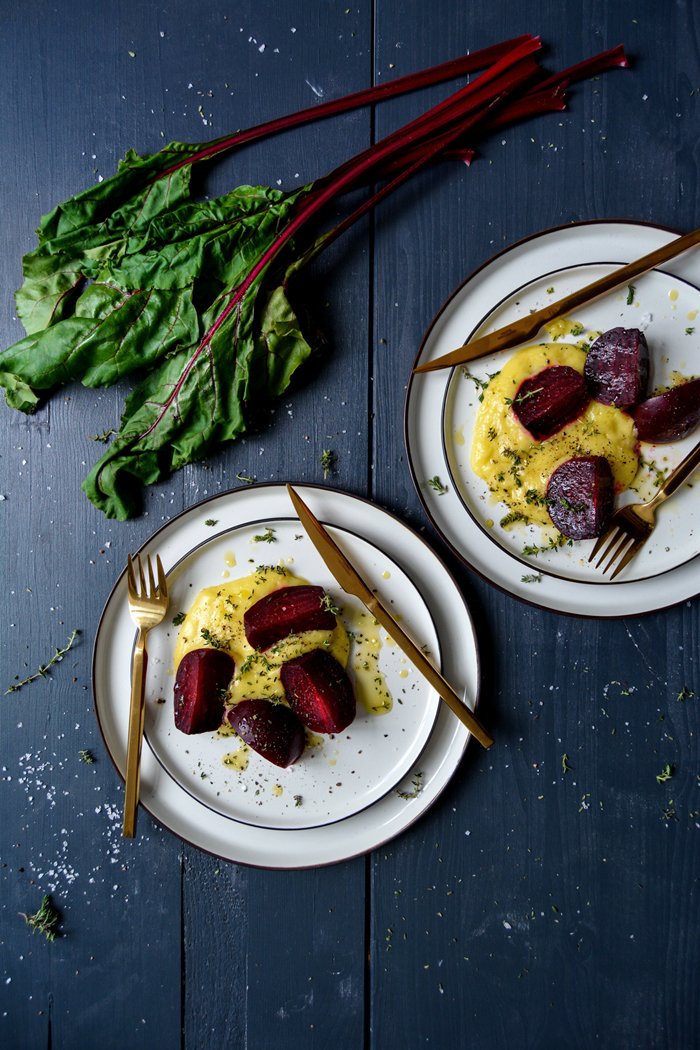
Beetroot and Skordalia - a velvety Greek Garlic Potato Dip
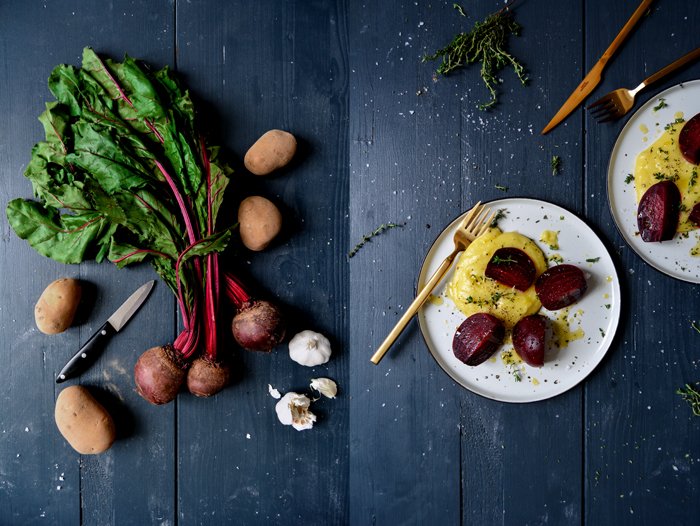
If you feel like garlicky mayonnaise but you're pushed away by its oily heaviness, cook some garlic and potatoes, then throw them in a blender, and you'll end up with skordalia. This popular Greek dip has a similar smooth texture if you pulse it - it becomes thick, sticky, and starchy. The added olive oil adds a Mediterranean touch and taste to it and makes it feel like velvet. If you use a potato masher, which is more common, it will be more chunky, like mashed potatoes, so it really depends on what kind of dip you're after. I was in a mayonnaise kind of mood so the blender was my tool of choice.
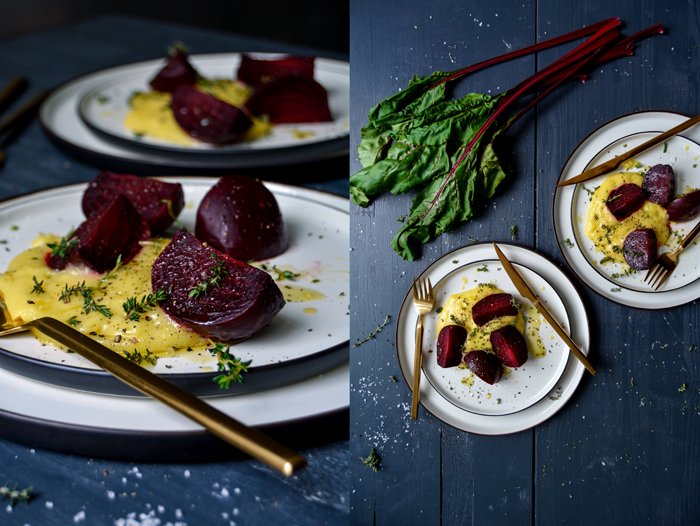
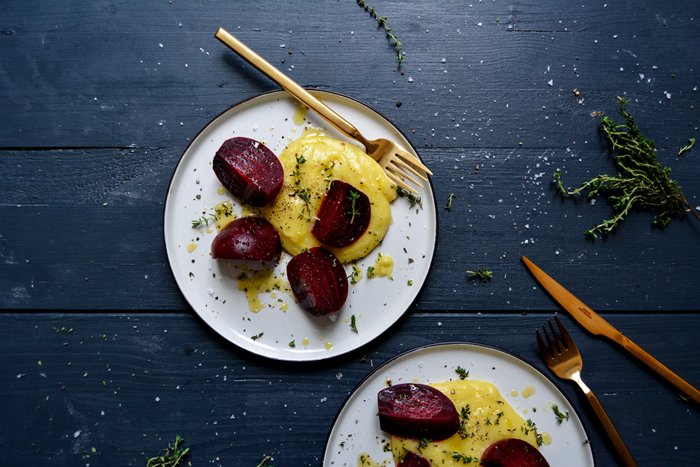
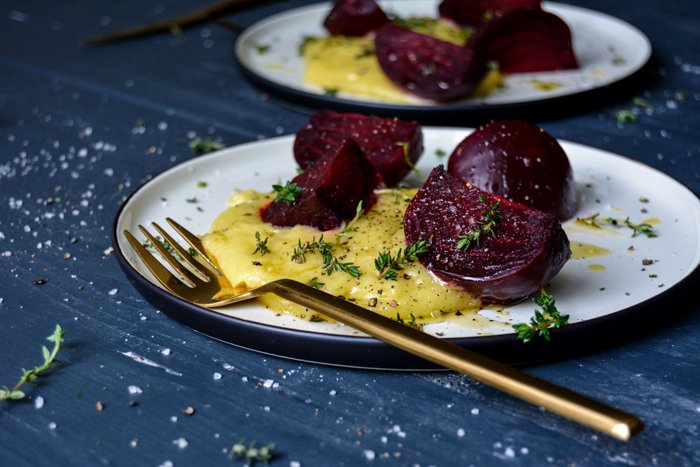
Skordalia is a new discovery for me and I don't know how I never heard of it or tasted it before. I love Greek food, I've been to Greece, and I ate my way through countless Greek restaurants, but for whatever reason, I never had it on my plate until now. So I'm keeping up and made an extra large batch of it. To balance the sweetness of the potatoes and garlic, I brought in some earthy flavours: Beetroots cooked in their skins along with a bay leaf. Peeled and still warm, I cut the purple roots into wedges, and served them with generous (!) amounts of my creamy dip. Delicious!
Beetroot and Skordalia - a Greek Garlic Potato Dip
Serves 2
For the beets
medium sized beetroots, unpeeled, 2
bay leaves 2
fine sea salt
For the skordalia
peeled potatoes, diced, about 240g / 8 1/2 ounces
large garlic cloves, unpeeled, 6
olive oil 4 tablespoons
fine sea salt
For the topping
fresh thyme leaves, about 2 tablespoons
flaky sea salt
black peppercorns, crushed in a mortar
Cook the beetroot along with the bay leaves in plenty of salted water on medium heat for about 40-50 minutes or until tender. Check the roots with a metal skewer, they should almost feel soft. Rinse under cold water and let them cool for a few minutes before you peel off their skins. Cut each beetroot into 4 wedges.
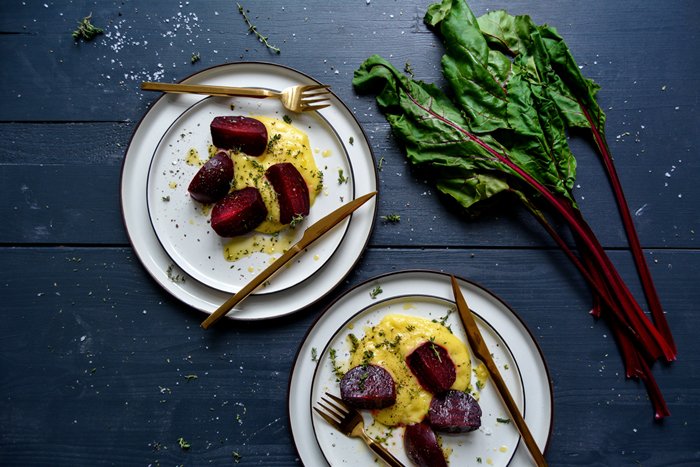
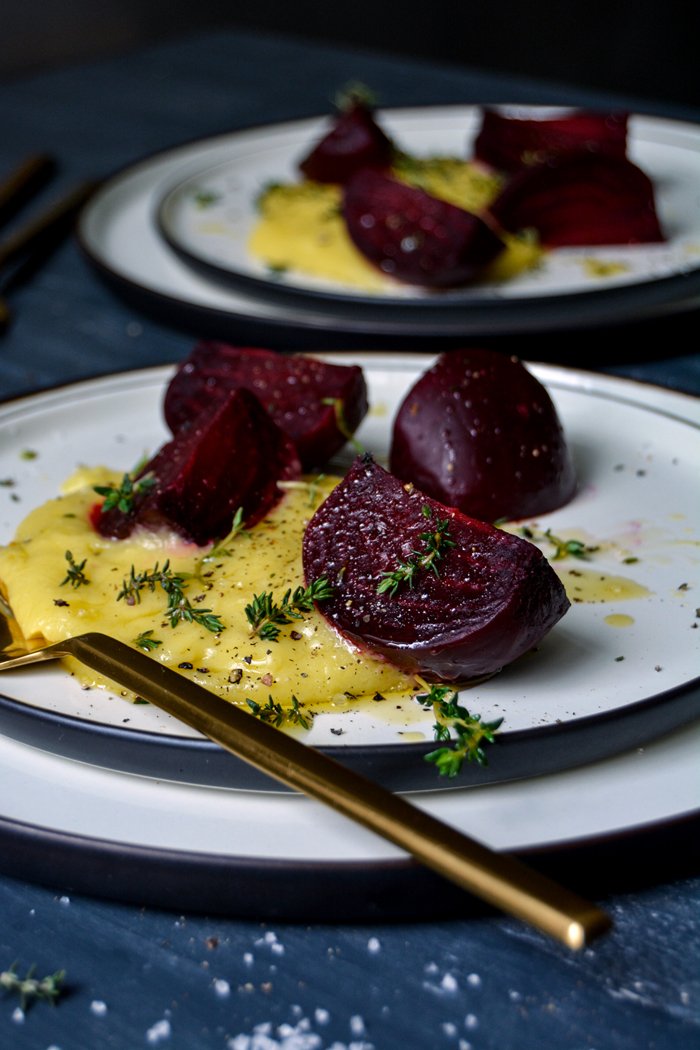
In a medium pot, bring the potatoes in plenty of salted water to the boil and cook for 10 minutes. Add the garlic and cook for another 5 minutes or until the potatoes are soft. Drain and quickly rinse with cold water. Peel the garlic and add, along with the potatoes, to a blender or food processor. Add the olive oil and a little salt and pulse until smooth. Season with salt to taste. Divide the beetroot wedges and skordalia between plates and sprinkle with thyme, flaky sea salt and crushed pepper. Enjoy cold or warm.

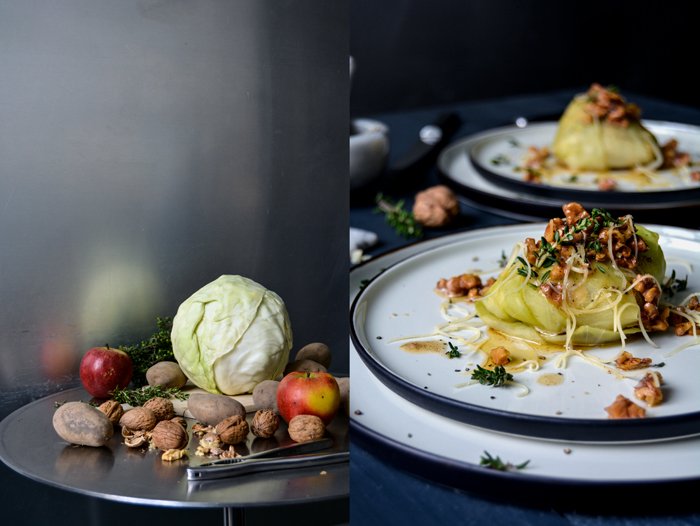
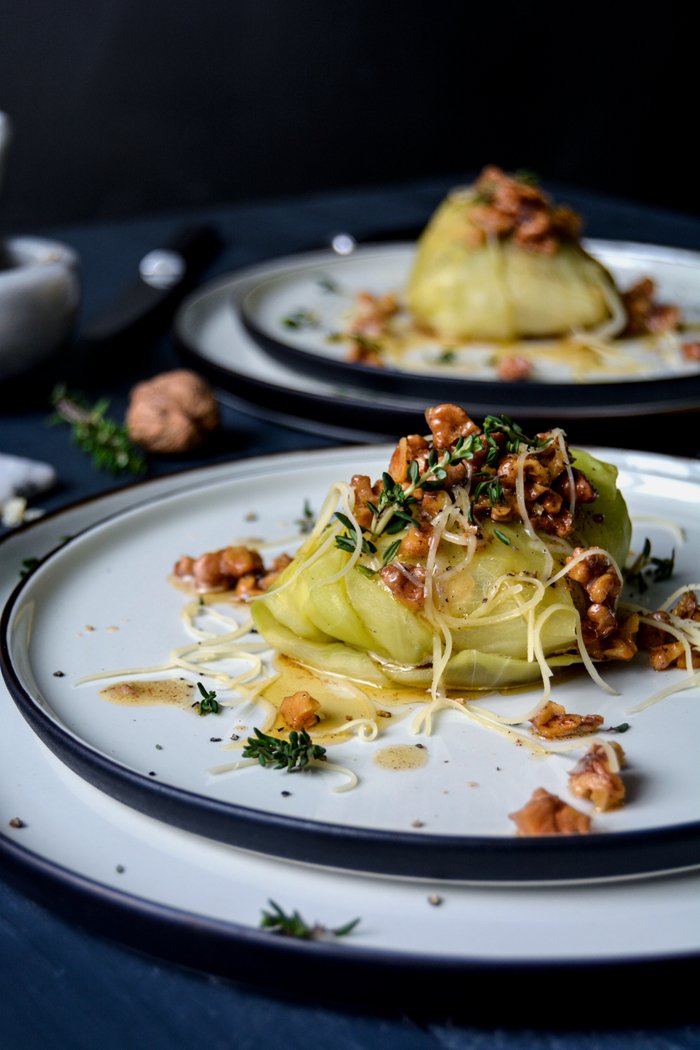
Potato and Apple Stuffed Cabbage Rolls with Walnut Butter and Gruyère

Here we are again: I've reached that critical time of the year - as always in February - when it's still all about cabbage and roots at the market, but I start dreaming of juicy tomatoes and cucumbers, sweet berries and peaches, and seafood dinners at the sea - my mind, impatient and hungry, is already settled in summer.
Luckily, February is quite a short month, then we have March, which at least offers ramps towards its end. In April I can feel the sun getting warmer, the sky becomes brighter, and the produce on my counter tops slowly starts to look more colorful. But for now, I must wait and enjoy what I've got - a beautiful crisp head of cabbage.
I blanched the large outer cabbage leaves and stuffed them with boiled potatoes, sour apple, fresh thyme, and a few spoonfuls of mascarpone, instead of sour cream, to bind the mixture. My personal highlight was the topping of crunchy walnut butter and freshly grated Gruyère. Any aromatic hard cheese would work here, but there's something about this combination of the roasted nuts and this slightly sweet Swiss cheese that fits perfectly to these little wintery cabbage packages.

Potato and Apple Stuffed Cabbage Rolls with Walnut Butter and Gruyère
For the cabbage rolls
large white or green cabbage leaves 8
peeled potatoes, boiled and chopped, about 250g / 9 ounces
small apple, peeled, cored and chopped, 1
fresh thyme leaves 1 tablespoon
mascarpone (or sour cream or ricotta) 3 tablespoons
organic egg 1
nutmeg, preferably freshly grated
fine sea salt
ground pepper
white wine
For the walnut butter
butter 60g / 1/4 cup
walnuts, roughly chopped, 25g / 1 ounce
For the topping
Gruyère, or any aromatic hard cheese, finely grated, about 2 tablespoons
a few fresh thyme leaves
black peppercorns, crushed in a mortar
For the cabbage leaves, take a large cabbage head and trim the bottom. Carefully peel off 8 large outer leaves. If they tear a little, it's fine. You'll only need 4-5 blanched leaves, blanch the remaining leaves to cover torn patches in the leaves that you use for the rolls.
Preheat the oven to 200°C / 400°F.
In a large pot, bring salted water to the boil and blanch the cabbage leaves for about 4-6 minutes or until tender. Rinse quickly under cold water, drain and cut out the hard stalk (in a slim triangle-shape).
For the filling, in a large bowl, combine the boiled potatoes, apple, and thyme. Whisk together the mascarpone and egg and season with salt, pepper and nutmeg. Add to the potato-apple mixture, stir to combine, and season with salt and pepper to taste.
Lay 4-5 cabbage leaves flat on the kitchen counter and cover torn parts with soft pieces of the remaining leaves. Put a generous tablespoon of the filling in the middle of each cabbage leaf, fold up the sides and roll it up, starting from the side of the stalk. Don't worry if they don't look perfect, mine didn't either. They can all have their individual shape.
Transfer the cabbage rolls to a baking dish and cover the bottom with a splash of white wine and some water. Bake in the oven for about 30-35 minutes or until golden and firm.
While the cabbage rolls are baking in the oven, prepare the walnut butter: In a small saucepan, melt the butter on high heat. When it's sizzling hot, add the walnuts and turn the heat down to medium. Roast for 10-20 seconds or until golden but not dark. Take the saucepan off the heat.
Divide the cabbage rolls between plates and drizzle with a little butter. Sprinkle with the roasted walnuts, fresh thyme, Gruyère, and crushed pepper.


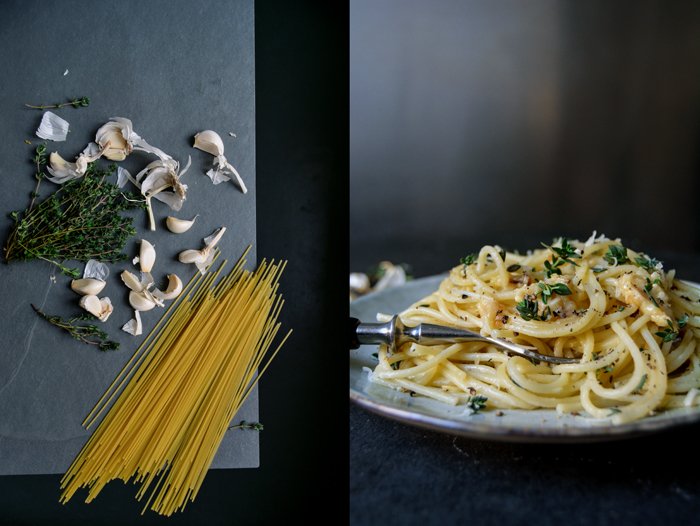
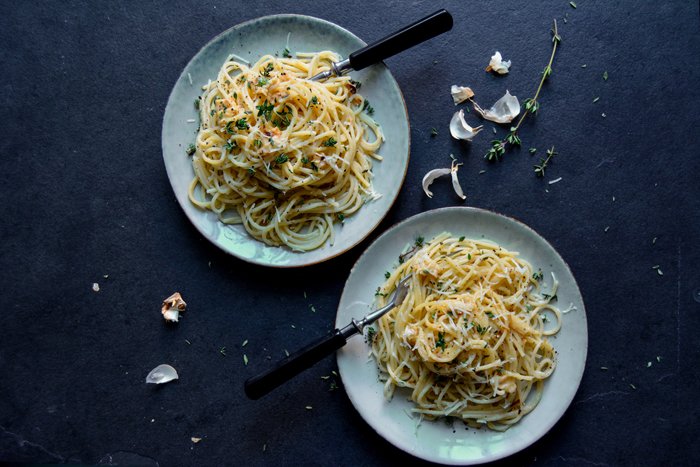
Roasted Garlic Butter Spaghetti with Thyme

The amount of garlic in this velvety, buttery pasta recipe sounds intimidating but if you let go of the idea of harsh, raw garlic and think of smooth, almost perfumed, oven-roasted cloves instead, it makes a lot of sense.
I used 22 large cloves, cooked in their skins in a hot oven. This kind of roasting turns them into a sweet, almost caramelized paste, so soft that you can mash them with a fork. I only mixed them with a bit of butter and salt and my pasta dish was almost done. Just young pecorino melted on top of the spaghetti - Parmesan would have been too strong and salty - and a few fresh thyme leaves and crushed peppercorns to balance out the sweetness.
It's a simple dish but there's something very sensuous and satisfying about it at the same time. If I weren't such a traditionalist, I could even consider exchanging my annual Christmas duck with this plate of pasta. A bottle of extravagant Bordeaux - bought without looking at the price, seeing that the dish itself wouldn't cost much - and my relaxed Christmas Eve would be sorted. However, I can't live without my slow roasted bird on the 24th December - which is Christmas in Germany. It was just a thought.


Roast Garlic Butter Spaghetti with Thyme
Serves 2
garlic 22 large cloves (in their skin)
spaghetti 200g / 7 ounces
butter, soft, about 30g / 2 tablespoons
flaky sea salt
young pecorino, freshly grated, about 2-3 tablespoons
fresh thyme leaves, about 2 tablespoons
black peppercorns, crushed in a mortar
Preheat the oven to 220°C / 425°F (conventional setting).
Spread the garlic in a large baking dish and roast in the oven for about 25 minutes or until soft. Turn the cloves occasionally and mind that they don't burn. Let them cool for a few minutes, peel them out of their skins and transfer them to a blender or food processor.
Cook the pasta in a large pot in plenty of salted water until al dente.
Add the butter and a little salt to the garlic in the blender and purée until smooth. Season with salt to taste.
Mix the warm spaghetti with the garlic butter and divide between plates. Sprinkle with pecorino, thyme, and pepper. Season with salt to taste and enjoy!


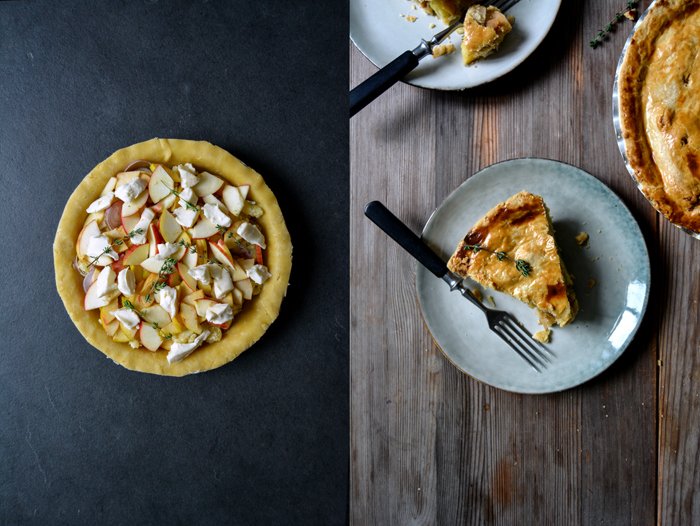
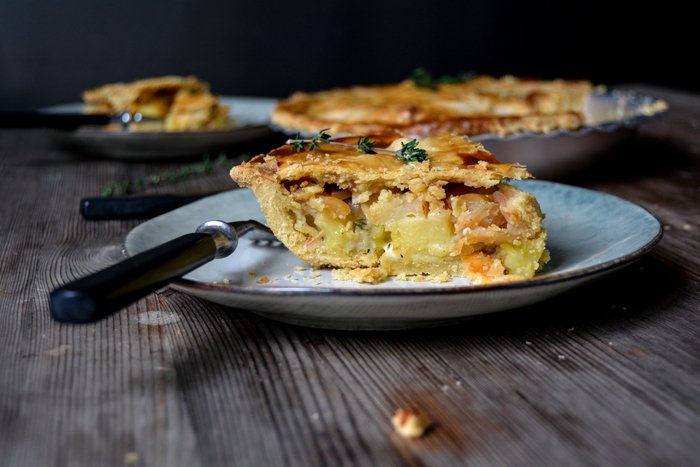
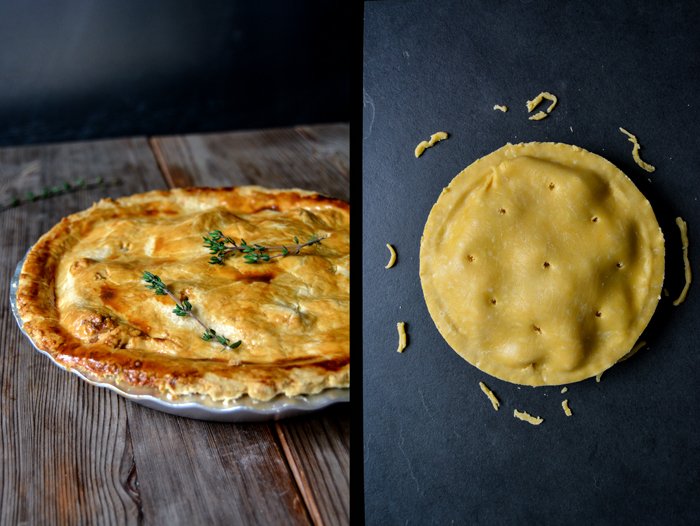
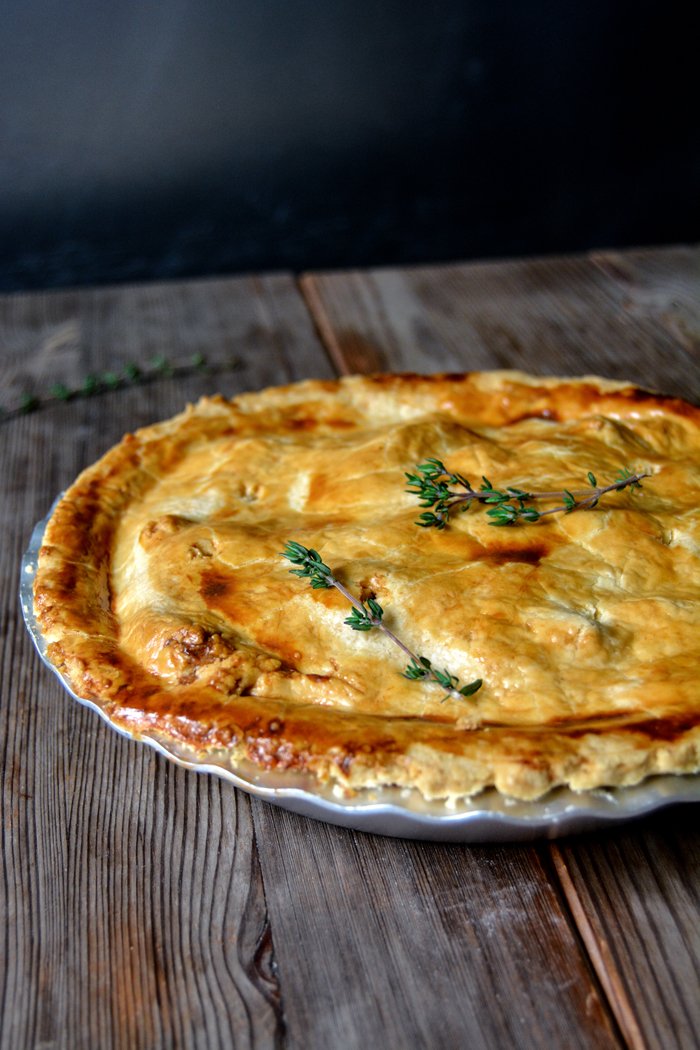
Potato, Apple and Onion Pie with Taleggio

I appreciate a good pie with a buttery crust all year round but there's something particularly satisfying about this hearty dish on a cold autumn's evening. Since the season started, I've already pulled a few of them out of my oven, Nigella Lawson's potato, cheese and spring onion pie is one of my all time favourites. Imagine coming home after a walk through the pouring rain, your bones cold and clothes wet, and then you see - and smell - this golden beauty on the table. Just the idea is so tempting that I could walk straight back into my kitchen and bake another pie.
Nigella's recipe inspired me to think about possible potato fillings wrapped in short crust - with apples and shallots for example. The fruits are at their peak at the moment, crisp, firm and packed with juices, they fill the air in my kitchen with the sweet smell of autumn. I sliced them thinly and layered them with onions to melt into the rich aroma of fresh thyme and milky Taleggio cheese. It was a good pie, especially in combination with German black pudding sausage (Blutwurst) on the side, thickly sliced and cooked in butter. I love this season!


Potato, Apple and Onion Pie with Taleggio
Serves 3-4
For the filling
potatoes, peeled and diced, 350g / 12 1/2 ounces
heavy cream 4 tablespoons
fine sea salt
ground pepper
nutmeg, freshly grated
fresh thyme leaves 2 1/2 teaspoons
medium shallot, thinly sliced, 1
small sour apples, quartered, cored and thinly sliced, 2
Taleggio cheese, chopped, 70g / 2 1/2 ounces
For the pastry
plain flour 300g / 2 1/3 cups
fine sea salt 1 teaspoon
butter, cold, 150g / 5 1/2 ounces
organic egg yolks 2
cold water 2 tablespoons
For the glaze
organic egg yolk 1
milk 1 tablespoon
a pinch of salt
Cook the potatoes in salted water for 10 minutes, drain and let them cool completely.
Mix the cooked potatoes with the cream and season with salt, pepper, nutmeg and thyme to taste.
For the pastry, combine the flour with the salt in a large bowl. Cut the butter into the flour with a knife until there are just small pieces left. Continue with your fingers and quickly rub the butter into the flour. Add the egg yolks and water and continue mixing with the hooks of your mixer until you have a crumbly mixture. Form 2 discs, dividing the dough roughly 2:1, wrap in cling film and put in the freezer for 10 minutes.
Preheat the oven to 400°F (200°C) (conventional oven).
Whisk the egg yolk, milk and salt for the glaze.
Take the dough out of the freezer and roll out both discs between cling film, the bigger piece for the bottom and sides and the smaller one as the lid of the pie. Line a 23cm / 9″ shallow pie dish or a 20 ½cm / 8" loose bottom springform pan with pastry. Spread the potatoes on top of the dough, cover with a layer of onions and a layer of apples and finish it off with the cheese. Close the pie with the smaller pastry lid, gently push the rim with your fingers to seal it. Make a few small holes in the top with a skewer and brush the pastry with the egg glaze. Bake the pie for 15 minutes before you turn the heat down to 350°F (175°C), bake for another 45 minutes or until the pie is golden and the pastry is baked through. Let the pie cool for at least 15 minutes before you cut it into pieces.
Serve on its own or with thick slices of black pudding cooked in a pan in hot butter for just a couple minutes.


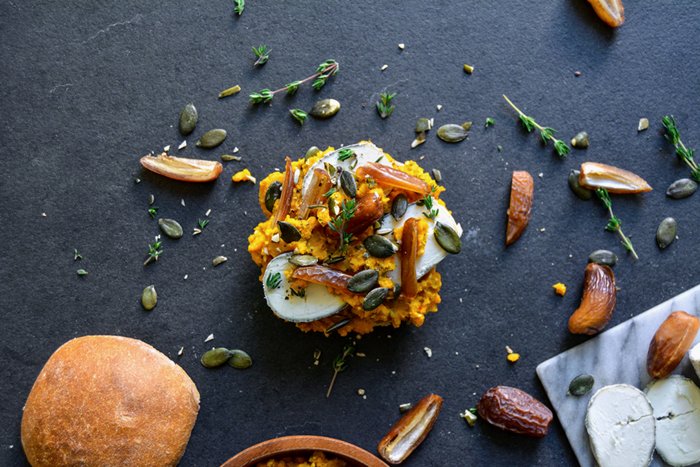
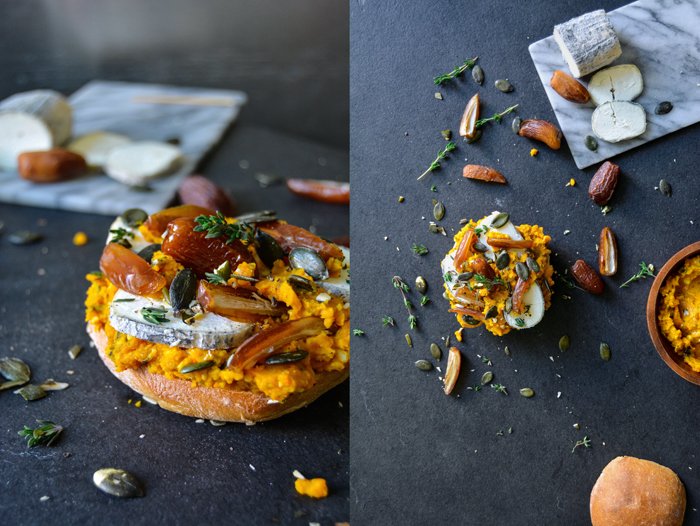
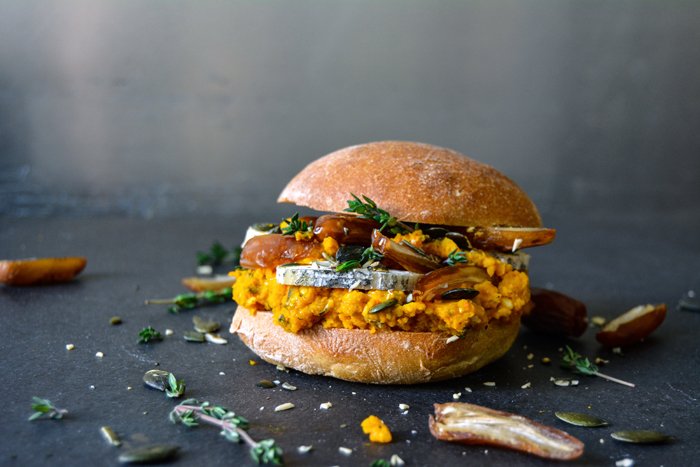
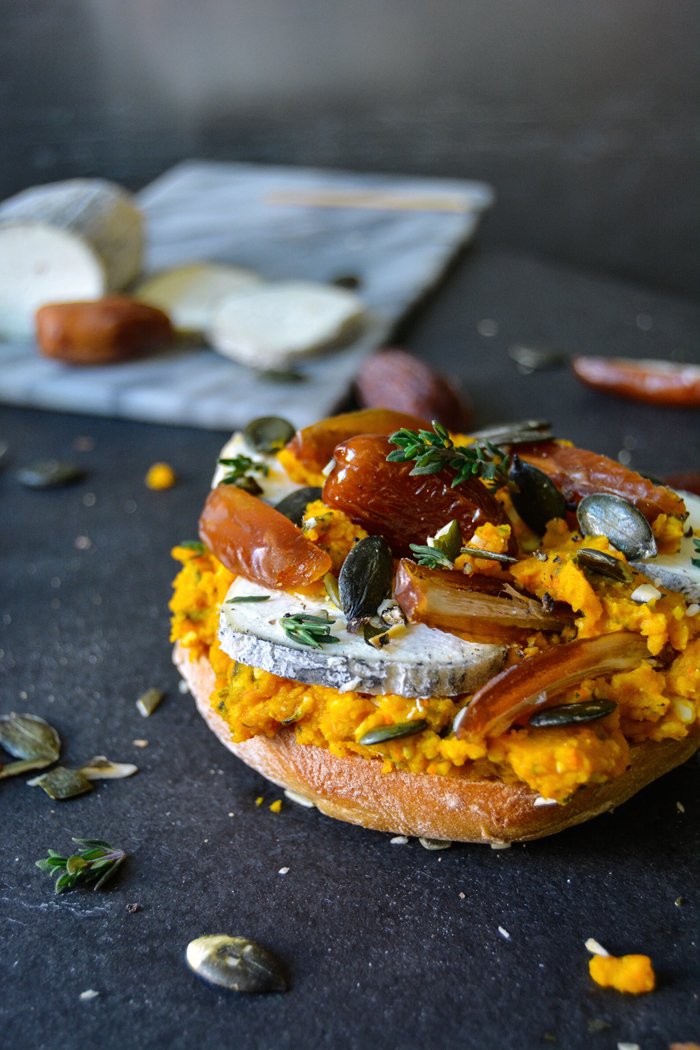
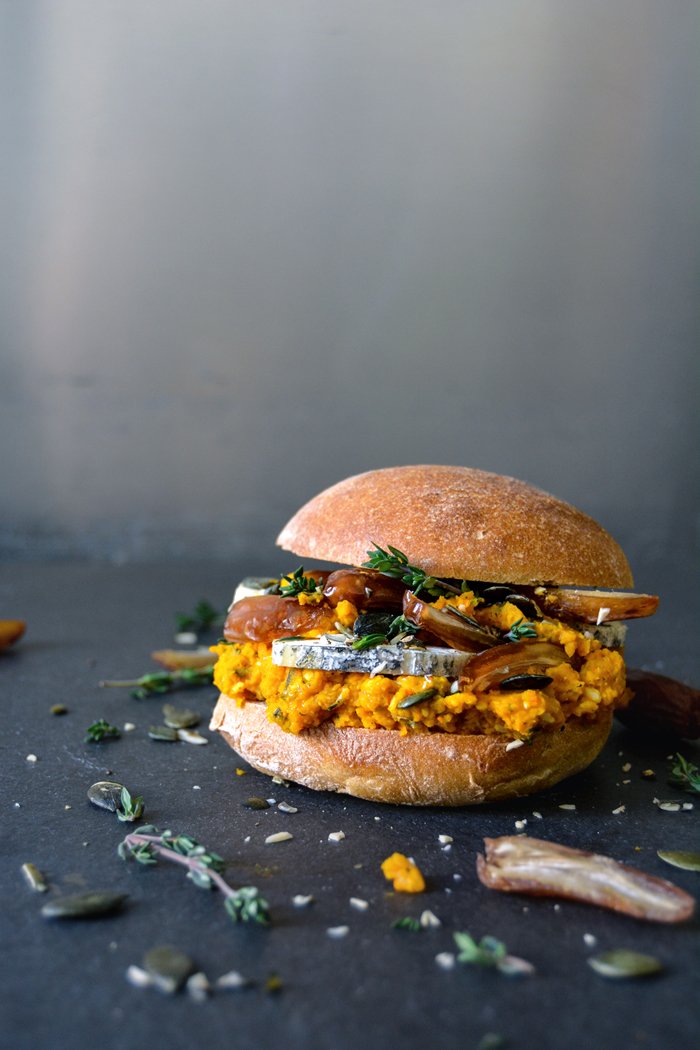
Pumpkin Pesto, Date and Ripe Chèvre Sandwich
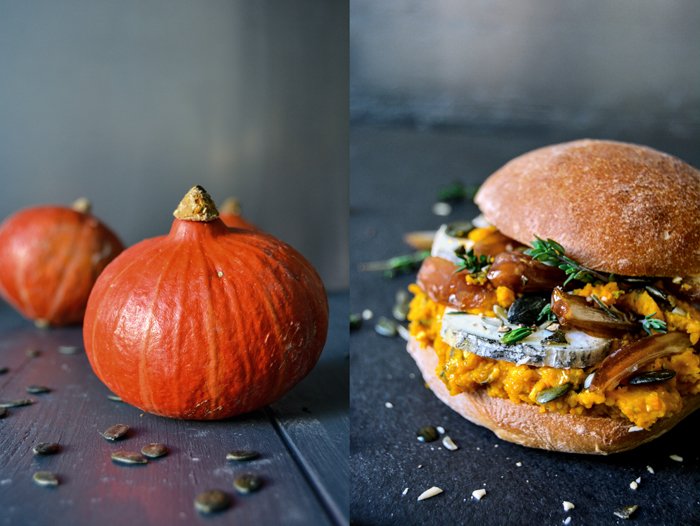
They are finally back on my windowsill - colourful pumpkins in all shades, shapes and sizes! At the beginning of a new season I tend to hoard nature's new produce like a squirrel. My excitement for the fruits and vegetables that I've been missing and looking forward to for months causes irrational behavior at the market. When I came home with enough pumpkin to feed a large Mediterranean family I thought it would be a good idea to purée one of them and make space on my crowded kitchen tops. I turned it into a pesto.
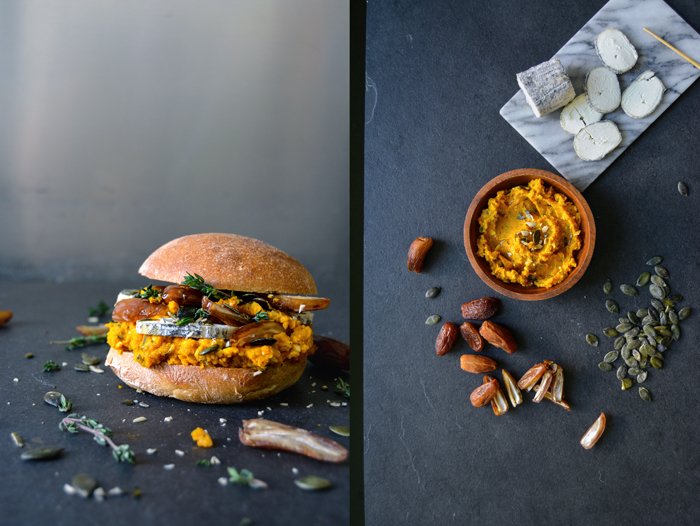
Pesto comes from the Italian word pestare, meaning to pound and to crush, herbs are the most common ingredient but vegetables are an equally delicious but often neglected addition. Broccoli, asparagus, beans, peas, there are no limitations. Winter squash is packed with taste and subtle sweetness, once puréed the texture is so smooth that it seems like pumpkin is practically made to become a pesto. You can use canned purée or cook the squash in the oven, which I always prefer, it tastes better. My bright pesto is refined with orange juice and zest, thyme and the vegetable's seeds. I went for Hokkaido as you can use its skin and I appreciate its nutty flavour, butternut or Musque de Provence work just as well. I'm sure it would be scrumptious stirred into warm spaghetti but I spread it voluptuously on a sandwich instead, with dried dates to enhance the sweetness and Sainte-Maure de Touraine affiné, an aromatic ripe Chèvre.
Pumpkin Pesto, Date and Ripe Chèvre Sandwich
You can also use the pumpkin pesto for pasta dishes.
Makes 3 sandwiches
dark buns, cut in half, 3
Sainte-Maure de Touraine affiné, sliced, 80g / 3 ounces (or any other aged Chèvre)
juicy dates, pitted, quartered, 3-4
fresh thyme leaves, 1 tablespoon
pumpkin seeds 1 tablespoon
black peppercorns, crushed in a mortar
For the pumpkin pesto
Hokkaido (with skin) or butternut squash (peeled), cut into cubes, 350g / 12 1/2 ounces
pumpkin seeds 2 tablespoons
olive oil 2 tablespoons
freshly squeezed orange juice 1 tablespoon
orange zest 1/4-1/2 teaspoon
fresh thyme leaves 1-2 teaspoons
salt
Preheat the oven to 200°C / 390°F (convection oven).
Spread the pumpkin in a baking dish and fill the bottom with water (about 60ml 1/4 cup). Wet a large piece of parchment paper, big enough to cover the baking dish and lay it on top of the pumpkin. Cook it in the oven for about 20 minutes or until tender but not mushy. Purée the pumpkin in a food processor, add the pumpkin seeds, olive oil, juice, zest, thyme and salt and purée until smooth. Season with orange, thyme and salt to taste.
Spread the pumpkin pesto voluptuously on the bottom side of a bun, lay the Chèvre on top and sprinkle with pumpkin seeds, dates, thyme and pepper. Enjoy!

An Autumn Breakfast - Mushroom and Potato Buns with Thyme
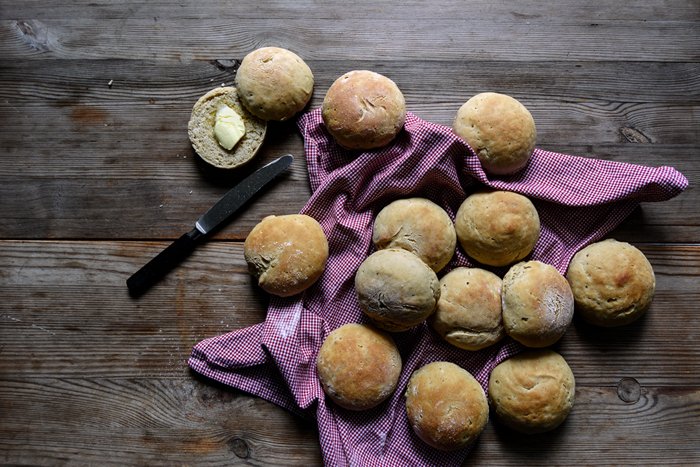
As soon as the sweet and earthy smell of my warm autumn buns reached my nose, I felt at peace again and forgave my gnocchi recipe for not performing as expected. A few days ago I mentioned that I had the genius idea to make mushroom gnocchi with chopped porcini and chanterelles stirred into the mixture. However it was a rather frustrating experience, no matter how much flour I added to the soft dough, it was too moist and the texture didn't change at all. It was impossible to form anything resembling gnocchi. After adding a full 1kg-package (2 1/4 pounds) of flour I gave up, it seemed hopeless and I was ready to chuck everything in the bin. Luckily my boyfriend suggested turning the dough into bread - a juicy loaf of potato bread, fluffy, light and juicy - simply satisfying. All of a sudden the recipe made sense, I mixed in a little more flour, some yeast and let it rise for an hour. This gave me enough time to calm down and think about how I'd like to shape my aromatic autumn creation. I went for buns, 24 to be precise, enough to eat mushroom potato buns for the next 2 weeks. It wouldn't have been a big deal, they taste fantastic, but I decided to freeze half the batch for cozy weekend breakfasts. Instead of going to the bakery on Sunday mornings I'll just switch on the oven and fill my kitchen with the aroma of thyme, porcini and chanterelles. 24 buns made of 1600g (3 1/2 pounds) flour can be a bit intimidating for a weekend baker so I scaled down the recipe by half.
The past few weeks have been so busy that I didn't even realize that it's been a month since we got back from our Mediterranean island. I miss it, of course, and I felt so happy when Molly from My Name Is Yeh asked me if I'd like to meet her in Malta. A short trip with friends took her to the archipelago and I would have given a lot to make it possible for us to finally meet after our cross-continental kitchen talk a few months ago. Unfortunately, I didn't manage, the final work on my book has kept me anchored to Berlin and my computer. But she went and enjoyed it so much that she wrote a sweet post about her 3-day trip and her new culinary discovery: Timpana, click here for her travel experiences!
I've kept one special bit of news for the end: Ever since I held Nigella Lawson's Domestic Goddess in my hands for the first time, I've been a great admirer of her work. So when she decided to share my vanilla profiteroles on her Instagram, it was a very, very happy day. Thank you Nigella! And here it is!


Mushroom and Potato Buns with Thyme
Keep in mind that the potato mixture for the dough has to cool in the fridge before mixing it in, you can prepare this step a day in advance.
Makes 12 buns
starchy potatoes, cut into cubes, 450g / 16 ounces
butter 30g / 2 tablespoons
organic egg yolks 2
plain flour, white spelt (type 630) or unbleached wheat, 810g / 6 1/4 cups
dry yeast 1 sachet (7g / 1/4 ounce)
salt 4 teaspoons
ground pepper
nutmeg, preferably freshly grated
fresh thyme leaves 1/2 tablespoon
mixed mushrooms, finely chopped, 100g / 3 1/2 ounces (half porcini, quarter chanterelles and quarter king oyster mushrooms)
Cook the potatoes in salted water until soft, about 15 minutes, drain well in a colander and press through a potato ricer. Mix immediately with the butter and egg yolks and let it cool down to room temperature before you put it in the fridge to cool completely. You can prepare the mixture a day in advance.
Scrape the cool potato mixture into a large bowl.
Combine the flour, yeast, salt and a generous amount of ground black pepper and nutmeg. Add the dry flour mixture, the thyme and mushrooms to the bowl with the potatoes. Mix with the hooks of an electric mixer for about 7-10 minutes until well combined. The dough will be soft and damp, if it's too sticky, add more flour. Cover the bowl with a tea towel and let it rise in a warm oven (35°C / 95°F) for 60 minutes (top/ bottom heat and not fan-assisted!).
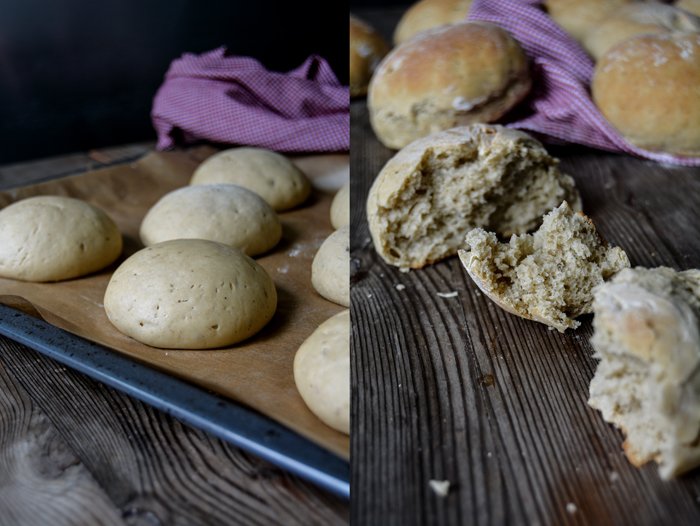
Punch the dough down, take it out of the bowl and knead for half a minute. Divide it in 12 portions, dust your hands with flour, put a portion of dough on the palm of your hand and roll with the other hand, holding it like a dome. Turn the dough for about 1o seconds on the palm of your hand until its top is round and firm, this builds up surface tension and prevents the buns from becoming flat. Continue with the remaining dough and lay the buns on a baking sheet lined with baking paper. Cover them with a tea towel and let them rise for about 15 minutes in a warm place.
Set the oven to 220°C / 430°F (top/ bottom heat).
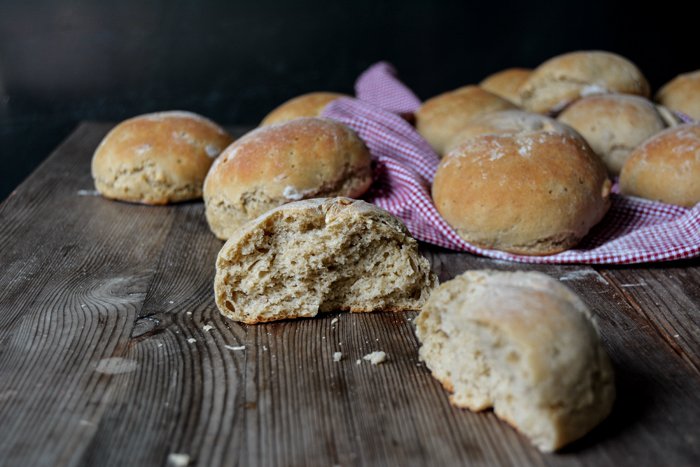
Bake the buns for about 11 minutes or until golden brown, knock on the bottom of a bun, it should sound hollow.


About helping and sharing - and a Provençal Artichoke Quiche

Everybody's life can be a feast and a tragedy at times, it can be calm and peaceful in one second and rocky and rough in the next. In these moments, all of us need a helping hand or someone who listens. I believe, I know, that there's no one out there who wasn't ever in need of help. It starts when we're born, when our mothers are there for us, giving without asking for anything in return. That's love. And all along the way, we meet so many people who are there for us and reach out when in need. Shouldn't we all be willing to do so? Why is it so hard for some to show compassion and be there for the ones in need of help? Why can't we - as those who are much better off and on more stable ground - be there for the ones who are hurt, exiled and persecuted? I believe we should treat others as we would want to be treated. If we refuse to help why should we expect help when we are in a difficult situation?
My grandmother decided to leave East Germany when the wall - die Mauer - was being built, she had to flee with 6 children. They went to West Germany with literally nothing, they left their farm and land behind to escape a regime that she and her husband didn't want their children to grow up in. They were refugees in what was once their own country. But they weren't alone, many people helped them to build up their future, many shared the little they had and my family managed to get back on their feet. 40 years later, East Germany was in need of help, the people of the West gave a share of what they had, out of solidarity, to rebuild a part of the country that had suffered for decades. The people in the East received help. That's compassion. Today, hundred thousands of people are willing to risk their lives and leave their homes to seek help in Europe and other wealthy parts of the world, to escape political systems that are also no longer safe to live in. Wouldn't we all do the same? Didn't we do the same throughout the history of human kind?

Paul from the Einfach-Lecker-Essen blog started the Blogger für Flüchtlinge (Bloggers for Refugees) initiative with a few of his friends to call for support and collect donations for refugee camps, first only in Berlin, and now all over Germany. The movement is growing quickly and more and more stand up every day to give a helping hand to the ones in need. Please spread the word if you write a blog (#BloggerFuerFluechtlinge), you can support the initiative with a donation here.
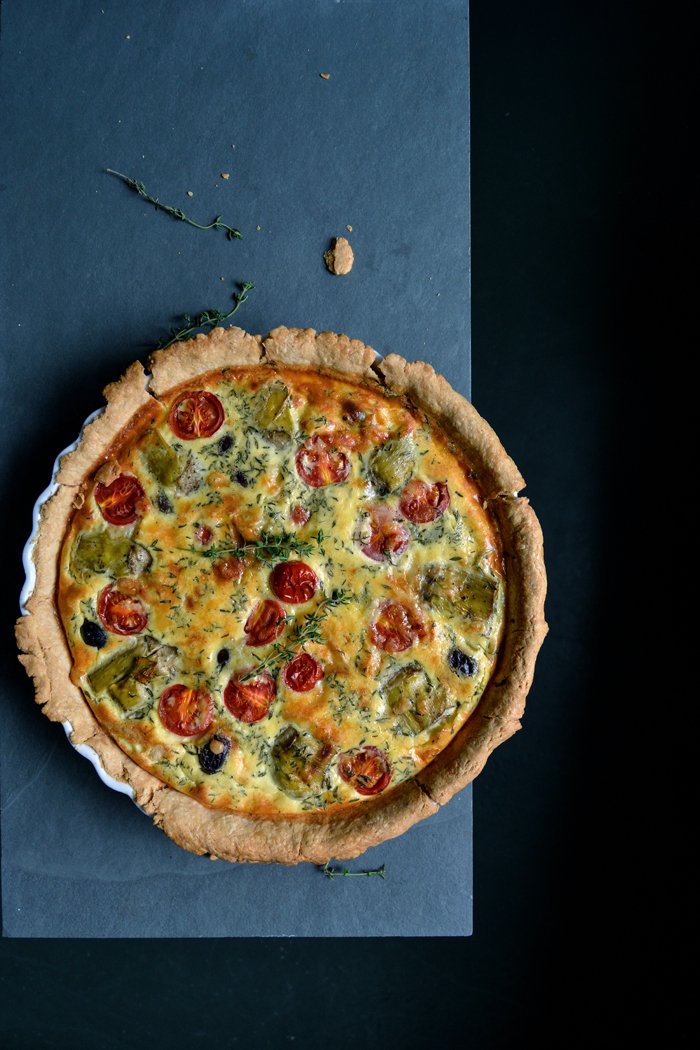
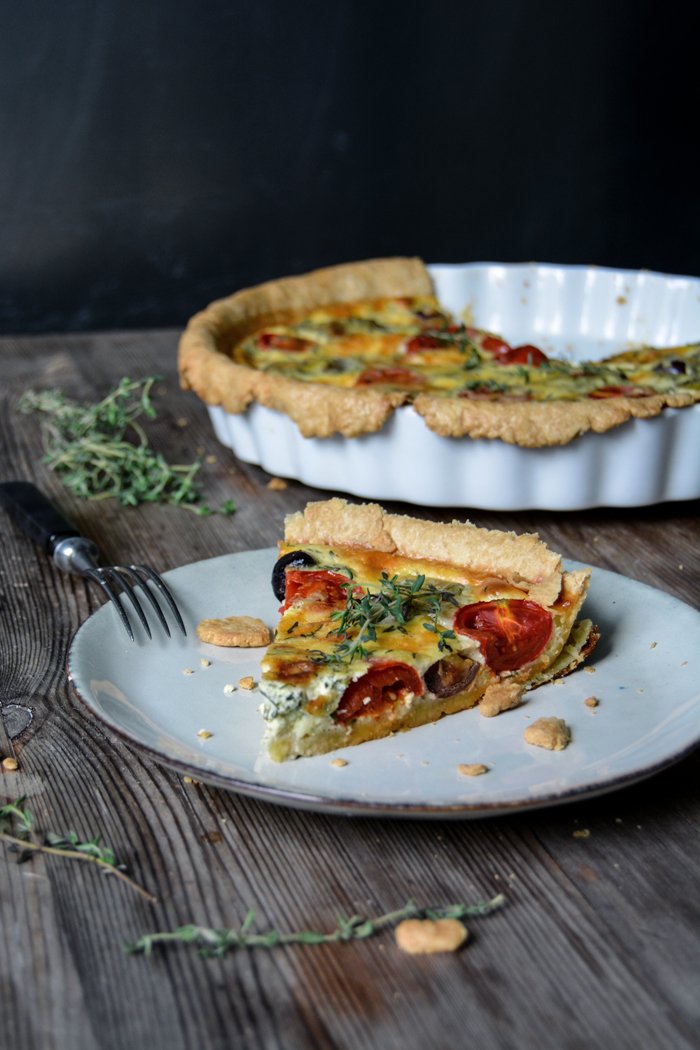
Today's recipe is a dish that is practically made to be shared - a fragrant golden quiche. A quiche is like a friend, it always makes me feel good and at home wherever I am, it's down to earth comfort food. Add some preserved artichoke hearts, tomatoes, olives, thyme and aromatic Gruyère cheese to the filling and you have a late summer Provençal picnic tart. And when we sit there in peace, enjoying the food together with the ones we love, a scene that's so normal for most of us, we shouldn't forget that this is what everybody aspires to. Nothing more and nothing less.
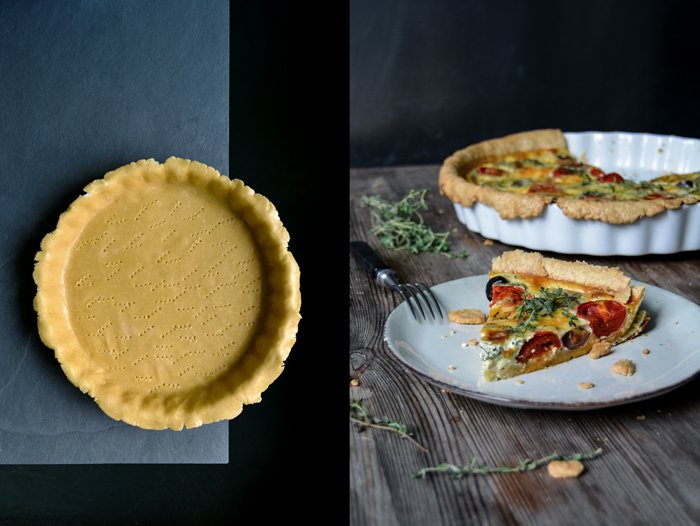
Provençal Artichoke Quiche
For a 30cm / 12″ tart pan or baking dish you need
For the short crust base
plain flour 260g / 2 cups
salt 1 teaspoon
butter, cold 130g / 4 1/2 ounces
organic egg 1
For the filling
organic eggs 4
heavy cream 125ml / 1/2 cup
sour cream 175g / 3/4 cup
fresh thyme leaves 3 tablespoons plus a few sprigs for the topping
salt 1 teaspoon
ground pepper
nutmeg, freshly grated, a generous amount
large preserved artichoke hearts, cut in half (lengthwise), 3
black olives (preferably Kalamata) 10
cherry tomatoes, cut in half, 10
Gruyère cheese (or any other aromatic hard cheese), grated, 2-3 tablespoons
For the pastry, combine the flour and salt in a large bowl. Cut the butter with a knife into the flour until there are just little pieces of butter left. Continue with your fingers and rub the butter into the flour until combined. Add the egg and continue mixing with the hooks of your mixer until you have a crumbly mixture. Form a disc, wrap in cling film and put in the freezer for 12 minutes.
Set the oven to 200°C / 390°F (top/ bottom heat).
Roll out the dough between cling film and line the baking dish with the flat pastry. Prick it with a fork and blind-bake in the hot oven for 15 minutes or until golden.
Take the baking dish out of the oven and set the temperature down to 180°C / 355°F.
Whisk the eggs with the heavy cream, sour cream, thyme, salt, pepper and nutmeg.
Arrange the artichoke hearts, olives and tomatoes on top of the pre-baked pastry base, pour in the egg-cream mixture and sprinkle with cheese. Bake the quiche in the oven for about 55 minutes or until golden brown, the top should be firm. Let it cool for a few minutes and garnish with the thyme sprigs. Serve cold or warm.


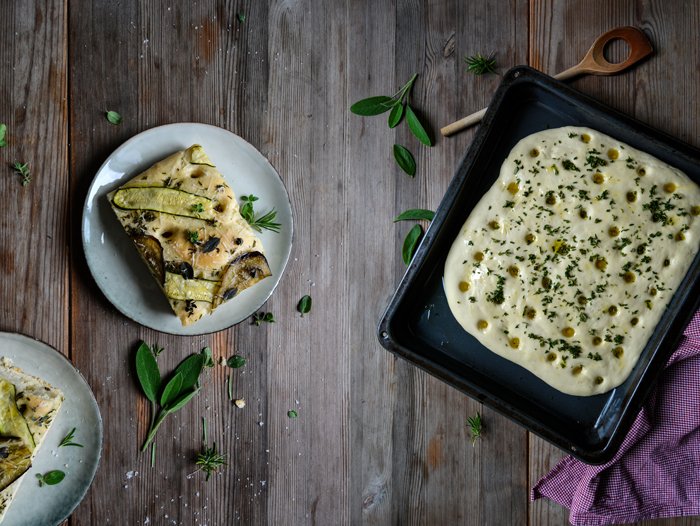
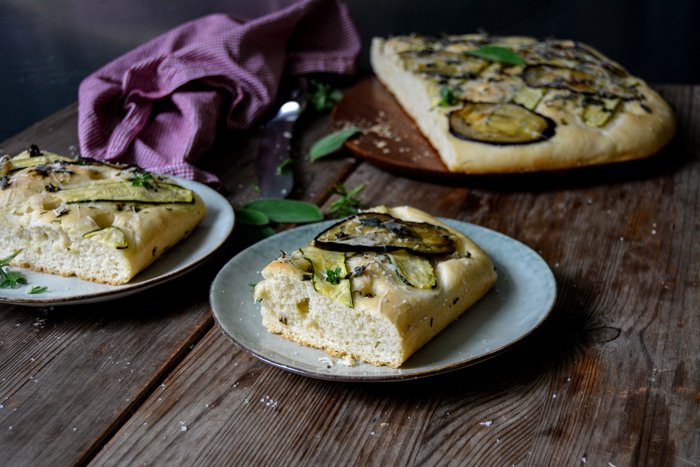
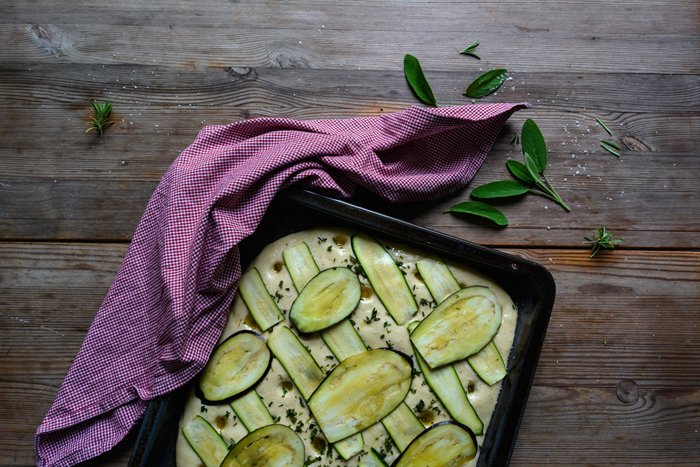
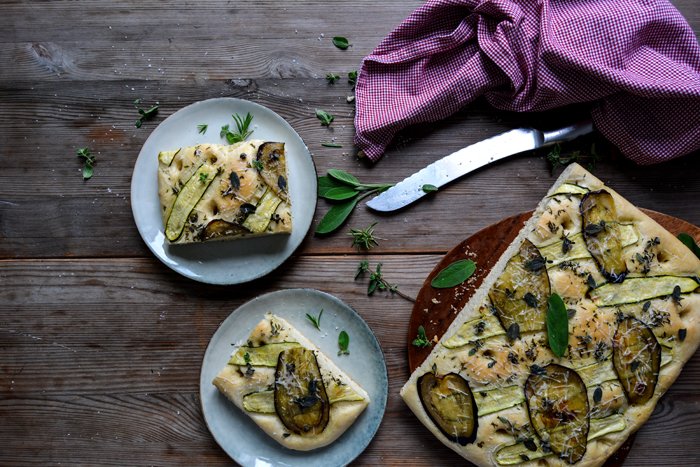
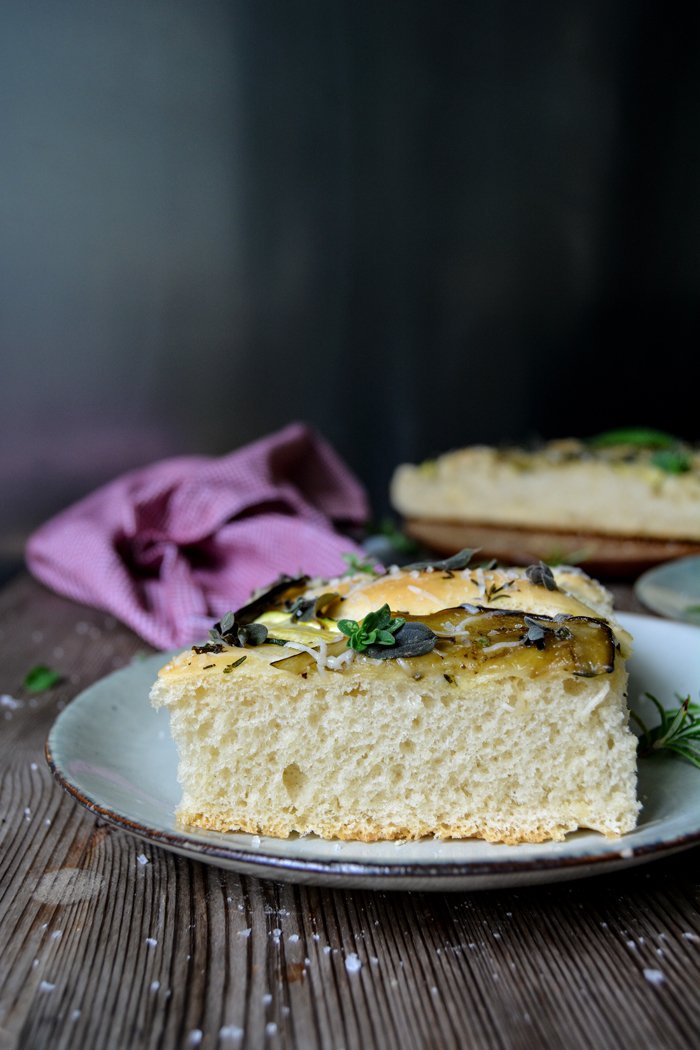
Herb Focaccia with Zucchini, Aubergine and Parmesan
This is one of my most beloved summer scenes: juicy focaccia topped with fragrant herbs on the table next to an aromatic selection of cheese and a chilled bottle of rosé wine waiting to be opened. Sometimes it impresses me how easy it can be to create a little holiday even in my own home. Although I have to admit that warm temperatures and a clear blue evening sky definitely help to put my mind in the right mood, scrumptious food is even more efficient.
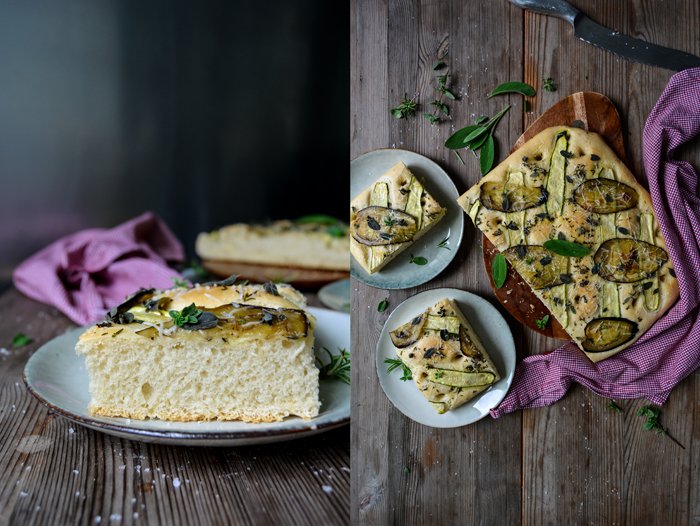
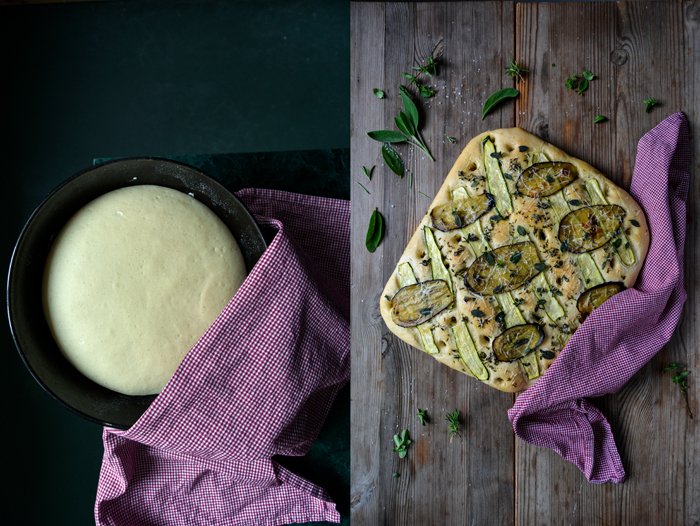
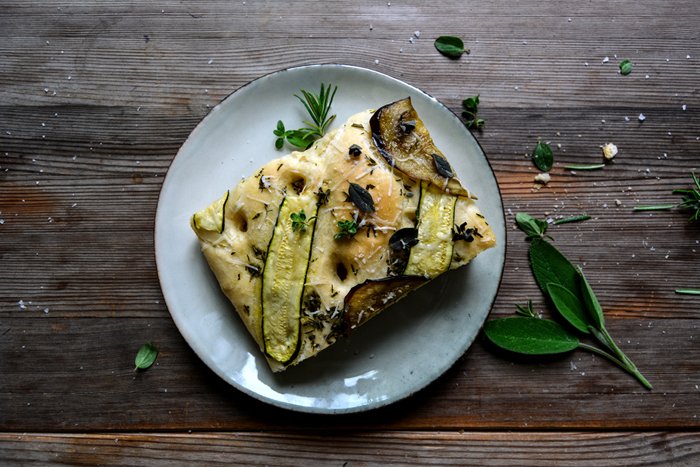
I used my reliable focaccia recipe to make the soft Italian bread, it's so oily that my fingers feel deliciously smooth and sticky after each bite. Last year I fell in love with a topping of dark grapes and rosemary, in 2015 I'm falling for an almost pizza-like creation. I picked a selection of rosemary, thyme and sage right from the front row of my window sill garden, chopped them finely and spread the green crumbles over the puffy, risen yeast dough. Thin slices of zucchini and aubergine came next to form a pretty grid pattern and add their summery fruitiness. To finish it off, I sprinkled my golden focaccia with fresh oregano and Parmesan. It's such a teaser, when I opened the door to take out the baking sheet, the warm smell of yeast, herbs and cheese caressed my nose. At this point, I definitely felt like I was somewhere in the south of Italy.
Herb Focaccia with Zucchini, Aubergine and Parmesan
For a 25 x 32cm / 10 x 12 1/2″ focaccia you need
plain flour 500g / 17 1/2oz
dry yeast 1 sachet (7g / 1/4 ounce)
salt 1 teaspoon
sugar 1 heaping teaspoon
water, lukewarm, 260ml / 1 cup and 2 tablespoons
olive oil 120ml / 1/2 cup (half for the dough and half for the topping)
fresh herbs (rosemary, thyme, sage), finely chopped, 2 generous tablespoons
small zucchini, very thinly sliced (best with a vegetable/ mandoline slicer), 1
medium aubergine, very thinly sliced, 1/2
flaky sea salt, for the topping
Parmesan, grated, 3 heaping tablespoons
fresh oregano, the leaves of a small handful of sprigs (about 2 heaping tablespoons)
In a large bowl, combine the flour, yeast, salt and sugar. Add the water and half the olive oil (60ml / 1/4 cup) and mix with the hooks of an electric mixer for a few minutes until smooth and well combined. Continue kneading with your hands for a few minutes until you have an elastic dough ball. Put the dough back into the bowl and cover with a tea towel. Let the dough rise in a 35°C / 95°F warm oven (top / bottom heat, no fan) for 45-60 minutes.
Take the dough out, punch it down and knead for 1 minute. Spread the dough on an oiled baking sheet with your hands until it measures roughly 25 x 32cm / 10 x 12 1/2″. Cover with a tea towel and let it rise for 20 minutes in a warm place.
Set the oven to 220°C / 430°F (top / bottom heat).
Punch about 6 x 7 holes into the surface of the dough, you can use the round bottom of a wooden spoon or your finger. Pour half of the remaining olive oil (30ml / 1/8 cup) over the dough and into the holes. Use the remaining 30ml / 1/8 cup of oil to thinly coat the sliced vegetables on both sides with your hand. Sprinkle the focaccia with the chopped herbs and lay the oiled vegetables in a cross pattern on top (start with the zucchini and continue with the aubergine). Season with sea salt and bake for 20 minutes or until golden and light brown on top. When it's done, sprinkle with Parmesan and oregano and leave in the hot oven for 1 minute.
Enjoy warm or cold at a summery table full of fruits, cheese and wine!


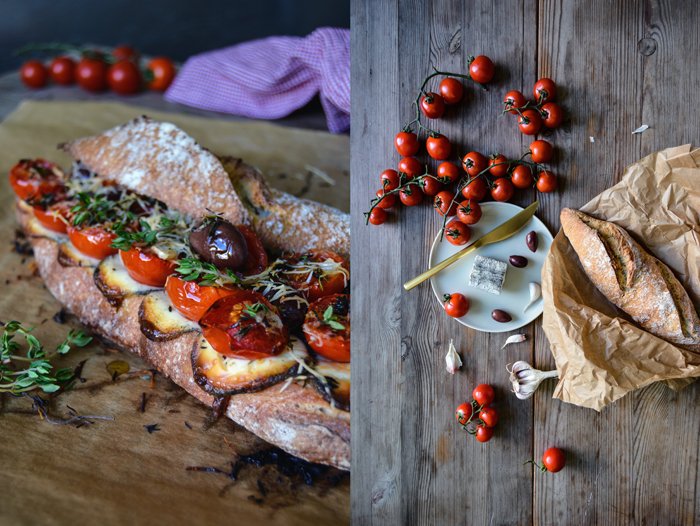
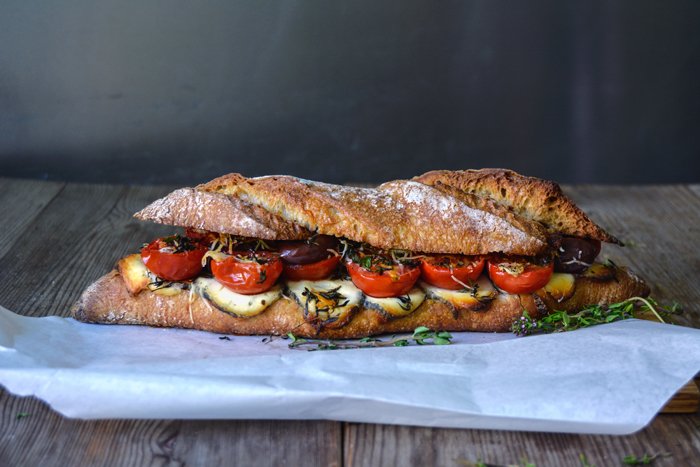
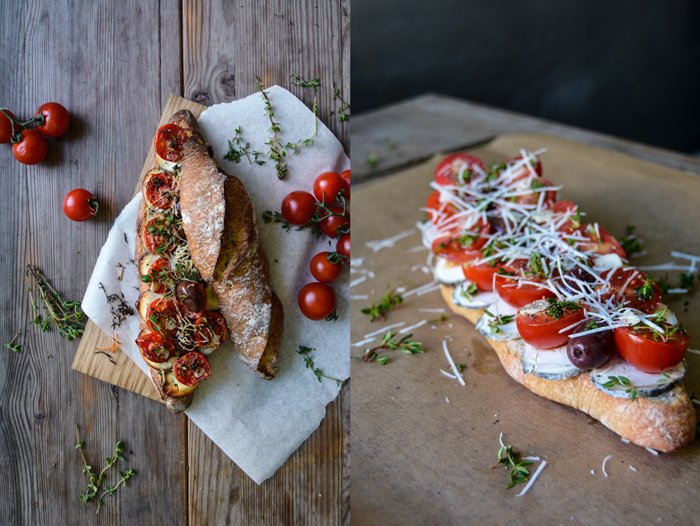
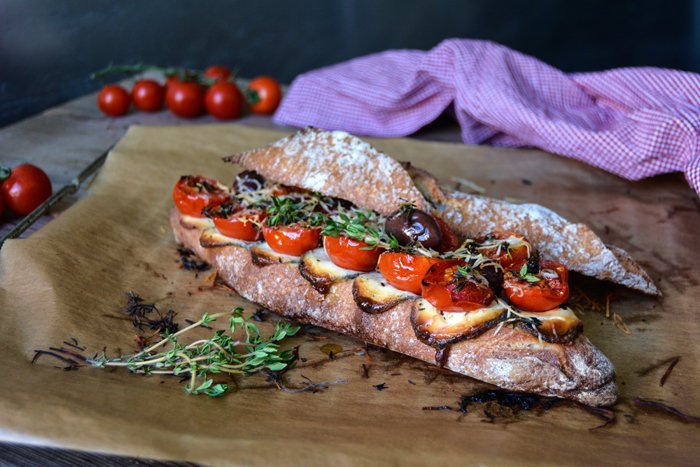
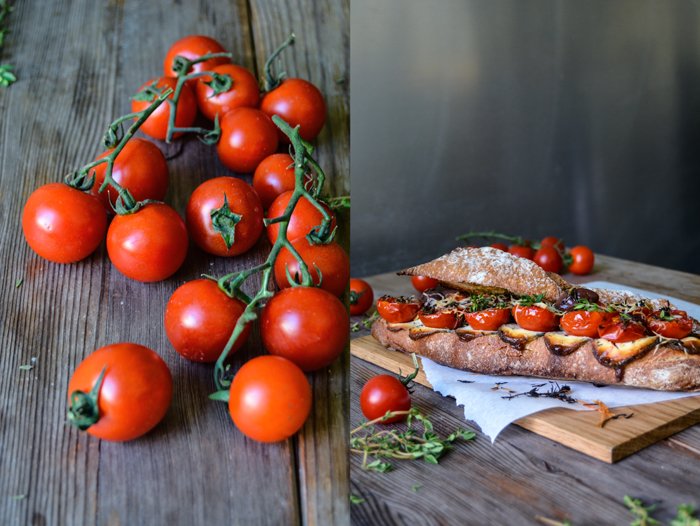
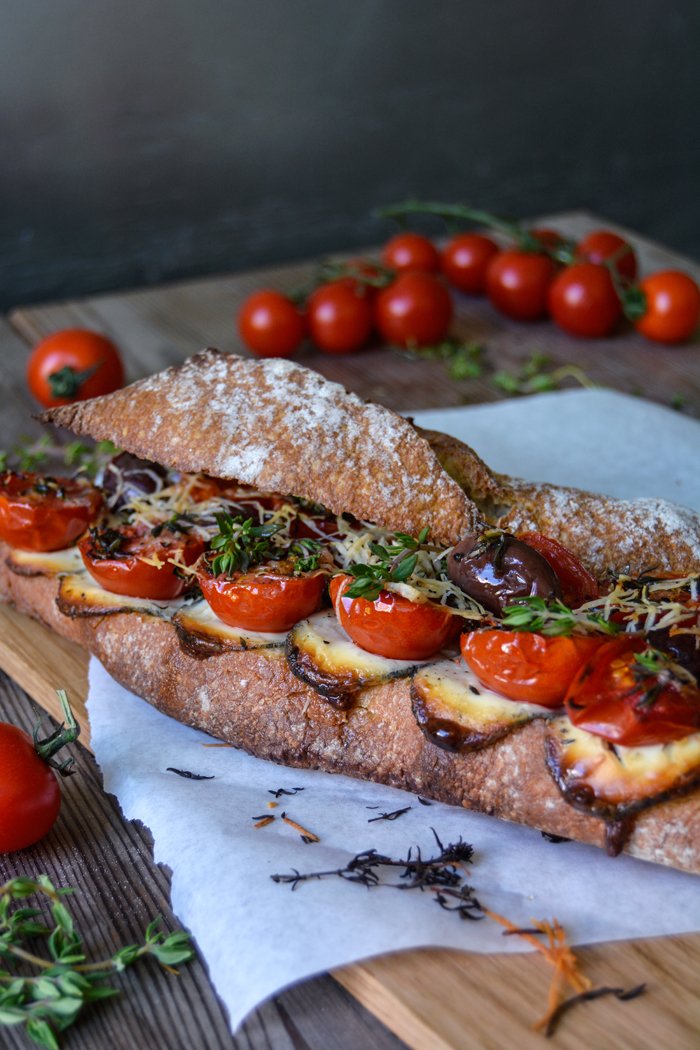
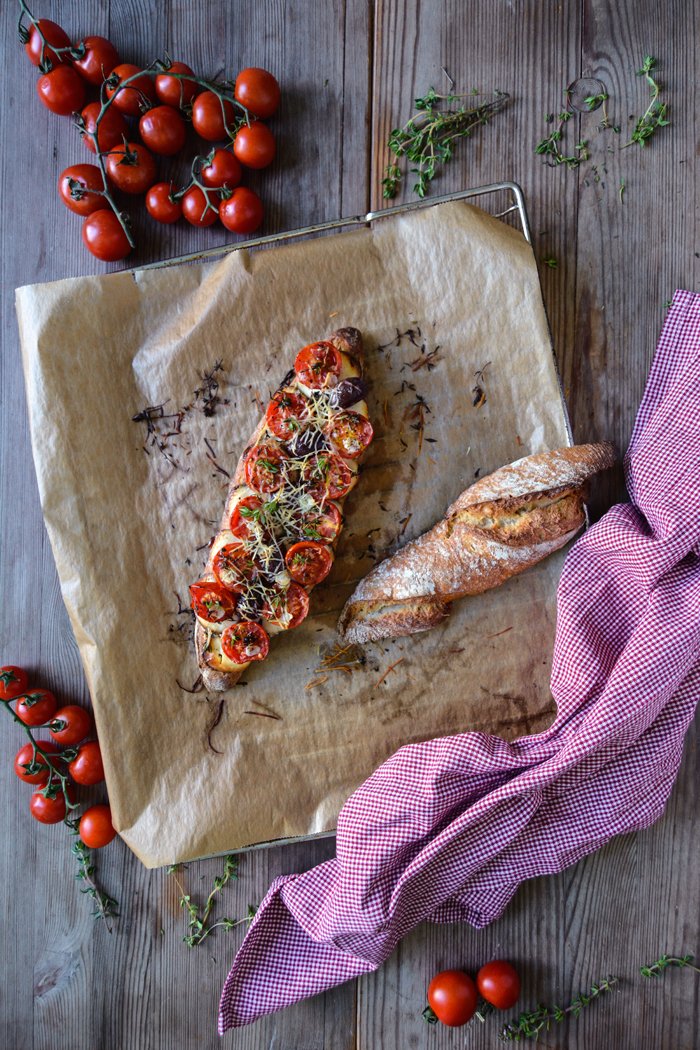
Grilled Tomato, Chèvre and Thyme Baguette Sandwich
Many summers ago, I spent a few wonderful weeks at the Côte d'Azur with my aunt, uncle and cousins. We stayed at a beautiful house in the middle of the green hills around Grasse, a picturesque town which is also called the world's capital of perfume. I think I wrote about this trip last year but after almost 500 posts I'm losing track! Never mind, I often sat with the girls of the family, my aunt and two cousins, at the pool in the garden. It was a little French paradise with all kinds of flowers, lavender, jasmine and roses turned this place into the most fragrant oasis. We had our girl chats, chilled, swam and ate, a perfect holiday!
Although I won't go to the French Riviera next month but to Malta (which I look forward to with growing excitement!), I had our peaceful Grasse garden scene in mind when I came up with today's sandwich. Imagine sitting on the fresh grass, feeling the warm morning air on your skin and the smell of a million flowers around you. You wear a summery dress and enjoy the quiet peace of the early hours of the day which is only interrupted when you take a big bite of this crunchy grilled baguette sandwich topped with chèvre, cherry tomatoes, olives, garlic, thyme and pecorino (I'm sorry, I had no French substitute at hand). Doesn't this sound just right?

Grilled Tomato, Chèvre and Thyme Baguette Sandwich
As a lunch for two you need
rustic French baguette (around 25cm / 10"), cut in half, 1
olive oil 2 tablespoons
chèvre (preferably Sainte-Maure de Touraine), very thinly sliced, 70g / 2 1/2oz
cherry tomatoes, cut in half, about 6
black olives 6
garlic, thinly sliced, 1 clove
fresh thyme leaves, from a small handful of sprigs
pecorino (or any other aromatic hard cheese), freshly grated, 2 generous tablespoons
black peppercorns, crushed in a mortar
Set the oven to 220°C / 430°F and line a baking sheet with parchment paper.
Place the bottom half of the baguette on the lined tray, brush the bread with 1 tablespoon of olive oil and spread the chèvre and then the tomatoes and olives on top. Sprinkle with the remaining olive oil, thyme, garlic, pepper and pecorino. Bake in the oven for about 20 minutes or until the cheese is melted and the tomatoes are soft. You can also bake the top half of the baguette for the last few minutes. When it's done, sprinkle with a little fresh thyme, season with salt (if necessary) and enjoy!


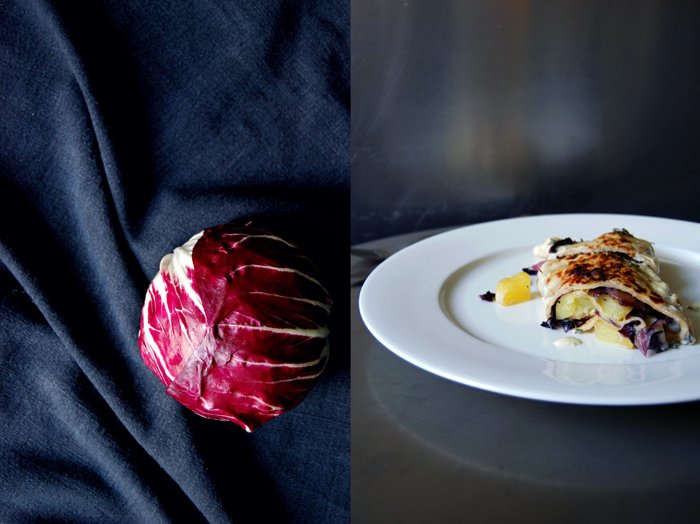
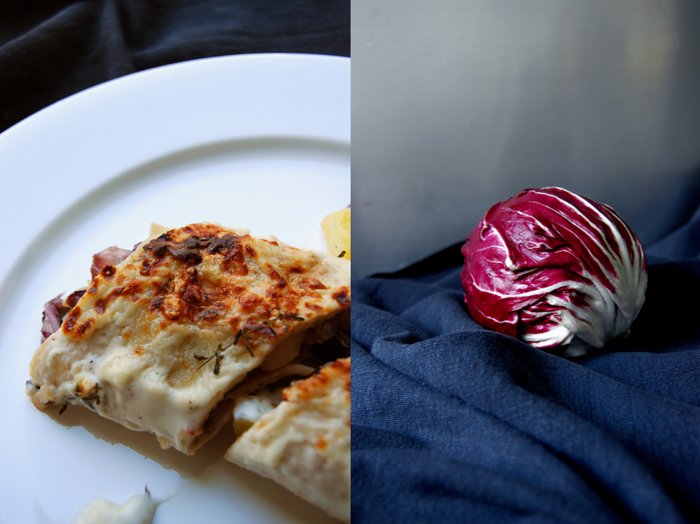
Crespelle with Radicchio, Potato and Thyme
It took me a while to use radicchio not only raw for salads but cooked as well. It was a late discovery, but once I tried it, I loved it, especially for the Italian cuisine! One of my favourites is linguine with radicchio, mustard butter and sautéed chicken liver. My friend Judith told me about this recipe and it became a winter pasta classic in my kitchen. Or my purple risotto with spices and thyme, the colour is beautiful and the mixture of cloves, bay leaf and red wine is so aromatic and rich. Radicchio is great, it's so strong, its unique bitterness is so dominant that it asks for more flavours to be added to it.
A couple days ago I mentioned that we had family from LA staying with us, so our days were split between walking through the city for some sightseeing and food, either from my kitchen or from one of the great places we visited. Italian restaurants, German restaurants, department stores (we focussed on the fish section), various cafés specialized in German cake, American cake or chocolates from all over the world. We savored for days, as always!
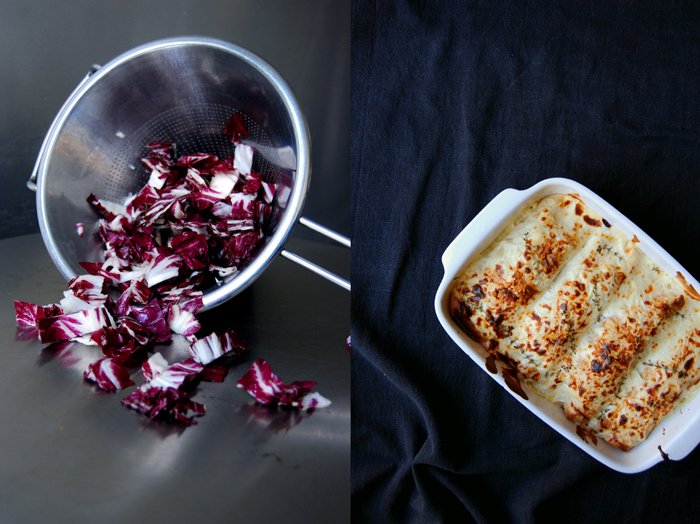
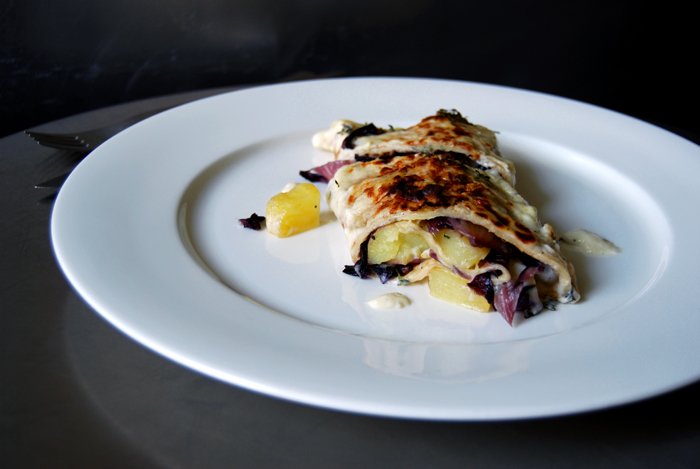
Coming back to the purple radicchio and to one of our lunches at home, I cooked crespelle for us one day, filled with a bitter sweet stuffing of radicchio, potatoes and thyme. I used the herb to refine the pancake dough and the filling which made it come though quite strong. It added a bit more taste to the crepes which would have been to soft for this filling on their own. All the bitterness and sweetness wrapped in these thin pancakes with a creamy Béchamel sauce inside and on top made us all enjoy in silence for a short while, until our delicious Italian wraps were gone!
Here's a springy green version of my crespelle that I wrote about in March, filled with spinach.
Radicchio, Potato and Thyme Crespelle
For 4 filled crespelle you need
radicchio, quartered and sliced, 300g / 10.5 ounces
potatoes, cooked, sliced and quartered, 400g / 14 ounces
fresh thyme leaves 2 tablespoons
garlic, finely chopped, 2
red wine 60ml / 2 ounces
balsamic vinegar 1 teaspoon
Parmesan, grated, 2 tablespoons
olive oil
salt and pepper
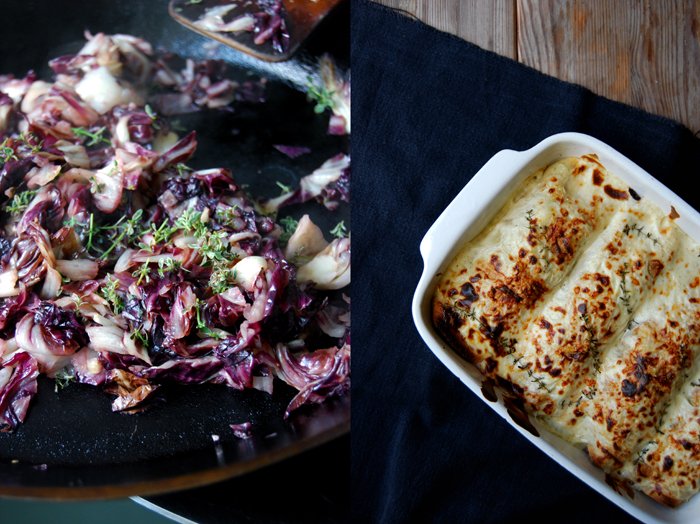
In a large pan, heat a splash of olive oil, add the garlic and radicchio and sauté for about 4 minutes or until soft on medium heat. Deglaze with the red wine, take off the heat and stir in 2 tablespoons of thyme and the vinegar. Season with salt, pepper and vinegar to taste.
For the Béchamel sauce
milk 600ml
butter 30g / 1 ounce
plain flour 30g / 1 ounce
bay leaf 1
a pinch of nutmeg, grated
salt and pepper
In a saucepan, bring the milk with the bay leaf, nutmeg, salt and pepper to the boil.
Melt the butter and whisk in the flour, let it cook on medium heat for 1 minute. Take off the heat and slowly add the hot milk, whisk until smooth and cook for about 3-5 minutes on lowest heat until it's thick and creamy. Discard the bay leaf and season to taste.
For the crespelle
milk 160ml
organic eggs 2
plain flour 130g / 4.5 ounces
salt 1/4 teaspoon
fresh thyme leaves 1 tablespoon
butter for frying
Mix the ingredients well and let the dough rest for 5 minutes. Heat some butter in a large pan and fry 4 thin crespelle, one at a time, golden on both sides.
To assemble
Set the oven to 200°C / 400F (top/ bottom heat).
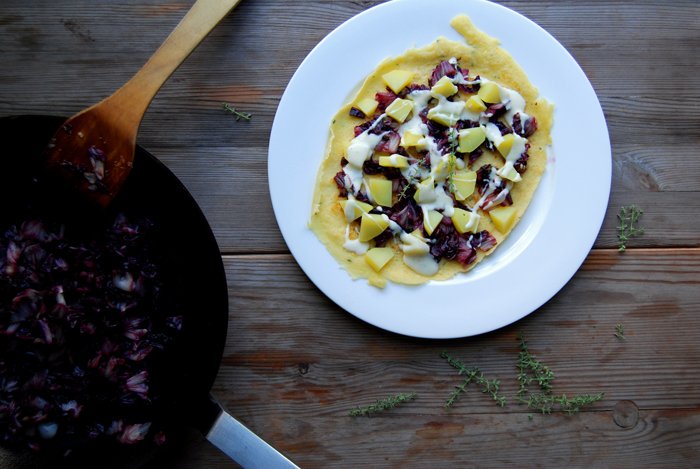
Lay a crespelle flat on a plate, spread with 1/4 of the radicchio and potatoes and sprinkle 2 tablespoons of the Béchamel sauce on top, roll into a wrap. Continue until all four are done and put them next to each other in a baking dish. Pour the remaining sauce on top and sprinkle with parmesan. Bake for 12 minutes or until golden brown. Switch on the grill for the last 1-2 minutes, this makes the crespelle a little bit crisp.


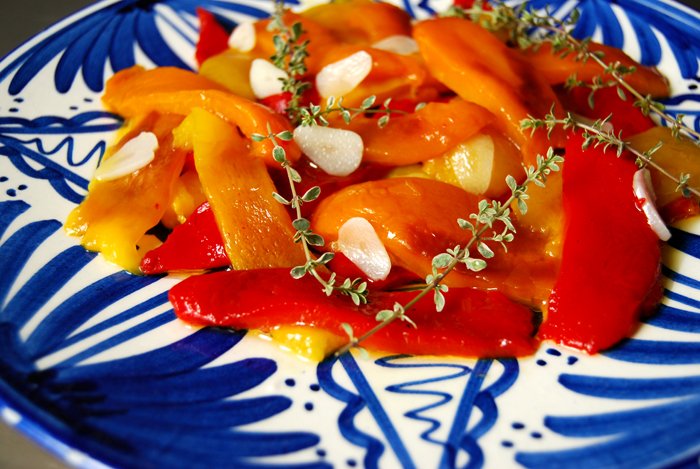
Grilled Bell Pepper with Garlic and Thyme
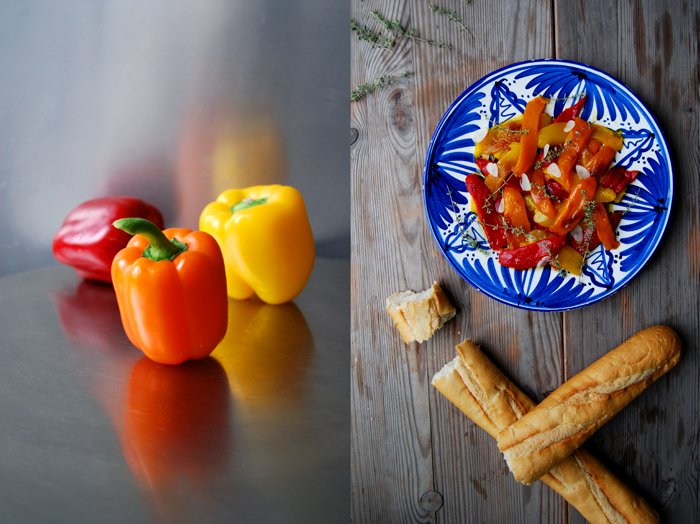
When I see juicy strips of grilled bell pepper on an antipasti platter, colourful in red, orange and yellow, I can barely stop myself from eating all of them (which is unfortunate for my antipasti platter companion). I love this balanced taste of sweet and smokey, it's addictive! There are many ways to do this, some prefer to grill the fruit cut in half, some say you should cook it whole in one piece. Peeling the skin off can be a bit fiddly but it's manageable, there are many suggestions to make this part easier. The latest I heard was to put the grilled bell pepper in a plastic bag and shake it to get rid of the skin although I've never tried it myself.
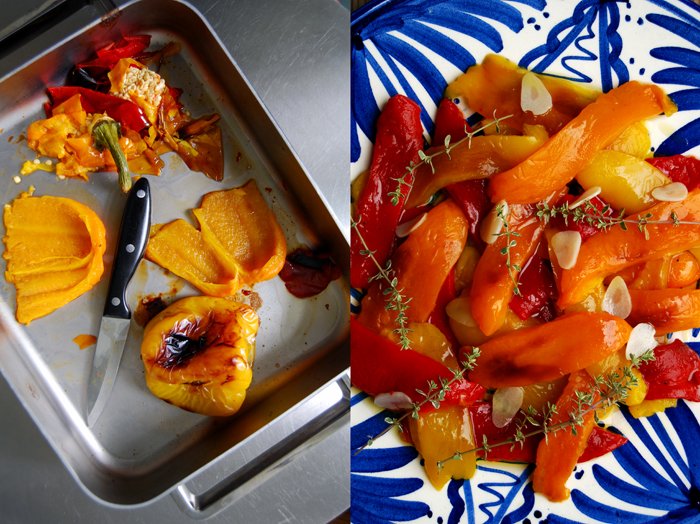
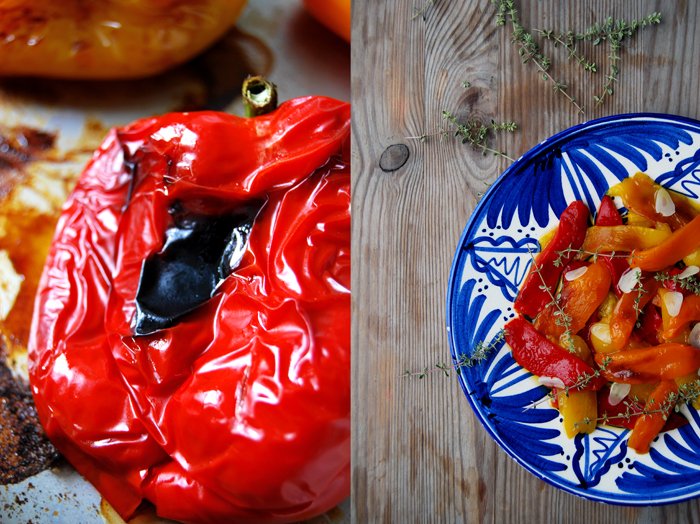
This is how I grill and peel bell pepper, how I've done it for years and it works perfectly: I put the whole fruit in a baking dish under the grill, turning it as soon as one side gets dark (meaning partly black). When the skin is dark and burst all around, after about 25 minutes, I open the oven, take out the dish and lay a wet kitchen cloth or paper towel over the bell peppers to cover them completely. I wait just a few seconds as they should stay warm and moist for this process. Then, I take out one pepper after the other and pull the skin off with a knife. If you leave them to cool without the moisture it's impossible to peel them without damaging the flesh.
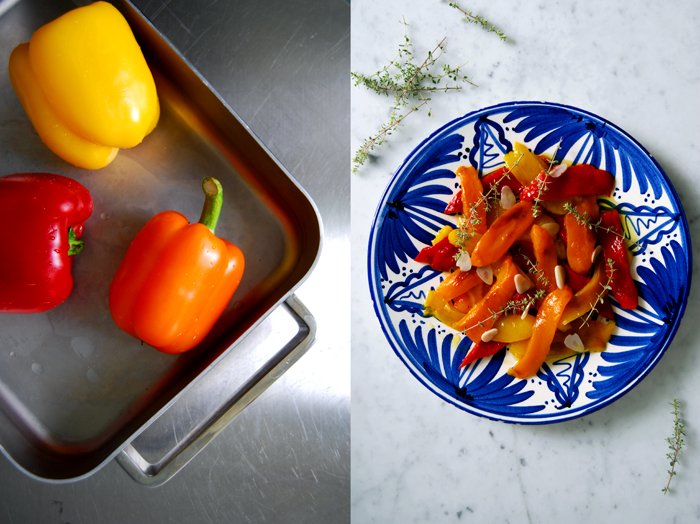
Sometimes I grill a big batch of bell peppers, I cut them in thick strips and keep them covered in olive oil in the fridge for days. Apart from the fact that it is a convenient (and healthy) nibble, it's perfect for an antipasti platter at one of our dinner parties, as a salad or to make sandwiches. This time I grilled only three peppers and marinated them in garlic infused olive oil and fresh thyme. They didn't last very long!
Grilled Bell Pepper with Garlic and Thyme
For 2-4 people you need
bell peppers (red, orange or yellow) 3
olive oil 3 tablespoons
garlic, cut into thin slices, 1 big clove
thyme sprigs 8
In a sauce pan, warm up the olive oil and garlic for 3 minutes on a medium-low heat to infuse the oil, the garlic shouldn't change colour.
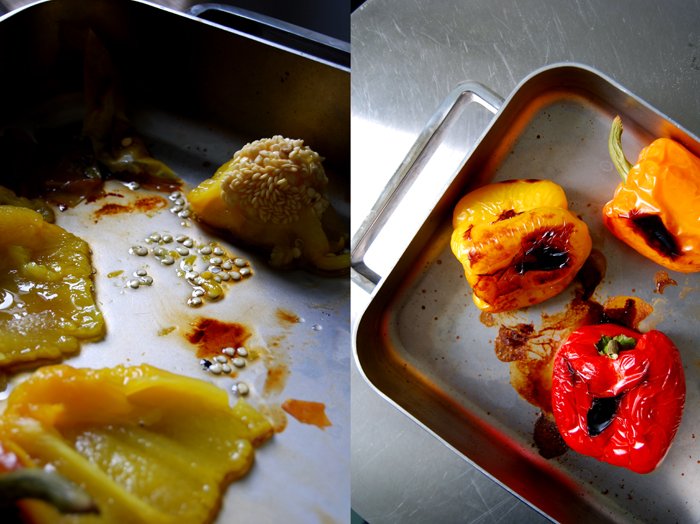
Put the bell peppers in a baking dish under the grill and turn them as soon as one side gets dark and starts to burst. I turned them twice, after 10 minutes on each side, I cooked the third side for only 5 minutes. Take the baking dish out and cover with a wet kitchen cloth or paper towel immediately. Wait for 10 seconds, take out one pepper and peel it with a knife. Keep in mind that they are still hot, especially the inside! Cut the peeled fruit in half, take out the seeds and cut the bell pepper into strips.
Pour the olive oil over the bell peppers and sprinkle with the garlic and thyme sprigs (or just the leaves if the sprigs are hard and woody). You can season it with salt and pepper but I left it pure.

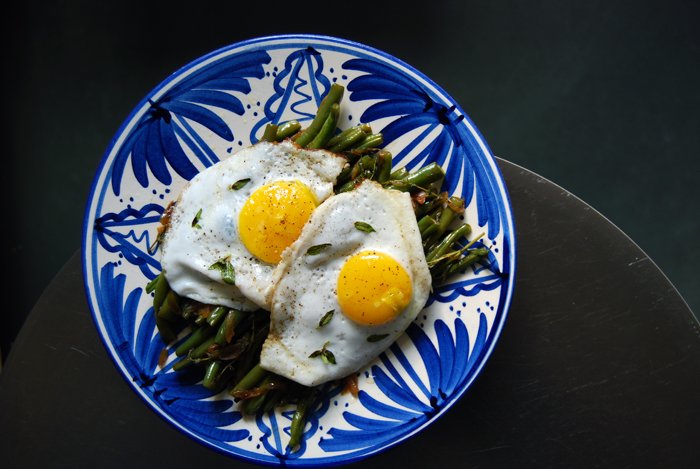
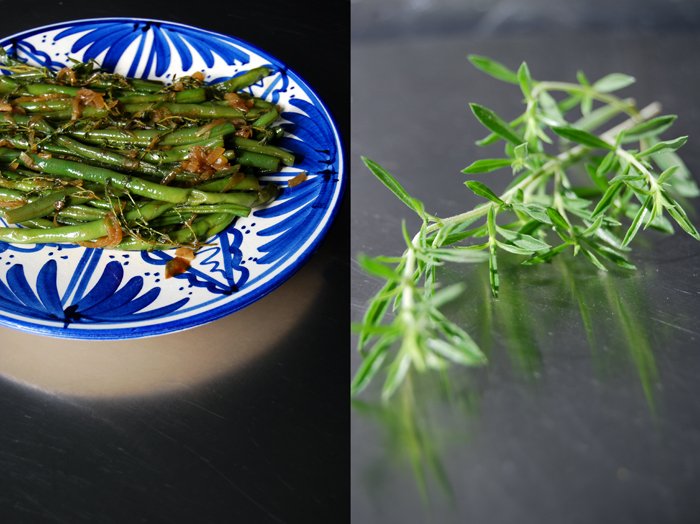
Green Beans, Fresh Herbs and a Fried Egg
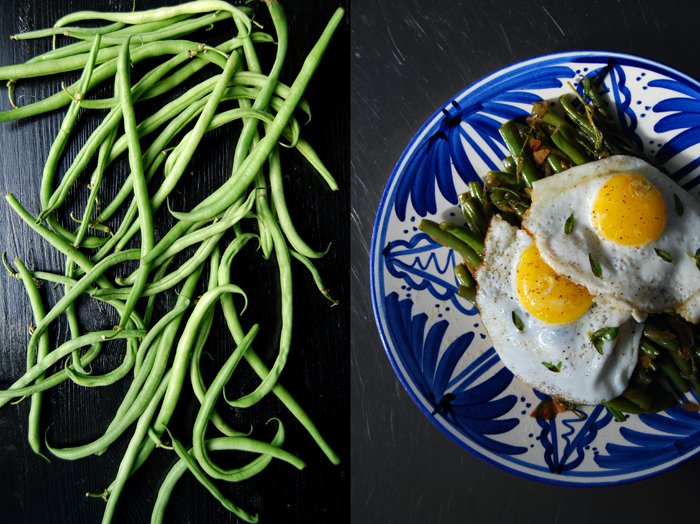
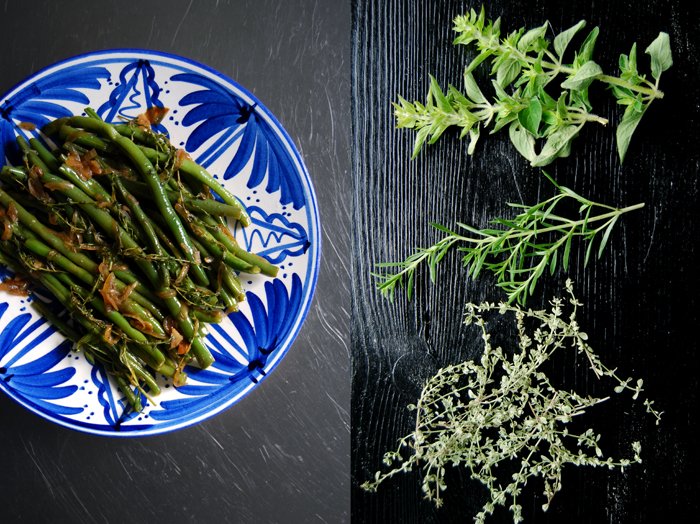
Three different kinds of fresh herbs are spread on my table, ready to be mixed with my sautéed green beans! I chose a few sprigs of fresh thyme, summer savory and marjoram from my herbal pot selection to turn this simple dish into an aromatic combination of crisp greens and fried eggs. I deglazed the beans with pastis to add one more flavour, a wonderfully warm anise! The strong aroma of this liqueur lifts the beans up to another level, it works with fava beans as well!
Unfortunately, many people around me are not too fond of anise aroma, it's one of those spices that is mentioned the most when I ask people about their culinary dislikes. Therefore I keep this dish for the two of us and the few who appreciate pastis as much as I do, be it on a plate or in a glass.Tomorrow I will share a recipe with you which shows off this liqueur's sweet side!
Green Beans, Fresh Herbs and a Fried Egg
For 2 people you need
green beans, the ends cut off, 250g / 9 ounces
small onion, cut in half and sliced thinly, 1
pastis 50ml / 1 3/4 ounces
water 50ml / 1 3/4 ounces
garlic, thinly sliced, 2 cloves
thyme a small bunch
summer savory 2 sprigs
marjoram 2 sprigs
olive oil
salt and pepper
organic eggs 2
butter
In large sauce pan, heat a splash of olive oil and cook the onions on medium temperature for 2 minutes. Add a little more oil and the beans, stir and cook for 3 minutes. Deglaze with the pastis, season with salt and pepper, add the water and herbs and cook with a closed lid for 8-10 minutes or until the beans are al dente. Season with salt, pepper and pastis to taste.
Heat a little butter in a pan and fry the eggs on a medium heat. Serve the eggs on top of the beans.

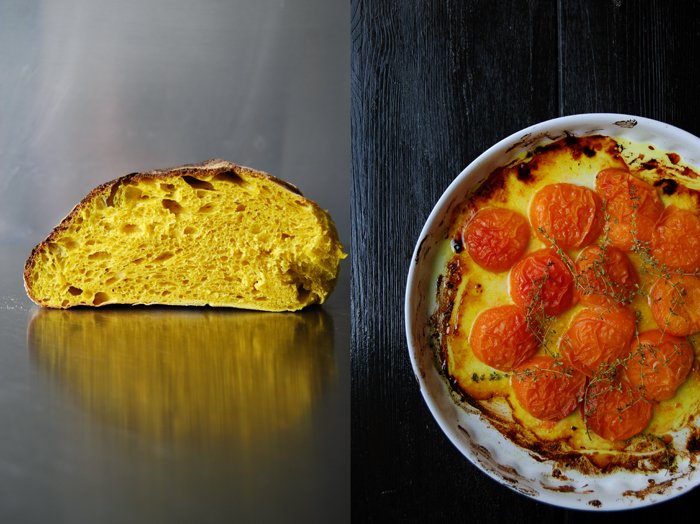
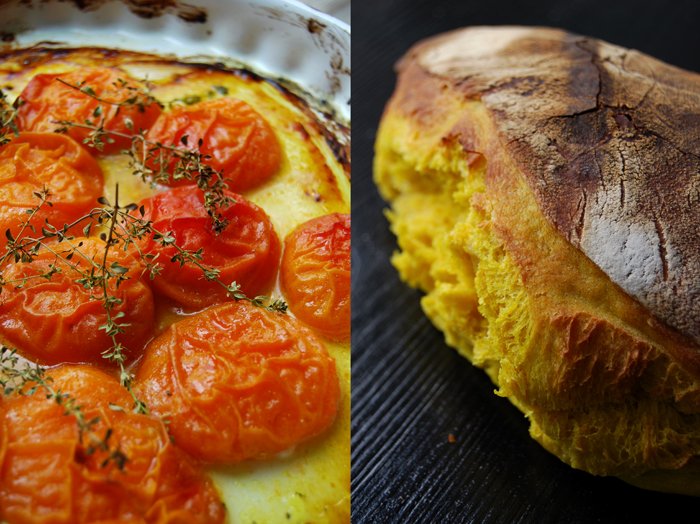
Roasted Apricots on Turmeric Bread

Sandwich Wednesday news! After 7 months of baking my own bread or visiting one of my trusted bakeries, there will be a new monthly sandwich feature on the blog, eat in my kitchen x The Bread Exchange.
The Bread Exchange is a trading project started by Malin Elmlid in 2008, she is a master when it comes to baking the perfect sourdough bread. Together we will share our creations on eat in my kitchen, every month she will deliver a loaf of bread to my kitchen and I will turn it into a new sandwich idea. This will be exciting as Malin likes to use the exotic ingredients she gets through trading; turmeric from Iran, vanilla from Madagascar, salt from Israel, charcoal, matcha, the list is long and inspiring!
You can't buy Malin's bread, you can only trade for it and that makes it all the more special. You can offer culinary products, a dinner, invite her to a special place, teach her one of your skills or share a talent. Anything of personal value might inspire her and become your trade. The Bread Exchange has been going on all over the world, wherever Malin goes, her sourdough travels with her. More than 1400 loaves of bread have been traded and thankfully enjoyed in Berlin (where she lives), in Sweden (where she's from), the Netherlands, Afghanistan, Sinai, Morocco, Greece, USA and Belgium.
Last winter Malin asked me if I would like to test cook a couple of the recipes for her first cookbook which will be published this autumn. I cooked, baked and savored, they were all delicious and worked out perfectly - it will be so exciting to have the final The Bread Exchange book in my hands!

Now it's time to talk about sandwiches! Malin suggested starting off with her Moonraker Sourdough, a turmeric and honey bread which she created a couple years ago. It's originally made with dried apricots but she left them out this time. This glowing yellow loaf of bread with a strong spice aroma is inspired by the colour palette of the famous 70's Bond movie which gave it its name. Look at the colour and texture of this beautiful bread, imagine turmeric and the best sourdough bread you've ever eaten and you will have an idea of what I had on my kitchen table! As most of you won't be able to find a turmeric bread I will involve the flavours that Malin uses in her bread creations for my sandwiches, so you just have to get (or bake) the best sourdough bread you can find in town and then you can start!
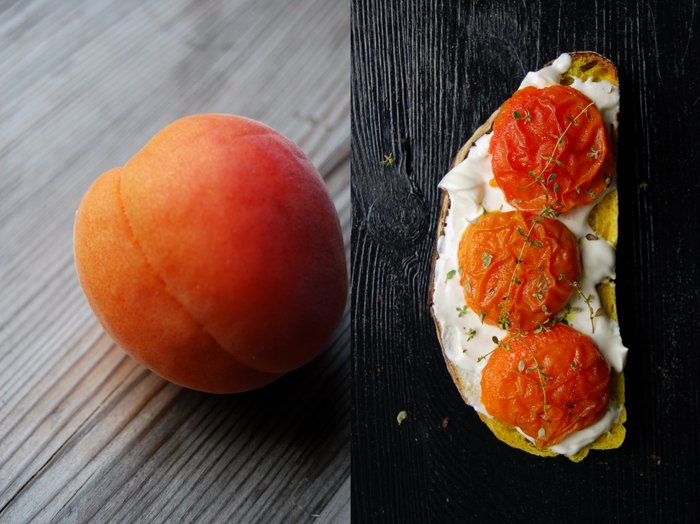
Here's our first eat in my kitchen x The Bread Exchange sandwich creation, fresh apricots roasted with thyme, cardamom and turmeric in honey olive oil together with maple syrup and cardamom crème fraîche on thick slices of turmeric sourdough bread! This sandwich is wonderfully aromatic, juicy and fruity, the spices are present but not overpowering. If you don't have a loaf of bread at hand you could also pack the roast fruits on vanilla ice, this is just as good!
My next sandwich cooperation with Malin will be in August, I don't know what she'll bring to my kitchen but I can't wait to enjoy another one of her creations!
Roast Cardamom Apricots on Turmeric Bread
For 4 open sandwiches you need
sourdough bread, 1 loaf, cut into thick slices
fresh apricots, cut in half, 6
honey 1 tablespoon
olive oil 1 tablespoon
ground turmeric 1/4 teaspoon
ground cardamom 1/4 teaspoon
thyme 10 small sprigs
coarse sea salt
For the spread
crème fraîche or cream cheese 150g / 5.5 ounces
maple syrup 1 teaspoon
a pinch of ground cardamom
a pinch of salt
Set the oven to 230°C / 450°F.
Warm up the honey in a sauce pan and whisk in the olive oil, turmeric and cardamom. Coat the apricots with the honey olive oil, sprinkle with sea salt and spread on a baking dish (cut side up). Lay the thyme on top and roast in the oven for 8 minutes, turn the fruits around and bake for another 2 minutes.
Whisk the ingredients for the spread till creamy, season to taste and spread on the slices of bread. Put 3 apricot halves on each slice, gently as they are soft. Sprinkle with a couple roast thyme sprigs.


Bean and Bacon Salad with White Balsamico and Lemon Thyme
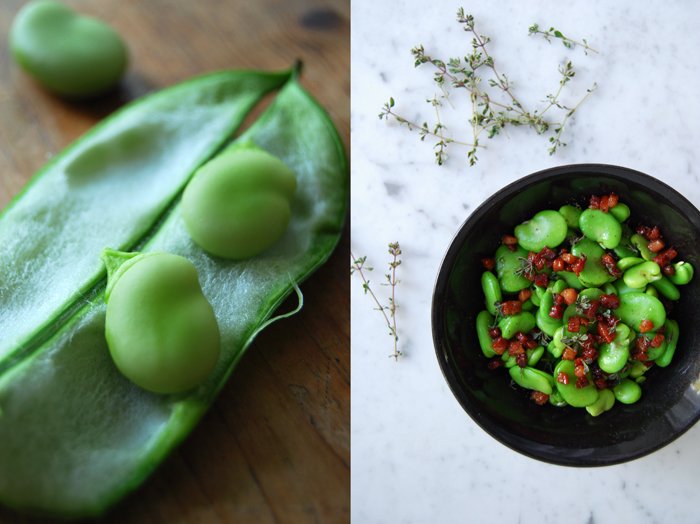
There is something really satisfying about deglazing tiny, crunchy cubes of bacon with sweet Balsamico vinegar. Be it the white or the dark one, both coming from Modena, this vinegar merges with the oily bacon juices to a thick, sweet and sour syrup. It is very concentrated, a great dressing to glaze hearty and crunchy salads like beans and cabbage. A few spoons enrich the vegetables with the whole range of the vinegar's aroma together with the meat's smoky saltiness.
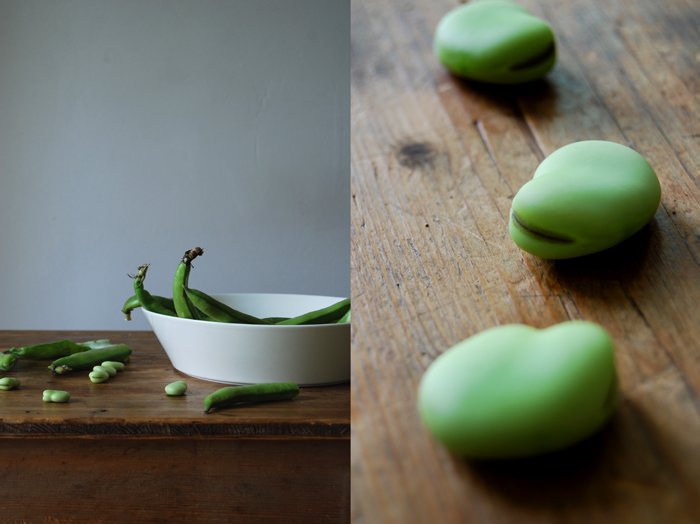
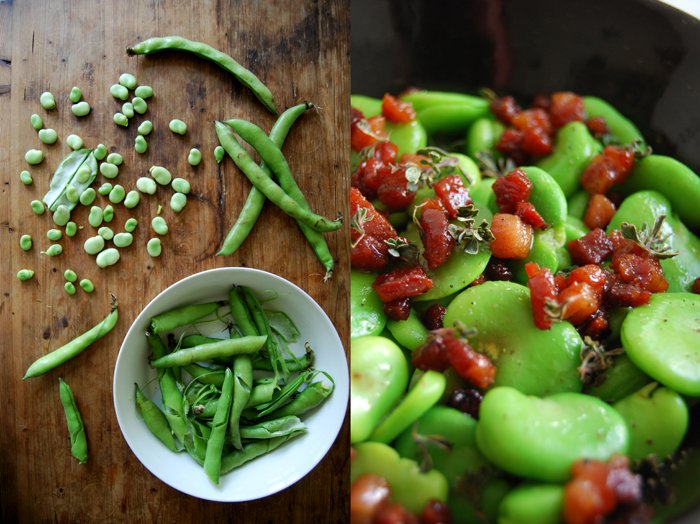
I like to use this dressing for my traditional Bavarian cabbage salad as it brings out a sweet smoothness in the strong cabbage. Today it refines my fava beans, crunchy and green, cooked in salted water for around 6 minutes until they were al dente and rinsed with cold water. I peeled the beans out of their transparent shells for this salad and added some lemon thyme, salt and pepper.
As always, there is lots of peeling involved when there are fava beans on the table, I had 130g / 4.5 ounces of peeled beans after I started with 700g / 1.5 pounds of the fleshy pods. It was enough for the 2 of us as a side dish. I fried 30g / 1 ounce of bacon cut into tiny cubes in a little olive oil for a few minutes until they were golden brown and crisp before I deglazed it with 25ml / 1 ounces of white Balamico vinegar. I scraped the bits and pieces off the bottom of the pan and poured the syrup and bacon over the beans immediately. It just needed a little salt as the bacon added quite a bit of saltiness to it, some ground black pepper and a few fresh leaves of my lemon thyme on top and the salad was done!

Fougasse Sandwich with Baked Beetroot, Goat Cheese and Thyme

I got really hooked on the roots and syrup combination in the past week. It all started with my ginger honey glazed Navet, yellow turnip fried as vegetarian steaks followed by caramelised maple parsnip with goat cheese combined in a warm salad and I'm still in the mood for sweet and earthy duos, at least one more.
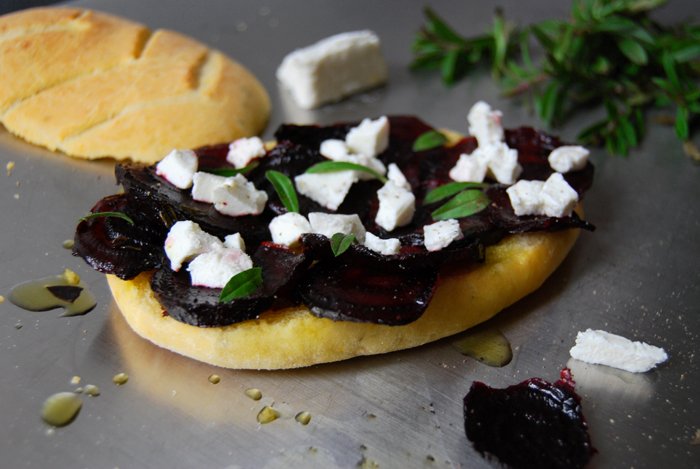
It's Sandwich Wednesday and the first thing that came into my mind when I looked at the beautiful Fougasse bread I baked yesterday, was a baked beetroot sandwich. My flatbread has strong aromas of orange and sage, perfect to add some more earthy and sweet flavours. There are some beetroots lying on my kitchen window sill, just waiting to be baked in maple syrup and olive oil sprinkled with thyme. I found a kind of thyme at the organic store that I have never seen before, with thick, long leaves. They are stronger in taste compared to the small leaved one, a bit woody. The thin slices of the roots are done after 10 minutes in the oven, soft, syrupy and partly crisp. I let them soak into the oily bread and finish my sandwich with some mild goat cheese crumbled on top to add some fresh milkiness.
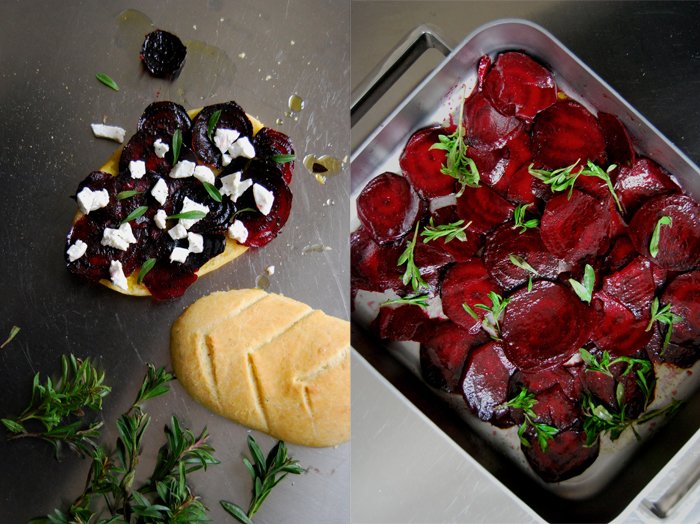
I made 3 flatbread sandwiches with 3 small beetroots peeled and cut into very thin slices and mixed with 3 tablespoons of olive oil and 2 tablespoons of maple syrup. I seasoned the roots with salt and pepper, mixed them with a few sprigs of thyme and roasted them spread in a roasting tin for 12 minutes in the hot oven set to 220°C / 430°F (Rotitherm roasting setting) until they were soft.
If you don't want to make your own Orange Sage Fougasse bread (I can just recommend it as it's fantastic), you can also use focaccia or soft buns (I made some very soft and juicy Mountain Buns with spices a couple months ago). I cut the flatbread in half, drizzled some olive oil (generously) on one side and spread the roast beetroot slices on top. After I sprinkled them with goat cheese (for 3 sandwiches I used 100g / 3.5 ounces of cheese), some fresh thyme leaves, salt and pepper, I closed my Fougasse sandwich, pleased about another great sweet root variation!


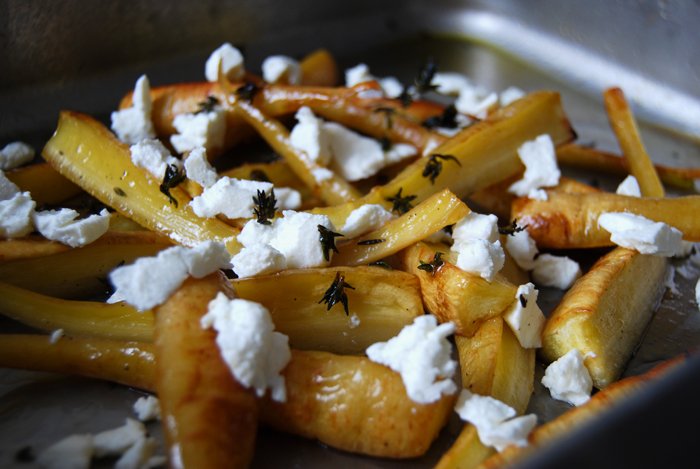
A Salad of Caramelised Parsnip with Maple Syrup, Goat Cheese and Thyme
At the moment I could eat roots and turnips all the time luckily, as tasty spring vegetables are still a few months away. It's always the same, around March I start to miss ripe tomatoes, juicy cucumber, crunchy lettuce, zucchini, the ripe tastes of summer. Greenhouse vegetables reach their watery peak at this time of the year so they are not really an alternative. The cherry tomatoes I bought the other day had thick skin and when I ate them I had to image tomatoes rather than tasting them. I don't really feel like cabbage anymore, so I stick to everything that grows in the ground.
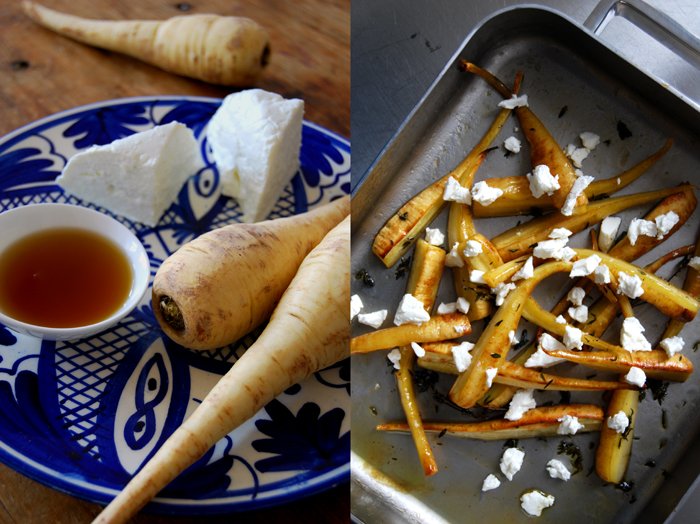
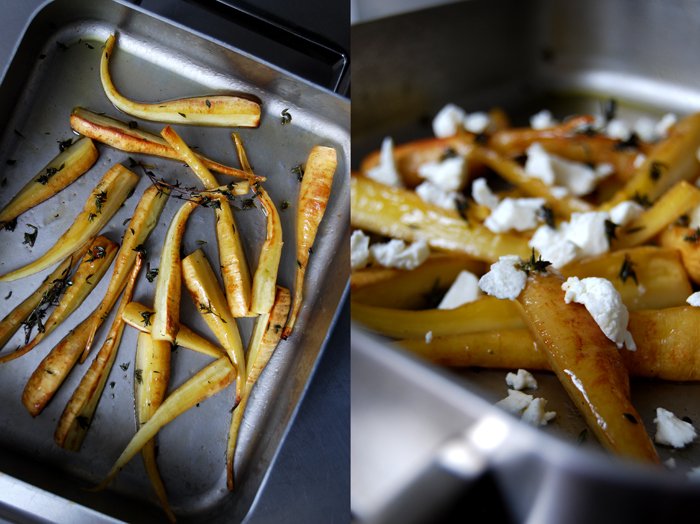
I enjoyed my Monday's Ginger Honey Navet Steaks so much, their sweet, syrupy juices were delicious, that I thought about other combinations of roots and syrup. My choice was caramelized parsnip roasted with maple syrup and thyme leaves, combined with fresh goat cheese in a warm salad. The juices make a great thick syrup, glazed around the roots they are a perfect match for the milky cheese crumbs and strong wintery herb. You could make it as a side dish, still hot, we ate it as a warm salad, I didn't want the cheese to melt.
I cut three parsnips into long strips and glazed them with 3 tablespoons of olive oil and 2 tablespoons of maple syrup mixed with salt and pepper. A dash of white wine and the leaves of 4 sprigs of time on top, everything well spread in a roasting tin, I baked it for 15 minutes in the hot oven set to 200°C / 390°F, Rotitherm roasting setting. When the parsnip was done, golden on the outside and soft inside, I let them cool for a couple minutes before I crumbled 80g / 3 ounces of fresh, soft goat cheese over the roots. The two us cleaned the tin with our fingers, not to waste a drop of the sweet syrup.

Earthy Porcini Lentil Soup with Honey and Ginger
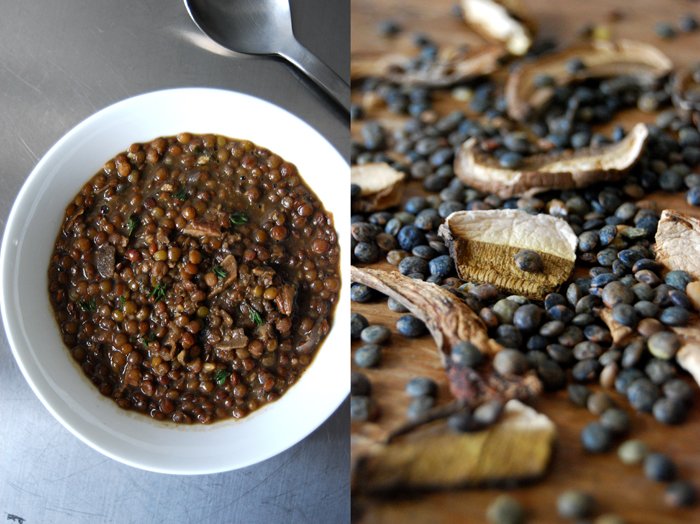
A couple days ago I ate a very aromatic porcini soup at one of my favourite restaurants and I was very surprised when the chef and owner told me where the mushrooms for this wonderful meal came from, the desert. The dunes of the Kalahari in southern Africa produce sensational truffle and porcini in season from now till May. I savored this dinner together with my family and we were all surprised and impressed at the same time! I've never seen mushrooms from the Kalahari in a store or at the markets before but I will definitely look out for them!
The soup was so tasty that it aroused my appetite for mushrooms and I had to think of a lentil soup my aunt Ursula had told me about (she was at the dinner as well). It combines the earthy flavours of lentils and porcini. I went for dried porcini (from Italy not from Africa). My aunt recommended them for this meal as you have to shred them finely into a very concentrated porcini flour which you cook together with the lentils. I used my Swabian Alb Leisa Lentils from South Germany for this meal which conveniently don't need to soak in water. Their taste is strong enough for the aromatic porcini, so strong that I could even add a piece of ginger, some thyme sprigs and a spoon of honey. The result is an absolutely delicious lentil soup full of wintery aromas.
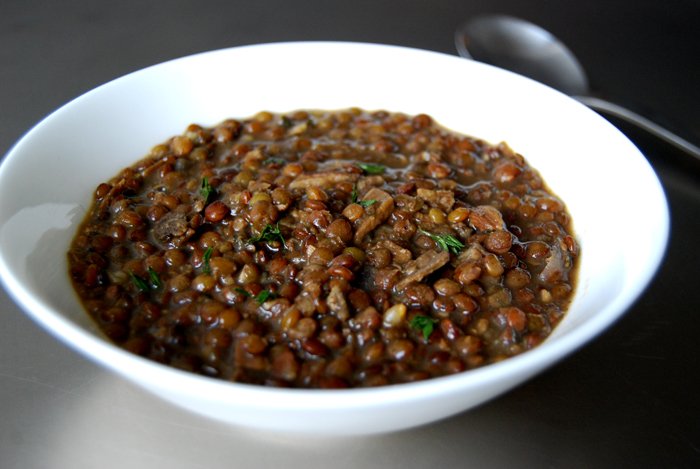
Porcini Lentils with Honey, Ginger and Thyme
This is great to cook in large batches to keep in the freezer for quick dinners!
For 4 people you need
lentils 350g / 12.5 ounces (I use a small dark type which doesn't need to soak)
dried porcini mushrooms, shredded finely in a blender, 50g / 2 ounces
medium sized onion, chopped, 1
garlic, crushed, 1 clove
broth 1000ml plus more for cooking depending on the lentils
fresh thyme 5 sprigs
ginger, thumbnail sized
bay leaf 1
honey 1 tablespoon
salt and black pepper
olive oil for frying
In a large pot, fry the onion and garlic in a little oil on medium heat until golden, add some more oil and the shredded porcini and fry for 1 minute. Add the lentils, ginger, thyme, bay leaf and the broth. Don’t season with salt yet or the lentils will stay hard. Close the lid and let it cook for about 30 minutes. The cooking time depends on the lentil type, mine needed 30 minutes. When the lentils are soft, add the honey, season with salt and pepper and take out the thyme sprigs, bay leaf and ginger.

A warming Soup with Chestnuts, Cinnamon and Thyme

For this soup I appreciate the convenience of vacuum packed peeled chestnuts - even though I love the romantic, wintery atmosphere when you bake them in the oven and they fill the air with the smell of their burned peel. I need quite a few nuts for my recipe and with so many to peel, the thought of burnt fingers puts me off. I want a soup without major frustration and injury, so I bought them pre-cooked and peeled. This is a quick soup, relaxed cooking and I didn't want to change that.
I had a velvety soup in mind, smooth and a bit sweet, enhanced with some cinnamon and thyme. I wasn't sure if the chestnuts would be too overpowering so I added a few cooked potatoes. When you have a nice broth on hand, the preparation only takes a few minutes. All you need to do is fry an onion in a little oil, add the chestnuts, potatoes, cinnamon and thyme and heat everything together with the broth, some cream, salt and pepper. When you have everything together, mix it in a blender.
As a main for 2, I used 250g / 9 ounces chestnuts, 3 medium sized cooked potatoes (cut into cubes), 1 large onion (chopped and fried in olive oil), 600ml of broth, 1 tablespoon of heavy cream, seasoned with 1/2 a teaspoon of cinnamon plus salt and black pepper to taste. Fill into bowls and if you like sprinkle with chestnut crumbles, cinnamon and thyme.


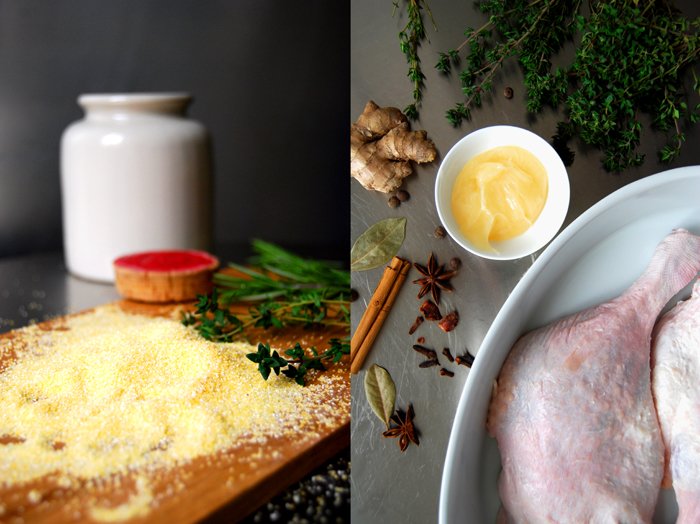
Ginger Honey Glazed Duck with Spices and Polenta
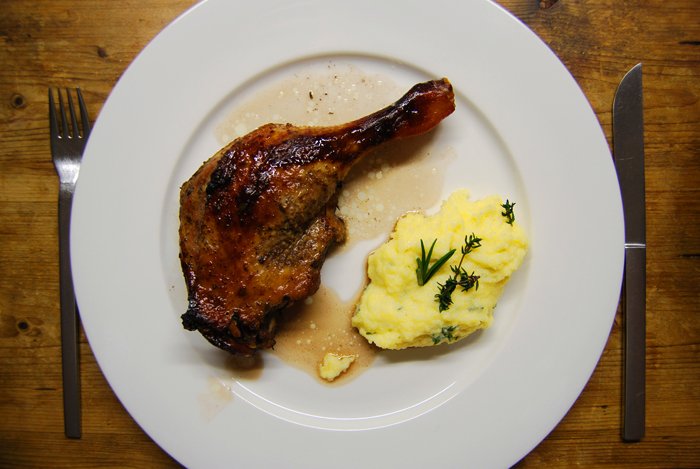
Sometimes I don't have the time or patience to slow cook a whole duck for hours like I do with my Christmas Duck. Although this really makes for the most tender and juicy meat, I need a quicker alternative. Here's what I came up with, honey glazed duck legs, juicy as well, with crisp skin, rubbed with spices and - most importantly - you can enjoy all of this after about an hour. If I find the time I marinade the meat in the morning so that the flavours can spread and soak into the skin during the day but it's great either way.
I prefer the darker, deeper meat of wildfowl like duck, goose and pheasant, especially in the cold season. They allow you to rub strong spices and herbs into their skin without loosing their own qualities. For my duck legs, I went for an aromatic mixture of clove, bay leaf, ginger, star-anis, thyme, allspice and a good amount of honey for a crispy caramelized skin. The juices made an amazing sauce, a concentrate of all the spices, I just added some red wine. Perfect to dip the polenta in which I seasoned with thyme and rosemary.
GingerHoney Glazed Duck with Spices and Polenta with Thyme and Rosemary
I prepare the polenta around 4o minutes after I put the duck legs into the oven.
For 2 people you need
duck legs 2
red wine 250ml (or 100ml red wine and 150ml broth)
salt and black pepper
olive oil
For the marinade
aromatic honey 2 tablespoons
ginger, thumbnail sized, grated
thyme, leaves of 5 sprigs
allspice berries, ground, 3
cloves, ground, 5
bay leaf, ground, 1
star-anis, ground, 1
cinnamon, ground, 1/4 teaspoon
Warm up the honey in a small sauce pan until it becomes liquid, spread on the duck legs together with the spices and rub everything into their skin marinating them for 1 hour (if possible). You can also prepare them in the morning (like I do) and keep them in the fridge all day before you cook them in the evening.
For the duck legs
Set the oven to 260°C / 500°F. My oven has a Rotitherm roasting setting which works perfectly for poultry.
Put the duck legs into an oiled baking dish, skin side up, and season with salt and pepper. Pour the remaining honey and spices of the marinade over the duck and place the dish in the hot oven. When the skin starts to get brown after a few minutes turn the temperature down to 130°C / 265°F and pour the red wine into the baking dish (a little over the duck as well) and bake for 60 minutes. Check with a skewer, if only clear juices come out the duck is done. Keep the duck legs in a warm place, pour the juices into a sauce pan and season with salt and pepper to taste. I didn't even need to cook the sauce down. It was perfect, very intense, it didn't need anything else. If you like you can add some more honey, Balsamico or a little orange juice.
For the polenta
polenta 120g / 4 ounces
water 250ml plus 150ml for cooking
milk 250ml
thyme, leaves of 4 sprigs
rosemary, chopped, 1/2 - 1 teaspoon
salt 1 teaspoon
olive oil 2 tablespoons
In a sauce pan, mix 250ml of water with the milk and salt and bring to the boil. Take the pan off the heat, add the olive oil, polenta and herbs and mix with a whisk. Turn down the heat to the lowest temperature and put the pan back on. Cook the polenta for 10 minutes mixing and adding the rest of the water once in a while.
