Meet in Your Kitchen | Kristiane's Kaiserschmarrn, Pars and Pralinés

This post is part of my Meet in My Kitchen podcast: How did we get to where we are in life & what does food have to do with it
"I thought I wasn’t allowed to do something that was different from what I had learned. I felt trapped in the traditional framework of the patisserie. I was very nervous to dive into a new scene where I felt I didn’t belong to." - Kristiane Kegelmann
Whenever we create something we use our senses. No matter if it's about the arts or crafts, we see, we feel, we smell, and when it comes to food, we also use our taste. Kristiane Kegelmann loves working with the whole sensory spectrum, in her art and in the food she creates - and especially when they both merge.
During her early years as a pastry chef in Vienna, at the traditional Demel confectionery founded in 1786, Kristiane often pushed the boundaries of her craft. Although the budgets for customized cakes, torten, and gateaux were often almost bottomless, the freedom, the expectation of how a sweet creation should look like was limited. In size larger than herself, the costs sometimes reaching the price of a small car, yet her creativity was forced to stay within a certain range, the rigid range of the classic patisserie, of its craft and creations, defined over hundreds of years.
There was no tolerance when her aesthetic feeling, and her curiosity, left the frilly cream toppings and sugary ruffles and roses behind. Kristiane likes cubistic shapes reminding of the concrete architecture of the 60s and 70s, of brutalism, Le Corbusier and Gottfried Böhm, or the angular shapes of Daniel Libeskind's buildings. Her approach is far from sweet, cute, and superficially pleasing. Her aesthetic is definitely challenging for the stubborn pastry traditionalist.
It was only through the arts that she felt able to free herself, to go beyond her own expectations in her craft. Working with an Austrian sculptor, experimenting with architectural forms and structures, combining edible and non-organic material both in her art and in her pastries and chocolates, and in the end leaving Vienna to move to Berlin, were the necessary steps to become the artist and pâtissière she wanted to be.

"Chocolate allowed me to fill a shape with a surprise. I felt, seeing that this is what I’m good at, I’m allowed to turn it into art." - Kristiane Kegelmann
Growing up in Munich in a family where food in general, but each ingredient in particular, was given a lot of attention, a huge effort was made to strive for quality and track the origin of the products that ended up in her mother's kitchen. Kristiane knew about buckwheat - and wasn't particularly fond of it - when the other kids were still munching on soft wheat bread sandwiches with flappy cheese. Her sense for flavors, for quality, started to become more and more refined even before she became aware of it.
Arriving Berlin in 2015, all of a sudden Kristiane had all the freedom, and the space, to create art and food according to her own ideas. Some of her works are edible, like her chocolates and pralinés, some aren't, which turned into a new conflict: where are the two disciplines interwoven, where shouldn't they, where does one start and the other one end? It's an ongoing process and the price you pay for creative freedom.

"In our traditional food, we used to be much closer to the original produce than we are today. It’s a process of simplification, of industrialization." - Kristiane Kegelmann
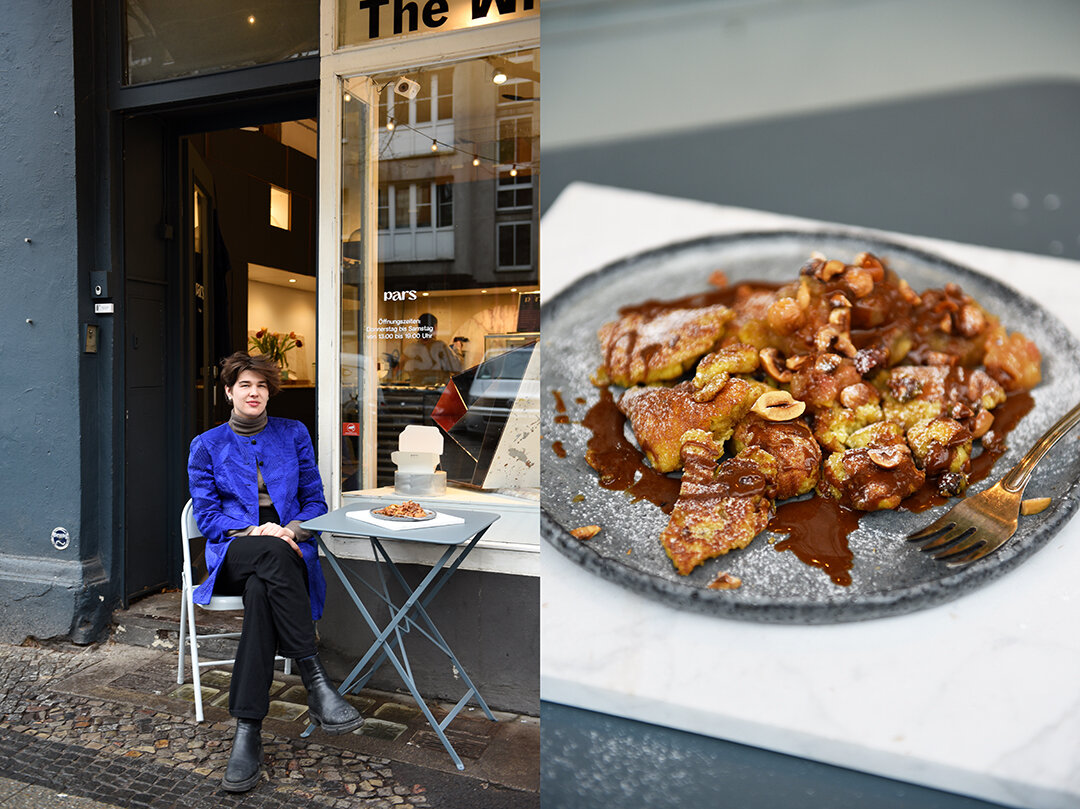
At least at her pars pralinés shop, you can eat everything the pastry chef puts in front of you - and that is spectacular. Kristiane puts the same attention into her sweet creations' fillings as she puts into their shapes and (natural) coloring. Once you bite into the delicate chocolate shell, you might be surprised by a fragile crunchy dill flower, or pear combined with sesame - which is a fantastic combination. Hops and lavender also go very well together, and a classic hazelnut praliné impresses with the intense, pure taste of hazelnuts that come from Kristiane's home region, from Bavaria.
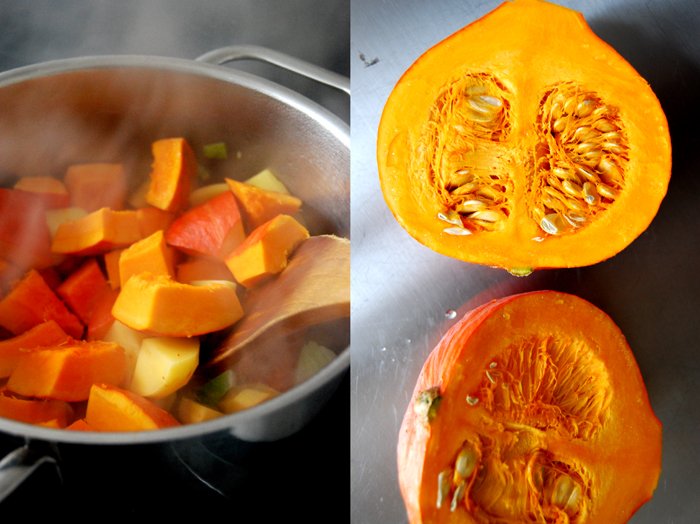
We would have loved to share a praliné recipe with you but unfortunately, the preparation is too complex, so instead we went for a very comforting Austrian breakfast/ brunch/ teatime/ dessert classic: kaiserschmarrn - a torn pancake - with hazelnuts and apple purée.
The podcast episode with Kristiane Kegelmann is in German. You can listen to the Meet in My Kitchen podcast on all common podcast platforms; there are English and German episodes. You can find all the blog posts about these podcast episodes including my guests’ recipes here on the blog under Meet in Your Kitchen.
Listen to the podcast episode with Kristiane on:
Spotify / Apple / Deezer / Google / Amazon / Podimo
On Instagram you can follow the podcast @meetinmykitchenpodcast!

Kaiserschmarrn with Hazelnuts and Apple Purée
by Kristiane Kegelmann / pars
Kristiane uses her own pure hazelnut spread (Nussmus) for serving, which you can buy online from her shop, but you can of course replace it with any other quality hazelnut spread (although hers is particularly delicious!).
She refines the apple purée with cherry blossom sugar (fresh cherry flowers mixed with sugar and stored in a jar, it's divine!) but you can also use regular sugar.
Serves 4
For the cherry blossom sugar (optional)
1kg / 5 cups granulated sugar
1 handful fresh cherry blossoms
Combine the sugar and cherry blossoms, rubbing the sugar and blossoms with your hands to intensify the flavor, and store in a large jar.
For the apple purée
50g / 1/4 cup cherry blossom sugar (or granulated sugar)
120ml / 1/2 cup apple juice
4 medium, sour, firm apples, cored and cut into small pieces (don't peel the apples)
In a large pan, caramelize the sugar over medium heat then add the apple juice and stir until the caramel dissolves. Add the apples and cook until soft then sweeten with sugar to taste. Using a blender or a blender stick, purée the apples until smooth. If you prefer the apple purée a bit thicker, transfer it to the pan and cook, stirring constantly, until it reaches the desired texture.
For the kaiserschmarrn
1 ounce / 25g whole hazelnuts with skin
4 large eggs
A pinch of salt
30g / 2 generous tablespoons granulated sugar
350ml / 1 1/2 cups whole milk
160g / 1 1/4 cups all-purpose flour
Unsalted butter, to cook the kaiserschmarrn
About 4 tablespoons hazelnut spread, whipped until soft, for serving
1-2 tablespoons confectioners' sugar, sifted, for serving
In a medium pan, roast the hazelnuts, stirring constantly, over medium heat for about 2 minutes or until fragrant; let them cool for a few minutes. Using your hands, rub the skin off the hazelnuts then chop them roughly and set aside.
In the large bowl of a stand mixer, fitted with the whisk attachment, whisk the egg whites and salt for a few minutes until stiff then transfer to a large bowl and whisk the egg yolks and sugar for a few minutes until light yellow and creamy. Using a wooden spoon, gently fold 1/3 of the milk into the egg yolk mixture, followed by 1/3 of the flour. Repeat with the remaining milk and flour, folding until combined, then gently fold the egg white into the batter just until combined.
In a large pan, heat a generous tablespoon of butter over medium-high heat, add half the batter, reduce the heat to medium, and cook for a few minutes or until the bottom of the pancake is golden. Cut the pancake into 4 pieces, add a little more butter to the pan, then flip each piece and cook until the bottom is golden. Using 2 forks or spatulas, tear the pancake into chunky pieces. Sprinkle with a little sugar, add a bit more butter if necessary, and cook the torn pancake, stirring, for a few more minutes or until golden brown then transfer to a large platter, cover, and cook the remaining batter in the same way.
Divide the kaiserschmarrn between 4 plates, sprinkle with the hazelnuts, drizzle with the hazelnut spread, and dust with confectioners' sugar. Add a dollop of the apple purée and serve immediately. Enjoy!


Meet In Your Kitchen | Cynthia Barcomi's Pecan Pie with Chocolate and Cranberries

This post is part of my Meet in My Kitchen podcast: How did we get to where we are in life & what does food have to do with it
“I do feel that with time I have learned the necessity to calculate my risk. In the beginning I was uninterested in calculating risk, I wasn’t even necessarily interested in spending the time of thinking How risky is this. I was much more focussed on what I wanted to do.” – Cynthia Barcomi
Before I moved to Berlin I used to have a little ritual, every time I came here I made it a point to visit Cynthia Barcomi's Deli at Hackescher Markt. I was in love with this place, obsessed with her chocolate cherry muffins, with her tuna sandwich made with the juiciest potato bread, and the world's best New York cheesecake. Whenever I set on the black and white leather benches in the tall lofty room of her Deli, Cynthia managed to make me feel home and taken care of but at the same time hungry and excited for everything that was new to me in this big city.
There was a lot that this American lady taught me - without ever meeting her: my first carrot cake was hers and the frosting of that cake seemed like a miracle for a German girl in the nineties, almost impossible that something tasting so good is only made of cream cheese, lemon, butter, and sugar. Four simple ingredients creating sweet magic. No one masters the genius simplicity of comforting American-style baking like she does, at least in my world. She approaches her recipes like everything else in her life: with curiosity, discipline, passion, and stubborn persistence. Cynthia only stops working on a recipe - be it for her café, for one of her nine books, or for her TV shows - when she's 100% sure that she nailed it. She never compromises.

"There was definitely a time when I was like I have to do this and this, more and more, and now I kind of feel like it is really important for me to stay focussed. And it is really important for me to protect this part of myself, which feels incredibly inspired and curious and creative and all these different things, where I know if I get too bogged down by the many other things that are going on in the world or in my life that I cannot access that."– Cynthia Barcomi
Cynthia came to Berlin in the nineties, tumbling out of a rather protected childhood in Seattle, Washington State, and a few wild years in New York City, studying philosophy, theatre and drama at Columbia University and becoming a dancer at the same time. Those were the eighties and Cynthia lived the Flashdance-life. Although it can't really get much better than that Cynthia felt pulled to Europe, to Pina Bausch, Paris, Florence, and at one point to Berlin.
Always moving, she can't stand still. With two kids, she started looking for a more steady life in the food world (maybe the only thing she ever miscalculated), so she decided to roast her own coffee beans and open her first café in Kreuzberg. Today this wouldn't be such an adventurous career move, but back in 1994, this was a risky endeavor. There were no American-style cafés, people didn't really care much about American cakes, pies, and cookies, there was simply no demand for it. Germans drank their old-fashioned filter coffee in questionable quality, and were happy with it, and enjoyed their German cakes for their Kaffee und Kuchen. So now Cynthia popped up in the city, ready to conquer and change it all - and she succeeded.

"I think it’s really important that you do stay true to yourself and that you spend less time comparing yourself and your work to other people, which I think is going down a rabbit hole that will suck all the energy out of you. And I really do encourage especially women to kind of not have quite so much shit in their head and just do it."– Cynthia Barcomi
Three years after starting her first café, she opened her Deli, which is the reason why I moved to the area where I live now. I had to be close to that place. Almost 30 years ago, Cynthia changed they way people eat in the capital. Less competition may make it sound easier compared to today but this also meant that the risk was much higher. She had to pioneer a market that was so unfamiliar with her vision that even the banks told her "Look lady, if this were a really good idea, we'd already have it." Her answer was "What are you talking about. Society lives from new ideas. We wouldn't have washing machines, we wouldn't have cars, we'd be lighting fire, we'd be cavemen. I mean come on. Jesus!" So she just put a plate of her cookies on the guy's desk and at one point she got the loan.
Sometimes in life you have to swim against the current, ignoring the anxious voices around you. It worked out in Cynthia's case but it wasn't always a smooth journey. Last year she had to close her Deli to save her business. A decision so painful that it still hurts her to talk about it. A chapter came to an end, after writing a beautiful story that will always be a part of Berlin, but Cynthia wouldn't be the person who she is if she didn't get back on her feet to write another story - to be continued.
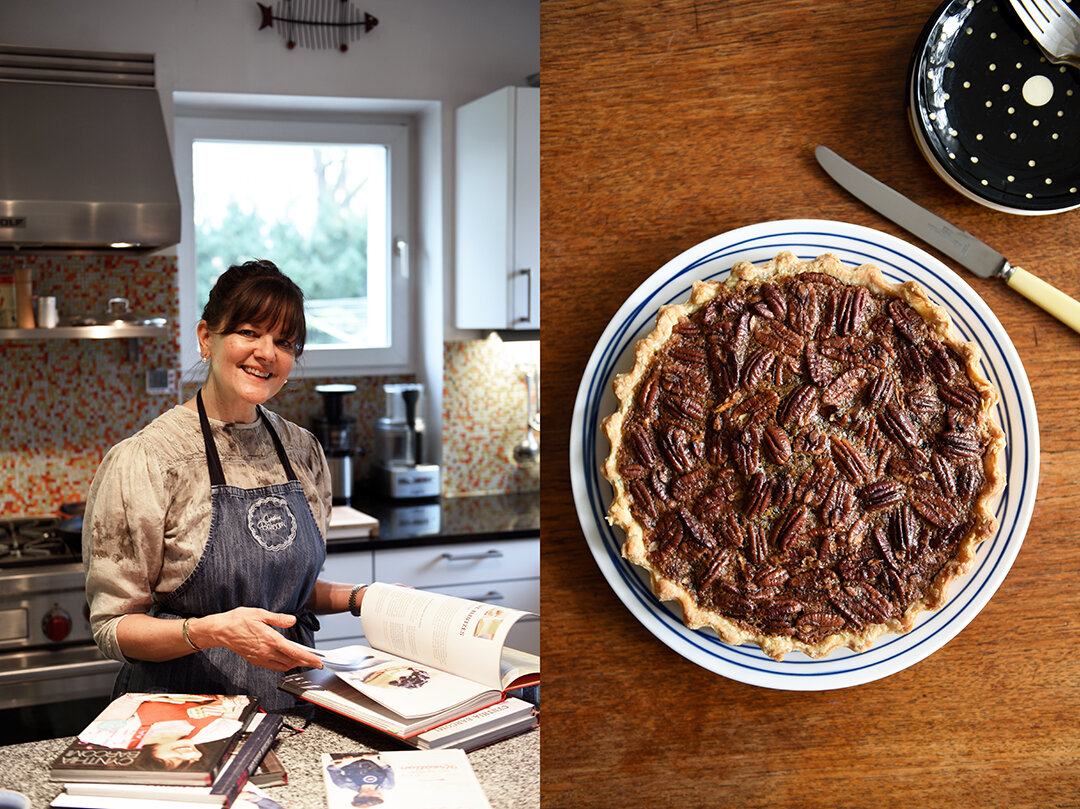
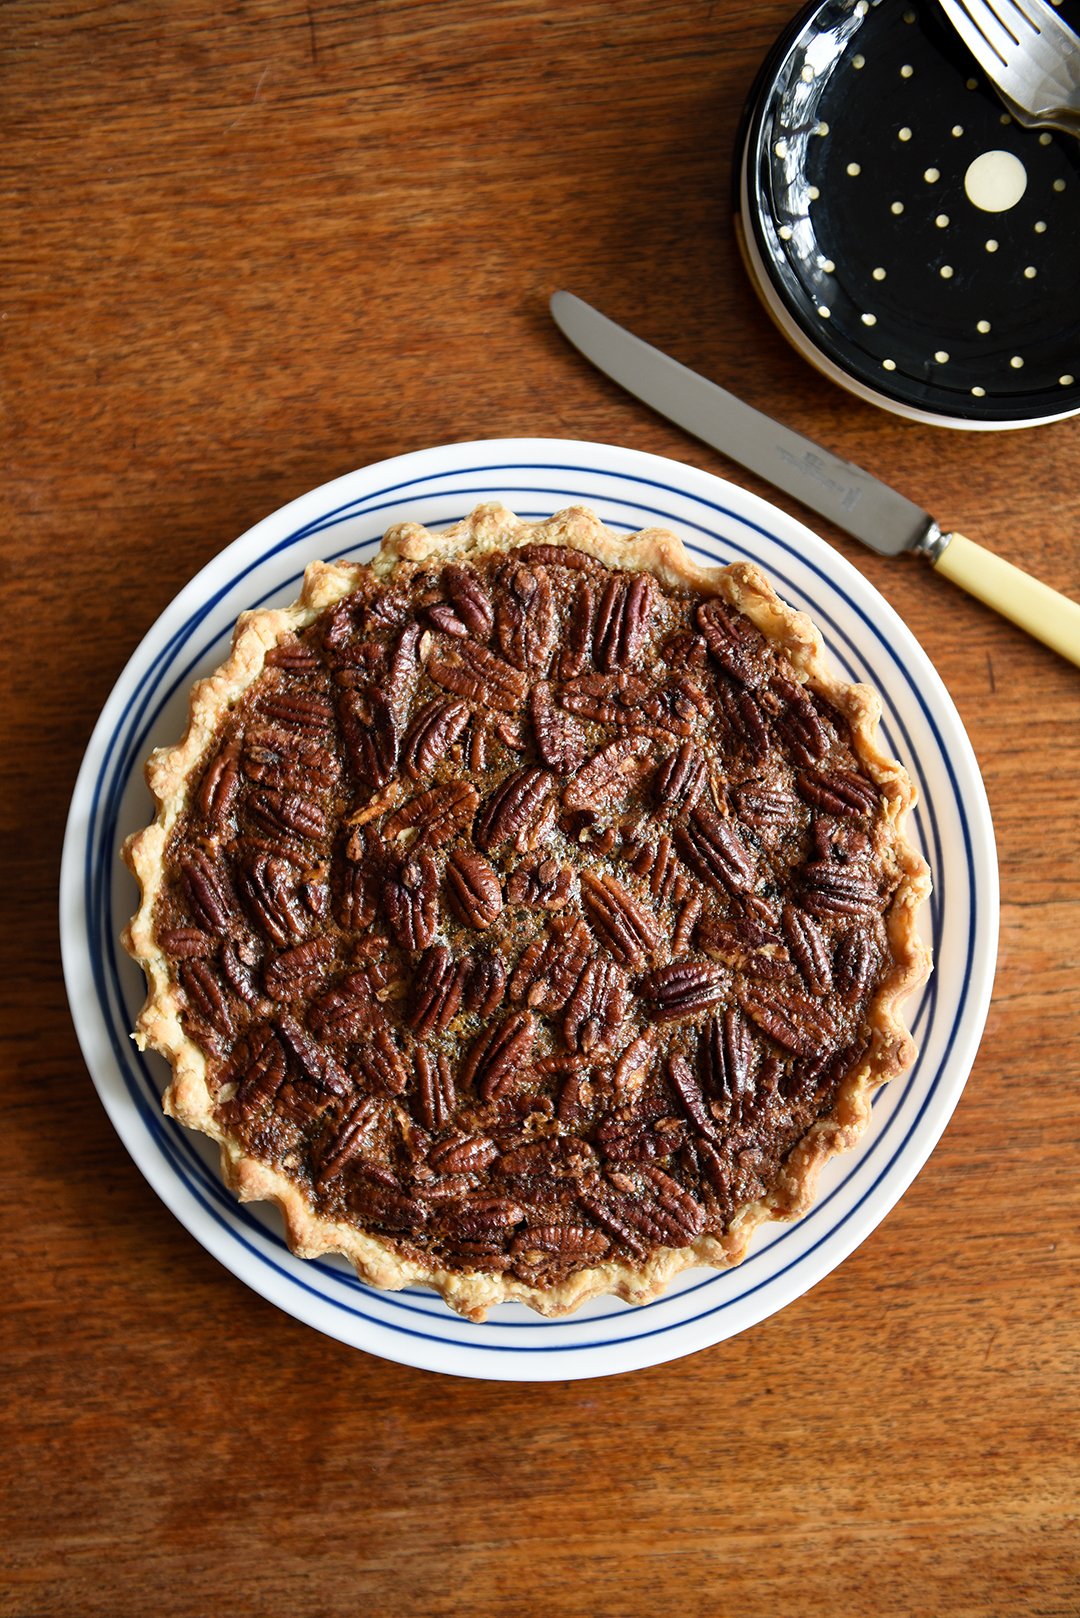
Cynthia shared the ultimate Christmas or New Year's Eve dessert with me: Pecan Pie with Chocolate and Dried Cranberries.
The podcast episode with Cynthia Barcomi is in English. You can listen to the Meet in My Kitchen podcast on all common podcast platforms; there are English and German episodes. You can find all the blog posts about these podcast episodes including my guests’ recipes here on the blog under Meet in Your Kitchen.
Listen to the podcast episode with Cynthia on:
Spotify / Apple / Deezer / Google / Amazon / Podimo
On Instagram you can follow the podcast @meetinmykitchenpodcast!

Pecan Pie with Chocolate and Dried Cranberries
by Cynthia Barcomi
Makes one 23cm / 9" - pie
For the crust
125g / 1/2 cup cold unsalted butter
25g / 1 1/2 tablespoons vegetable shortening
180g / 1 1/4 cups all-purpose flour
25g / 3 1/2 tablespoons cornstarch or wholegrain flour
1 teaspoon granulated sugar
1/2 teaspoon salt
75ml / 1/4 cup plus 1 tablespoon ice cold water
For the filling
100g / 1/2 cup muscovado sugar
3 large eggs
200ml / 3/4 cup plus 2 tablespoons maple syrup
1/4 teaspoon salt
1 tablespoon vanilla extract
25g / 1 1/2 tablespoons unsalted butter, melted
100g / 3 1/2 ounces dark chocolate, coarsely chopped
100g / 3 1/2 ounces dried cranberries or dried cherries, lightly floured
200g / 7 ounces pecans, left whole
For a light and flaky crust, cut the butter and the shortening into small pieces and chill in the fridge while you prepare the rest of the ingredients.
In a large bowl, combine the flour, starch, sugar, and salt. Blend in the cold butter and shortening with your fingertips or a pastry blender until the mixture resembles coarse meal. Add cold water and stir with a fork until a dough just forms. Transfer the dough onto a lightly floured work surface and quickly knead the dough into a circle. Wrap the dough in parchment and chill for about 2 hours (the dough will keep in the fridge for several days and in the freezer for several months).
Preheat the oven to 200°C / 400°F (convection setting). Have a 23cm / 9"-pie or tart form at your side. No need to butter it.
On a lightly floured work surface, roll out the dough to about 3mm / 1/8" thick. Work with a light dusting of flour on your rolling pin and on your work surface. Do not use too much flour or the crust will become hard and dry. Place the rolled-out dough into the pie dish and gently press into the sides. Trim the edges to an about 5mm / 1/4" overhang. With your fingertips, crimp the edges. Chill while you make the filling.
Make the filling. In a large bowl, whisk the brown sugar with the eggs, then stir in the syrup. Add the salt, vanilla extract, and melted butter and stir to combine.
Place the chopped chocolate onto the bottom of the pie dough, followed by the dried fruit, and the pecans. Carefully pour the egg mixture over the pecans. Bake for 10 minutes at 200°C / 400°F, then reduce the heat to 190°C / 375°F and bake for another 10 minutes. If it seems to be getting brown too quickly, cover the pie with parchment. Reduce the heat once again to 180°C / 350°F and bake for another 14–16 minutes until golden. Leave to cool on a rack for several hours before serving.


23 Recipes for Cozy Christmas Baking

Berlin, December 2017:
I'm sitting at my dining table, listening to Jingle Bells, wrapping Christmas presents, and waiting for the snow to fall. It's the last weekend before Christmas, the last chance to fill the kitchen with the tempting smell of cinnamon, cloves, and citrus fruits, cardamom, chocolate, and candied nuts, so what am I going to bake? I picked 23 recipes from the last four years of cozy Christmas feasting on Eat In My Kitchen and I love each one of them. Just a look at the pictures and my taste buds get excited. I can remember the woody notes of my Rosemary and Lemon Heidesand Cookies, the citrusy-buttery sweetness of my Mediterranean family's Maltese Lemon Christmas Cookies, the elegance of my mother's classic, her Linzer Cookies, and of course, my annual highlight, the best Vanilla Kipferl in the world. You can find a variation of this famous German cookie in my Eat In My Kitchen book, wonderfully fragrant Cardamom Kipferl. So, happy baking, treat yourself to a cozy weekend with the ones you love and indulge in the pleasures of Christmas baking!
Click on the titles for the recipes:


Chocolate, Orange and Cardamom Stollen
My granny Lisa was loved and adored for many of her baked goods. She truly mastered the German Sunday coffee table, filling the house with the sweetest smell of butter, sugar, and eggs every weekend. To please her six children's cravings, and later a growing pack of grandchildren, she sometimes baked seven different cakes in one day. Sponge and fruit cakes, cream tarts and crumbles were often lined up on her kitchen counter and doubtlessly influenced my own baking habits. Her Donauwelle - a marbled cake with cherries and buttercream - will always be my favourite. It's the taste of my childhood - and the beginning of my ever hungry sweet tooth.
Six to eight weeks before Christmas, Lisa used to take orders from friends and family for another one of her celebrated classics: stollen. It's a German staple that you can find at every bakery, in every household as soon as the Christmas lights leave the boxes to twinkle behind wintery windows. The original stollen is quite a dense treat, it's a heavy yeast dough, the texture is crumbly like a fruit bread, but it has richness and depth. Raisins, candied orange and lemon peel infuse the cake for weeks while it sits wrapped in parchment paper in the darkness of the pantry. The top brushed with warm fat and then generously dusted with icing sugar, preventing it from drying out and giving it its snowy white Christmas look.
You can find various interpretations of the basic formula and fill the cake with marzipan, hazelnut or poppy seed paste to add taste and moistness. This is the first stollen recipe I ever created and I wanted it to be an aromatic firework of flavours without distracting from the classic's qualities. I went for bittersweet chocolate chunks, candied orange peel, and a touch of christmassy cardamom and aniseed. I'm more impatient than my granny, so we ate the stollen immediately. There's only one treat that I manage to wait for and that's English Christmas pudding.
Thanks to Kærgården for sponsoring this post, thanks for reminding me of my granny's kitchen and inspiring me to create my first stollen recipe!


Chocolate, Orange and Cardamom Stollen
For the stollen
plain flour 450g / 3 1/2 cups (divided)
granulated sugar 70g / 1/3 cup
ground cardamom 5 teaspoons
aniseed, finely ground in a mortar, 1/4 teaspoon
zest of 1 large orange
fast-acting yeast 2 sachets (7g / 1/4 ounce each)
water, lukewarm, 150ml / 2/3 cup
fine sea salt 1/8 teaspoon
soft butter, unsalted, 250g / 9 ounces
candied orange peel (preferably organic) 100g / 4 ounces
almonds, roughly chopped, 150g / 5 ounces
bittersweet chocolate (50%), roughly chopped, 170g / 6 ounces
For the topping
butter, unsalted, melted 50g / 2 ounces
icing sugar, sifted, about 4-6 tablespoons (to taste)
ground cardamom (optional, to taste)
In the large bowl of a stand mixer, combine 260g /2 cups of the flour, the sugar, cardamom, aniseed, orange zest, and yeast. Add the water and, using the hooks, mix for about 2-3 minutes or until well combined. If the dough is too sticky, add a little more flour. Cover the bowl with a tea towel and let the dough rise in a warm place, or preferably in a 35°C (100°F) warm oven, for 45 minutes or until almost doubled in size.
If the dough has almost doubled in size, add the remaining 190g / 1 1/2 cups of flour, the salt, butter, and orange peel and, using the hooks of the stand mixer, mix for about 3 minutes until smooth. Add the almonds and chocolate and continue mixing until well combined. The dough should be soft and shiny, but not sticky. Take the dough out of the bowl and, using your hands, knead for about 1 minute.
Line a baking sheet with parchment paper.
Transfer the dough to the lined baking sheet and form a short-ish loaf-shape. Flatten the dough a little, flip one long side over until it reaches the middle, then flip over the other long side (see 6th picture), pushing the layers softly together, but don't flatten the loaf, it will expand when it's in the oven! Cover with a tea towel and let rise for about 20 minutes.
Preheat the oven to 175°C / 350°F.
Bake the stollen for about 45-50 minutes or until the loaf is just baked through.
For the topping, brush the top of the warm stollen with the melted butter and dust immediately with icing sugar. If you'd prefer the cardamom to be more present (I recommend to try the stollen first), combine some icing sugar with additional cardamom (to taste) and dust the top of the stollen.
You can serve the stollen immediately, yet I prefer to eat it when it's cool and the chocolate isn't soft anymore. Keep it wrapped in parchment paper and aluminium foil.


Cherry Chocolate Meringue Pie
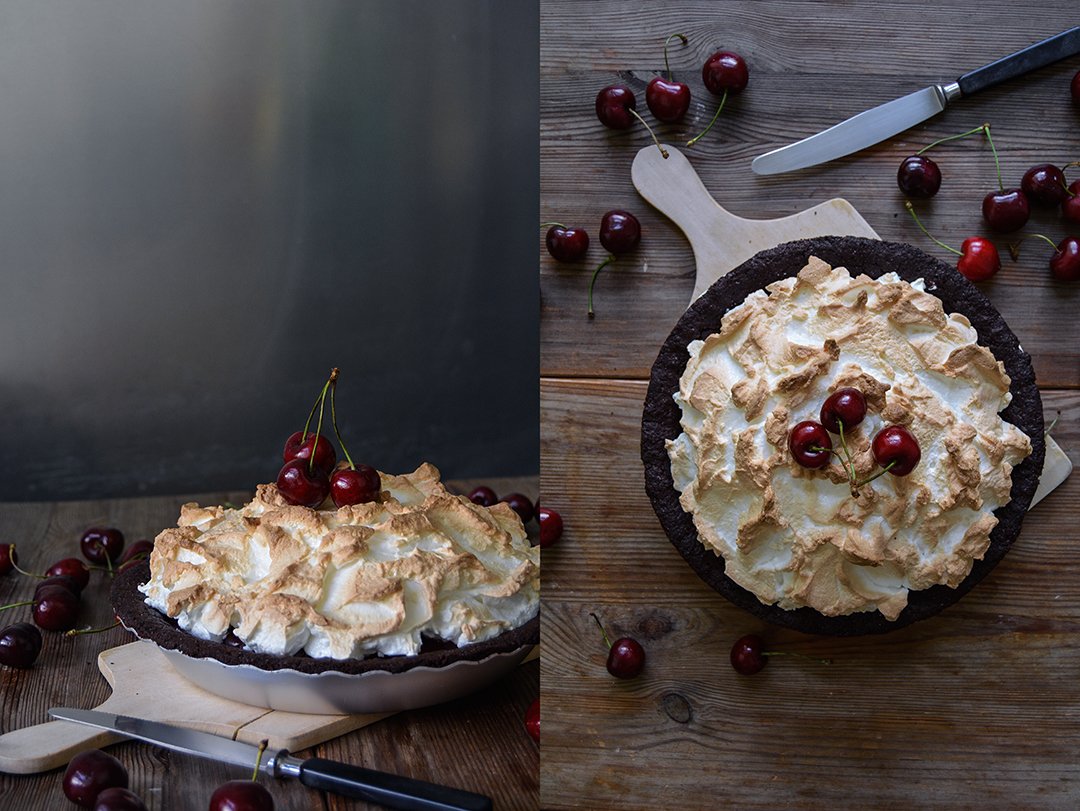
Think of Black Forest Torte and meringue pie, take out the heaviness of the whipped cream, and you have a rough idea of the taste of this opulent beauty. My Cherry Chocolate Meringue Pie has all the nice features of the famous southern German coffee table classic, including dark chocolate, Kirsch Schnaps, and sweet summer cherries - it's just lighter. You can also find this recipe in my 365 book.
My friend Jenny was the first baker who introduced me to meringue pie, her formidable lemon meringue pie blew my mind. Although we have similar cakes in Germany, like a sponge cake layered with gooseberries and meringue, it doesn't have the same qualities as a pie. It's richer, a proper German torte. A pie, however, focuses on the fruit filling, there's only a thin buttery short crust base holding all that lusciousness together. The wonderfully fluffy, airy meringue topping adds a very fine sweetness, wrapped in fragile crispiness. It works perfectly with sour rhubarb, a pink spring pie that became a popular recipe on the blog. I could have used the same formula for my plump black cherries, but I wanted a chocolate base. I couldn't get it out of my mind and I'm glad that I didn't, it's the perfect Schwarzwälder Kirsch Pie (the German name for black forest).

Cherry Chocolate Meringue Pie
You'll need a 23cm / 9″ shallow pie dish for this recipe.
Makes 1 pie
For the cherries
fresh sweet cherries, pitted, about 550g / 1 1/4 pounds (about 4 cups pitted cherries)
granulated sugar 100g / 1/2 cup
ground cinnamon 1 teaspoon
Kirsch schnaps 3 tablespoons
cornstarch 30g / 1/4 cup
For the pastry
plain flour 160g / 1 1/4 cups
Dutch-process or natural unsweetened cocoa powder 50g / 2 ounces
granulated sugar 3 tablespoons
fine sea salt 1/4 teaspoon
unsalted butter 120g / 1/2 cup
cold water 3 tablespoons
For the meringue
fresh organic egg whites 3
a pinch of fine sea salt
granulated sugar 80g / 1/3 cup plus 1 tablespoon
For the cherry filling, in a medium saucepan, heat the cherries, sugar, and cinnamon over medium heat, stirring constantly. When the sugar dissolved, stir in 2 tablespoons of the schnaps, close with a lid, and cook for about 5 minutes or until the cherries soften. Turn the heat down to low. Add 2 tablespoons of the liquid of the cherries to a small bowl and whisk in the cornstarch until smooth, pour back into the saucepan, stirring constantly until well combined. If you'd like the schnaps to be more prominent, add 1 tablespoon of the spirit. Pour the cherries and all the liquid into a wide pan and let them cool completely.
For the pastry, in the large bowl of a stand mixer fitted with the hook attachment, combine the flour, cocoa, sugar, and salt. Add the butter and use a knife to cut it into the flour until there are just small pieces left. Quickly rub the butter into the flour with your fingers until crumbly. Add the water and, using the hooks of the stand mixer, mix until combined. Form the dough into a thick disc, wrap it in plastic wrap, and chill in the freezer for 15 minutes.
Preheat the oven to 210°C / 410°F (conventional setting).
On a table or countertop, place the dough between 2 sheets of plastic wrap and use a rolling pin to roll it into a circle, large enough to line a 23cm / 9″ shallow pie dish. Push the pastry into the dish, trim any excess dough off the rim with a knife, then prick the pastry all over with a fork. Bake for 15 minutes. Let the pastry cool completely before you assemble the pie.
In the large bowl of a stand mixer, whisk the egg white and salt for 1 minute. Adding the sugar gradually, continue mixing for about 1-2 minutes or until stiff.Preheat the oven to 210°C / 410°F (conventional setting).
Pour the cool cherries and all the liquid on top of the pastry. Scrape the stiff egg white on top, shape it to a dome and form little peaks with a knife to create an uneven surface. Bake for 7 minutes or until the top is golden brown and crisp. Let it sit for about 30 minutes before serving, the cherries need to set.
The pie tastes best on the 1st and 2nd day, however, you need to keep it in the fridge, which softens the pastry.


Marbled Red Wine and Chocolate Cake
Let's start this beautiful Sunday with some happy news:
The Eat In My Kitchen book is one of Food52's '15 Piglet Community Picks 2017'! Thank you so much for your book love and support! And if I may ask you for a little more support, it would be fantastic if you could write a review of my book on Amazon, it can be a quick one, but it would help me a lot. Here are the links:
So, back to my kitchen: I've always had a sweet tooth, but I'm a bit of a piggy at the moment. There isn't a single day without cake on the table. Be it baked by myself, or a luscious piece of New York Cheesecake or hazelnut mascarpone torte from my favorite cafés around the corner; or those ultra soft and spongy yeast rolls and buns from a bakery - also just around the corner - that I only discovered a few months ago. I need my sugar no matter what my responsible mind tries to convince me of. Maybe I should have a day or two without it, I don't care. I'm the happiest person in the world when I'm snuggled into my beloved Butterfly Chair - that's currently covered in sheep fur for seasonal reasons - with a cup of Earl Gray tea on my lap and a large piece of cake close at hand.
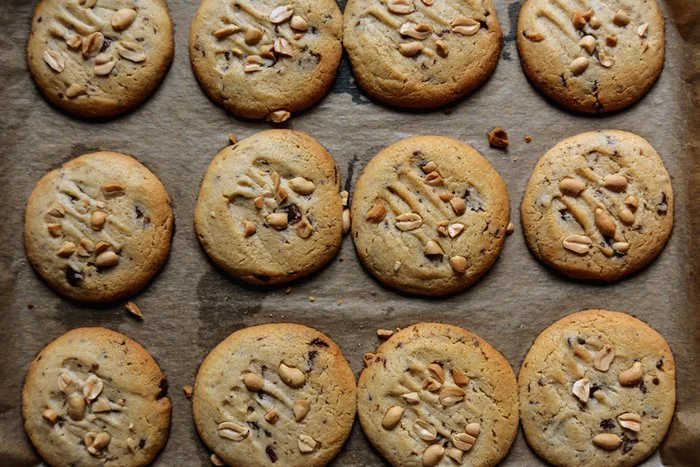
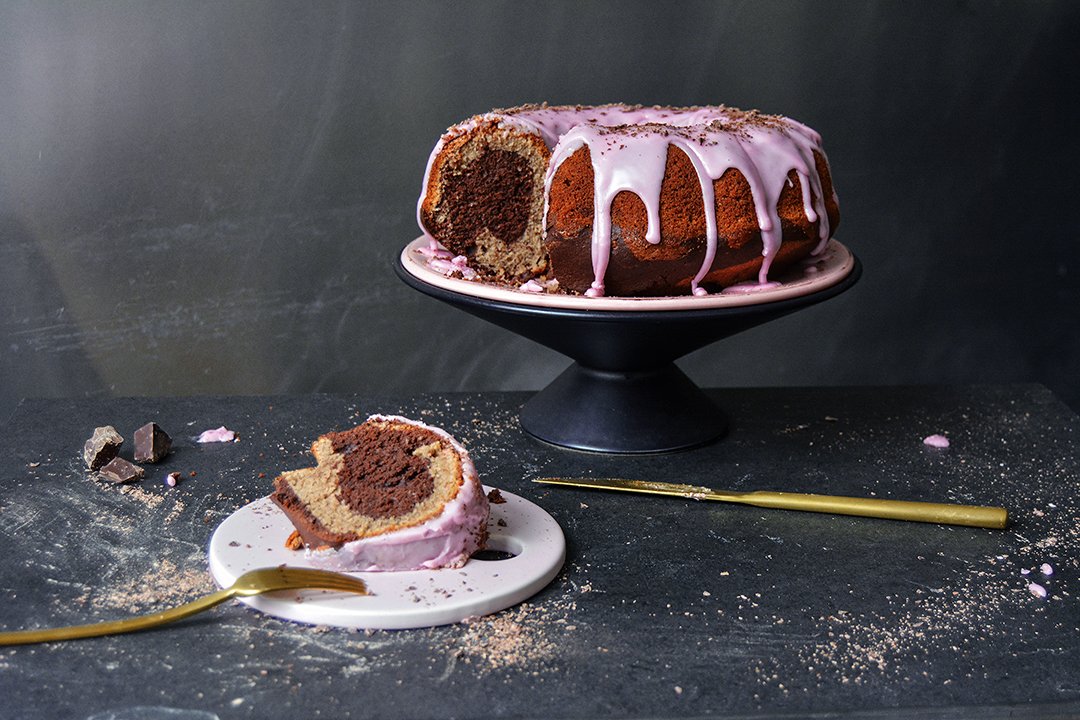
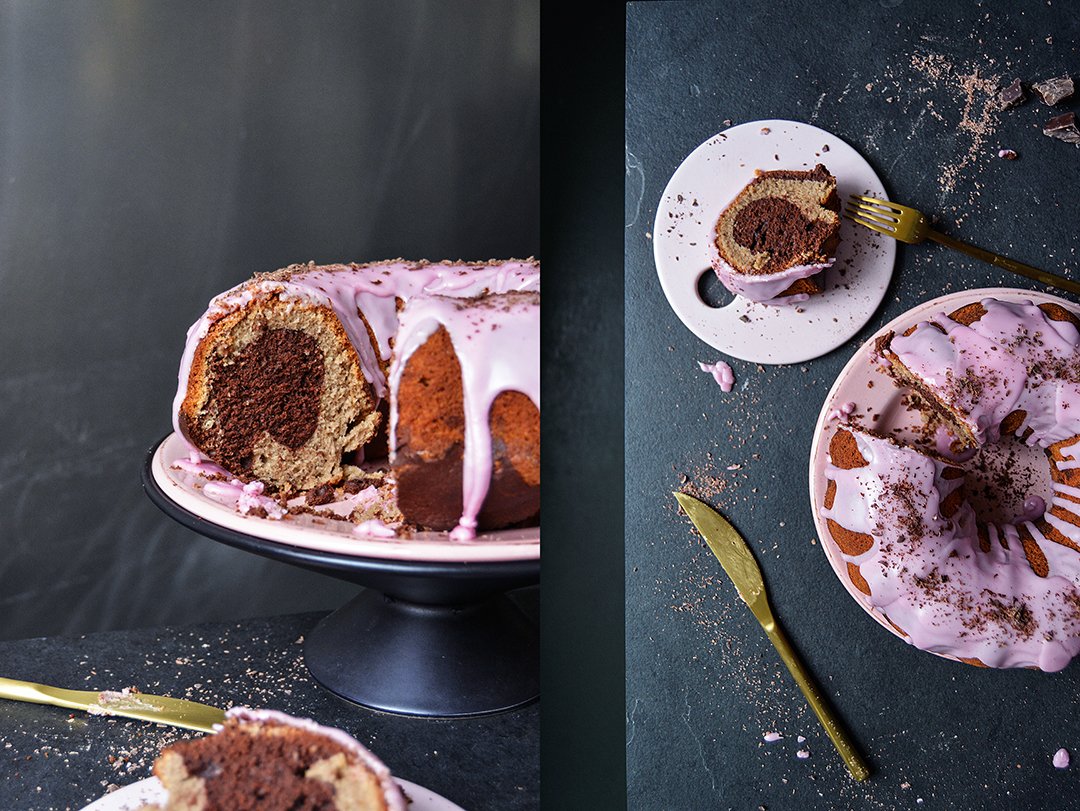
Last week I had even more reason to bake, two birthdays in the calendar called for a sweet feast. I made the Poppy Seed and White Chocolate Babka that I shared with you last Sunday, peanut butter meringues (the recipe still needs some tweaking, but it'll come up soon), and a marvelous marbled red wine and chocolate cake. It's a marriage between my long loved Red Wine Cake and my classic Chocolate Marble Bundt Cake - I couldn't be more satisfied with the result. It's a little less sweet than my original pink wine creation due to the bittersweet chocolate batter swirled in and it's just perfect. Imagine a large bite of this fluffy cake covered in sticky red wine glaze melting in your mouth. Heaven.
Marbled Red Wine and Chocolate Cake
Makes 1 Bundt cake
dry breadcrumbs, for sprinkling the pan
organic eggs, separated, 6
fine sea salt 1/8 teaspoon
plain flour 300g / 2 1/3 cups
baking powder 3 teaspoons
ground cinnamon 2 teaspoons
unsweetened cocoa powder 2 teaspoons, plus 30g / 1/3 cup for the chocolate batter
butter, at room temperature, 210g / 3/4 cup plus 2 tablespoons
granulated sugar 250g / 1 1/4 cup, plus 1 heaping tablespoon for the chocolate batter
red wine 120ml /1/2 cup
For the icing
icing sugar 220g / 2 1/4 cups
red wine 4-5 tablespoons
bittersweet chocolate, grated, 1 tablespoon
Preheat the oven to 180°C / 350°F (preferably convection setting). Butter a 23cm / 9″ Bundt pan and sprinkle lightly with breadcrumbs.
Whisk the egg white and salt until stiff, set aside.
In a large bowl, combine the flour, baking powder, cinnamon, and 2 teaspoons of the cocoa powder.
In the large bowl of a stand mixer, fitted with the paddle attachment, beat the butter and 250g / 1 1/4 cup of the sugar for a few minutes until fluffy. Add the egg yolks, one at a time, and continue mixing until thick and creamy. Add the red wine and mix until well combined. Using a wooden spoon, fold the egg white and the flour mixture into the butter mixture, alternating about 1/3 at a time, combining well in between.
Scrape half the batter into the prepared Bundt pan. Stir the remaining cocoa powder (30g / 1/3 cup) and sugar (1 heaping tablespoon) into the remaining batter, mix until well combined. Dollop the chocolate batter on top of the lighter batter and spread carefully. Using a small fork, swirl through the 2 batters, carefully from top to bottom, pulling slowly once all the way through the pan. Bake for about 40 minutes (slightly longer if using a conventional oven) or until golden and spongy. Check with a skewer, it should come out clean. Let the cake cool for 2-3 minutes, then shake the pan a little and flip the cake onto a plate to cool completely. If the cake won’t come out, place the warm Bundt pan into a large bowl filled with cold water. This will help loosening the cake from the pan.
For the icing, in a medium bowl, whisk the icing sugar with 4 tablespoons of red wine until smooth. Add more wine if the mixture is too thick. Drizzle the icing over the cake and sprinkle with chocolate while the icing is still soft. Enjoy!


Chocolate Spice Christmas Cookies with Candied Lemon Peel
I used to have a huge spice box in my kitchen that didn't look very pretty and also wasn't particularly practical. For whatever reason, I decided in my early kitchen years to store all my spice filled glass jars and tiny metal tins in this box and that's where I kept them for two decades. This beaten and buckled box still exists, I just use it for potatoes at the moment (even a box has to stay flexible in life). I used to arrange my spices in two layers of jars, so when I needed juniper berries from the bottom, I would always have to empty the whole thing. Rather impractical.
Around two years ago, I renovated my kitchen, I changed the sink and cupboards on one side of the room. When everything was set up, I had a skype call with my Maltese mama Jenny to proudly present my work to her. Not that she's particularly experienced in kitchen renovation, it's rather the opposite, she still works in her gorgeous sea-blue kitchen gem from the 60s. I don't remember why, but we started discussing the spice-situation in my kitchen. There's a slim cupboard with two sliding drawers next to my sink, so when we had our video chat, we both looked at this drawer and decided that it should become my spice cupboard. I arranged everything that same day and since then I'm more than happy to have such a luxurious overview of my spice collection.
The spices I use the most, right at the front when you open the door, are Maltese fennel and coriander seeds, the whole range of peppercorns in black, green, white, and pink, cinnamon, and cardamom. Jars of cumin, cloves, aniseed, allspice, juniper berries, and mustard seeds are right behind. Then there's the hot section, with cayenne and urfa chilli, plus sumac and a few spice mixtures. I love this cupboard, it's a bit chaotic, and it's still a colourful collection of various jars and containers, but it smells beautiful.
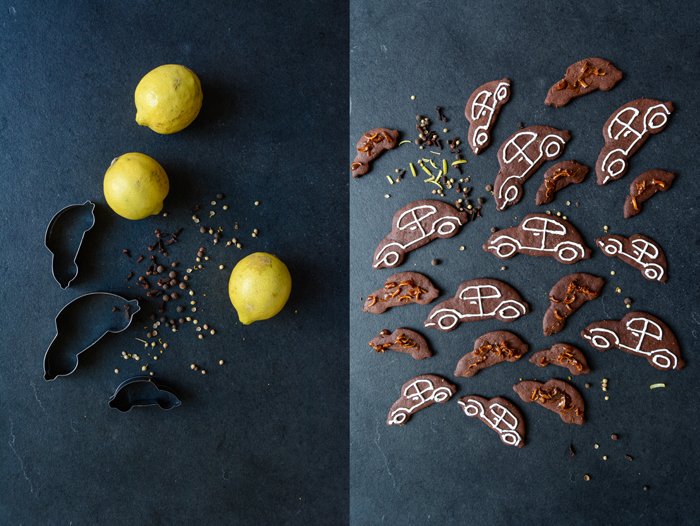
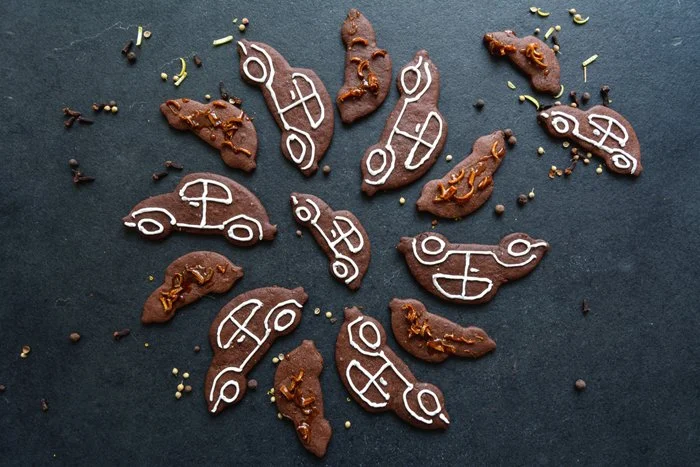
Although I generally prefer a certain order in my kitchen, there are zones and tools in this room that seem to follow their own rules. Cookie cutters, for example, tend to end up in places where I don't even know how they got there. I bought a large metal ring at one point to get my growing collection under control. Every year I buy a couple new ones to add to the classics, to stars, angels, and Santa. I tend to have annual favourites. Squirrel, sausage dog, and deer were popular for a long time, which might speak for my love of cute animals. My collection of three beetles is relatively new, maybe I need a car? Who knows. But apart from giving my cookies a cute look, a cutter should be practical. For example, I barely use the deer anymore because the cookies tend to lose their antlers in the oven, so it looks rather sad. My beetles however are very cooperative, roundish, no narrow parts, and they are even big enough to get a proper royal icing decoration.
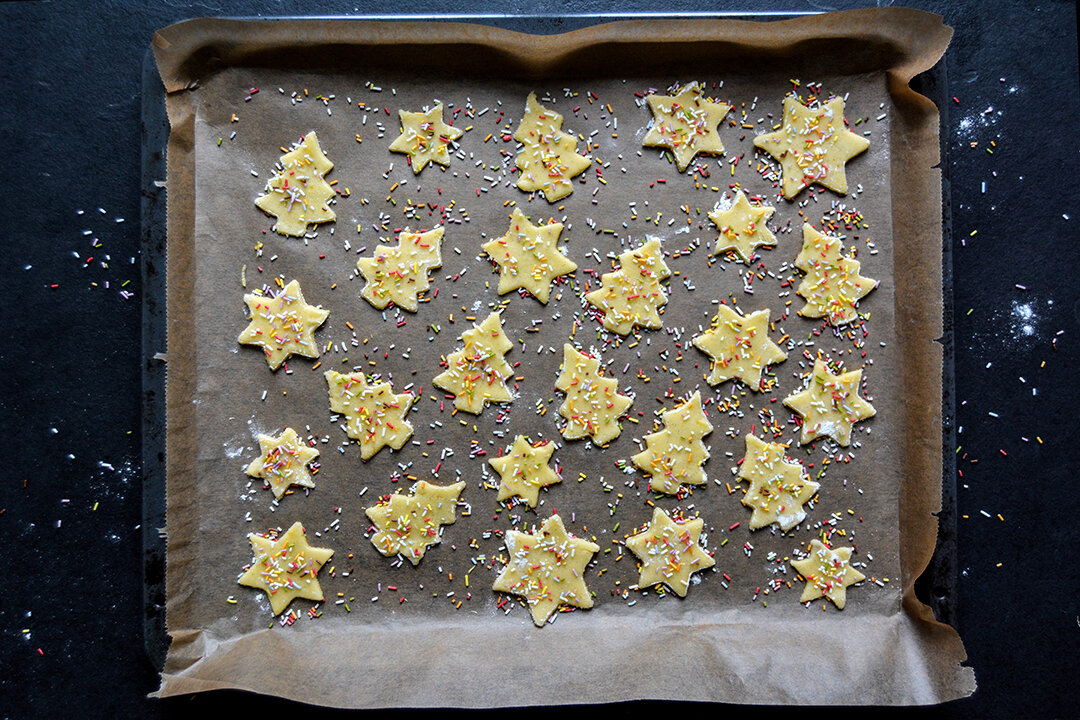
I must admit that decorating sweets is not one of my best talents. But I thought it would be nice to bake some cookies at this time of year that you can decorate - especially if there are kids around the baking table. And if you're as lazy as I am and you have a soft spot for citrus, I have a great alternative for you. Decorate half the batch of these delicious chocolate spice cookies with royal icing (I recommend you trust the pros and buy the mixture from a baking shop) and make your children happy. For the other half, caramelize lemon peel until sweet and crunchy, sprinkle this sticky golden mixture over the remaining cookies and make yourself happy. These are the adult cookies. They aren't as pretty as the cute hand decorated ones, but the combination of dark chocolate, cinnamon, cloves, coriander, aniseed, and candied lemon peel makes up for it. They taste so unbelievably good that you won't even mind the looks.
For more delicious recipes and kitchen inspiration, visit Volkswagen's Pinterest community board Food Bloggers for Volkswagen.

Chocolate Spice Christmas Cookies with Candied Lemon Peel
Makes about 50 cookies
For the cookies
plain flour 260g / 2 cups
unsweetened cocoa powder 50g / 1/2 cup
baking powder 1/4 teaspoon
freshly grated lemon zest 1 tablespoon (from 1 large lemon)
ground cinnamon, 1 teaspoon
cloves, ground in a mortar, 10 (about 1/2 teaspoon ground cloves)
coriander seeds, ground in a mortar, 2 teaspoons
aniseed, ground in a mortar, 1/2 teaspoon
allspice berries, ground in a mortar, 4
fine sea salt 1/8 teaspoon
butter, at room temperature, 130g / 1/2 cup plus 1 teaspoon
icing sugar 120g / 1 1/4 cups
organic egg 1
For the decoration
(if decorating half the cookies with royal icing and the other half with candied lemon peel)
royal icing mixture, whisked with a little water, about 60g / 2ounces
granulated sugar 50g / 1/4 cup
water 2 tablespoons
very thin strips of fresh lemon peel, 1 small handful
In a large bowl, combine flour, cocoa powder, baking powder, lemon zest, cinnamon, cloves, coriander, aniseed, allspice, and salt.
In the bowl of a stand mixer, fitted with the paddle attachment, beat the butter and icing sugar until fluffy. Add the egg and mix for about 1 minute or until well combined. Replace the paddle attachment with the dough hook, add the flour-spice mixture to the bowl with the butter, and mix until well combined. Form a thick disc, wrap in cling film and put in the freezer for about 20 minutes.
Preheat the oven to 160°C (325°F) and line 3 baking sheets with parchment paper.
In batches, roll the dough out thinly (about 3mm / 1/8" thick) between cling film and cut out cookies in whatever shape you like. Keep the remaining dough in the fridge while cutting the cookies. Arrange the cookies on the lined baking sheets and bake, one baking sheet at a time, for about 6 minutes or until golden. Let them cool for a few minutes before you transfer them to a cooling rack.
For the royal icing, whisk the royal icing mixture with a little water (following the instructions on the package) and, using a piping bag with the smallest attachment you can find, decorate half the cookies.
For the candied peel, in a small saucepan, bring the sugar and water to the boil. When it starts to caramelize add the lemon peel. Lower the heat to medium and cook for about 3 to 4 minutes or until the peel is golden and soft—mind that it doesn't burn. While the caramel is still liquid (you can leave the saucepan on lowest heat), quickly sprinkle the remaining cookies with the candied lemon peel.
Happy baking!


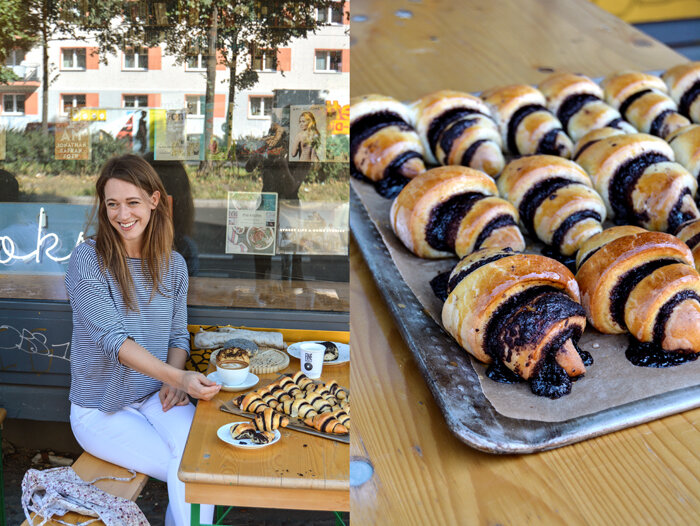
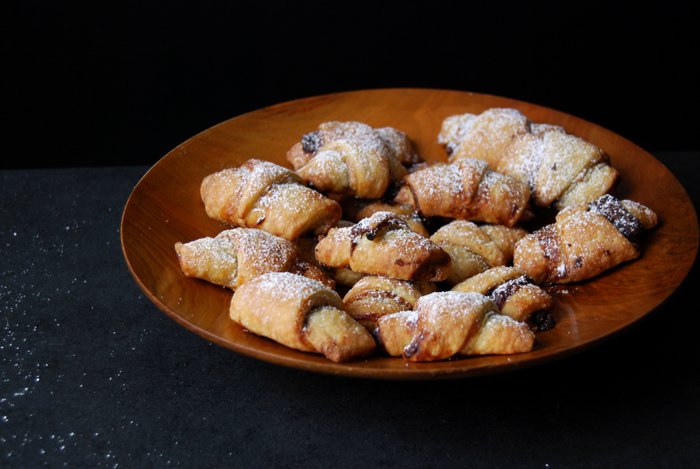
meet in your kitchen| Shakespeare & Sons, Berlin and Laurel's Chocolate Rugelach

"They both slow you down. They’re both transportive. They both smell good. They can both be enjoyed at the same time" - Laurel's words, when I asked her what she likes about the connection of food and books.
I've enjoyed sweet treats made by Laurel's hands for many years, but it took a while for us to meet personally. Together with her business partner Roman, the young woman from Boston runs Berlin's popular Shakespeare & Sons and Fine Bagels - a heavenly place for English books, bagels, cookies, rugelach, and cakes - all in one store! Originally, they started their Berlin business in a cozy space in Prenzlauer Berg that was, conveniently, quite close to where I live. But two years ago they had to move and I lost my dear store. A recent coffee date at their gorgeous new store in Friedrichshain brought back memories and awoke the idea to meet the stranger behind all these amazing sweet goods. It was actually a chocolate rugelach - possibly the best rugelach I ever ate - that made me get in touch with Laurel that same day. Her rugelach is gooey, chocolatey, sweet and juicy, it's so good that you basically have to order one after the other. When we met later, Laurel told me that her dear friend Sanam used to say that every rugelach sticks to your hips for seven years. If something tastes so good, I don't care about my hips, it's worth every pound!
Laurel is a self-taught baker with a weak spot for anything baked and sweet, a trait of her food loving family. Especially the women are quite gifted and know how to impress the hungry crowds at their kitchen tables with homemade cookies, cakes, and breads. Luckily, for generations, this passion has been passed on to the young ones.
Although she calls herself a shy bird who prefers to stay behind the scenes, when I saw her roll out the puffy yeast dough, dishing out stories about Israeli and American rugelach, I didn't believe it at all. Laurel sounds like a pro who must have a cooking show one day. I enjoyed watching her spread the dark chocolate filling lusciously over the orange flavoured dough so much, that I almost forgot how hungry I was. Luckily, it only took 15 minutes and she pulled out the most fragrant warm rolls in front of my camera - and then they went straight into my mouth.
Shakespeare and Sons also have the English Eat In My Kitchen book on their shelves!


Laurel's Chocolate Rugelach
For the dough
7 cups / 910g bread flour
2/3 cup / 130g granulated sugar
4 1/2 teaspoons instant yeast
2 teaspoons salt
1 cup / 225g butter
1 1/3 cups / 315ml milk
1 tablespoon vanilla extract
4 eggs
zest of 1 orange
For the filling
3 cups / 600g of sugar (this can be substituted for demerara or even muscavado for a stronger flavor)
2 1/4 cups / 270g unsweetened cocoa powder
3 tablespoons ground cinnamon
1 3/4 cups / 415g butter
For the egg wash
2 eggs, lightly beaten
In a bowl, whisk together flour, sugar and yeast. When that is mixed in, add salt and whisk again. In a saucepan, melt butter on low heat and then remove from heat. Add milk and whisk. Add vanilla and eggs and whisk. Pour liquid mixture into the flour mixture. If using a mixer, mix until incorporated with the paddle attachment, then switch to a dough hook. Knead with the dough hook for 5 minutes. If mixing by hand, mix well with a wooden spoon and then turn out onto a floured surface and kneed well for about 7 minutes. It's a very stick dough however, so it's best to use a machine. Put the kneaded dough into a well-greased bowl, cover with a wet cloth or plastic wrap, and let rise for about an hour or until your fingerprint in the dough doesn't spring back.
Preheat the oven to 175°C / 350°F. Line 2 baking sheets with parchment paper.
While your dough is rising, make the filling. Mix sugar, cocoa, and cinnamon. Melt butter and pour on while hot. Mix well. Set aside to cool. You can cool it faster in a refrigerator, but be careful not to let it sit in the fridge for too long. It will turn into a solid block.
Turn out your dough onto a floured surface and cut it into 3-5 balls, depending on how large you want your rugelach. There's no need to punch down the risen dough, as the rolling will do that for you. Roll out one of your dough balls into a perfect circle about 1/2cm / 1/4" thick. Spread your filling evenly and thinly across the dough, being careful not to tear the gentle dough. Use a pizza cutter to trim the edges and to divide the dough circle into about 12 triangles, like pizza slices. Now starting from the outside of the circle, roll up your rugelach so they look like little croissants. Place on a baking sheet.
When you've done this for all of your dough, brush your rugelach with an egg wash and bake for about 15 minutes. When you take them out of the oven, drizzle with simple syrup. Oh damn, now you get to eat them.
This recipe also freezes beautifully. I usually bake up as many as I want and put the rest of the unbaked rugelach in the freezer to take out and bake as I need them. (Think about the possibilities here. Seriously. Lazy winter weekend mornings in bed and then...poof...15 minutes later you've got gooey hot rugelach in your kitchen? This is a maximum pleasure recipe so it's a wise move to keep them on hand). Just give them a few minutes to thaw before you throw them in the oven.

How does an ex-physicist decide to start a bagel shop? When did you come up with the idea? Did this idea grow over years or was it a spontaneous decision?
Ha, I don’t know if I’d call myself an ex-physicist. I’d say I got the physics degree and ran. The bagel shop happened out of pure, selfish necessity. I found myself living in the first-class bagel desert of Berlin and, frankly, I was hungry. I tried to assimilate, I swear. Ate broetchens, croissants, muesli...you name it. What can I say? They weren’t doing it for me like a bagel and cream cheese does. I’ve always been a home baker, wasn’t particularly focused on anything else at that point in my life, and it just struck me as something to do. So pretty spontaneous.
At your peak, you baked 350 bagels every day on your own before you put your team together. You offer 25 different bagels at your shop, sweet and savoury. What fascinates you about this popular bun with a hole in the middle?
The bagel is a creature of the diaspora. At this point, it’s as much American as it is Polish-Jewish. It’s spent the last hundred years moving out of the basement-level New York bakeries, getting softer and bigger, and landing on breakfast plates the world over. At the same time, bagels are no longer created with the same reference point or even a nod to their history, and I think it’s important to maintain standards. What I like about a proper bagel is the deliberate chewiness and the impractical hole. The hole serves only to gush cream cheese and soil your clothes. And yet it’s got to be there. More surface area for the flavorful skin. So it’s not an easy food. But it’s such a good food.
Both of us share a passion for rugelach, can you tell us a bit about the difference between American style rugelach and the traditional recipes rooted in Israel?
Ok, so the kind of rugelach I’m familiar with from back home (Boston) are more of a gently flaky cookie made with a cream cheese or sour cream dough and a filling of jam, chopped nuts, raisins, and cinnamon sugar. The dough is a royal pain to work with, but worth it. Meanwhile the rugelach you’d find in Israel are generally from a yeasted dough and reach the level of chocolate-y gooeyness that solicits involuntarily obscene vocals from those eating them. Or maybe that’s just me. This is disloyal to my upbringing, but I’m just going to say it: there is nothing better than an Israeli rugelach. The clouds of bees in the shuk in Jerusalem agree with me.
What makes the Ashkenazi baking tradition so special to you?
A hundred years ago, my great-great grandmother and her sister made their living baking breads and challahs in a village on the outskirts of Warsaw. All the women in my family are wonderful bakers and this is a way of maintaining and honoring a longstanding food tradition. The mandelbread recipe I use in the store goes back at least four generations. I’m not sure how the ancestors would feel about the double-whammy of reverse migration and return to the kind of baking that for them was a tough necessity and for me a cutesy, artisanal hobby-turned profession, but that’s 21st century privilege for you.
What's the hardest part of running your own bakery?
Not eating all the cookie dough.
Are there any Shakespeare and Sons plans for the future, apart from books and bagels?
Right now I’m working with several other people to organize a Jewish food week called Nosh Berlin. It’ll be from March 19-26 2017. There’s never been an event like it here and people are really coming together. To kick it off, we’re partnering with The Breakfast Market at Markthalle Neun to have a Jewish breakfast market with everything from bagels to blintzes to jachnun to Ethiopian dishes, and more. The idea is to get as much wonderful Jewish food together in one place as possible. We’re drawing from local chefs and home-cooks as well as folks from abroad. Then throughout the week there will be events all over the city, from popup dinners to cooking classes to film showings to readings. So everyone should set aside a lot of tummy real estate for that week.
You grew up in Boston, you've lived in Kathmandu and in Prague, and you've called Berlin your adopted home for more than 5 years. What do you like about the capital? What inspires you in this city?
What I like about this city is how easy it is to do your own thing here. It’s a place with very little open judgement about life choices and success seems to be measured differently than where I grew up. And that has provided me and a lot of other people with the room to make slightly unorthodox dreams reality.
What do you like about the connection of food and books?
They both slow you down. They’re both transportive. They both smell good. They can both be enjoyed at the same time.
Can you tell us a little about the history of the house and store where you opened the new Fine Bagels/Shakespeares and Sons shop?
So the building in Friedrichshain where we’re currently located was built in 1962 as a bookstore and apartment building. Since it was in East Germany, it was a state-run bookstore until the fall of the wall, at which point it was privatized. To this day, old Berliners are always popping in to wax nostalgic about their memories of the bookstore from back in the day. If you walk into the store, you’ll noticed a raised portion to your left. It sits on top of a Cold War bunker that was built-in. Meanwhile, all of the built-in bookcases are original. They were covered in terrible particle board from the early ‘90s and when we tore it down, there was the beautiful original wood shelving. It’s a big space so we’re able to accommodate the bakery kitchen, the cafe, and the bookstore. It was a stroke of luck to get it.
You say that many women in your family are passionate home bakers, what did you learn from them? And what about the men in your family?
We’ve got some sort of cruel genetic predisposition to a sweet tooth running down both the paternal and maternal branches of my family. So there was always someone baking sweets. Cookies, cakes, quick-breads. My mother in particular is a home-made obsessive and passed that on. Particularly chocolate chip cookies, kugel, and zucchini bread. One grandmother was always making the most divine Toll House Cookies you’ve ever tasted and the other one was all about blueberry pies and cheesecakes. Would you believe it if I told you my maternal grandmother was an early adopter of the Weight-Watchers program? Shocking.As for the men, well, at least a lot of them are good dish washers. That’s all I’ll say.
If you had to name one dish from where you grew up, back home in Boston, that you miss the most, what would that be?
Honestly, just an onion bagel and cream cheese from Rosenfeld’s in Newton Center. I’m absolutely devoted. They’re the best. And good seafood, of course.
Which are your favourite baking cookbooks and why?
My absolute favorite is Inside the Jewish Bakery. There are no pretty pictures, but it’s the most accurate and comprehensive survey of Jewish-American bakery recipes I’ve ever seen. It’s full of history and storytelling and extraordinarily detailed instructions. And that’s what it should be. The authors, Norman Berg and Stanley Ginsberg, both made their careers in these very bakeries and know better than anyone what they’re talking about. It’s my ultimate reference point.
Where do you find inspiration for new recipes for the Fine Bagels' menu?
Mainly I try to wheedle old family recipes out of the elderly. Other than that, I go home and visit the old-school bakeries and delis around where I grew up. I’m not really trying to do anything so innovative. I’m more interested in preservation.
Who is your biggest inspiration in the kitchen?
Meike, this is entrapment! If I told you it was someone outside of my family, what would the family say? If I told you it was someone within my family, they’d think I was playing favorites. I’ll whisper it in your ear, but you can’t tell the internet. It’s my own neck I’ve gotta think about.
What was the first dish you cooked on your own, what is your first cooking memory?
Chocolate chip cookies with my mother. You hang around hoping to lick out the bowl long enough you inadvertently learn to bake.
What are your favourite places to buy and enjoy food in Berlin?
The fairly new Bread Station on the Maybach Ufer does the best sourdough loaves I’ve ever had. They’ll schmear up a hot broetchen with salted butter and comte for you and it’s heaven. Merle’s Roti and Rum near Yorkstrasse is divine...piles of hot roti, spicy curries, and homemade ginger beer. Heno Heno in Charlottenberg is worth the trip across town. Homey don buri, sour plum onigiri, and herring nigiri appetizers. Lon Men’s Noodle House on Kantstrasse and Agni on Prenzlauer Allee are two other favorites.
If you could choose one person to cook a meal for you, who and what would it be?
Joan Nathan. She’s the queen.
You're going to have ten friends over for a spontaneous dinner, what will be on the table?
A proper Nepali dal bhat tarkari. It’s the most wonderful food in the world. I bothered a lot of people into teaching me to cook while I lived over there and it’s still my favorite thing to make. A shout out of gratitude here to Saraswati Pangeni, Sudeep Timalsina, and Nirajan Tuladhar.
What was your childhood's culinary favourite and what is it now?
Childhood favorite? French toast. Grown up favorite? French toast.
Do you prefer to cook on your own or together with others?
I’m a kitchen misanthrope. Mainly because I’m clumsy. My ideal cooking scenario is having a friend hang out a safe 4 feet away from the cooking. They will gossip to me and drink wine while I make everything. Some days, like yesterday, this is not far off from the reality of my professional kitchen. Can’t say if that’s a good thing or not.
Which meals do you prefer, improvised or planned?
Planned. I live in permanent fear of not making enough food for my guests. This has never happened, but I gotta stay vigilant.
Which meal would you never cook again?
Latkes for 100 people. I smelled like a fry trap that fell into an onion field and my skin broke out in zits like a pubescent boy. Brutal.
Thank you Laurel!


Orange, Chocolate & Buckwheat Muffins
What a week!
The German Eat In My Kitchen book is out and my English book will follow next week, on the 4th October. Just 2 more nights!
The New York Times included the Eat In My Kitchen book in their list of 'The Best Cookbooks of Fall 2016'. NY Times' editor Florence Fabricant wrote a very nice review and also shared one of my recipes from the book. To call me excited would be a complete understatement - I feel insanely happy!
I had my first book launch event in my hometown Berlin, on the gorgeous roof terrace of the stunning Hotel de Rome. It was a golden afternoon, literally, we had blue skies and a slow sunset that wrapped the whole scene in magical light! There were so many wonderful people, fantastic wine from Meridiana Wine Estate in Malta, I offered my first food tastings - and saw many happy faces - and I held my first talk about my book, with dear Cynthia Barcomi. It was an unforgettable event and the best start possible for my book tour (you can see the pictures of the event here). Here's a picture of me at my launch, taken after I gave one of my cookbooks to tennis legend Boris Becker and his wife - the lunching family had to move table due to our event. I still feel a little bad because of that. Lots of nice pictures from the event are waiting on my computer to be shared on the blog, but I guess they'll have to wait a few more weeks, Malta is the next stop on my book tour. More adventures, book talks, and travels to come! To be continued ...
Here's a muffin recipe that I came up with - by request - a few months ago. Although oranges are a typical winter fruit, you can find them on the large fruit plate in my kitchen all year round. I can't live without their fragrant zest, especially in my baking. Pair it with bittersweet chocolate and you end up with one of the best combinations that the sweet world can offer (see last week's recipe from my cookbook). My quick and easy Sunday muffin is gluten free, made with buckwheat flour and ground almonds. It adds a nutty flavour, the texture is a little less dainty compared to plain flour, but the result is wonderful. Give me a cup of cappuccino and a few of these breakfast treats and I'm in heaven, especially when I can move straight to my sofa after a week of so much excitement.


Orange, Chocolate, and Buckwheat Muffins
Makes 12 muffins
buckwheat flour 200 g / 1 1/3 cups
ground hazelnuts or almonds 170 g / 1 1/2 cups
granulated sugar 100 g / 1/2 cup
freshly grated orange zest 3 tablespoons, plus more for topping
baking powder 3 teaspoons
baking soda 1/2 teaspoon
fine sea salt 1/4 teaspoon
freshly squeezed orange juice 120 ml / 1/2 cup
whole milk 120 ml / 1/2 cup
organic eggs 3
unsalted butter, melted and cooled, 125 g / 1/2 cup plus 1 tablespoon
bittersweet chocolate, roughly chopped, 100 g / 3 1/2 ounces
paper muffin pan liners 12
Preheat the oven to 190°C / 375°F (preferably convection setting). Line a 12-cup muffin pan with paper liners.
In a large bowl, whisk together the buckwheat flour, hazelnuts, sugar, orange zest, baking powder, baking soda, and salt.In a medium bowl, whisk together the orange juice, milk, eggs, and butter. Add to the flour-mixture and stir with a wooden spoon just until a lumpy batter forms. Gently fold in the chocolate. Mind that if you mix the batter too much, the muffins will lose their light texture.
Spoon the batter into the muffin cups and bake for about 16 minutes (slightly longer if using a conventional oven) or until golden. Take the muffins out of the pan and let them cool on a wire rack for 2 minutes before serving. Sprinkle the tops with a little orange zest.


From my cookbook: Chocolate Olive Oil Bundt Cake with Candied Orange Peel
Berlin, 2016:
The first picture of today's post caught the moment I held my Eat In My Kitchen cookbook in my trembling hands for the first time. I had to sit down, or rather, I fell into my beloved old chair in my living room. This chair has seen many emotions, sad and happy, it's been with me all my life and it's the place I want to be when the world around me becomes a little overwhelming.
So this chair had to catch me once again. My knees were wobbly and I didn't know if I should laugh or cry, so I did both. I received a package from my publisher and I knew what it was before I even opened it: two books, my books.
Tomorrow is a very special day, my German book, Eat In My Kitchen -sssen, backen, kochen und genießen, will be published and in a week the English book will follow: Eat In My Kitchen- to cook, to bake, to eat, and to treat, on October 4th. The book is already on Epicurious' list of 'The 25 Most Exciting New Cookbooks for Fall 2016' and my heart is jumping with joy!!
So many people keep asking me how I feel about my big publishing day(s), whether I'm excited, proud, or nervous. To be honest, I can't really say how I feel. Maybe confused and overwhelmed? As much as it felt normal to write this book at one point, to cook and bake the recipes, and to take the pictures, strangely enough it's starting to feel normal to know that it'll be out soon. It may sound weird and maybe I'm wrong, maybe I'll have a nervous breakdown at one point, maybe when I present the book in front of an audience (in the next few weeks, all over Europe and in the US), or when I see it at in bookstores, or when I watch people pulling it off a shelf and buying it. I don't know.
Luckily, I don't have much time to think about it, which is sometimes the best thing that can happen. Eat In my Kitchen feels as intuitive, natural, and close to myself as it can get. The physical book just as much as this blog. I'm in my comfort zone, constantly, which I consider to be the greatest gift. I don't take anything for granted in life, I'm here and I want to learn, grow, and experience everything. I don't know if I'll fail or succeed with this book, but it's also nothing I want to worry about. Every recipe, every story and picture that fill the 256 pages of this book, is totally me, to question or doubt its relevance, would be fatal. That would mean questioning my passion and my beliefs, before this book even sees a shelf in a bookstore.
I can say that I'm unbelievably happy that this book exists. With a big smile on my face, I stand behind all I've created and written in the past year and a half to fill its pages, in both the German and the English book. I went through many lows and I took the highs with great pleasure, I suffered and I cried, I changed some decisions and stood strongly behind others. I've been through my battles, while working on these pages. But now I let go. A month ago I wrote about this transition, this process of letting go of a project. Tomorrow, this process will be complete.
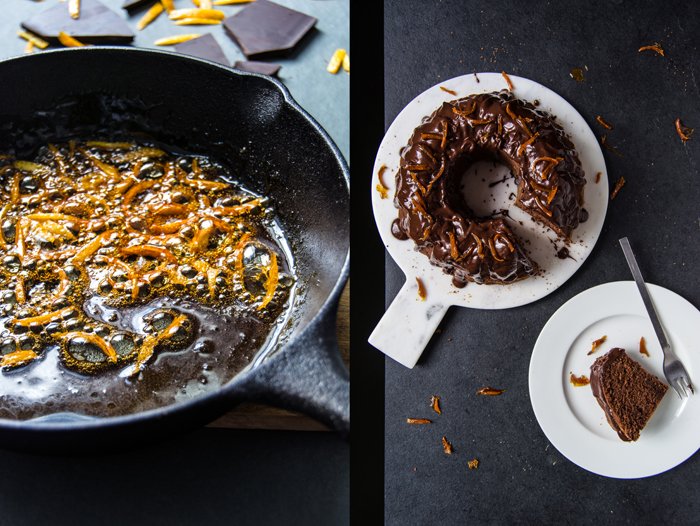
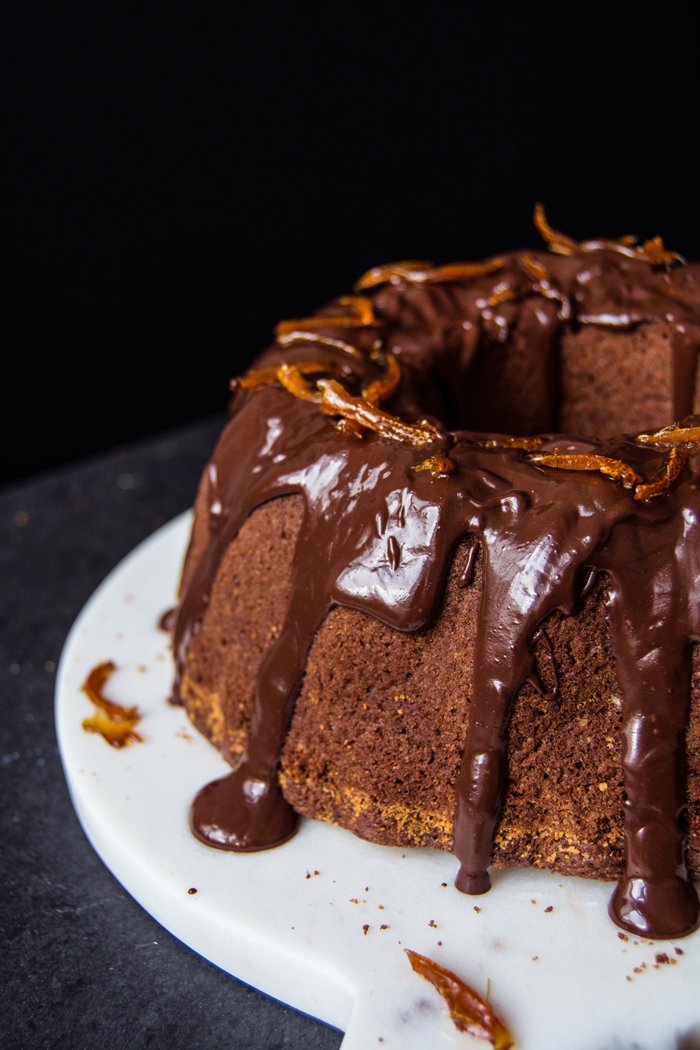
Today sees a premier on the blog, I'm sharing the first recipe from my book with you and, also for the first time, I'll share a recipe in English and in German. I get many requests to write my blog in two languages, and as much as I'd love to do that, I simple don't have enough time. I appreciate the effort of so many of you who aren't that familiar with the English language but still give it a try and follow my recipe instructions in a foreign language. Today, my German readers, you can relax and bake the most delicious, spongy chocolate olive oil Bundt cake, topped with a thick chocolate glaze and sweet and crunchy caramelized orange peel. I love this cake!
Next week, I'll share another recipe from my book with you, on the 4th October, on the day when my English readers can hold the book in their hands for the first time. I'll be in Malta at that point, celebrating the book at my launch at the gorgeous Villa Bologna before my journey takes me to London, New York, and Washington. I'll try my best to keep up with writing about all this here on the blog - and I also intend to start sharing videos on Instagram, so please come over and join my journey in the next few weeks and months.
Today I want to thank my amazing team here in Germany, all the wonderful women and men who made this book possible. Thank you everyone at Prestel in Munich, especially Pia, Julie, and Adeline. Thank you so much Ellen Mey for being my editorial guidance.
So very soon the book will be available in bookstores, and in case you can't find it on the shelves, you can order it at any bookstore in the world, or here:


Chocolate Olive Oil Bundt Cake with Candied Orange Peel
from Eat In My Kitchen - to cook, to bake, to eat, and to treat, published by Prestel
SERVES 8 TO 12
Dry breadcrumbs, for sprinkling the Bundt pan
2 cups (260 g) all-purpose flour
1 cup (200 g) granulated sugar
1 tablespoon baking powder
1 teaspoon baking soda
⅛ teaspoon fine sea salt
5 ounces (140 g) bittersweet chocolate
⅔ cup (155 ml) olive oil5 large eggs
3½ tablespoons (50 ml) whole milk
1 tablespoon freshly grated orange zest
3½ tablespoons (50 ml) freshly squeezed orange juice
FOR THE CHOCOLATE GLAZE
5 ounces (140 g) bittersweet chocolate
1 tablespoon (15 g) unsalted butter
1 to 2 teaspoons sunflower oil
FOR THE CANDIED ORANGE PEEL
¼ cup (50 g) granulated sugar
2 tablespoons water
1 small handful very thin strips of fresh orange peel
Preheat the oven to 350°F / 180°C (preferably convection setting). Butter a 7½-cup (1.75 l) Bundt pan and sprinkle generously with breadcrumbs.
In a large bowl, whisk together the flour, sugar, baking powder, baking soda, and salt.
In a large heat-proof bowl set over a saucepan of barely simmering water, melt the chocolate. Let cool for a few minutes then add the olive oil, eggs, milk, orange zest, and orange juice, and beat with an electric mixer for 2 minutes or until smooth. Add to the flour mixture and quickly mix with an electric mixer for 1 minute or until well combined. Pour the batter into the prepared Bundt pan and bake for about 35 to 40 minutes (slightly longer if using a conventional oven) or until golden brown and firm on top. If you insert a skewer into the cake, it should come out clean. Let cool for a few minutes then shake the Bundt pan a little and turn the cake out onto a plate. Let cool completely. Trim the bottom of the cake to even it out.
For the chocolate glaze, melt the chocolate and butter in a saucepan over low heat. Add 1 to 2 teaspoons of vegetable oil and whisk until smooth. Pour the glaze over the cooled cake, evening it out with a knife or leaving it in voluptuous drops.
For the candied orange peel, in a small saucepan, bring the sugar and water to a boil. When it starts to caramelize add the orange peel. Reduce the heat to medium and cook for 3 to 4 minutes or until the peel is golden and soft—mind that it doesn’t burn. While the caramel is still liquid, quickly transfer the candied peel to a piece of parchment paper. Let cool for 1 minute then peel it off the paper and decorate the cake while the glaze is soft.

German recipe:
Schokoladen-Gugelhupf mit Olivenöl und Kandierter Orangenschale
aus Eat In My Kitchen - essen, backen, kochen und genießen, veröffentlicht bei Prestel
FÜR 8–12 PERSONEN
Semmelbrösel, für die Gugelhupfform
260 g Mehl200 g Zucker
3 TL Backpulver
1 TL Speisenatron1 Prise feines Meersalz
140 g Zartbitterschokolade
150 ml Olivenöl
5 Eier
50 ml Milch
1 EL Orangenabrieb
50 ml frisch gepresster Orangensaft
FÜR DIE SCHOKOLADENGLASUR
140 g Zartbitterschokolade
1 EL Butter
1–2 TL Sonnenblumenöl
FÜR DIE KANDIERTE ORANGENSCHALE
50 g Zucker
2 EL Wasser
1 kleine Handvoll sehr dünne Streifen Orangenschale
Den Ofen auf 180 °C (Umluft) vorheizen. Eine Gugelhupfform (1,8 l) einfetten und großzügig mit Semmelbröseln bestreuen.
In einer großen Schüssel Mehl, Zucker, Backpulver, Speisenatron und Salz vermischen.
Die Schokolade in einer großen Schüssel über einem Wasserbad schmelzen. Ein paar Minuten abkühlen lassen, dann Olivenöl, Eier, Milch, Orangenabrieb und Orangensaft dazugeben und mit einem Handrührer etwa 2 Minuten glatt rühren. Zu der Mehlmischung geben und mit dem Handrührer etwa 1 Minute gut verrühren. Den Teig in die vorbereitete Gugelhupfform gießen und etwa 35–40 Minuten goldbraun backen, die Oberfläche sollte fest sein. Ein Metallstäbchen sollte nach dem Einpieksen in den Kuchen sauber sein. Ein paar Minuten abkühlen lassen, dann die Gugelhupfform ein wenig rütteln und den Kuchen auf eine Platte stürzen. Komplett auskühlen lassen und, falls nötig, den Boden gerade schneiden.
Für die Schokoladenglasur Schokolade und Butter in einem Topf bei niedriger Hitze schmelzen. 1–2 TL Sonnenblumenöl dazugeben und glatt schlagen. Die Glasur über den ausgekühlten Kuchen gießen, mit einem Messer verteilen oder in üppigen Tropfen herunterlaufen lassen.
Für die kandierte Orangenschale Zucker und Wasser in einem kleinen Topf zum Kochen bringen. Wenn es anfängt zu karamellisieren, die Orangenschale dazugeben. Bei mittlerer Hitze etwa 3–4 Minuten köcheln lassen, bis die Schale golden und weich ist – aufpassen, dass sie nicht anbrennt. Während der Karamell noch flüssig ist, die Orangenschale schnell auf einem Stück Backpapier ausbreiten. Ein paar Minuten auskühlen lassen, von dem Papier abziehen und den Kuchen damit dekorieren, solange die Glasur noch weich ist.


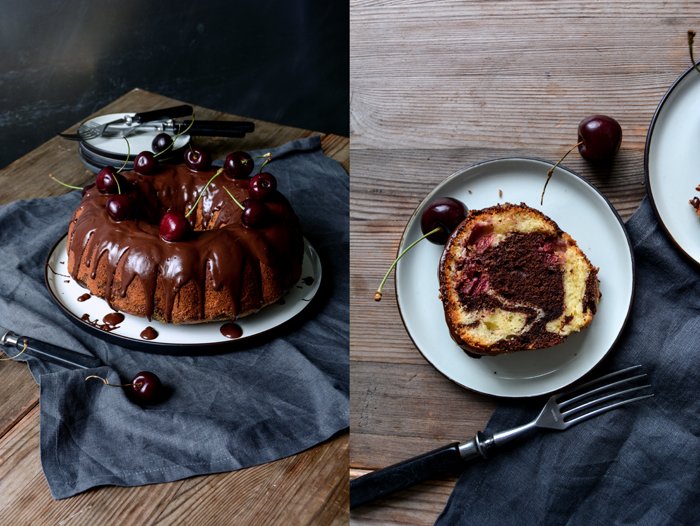
Cherry and Chocolate Marble Bundt Cake
Marble cake is a childhood memory baked in a Bundt pan. It was one of my granny Lisa's fabulous cake classics and it always impressed me with its light texture and the right balance of sweet sponge and bittersweet chocolate. Lisa must have had a weak spot for this duo. There's another masterpiece of hers, the decadent Donauwelle, which is basically the same combination baked flat on a tray, topped with cherries, German buttercream, and chocolate icing. It's a luscious, sweet bomb, perfectly fitting when it's cold and grey outside and you want to keep cosy. But the current mood is far from that, so let's forget about buttercream and all that stuff and think fruity.
You can keep it simple and dust a marble cake with a little icing sugar, but I find that a dark chocolate glaze gives it the necessary crunch and depth to balance out the softness and sweetness. To add a summery feel to it, I stirred some cherries into the batter. You can use fresh or preserved fruits, I go for preserved cherries, as it reminds me of my granny. Lisa used to have the most beautiful cherry tree in her garden, it was huge. The crop was generous, so she used to preserve the fruits and fill the shelves in her pantry. I remember long lines of jars, all filled with cherries ready to be turned into Donauwelle.
The cherries added a hint of pleasant fruitiness to the marble cake, which I liked a lot. I can imagine that apricots or peaches would work just as well, but I've never tried it, that's next on the baking schedule.

Cherry and Chocolate Marble Cake
Makes 1 Bundt cake
organic eggs, separated, 6
a pinch of salt
granulated sugar 250g / 1 1/4 cups
plain flour, sifted, 300g / 2 1/3 cups
baking powder 3 teaspoons
butter, at room temperature, 200g / 3/4 cup plus 2 tablespoons
vanilla bean, split and scraped, 1/4
whole milk 100ml / 1/3 cup plus 2 tablespoons
cocoa powder 30g /1/4 cup
pitted jarred or fresh cherries 200g / 7 ounces
breadcrumbs, to sprinkle the pan
For the glaze
bittersweet chocolate 200g / 7 ounces
butter 1 tablespoon
fresh cherries 8, for decorating (optional)
Preheat the oven to 180°C / 350°F (preferably convection setting). Butter a 23cm / 9″ Bundt pan and sprinkle with breadcrumbs.
In the large bowl of a stand mixer fitted with the whisk attachment, beat the egg whites, salt, and 1 tablespoon of the sugar until stiff.
In a medium bowl, combine the flour and baking powder.
In the large bowl of a stand mixer fitted with the paddle attachment, beat the butter, the remaining sugar, and vanilla for a few minutes until fluffy. Add the egg yolks, one at a time, and continue mixing until thick, creamy, and light yellow. Add the milk and mix until well combined. Using a wooden spoon, fold the egg whites and the flour mixture into the butter mixture, alternating about 1/3 at a time, combining well in between.
Scrape 1/2 of the batter into the prepared Bundt pan and spread the preserved cherries on top; push them gently into the batter. Stir the cocoa powder into the remaining batter, mix until well combined, and dollop on top of the light batter. Spread the dark batter carefully, then swirl with a small fork through the 2 batters, once is enough, carefully from top to bottom, pulling slowly all the way through the pan. Bake for about 40 minutes (slightly longer if using a conventional oven) or until golden and spongy. Check with a skewer, it should come out clean. Let the cake cool for 2-3 minutes, then shake the pan a little and flip onto a wire rack to cool completely. If the cake won't come out, place the warm Bundt pan into a large bowl filled with cold water. This will help loosening the cake from the pan.
For the chocolate glaze, in a small saucepan, melt the chocolate and butter on low heat, whisk until well combined. Let the chocolate cool for a few minutes, then drizzle over the cake. Decorate with the fresh cherries while the chocolate is still warm.


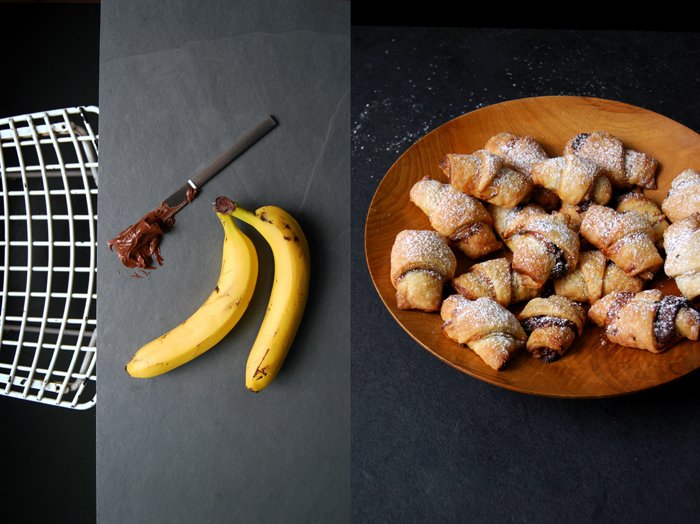
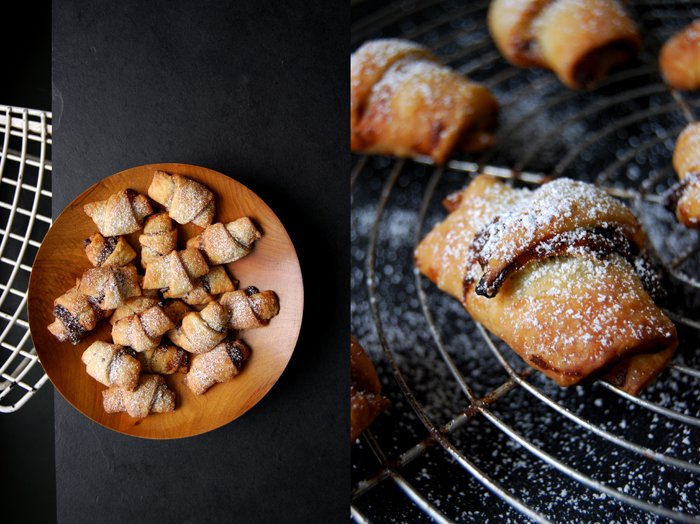
Banana and Chocolate Spread Rugelach
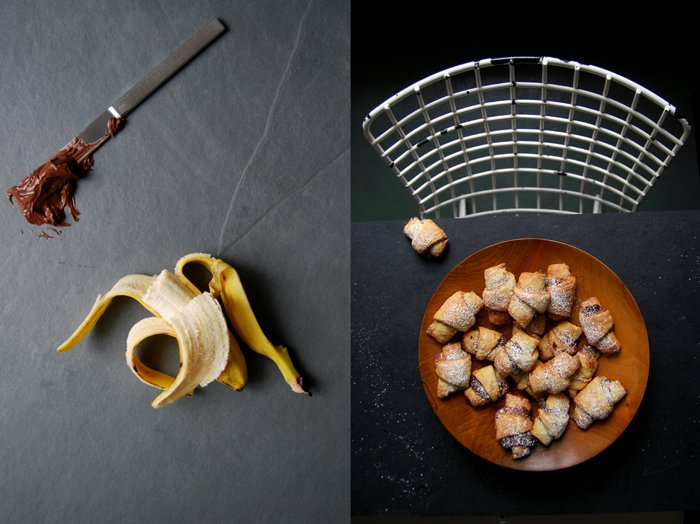
I've never baked croissants in my kitchen, I'm a bit scared of puff pastry at least when I'm the one who has to prepare it. Unfortunately, I love to eat them, sometimes I literally crave their buttery flakiness that leaves your fingers sticky and fills your mouth with the wonderful taste that only the excessive use of butter can create. Luckily, there is an easier and quicker alternative to the French treat coming from the Jewish cuisine. In case of urgent need of croissants, just bake rugelach!
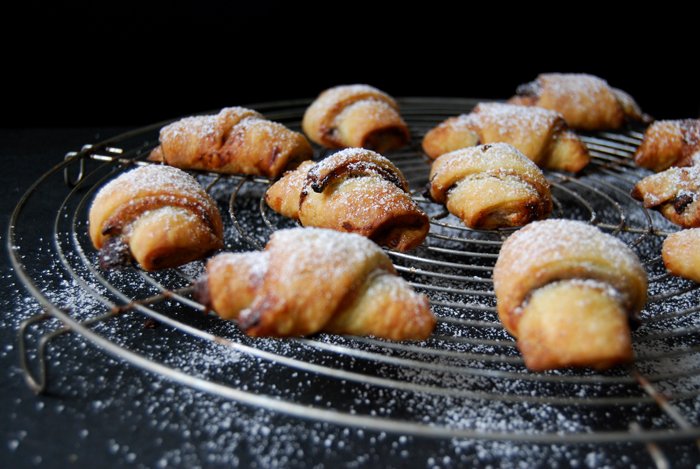
The delicate pastry is in no way behind croissants, neither in richness nor in tender lightness. It's the addition of cream cheese that creates this easy miracle, easy as it's far from being as time consuming as the French breakfast classic. When the ingredients are mixed and the dough has cooled in the freezer for half an hour, the rolling and filling can begin!
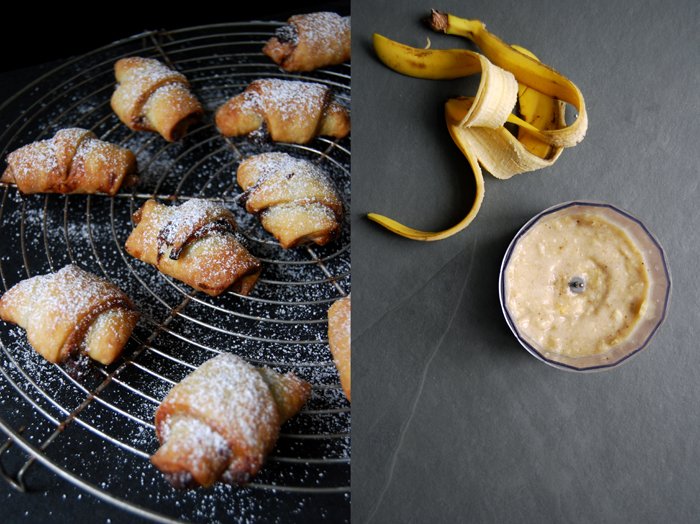
My last rugelach recipe was one of the first posts I shared on eat in my kitchen, I baked them for a festive Hannukah party at a friend's house. I used bittersweet chocolate and cinnamon, a combination that can never go wrong. For my new recipe I had a bit of a childish combination in mind, chocolate breakfast spread and puréed bananas, the perfect kiddy treat! I'm quite sure that a few of our friend's young children would have loved to join in my messy kitchen activity. My first batch of rugelach turned out to be a bit difficult as I tried to cut the single pieces after I spread the banana and chocolate on top of the pastry, messy! I can't recommend this, it's almost impossible! Instead, start with the banana layer, cut the triangles and then put on the chocolate spread, that's much easier.
So, what can I say about the taste? My partner was quite skeptical when I told him about this combination but then, as soon as he smelled the sweetest aroma coming out of the kitchen, he couldn't stop himself anymore. Both of us actually, as we ate them like peanuts. It's one of those sweets that hits the right spot with the first bite and calls for more and more!

Banana and Chocolate Spread Rugelach
For 24 rugelach you need
plain flour 150g / 5 ounces
icing sugar, 2 heaping tablespoons plus more for the topping
a pinch of salt
butter, cold, 125g / 4.5 ounces
cream cheese 125g / 4.5 ounces
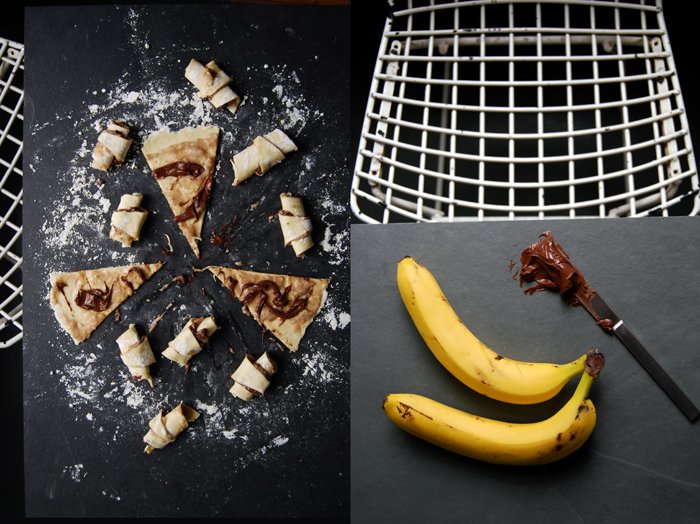
ripe bananas 2 (around 200g / 7 ounces)
chocolate spread (like nutella) 6 tablespoons
Combine the flour, icing sugar and salt. Cut the butter with a knife into the flour mixture until there are just little pieces left. Continue with your fingers and work the butter quickly into the flour. Add the cream cheese and continue mixing with a fork or the hooks of the mixer until the mixture is combined. Form 2 discs, wrap them in cling film and put them in the freezer for about 30 minutes, the dough should be hard but still rollable.
Set the oven to 185°C / 365°F and line a baking sheet with parchment paper.
Purée the bananas in a food processor until smooth.
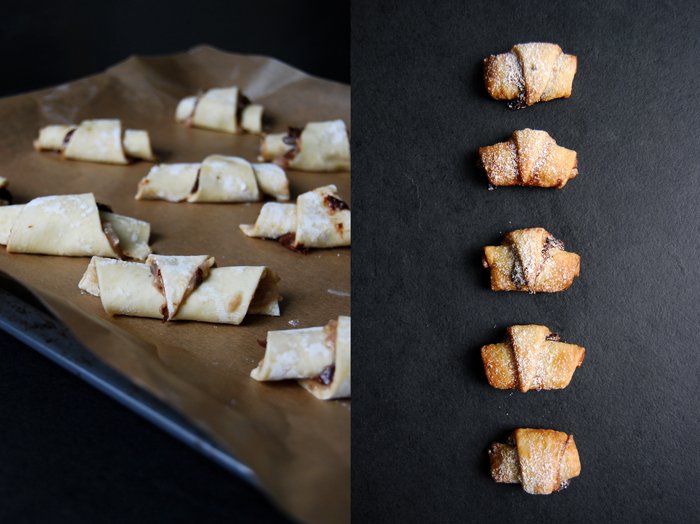
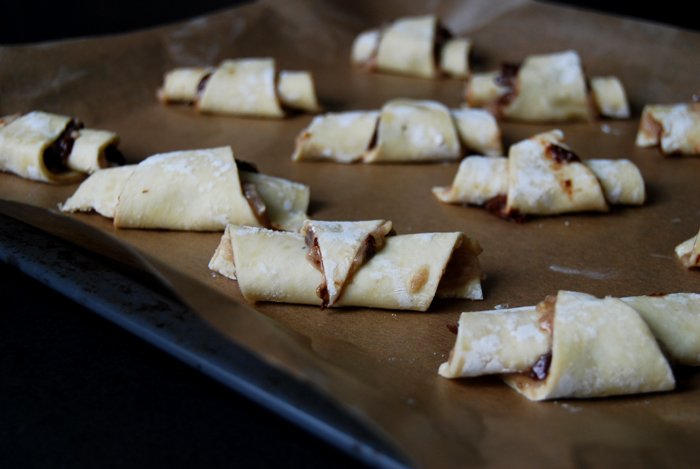
When the dough is firm, keep one disc in the fridge and roll out the other disc between cling film dusted with flour. You should end up with a circle of about 30cm / 12″. Flip the dough onto a new piece of floured cling film, this will make it easier to roll the rugelach. Spread half of the banana purée on the dough and cut it like a cake into 12 triangles. Divide half of the chocolate spread roughly into 12 portions and sprinkle on each triangle. Gently roll up the rugelach from the wider side to the tip. Bake in the oven for about 19-20 minutes or until golden brown. Continue with the remaining disc.
Let the rugelach cool on a wire rack and dust with icing sugar.

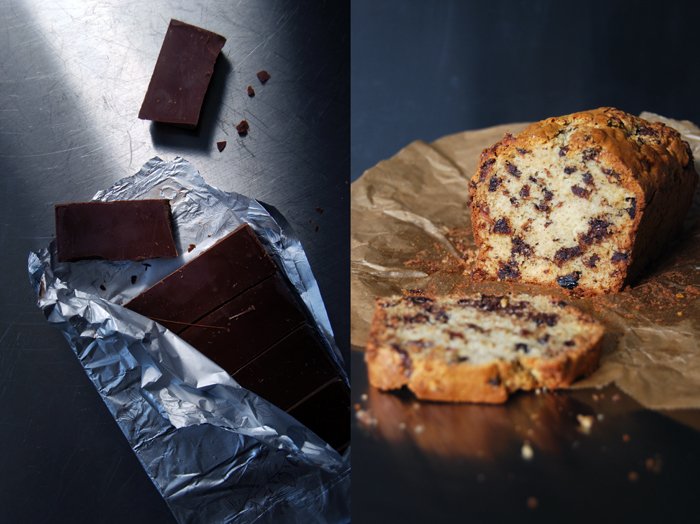
Chunky Chocolate Fruit Loaf with Dates and Prunes
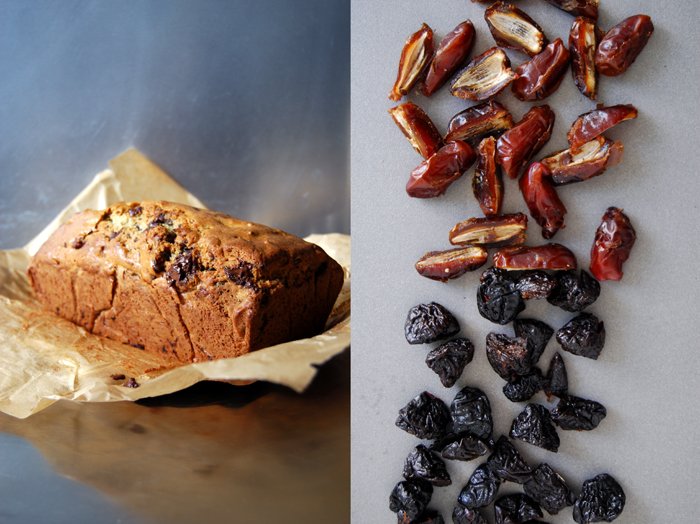
Raisins, prunes, dates, there are always lots of open bags in my kitchen shelves. Sometimes it's just too much! When there's no corner left which isn't occupied by dried fruits I know it's time for a recipe to empty them at one go and a fruit loaf is one of them. My fruity mixtures change depending on my shelf finds, I've often stocked up on figs, apricots or cranberries a bit too excessivly during the winter months as well, they can all go into the cake to add their concentrated fruity sweetness. It works for morning loaf cakes as much as for muffins, it makes them rich and won't leave you hungry! I'm particularly fond of this in combination with bittersweet chocolate, big chunks that melt into the dough and merge with the fruit, delicious!
This time I had dates, prunes and a dark Belgian chocolate which ended up in the lumpy dough, roughly chopped and sticky. It made the loaf dense and moist and so pleasantly sweet that it felt like a sweet bread rather than a cake. You can replace the dried fruit with any other you find in your shelves and add some nuts or white chocolate. I often bake it on Sundays when I feel the urge to bake all of a sudden, I can be sure that I will find something in my shelves worth turning into a fruit loaf.
Chocolate Fruit Loaf with Dates and Prunes
For a 24 x 10cm / 10 x 4" loaf pan you need
plain flour 340g / 12 ounces
granulated sugar 100g / 3.5 ounces
baking powder 2 teaspoons
baking soda 1 teaspoon
salt 1/4 teaspoon
butter, melted, 120g /4.5 ounces
milk 220ml /7.5 ounces
organic eggs 2
bittersweet chocolate, roughly chopped, 120g / 4.5 ounces
dates, roughly chopped, 100g / 3.5 ounces
prunes, roughly chopped, 100g / 3.5 ounces
Set the oven to 190°C / 375°F (fan-assisted oven). Line a loaf pan with parchment paper.
Combine the dry ingredients. Whisk the butter, milk and eggs and mix in the dry mixture with a wooden spoon. Don't over mix, the dough should be lumpy. Gently stir in the dried fruit and chocolate and scrape into the pan. Bake for 30 minutes, turn the oven down to 175°C / 350°F and bake for another 15 minutes or until golden. Check with a skewer, it should come out clean. Let the loaf cool in the pan for a few minutes before you take it out.


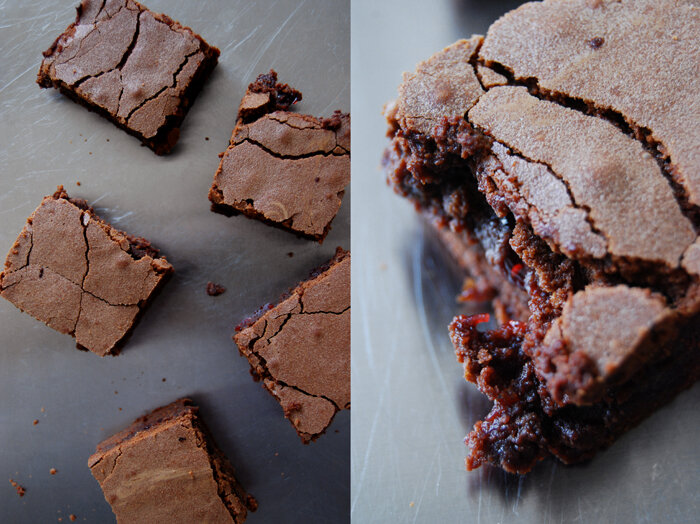
Fudgy Raspberry Chocolate Brownies

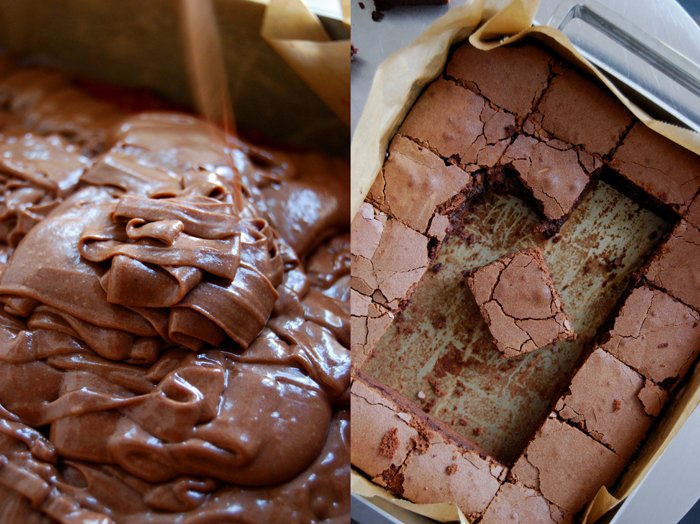
The first bite of these chocolate brownies changed my opinion about this cakey treat completely. After a few rather dry, too heavy or painfully sweet experiences with brownies I already felt like giving up on them. I never felt inspired and motivated to give them a try in my own kitchen but this recipe changed everything! They are fudgy, dense, chocolaty and juicy and a thin layer of sweet raspberry jam even adds a hint of fruitiness. You can't really ask for more when you pull a chocolate cake out of your oven!
It's important to use good quality chocolate, bittersweet, the kind you like to eat without putting it in a cake. Mine is 50% cocoa, I tried stronger ones but this works best for me. Sometimes I make the recipe without the jam layer which doesn't effect the brownie's fudginess, they just have to bake shorter as the fruit keeps the dough soggy for a bit longer. When I want chocolate, pure and intense than that's my choice! I like both, so much that I always make a big tray right away, even if there's just the two of us. I also like to make them for easy dinner parties, a sweet finger food dessert, no plates, just napkins and everybody gets a big brownie in their hands.
This recipe comes from my boyfriend by the way. One day he went into the kitchen, came up with this recipe and baked these wonderful brownies. I don't remember why or how, I don't ask questions, I just enjoy them!
Raspberry Chocolate Brownies
For a 28,5 x 23,5 cm / 11 x 9 " baking dish making 24 brownies you need
butter 350g / 12.5 ounces
bittersweet chocolate 350g / 12.5 ounces
a pinch of fresh vanilla
organic eggs 6
granulated sugar 320g /11.5 ounces
plain flour 250g / 9 ounces
salt 1 teaspoon
raspberry jam, whisked with a fork, 100ml
Set the oven to 175°C / 350°F (fan-assisted oven) and line a 28,5 x 23,5 cm / 11 x 9" baking dish with parchment paper. (It must be roughly this size).
Melt the butter together with the chocolate and vanilla in a sauce pan. Set aside and let cool for a couple minutes. Beat the eggs together with the sugar till fluffy and add to the chocolate mixture. In a large bowl, combine the flour and salt, add the liquid mixture and mix with your mixer until everything is combined. Pour half of the dough into the baking dish, even it out and spread the jam on top, carefully so that the layers stay separate. Add the rest of the dough and spread evenly.
Bake in the oven for 55 minutes. The top will be a pale brown and speckled. When you push in the middle you should feel a soft but spongy resistance. Let it cool for 10 minutes before you cut it into small squares.
If you make the brownies without the jam layer, check them after 30 minutes. It should look and feel as described above.

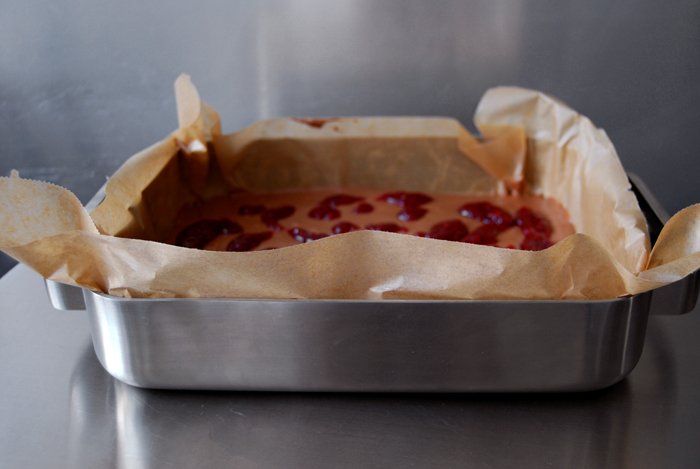


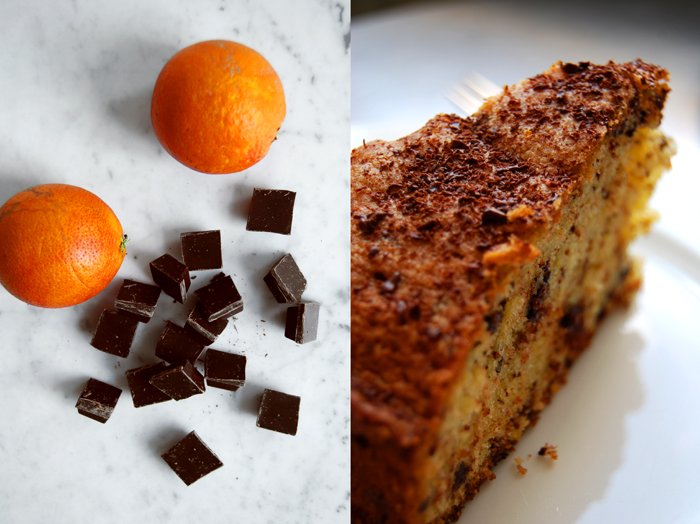
Bittersweet Chocolate and Orange Sponge Cake

Last week I wrote about one of my numerous phone calls with my Maltese granny who is actually my boyfriend's granny but over the years, after so many stays on her home island and through our shared passion for food she "adopted" me. That's how it feels, she became my granny. In our last conversation she gave me a wonderful recipe for the Maltese tea time cookies with vermouth and she also mentioned a cake made with bittersweet chocolate and orange (juice and zest). I love this combination but my boyfriend isn't so fond of it and I didn't want to end up eating a whole cake on my own. But she insisted on giving it a try, she knows her grandson after all, and she was right!
We both agreed that this cake is amazing, simple but so aromatic. The texture is very spongy and on top it has a fine sugary crust, a bit flaky. I sprinkled it with some more chocolate when the top was still a bit warm and it melted into the crust. Granny Edith was right, I didn't have to eat the cake on my own and it didn't even last for 2 days!
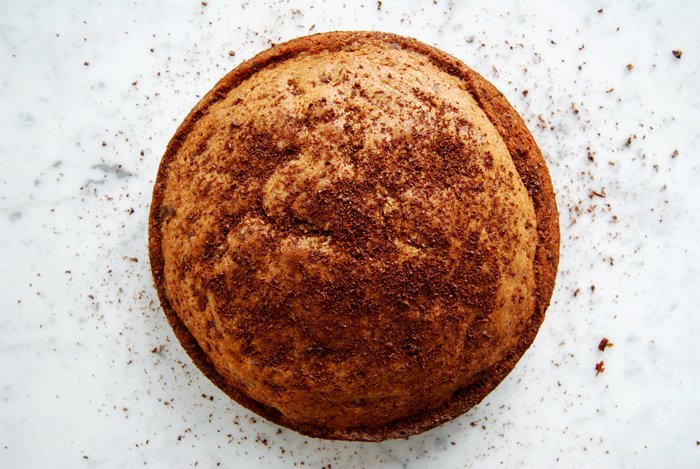
Bittersweet Chocolate and Orange Sponge Cake
For a 20cm / 8″ cake pan you need
butter 180g / 6.5 ounces
granulated sugar 210g / 7.5 ounces
plain flour 180g / 6.5 ounces
baking powder 2 teaspoons
a pinch of salt
organic eggs 3
orange juice 2 tablespoons
orange zest 1 1/2 tablespoons
bittersweet chocolate, chopped coarsely, 100g / 3.5 ounces plus 1 tablespoon finely grated for the topping
Set the oven to 175°C / 350°F (fan-assisted oven) and butter the cake pan.
Mix the butter with the sugar and orange zest till fluffy. Add the eggs, one at a time and mix well for a couple minutes. Add the flour, baking powder, salt and orange juice and mix quickly until everything is combined. Stir in the chopped chocolate and scrape the dough into the prepared pan. Bake for 40 minutes or until golden brown. Check with a skewer, it should come out clean. Let the cake cool for 5 minutes and sprinkle with finely grated chocolate.
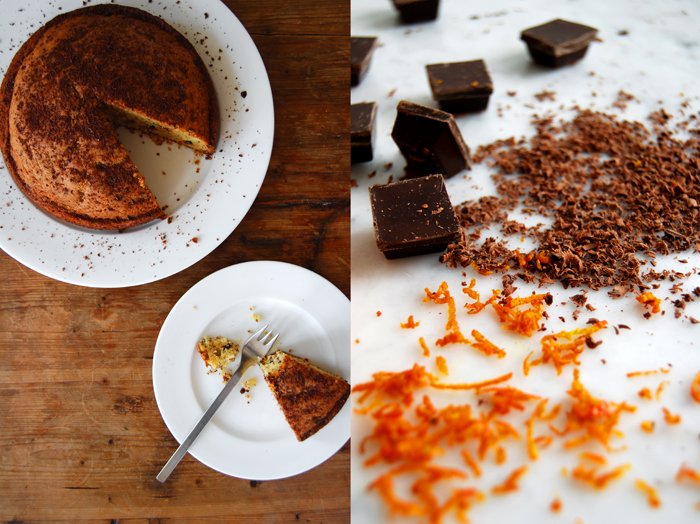


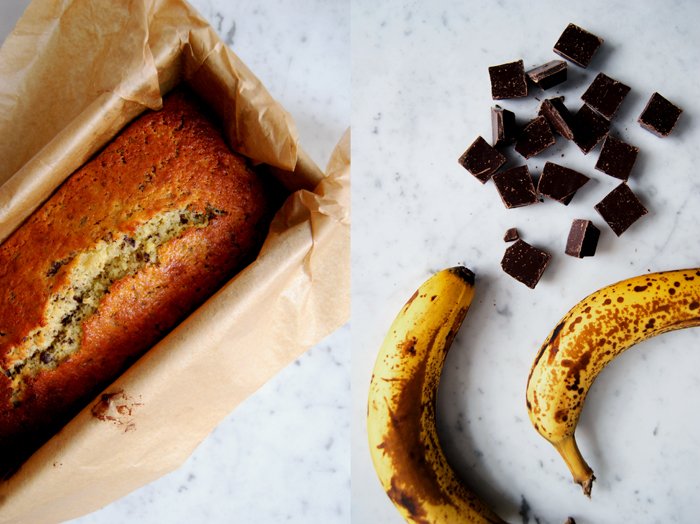
Sweet and Spongy Banana Chocolate Bread

This is another perfect weekend breakfast treat, Banana Chocolate Bread. I like mine juicy, almost moist, with lots of big pieces of banana and bittersweet chocolate chunks. When you take the bread out of the oven, golden and warm and you cut the first thick slice off the loaf, pushing the knife through sweet banana chunks and melted chocolate, you'll understand why there's no better start to the weekend. It feels, smells and tastes just right! I never wait for the bread and chocolate to cool, I have to eat a slice immediately as soon as it's done, the chocolate still warm and liquid.
The combination of banana and bittersweet chocolate is a special one as the sweetness and the bitterness balance each other out perfectly. I love it in ice cream, cookies and cakes, but to me nothing beats this duo when their big chunks merge into a warm cake, or morning bread. For one loaf I use three big bananas and 100g / 3.5 ounces of bittersweet chocolate, I don't want a hint of their flavours, I want an explosion on the taste buds.
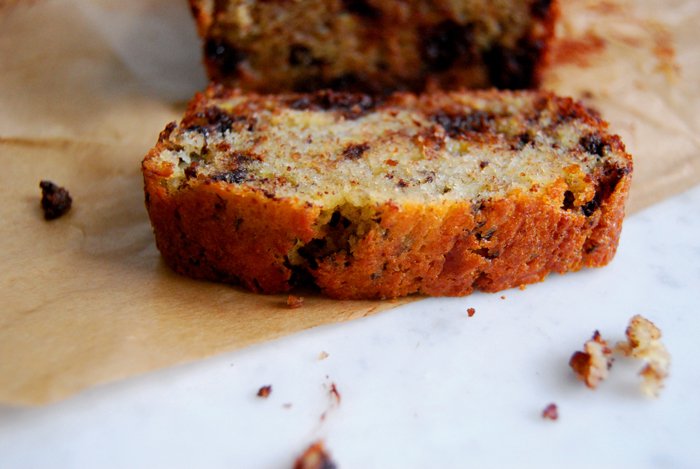
Banana Chocolate Bread
For a 24cm x 10,5cm / 9.5″ x 4″ loaf tin you need
butter 120g / 4.5 ounces
granulated sugar 100g / 3.5 ounces
vanilla sugar 1 package (you can also use vanilla extract)
organic eggs 2
large and ripe bananas, quartered, 3
plain flour 120g / 4.5 ounces
baking powder 2 teaspoons
salt 1/2 teaspoon
bittersweet chocolate, chopped roughly (leave a few bigger chunks), 100g / 3.5 ounces
Set the oven to 160°C / 320°F (fan-assisted oven) and line the loaf tin with parchment paper.
Combine the flour, baking powder and salt. Mix the butter together with the sugar and vanilla sugar till fluffy. Add the eggs, one at a time, and continue beating for a couple minutes. Add the bananas, beating for 10-20 seconds and stop before they get too smooth, they should be a bit chunky. Gently fold in the flour mixture with a spoon, add the chocolate chunks and fold them in, carefully as well. Scoop the dough into your prepared tin and bake for 55 minutes or until golden brown. Check with a skewer, it should come out clean.
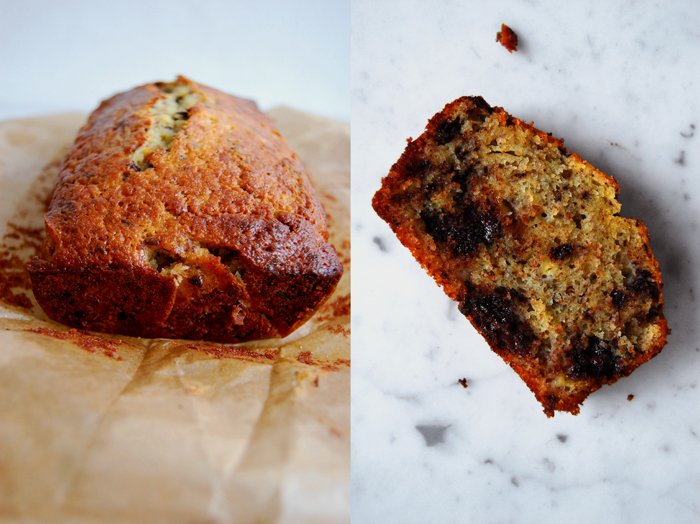

Flaky White Chocolate and Cranberry Twists
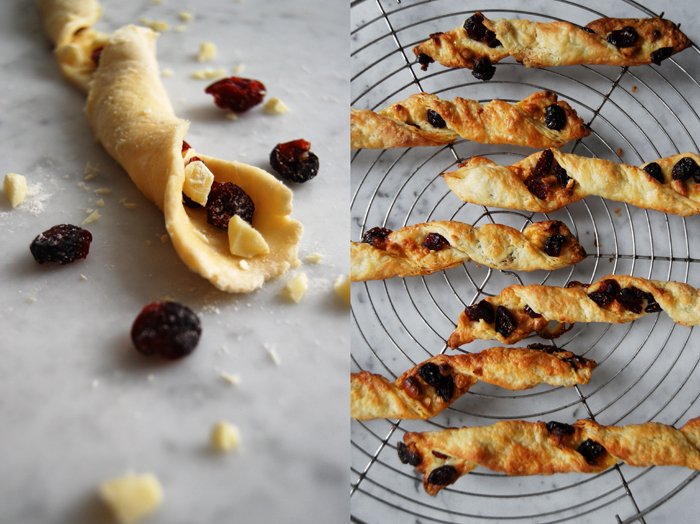
I've been wanting to bake something with white chocolate and cranberries since December but this idea never reached my oven - too much to bake, too little time. I was drawn to this combination last winter when I mixed them into my crunchy cookie recipe. The chocolate and the berries gave them a nice sweetness, milky and fruity. I enjoyed them so much that I decided to share them with our family and friends in Malta, so I sent them a big parcel stuffed with these cookies at Christmas time. The box was emptied within moments as we witnessed on Skype.
This weekend I felt like this duo again but didn't want to bake cookies. Croissants are more what I had in mind, just without the hassle of making two different doughs for the perfect puff pastry. I thought of my buttery flaky Rugelach, this dough is made to be wrapped around a sweet filling but I wanted something bigger, not just a mouthful - a handful! This is a Sunday morning pastry which you hold in your buttery fingers while you sip your coffee. I went for a long and twisted shape, quick to prepare, easy to eat, no hassle on a Sunday - Good morning everybody!
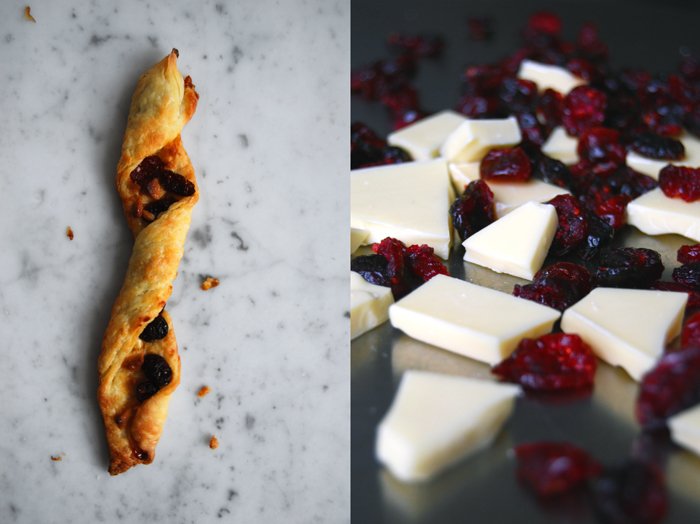
White Chocolate and Cranberry Twists
For 16 twists you need
plain flour 150g / 5 ounces
icing sugar, 1 heaped tablespoon
butter, cold, 125g / 4.5 ounces
cream cheese, at room temperature, 120g / 4.5 ounces
a pinch of salt
white chocolate, chopped, 70g / 2.5 ounces for the filling
dried cranberries 70g / 2.5 ounces for the filling
For the filling, mix the chocolate and cranberries.
Combine the dry ingredients. Cut the butter with a knife into the flour mixture until there are just little pieces of butter left. Mix with your dough hooks for a few seconds. Add the cream cheese and work it into the mixture with a spoon or the mixer until you have a crumbly mixture. Form 2 discs and put them in the freezer for 30 minutes. The dough should be very cold but not too hard, still rollable.
Preheat the oven to 185°C / 365°F and prepare a baking sheet with parchment paper.
Take out one disc, leave the second one in the fridge while you're preparing the first batch. Roll out the disc between floured cling film as the dough becomes very sticky at room temperature. Give it a rectangular shape, the width will be the length of your twists. Cut off a 4.5cm / 2" strip and pull it off the foil (don't worry if it's sticky, it's an elastic dough, you can also use a knife to lift it). Lay the pastry strip flat on your working surface, sprinkle with the filling, pushing it a little into the dough. Carefully, twist the pastry, starting on one side twisting it up to the middle and then continue from the other side. This way you don't loose too much of the filling. Place the twist on the baking sheet and continue with the rest of the dough. Bake the pastry for 12 minutes or until puffy and golden brown. It’s best to check them after 10 minutes to be sure that they don’t get too dark. Let them cool on a wire rack for a few minutes.
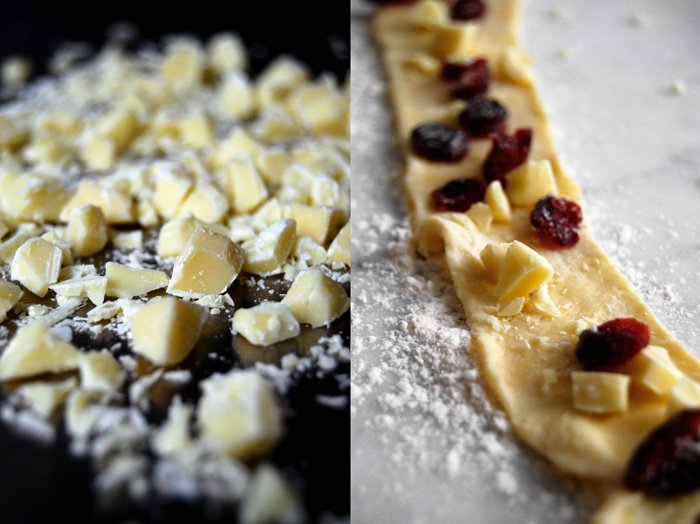
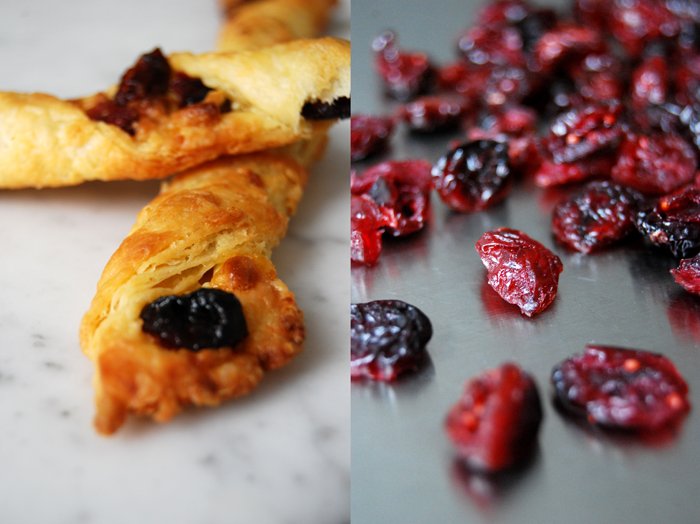
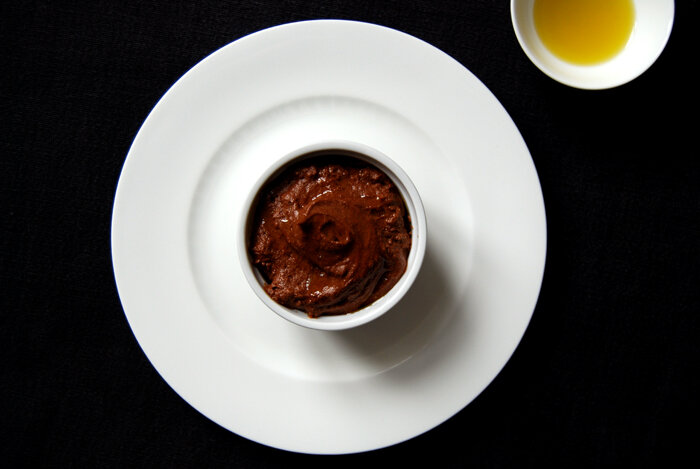
Mousse au Chocolat meets Olive Oil

My Mousse au Chocolat has all the finer qualities of a sumptuous mousse. Bittersweet chocolate rubs against an unexpected but perfect match, olive oil, thick and nutty with a little espresso. I know it sounds unusual but this combination is absolutely delicious! It's luscious, a special treat for the weekend, perfect after an opulent dinner. I don't make chocolate mousse all too often but sometimes I just need chocolate in its most concentrated and dense form and then it's time for this dessert.
The olive oil adds something to the chocolate that is hard to describe but so easy to enjoy. If you try to imagine it you won't even get close to it, you just have to feel and taste it in your mouth!
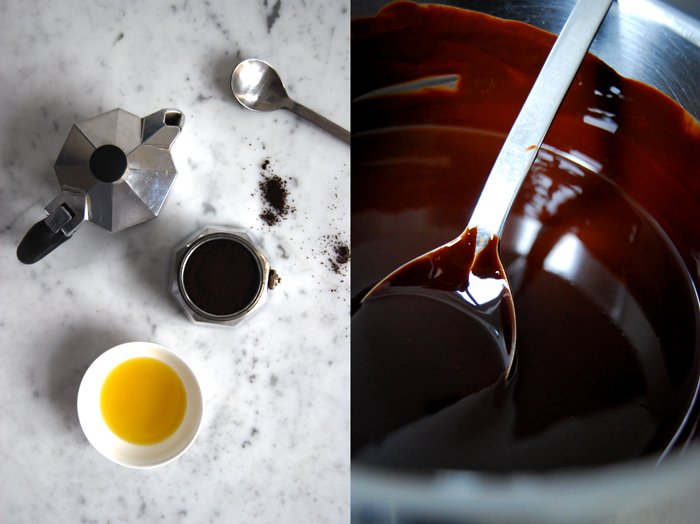
Mousse au Chocolat with Olive Oil
For 4 people you need
bittersweet chocolate, melted, 100g / 3.5 ounces
butter, melted, 60g / 2 ounces
organic eggs 3
granulated sugar 70 g / 2.5 ounces
good olive oil 6 tablespoons
espresso 1 teaspoon
a pinch of salt
Mix the melted butter, chocolate, olive oil and espresso. Beat the egg whites together with the salt. Beat the egg yolks and the sugar and mix together with the chocolate mixture. Stir 2 spoons of the stiff egg whites under the chocolate mixture. Stir the rest of the egg whites under the mixture as well, carefully, to preserve the light fluffiness. Fill into 4 forms and cool in the fridge for at least 3 hours.
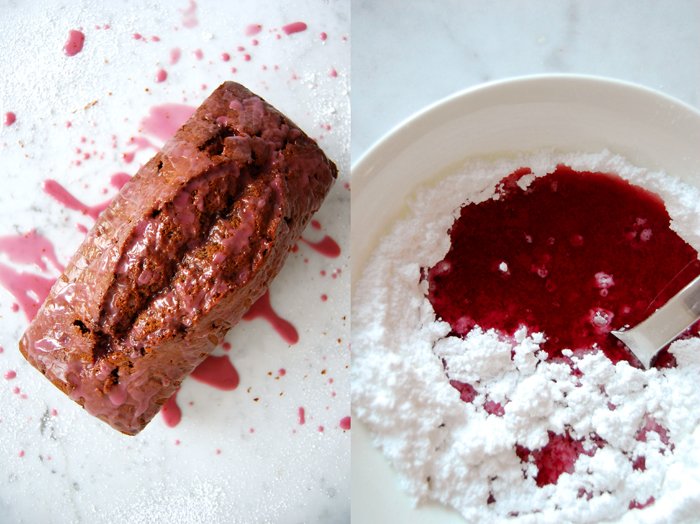
Red Wine Cake with Cinnamon and Chocolate
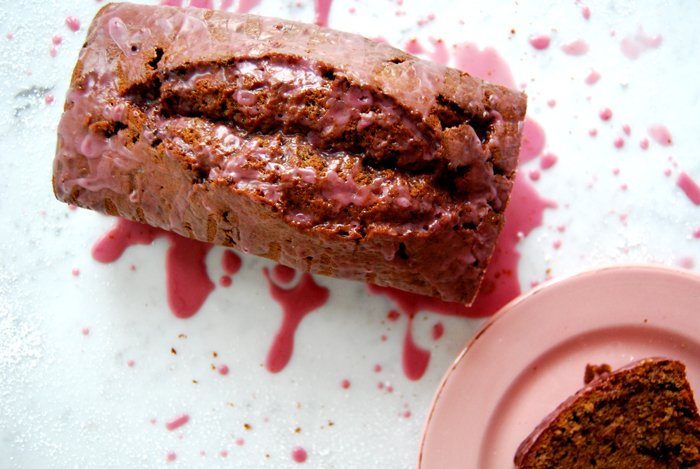
This is the cake of my late teenage years, made with red wine, bittersweet chocolate chunks and cinnamon. It's spongy, juicy and so rich in taste! My friends and I were obsessed with it, we baked it for every possible occasion. That's a while ago now and I've since moved on to other great cakes but today I thought it's time again: pink cake for the weekend!
I must say it was yesterday that this idea came to mind. I baked it and was surprised by the cakes texture until I noticed that I didn't put in the right amount of wine - I mixed up milliliters and cups on my measuring cup and put in far too little red wine. The cake turned out much too dry and hard on the outside. I was confused at first, wondering if the memory was sweetened by time but I remembered this cake so soft and juicy that I knew I must have mixed up the recipe (I even questioned my oven's reliability for a second). Today I got my second chance and my pink cake turned out as pretty and delicious as I remembered it!

Red Wine Cake with Chocolate and Cinnamon
For 1 loaf tin, about 23cm x 10cm / 9" x 4", you need
For the dough
butter 250g / 9 ounces
granulated sugar 250g / 9 ounces
organic eggs 4
plain flour 250g / 9 ounces
baking powder 3 teaspoons
cocoa powder 3 teaspoons
cinnamon, ground, 2 teaspoons
a pinch of salt
red wine 125ml
bittersweet chocolate, chopped, 100g / 3.5 ounces
For the icing
icing sugar (100g / 3.5 ounces) mixed with red wine or water (3-4 tablespoons)
Set your oven to 165°C / 330°F (fan-assisted oven). Butter your loaf tin and dust with flour.
Combine the dry ingredients (except the sugar). Mix the butter together with the sugar till fluffy, add the eggs, one at a time, and continue mixing for a couple minutes. Add the dry ingredients and the red wine and mix until smooth. Gently fold in the chocolate and scoop into your prepared tin. Bake for 65 minutes or until golden. Check with a skewer, it should come out clean, and let it cool. Spread the icing sugar on top of the cake to finish its pink glory.


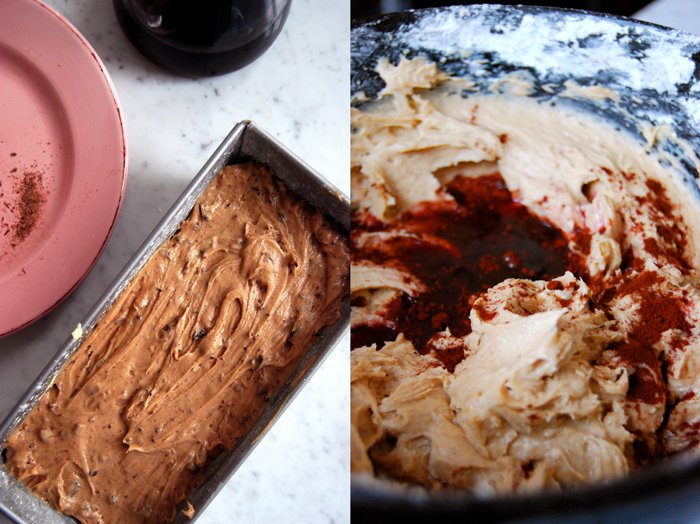
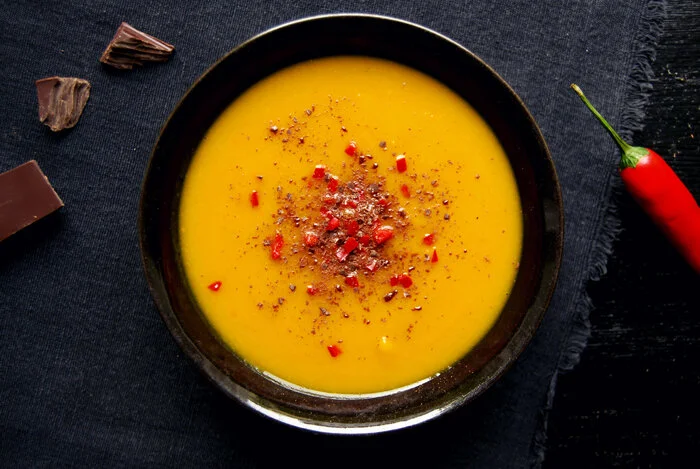
Spicy Pumpkin Soup with Bittersweet Chocolate

It's cold outside and I see a bright orange pumpkin right in front of me telling me what I need - a warming pumpkin soup. I have played around with many pumpkin variations in the past, with bacon, curry mixtures, roasted onions and I also love my puristic version with pumpkin seed oil and pumpkin seeds. Over the years my pumpkin soups became more spicy. I tend to feel cold all the time in Winter and nothing beats a hot and spicy soup to warm up your body from the inside.
Today I want my soup really hot and I also feel like adding some bittersweet chocolate on top (I love the combination of bitter, sweet and spicy!). I mix the soup in a blender which gives it a smooth and velvety texture. Together with the chili and bittersweet chocolate sprinkles on top, it makes quite a sensual meal!
This recipe has been featured on Food52 Halfway To Dinner!

Pumpkin Soup with Chili and Bittersweet Chocolate
For 4 people you need
For the soup
pumpkin (squash), without the seeds and fibres, cut into cubes, 600g / 1.5 pounds (I like to use Hokkaido squash with skin, or peeled butternut or Musquée de Provence)
medium sized potato, cut into cubes, 1
medium sized leek, sliced thinly, 1/3
medium sized carrots, cut into small cubes, 2
medium sized onion, chopped, 1
garlic, quartered, 1 clove
bay leaf 1
small dried chili peppers 2
a pinch of mace or nutmeg
salt and pepper
olive oil
water around 1l / 2 pints
For the topping
fresh red hot chili pepper, chopped finely, 1
bittersweet chocolate, grated, 4 heaped teaspoons plus more to taste
In a large pot, heat a splash of olive oil and cook the onion for a few minutes until golden and soft. Add the garlic, leek and carrots and cook for 2 minutes, stirring constantly. Add the pumpkin and potato, cook for 2 minutes and cover with water. Add the bay leaf and the dried chili peppers and season with mace (or nutmeg), salt and pepper. Bring to the boil and cook for about 30 minutes (without a lid) or until the pumpkin is soft.
Take the pot off the heat and remove the bay leaf and dried chili peppers. Purée the soup with a stick mixer or in a blender until smooth, season with salt and pepper to taste. Divide the soup between the plates and sprinkle with the fresh chili pepper and chocolate.