Meet In Your Kitchen | Daniel Schreiber's Sourdough Waffles with Plum-Apple Jam

This post is part of my Meet in My Kitchen podcast: How did we get to where we are in life & what does food have to do with it
"Through food we connect with the world’s gift and also with the gift of the knowledge of other generations." - Daniel Schreiber
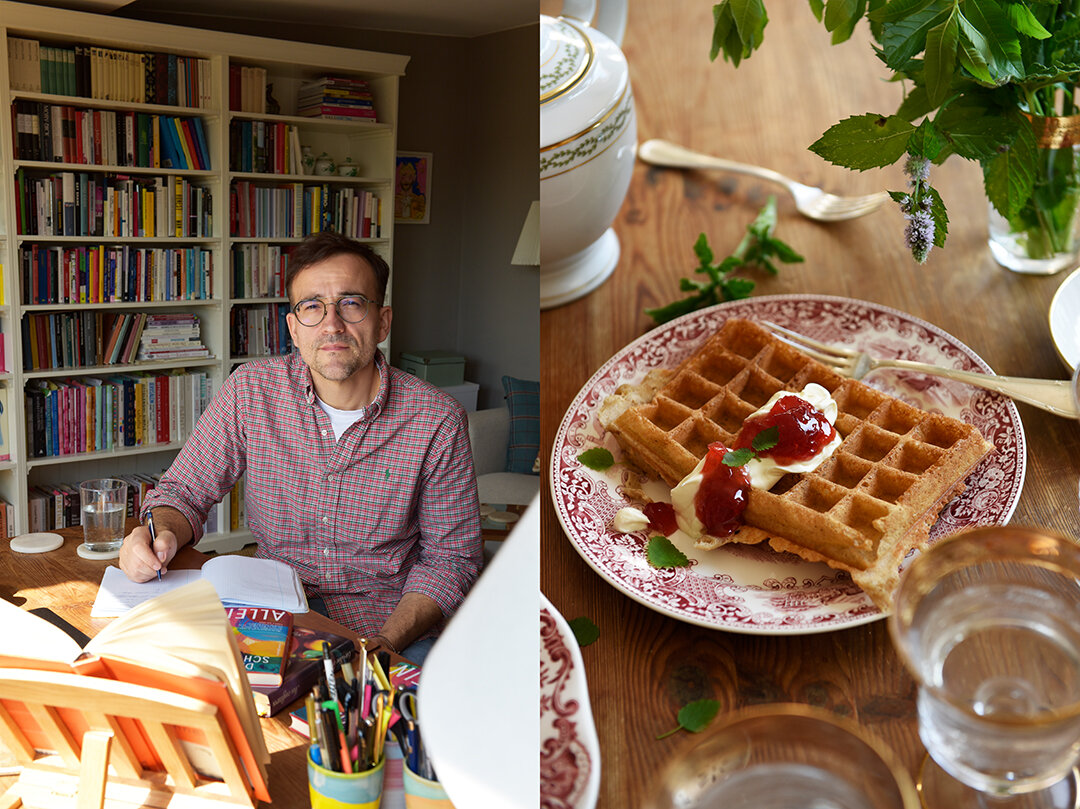
Daniel Schreiber writes books that touch a sensitive spot. He writes about his own experiences yet these are experiences that we all share in one way or the other. In his last three books - 'Nüchtern' (Sober), 'Zuhause' (Home), and 'Allein' (Alone) - he touches the fears we know but learned to sail around, he writes about his own life but reminds us of our own.
Every word he chooses says the truth, very direct, very blunt, you can feel that, and by this, in a way that is hard to describe, he creates a fragile beauty. It's the beauty of togetherness, that we are all in this together, that we're not alone, we're not the only one struggling, and that we can share our struggles and be open about them. It sounds almost too sweet but despite the pain that is present in his books, there is so much warmth. Like in real life.
It's like your favorite tea cup, it's cracked, it's chipped, you glued it back together, but when you feel its uneven surface drinking your tea in the morning, you don't think of the pain you felt when it broke. Each crack makes it even more familiar, makes it even more a part of yourself, your story, and who you are. You learn to love these cracks. Daniel manages to transport this feeling in his books. Each crack we have makes us the person who we are. It's a long and beautiful story of life, love, and learning, and yes, sometimes it also hurts.

"When I came to New York it was quite a depressive period for me but something happened at that time in connection with food that helped me a lot. I started cooking through the Larousse Gastronomique and practically cooked every evening. I went shopping to the market or supermarket every day to try out new recipes. That gave me a lot of strength." - Daniel Schreiber
And what does food have to do with it? Daniel's eyes start sparkling when he's talking about his mother's garden in a tiny village in Mecklenburg-Vorpommern (Mecklenburg-Western Pomerania) where he grew up. When he talks about picking fruit and vegetables and filling a bucket up to the rim with the harvest to take home to his kitchen in Berlin every time he visits his parents. His mother's cooking and recipes - some of which she keeps secret until today - laid the foundation for Daniel's love for cooking. A love that taught him that there's light even in the darkest of times - and he can choose to switch it on.
Food and literature were held up high in his family's house and became his companions on his own journey. Studying literature in Berlin and New York City put the young man in touch with buzzing metropolitan life and helped him shape his identity as a young man. His original academic dreams faded and instead he worked for newspapers and magazines. He wrote a celebrated Susan Sontag biography followed by three books, weaving his own experiences into a scientific, psychological, and philosophical context.

"Most of us have problems to say what we really want to say. Society and our families don’t educate us to really find an authentic relationship with ourselves. We have to fulfill certain roles, certain expectations, that we ourselves and society force upon us, economical and social expectations. And these internalized expectations and roles are in our way most of the time." - Daniel Schreiber
No matter how rocky his life got at times, no matter how far he drifted away, Daniel always searched for and found the way to the kitchen and with this, a way back to himself. Working as a private chef, cooking and catering for families and events in Manhattan and the Hamptons, strengthened his confidence as a cook and sparked his curiosity. Cooking through a vast collection of books, experimenting with recipes, turned Daniel into a person who knows the tastiest recipes for almost every dish you can think of.
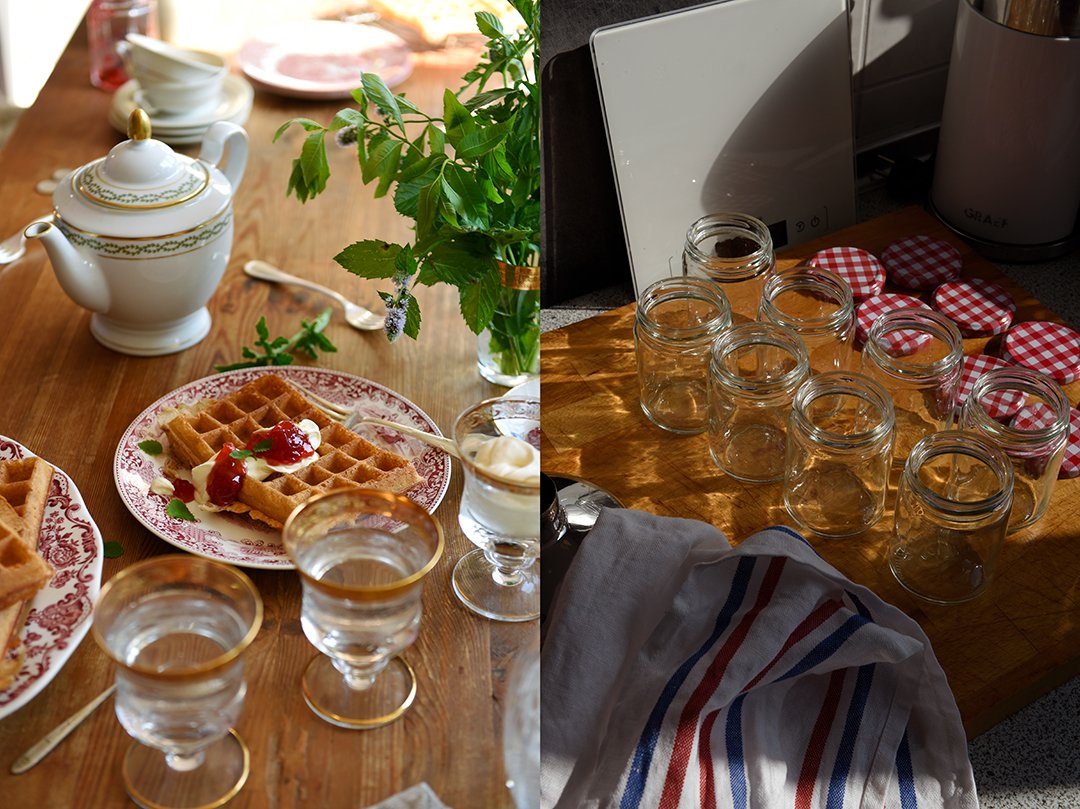
His sourdough bread and waffles reach perfection in taste and texture, the homemade jam collection on his kitchen shelves can easily compete with a professional jam manufactory. Whatever he sets his mind on becomes his passion. His terrace looks like a dense green jungle speckled with colorful blossoms in all shapes and sizes - and he can tell you the name of every single plant there is in his green kingdom. He turns piles of wool into the favorite scarves, quilts, and sweaters of family and friends. And he puts words and letters together in ways that I want to read his books even when they force me to face my own fears.
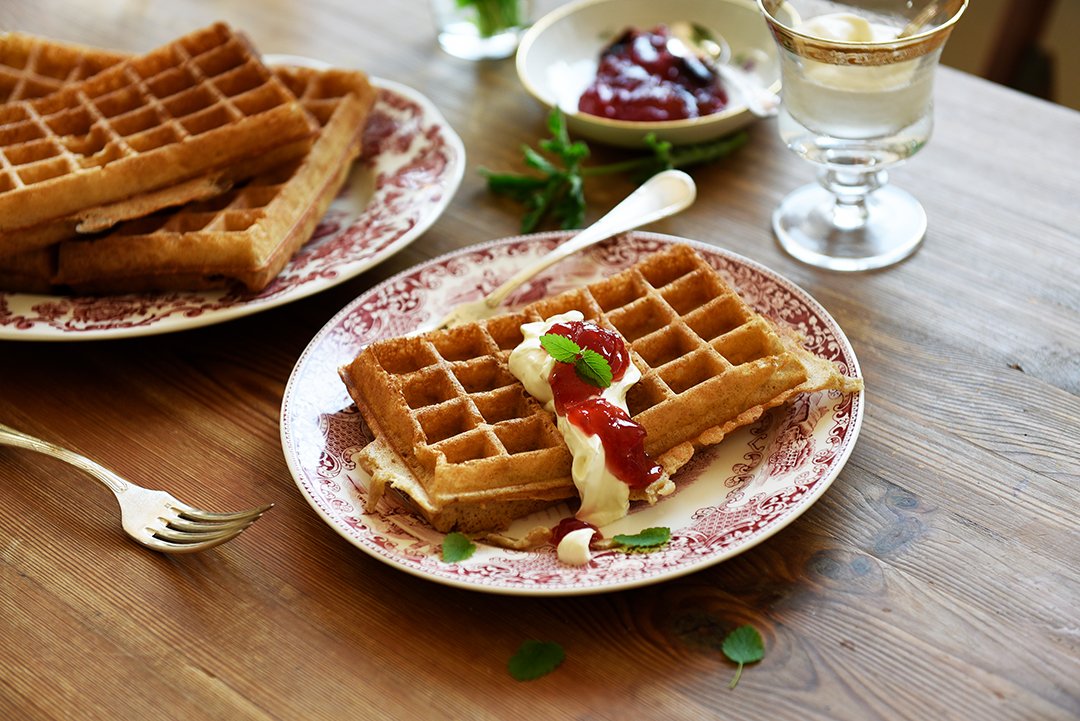
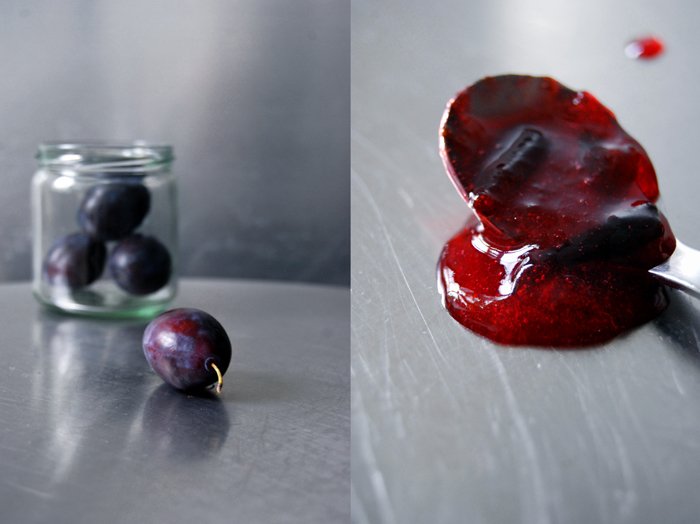
Daniel shared two recipes with me that are perfect for an autumn brunch or cozy teatime: Sourdough waffles, crisp on the outside and spongy inside, crowned by dollops of crème fraîche and crimson colored jam made of dark plums and firm apples infused with star-anise and vanilla.
The podcast episode with Daniel Schreiber is in German. You can listen to the Meet in My Kitchen podcast on all common podcast platforms; there are English and German episodes. You can find all the blog posts about these podcast episodes including my guests’ recipes here on the blog under Meet in Your Kitchen.
Listen to the podcast episode with Daniel on:
Spotify / Apple / Deezer / Google / Amazon / Podimo
On Instagram you can follow the podcast @meetinmykitchenpodcast!

Sourdough Waffles with Plum-Apple Jamand Crème Fraîche
by Daniel Schreiber *
* The waffle recipe is adapted from a New York Times recipe and the jam recipe is adapted from a recipe by Christine Ferber.
For the plum-apple jam
Mind that the jam needs to sit overnight before you finish cooking it the next day.
Makes 6-7 small jars
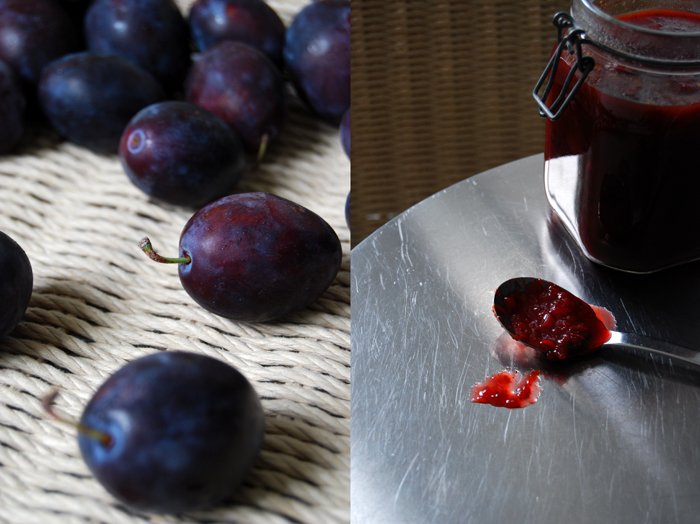
680g / 1 1/2 pounds dark plums (Zwetschgen, Italian Prune Plums), cut in half and pitted (weight without pits: 500g / 18 ounces)
750g / 1 2/3 pounds firm, sour apples (Granny Smith, Golden Delicious, Idared), peeled, quartered, cored, cut crosswise into very thin slices (final weight: 500g / 18 ounces)
800g / 1 3/4 pounds granulated sugar
2 star-anise
1 vanilla pod, split in half
2 medium lemons, juice only
7 small jars with their lids, sterilized
The day before you want to cook the jam, combine all the ingredients in a tall, large pot and let it sit for 1 hour. Over high heat, stirring gently, bring the jam to a boil. When the jam starts bubbling and rising, immediately remove the pot from the heat, cover with a lid, and let it sit overnight.
The next day, place a saucer in the freezer. Remove the lid from the pot and bring the jam to a boil over high heat, stirring gently. Cook the jam for 10-15 minutes or until it thickens and reaches its setting point. To see if the jam reached its setting point either use a sugar thermometer, the temperature should be 105°C / 220°F, or place a small spoonful of jam on the chilled saucer that you kept in the freezer, wait 20-30 seconds then push the jam with your finger. The jam should wrinkle up. Remove and discard the vanilla pod and star-anise. Using a ladle, fill the jam into the sterilized jars, close them tightly with their lids, and store in a dark place.
For the sourdough waffles
For this waffle recipes, you make use of the sourdough starter that you usually discard every day when you refresh your sourdough starter. Just make sure that you take 240g / 1 cup sourdough starter aside before (!) you refresh your starter. Mind that you need to prepare the batter the night before you want to bake your waffles and finish it the next day.
Serves 2-4
240g / 1 cup sourdough starter that hasn't been refreshed (fed)
220g / 1 cup buttermilk
120g / 1 cup all-purpose flour (German flour type 550)
1 tablespoon light brown sugar or granulated sugar
1 vanilla pod, split and scraped, or 1/2 teaspoon vanilla extract
1 large egg
60ml / 1/4 cup olive oil
1/2 teaspoon fine salt
1 teaspoon baking soda
The night before you want to bake the waffles, whisk together the sourdough starter, buttermilk, flour, sugar, and vanilla seeds in a large bowl until smooth. Cover with plastic wrap and let it sit at room temperature overnight.
The next day, when you're ready to bake the waffles, preheat a waffle iron (ideally a square Belgian waffle iron). Add the egg, olive oil, salt, and baking soda to the sourdough mixture and whisk to combine.
Pour a ladle of the batter into the hot waffle iron and bake until golden brown and crisp. Transfer the waffle to a cooling rack and let cool for a few minutes. Continue baking more waffles with the remaining batter.
For serving
Crème fraîche
Place a dollop of crème fraîche and a dollop of jam on a warm waffle and serve immediately.


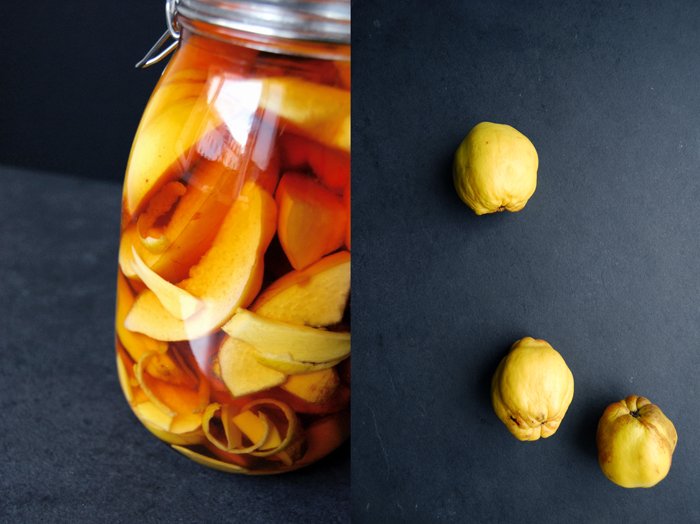
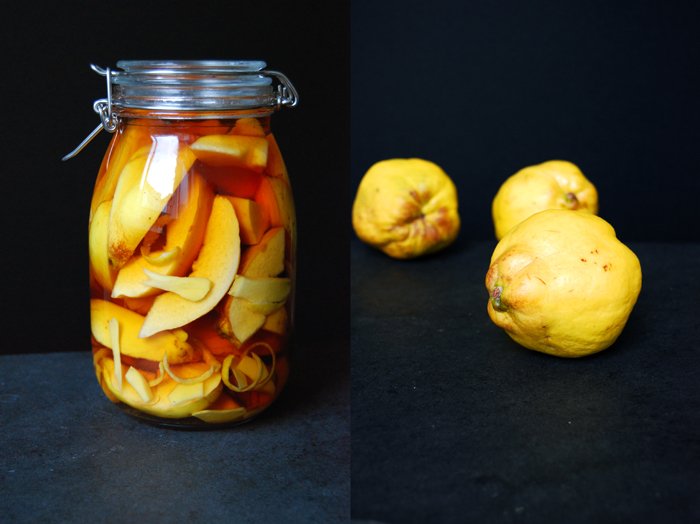
Ginger, Lemon and Quince Brandy

This is one of my little kitchen traditions, every year in November, I go to the market to buy quinces to make Nigella Lawson's Quince Brandy with Cinnamon and Star-anise. After a few weeks, the spirit turns into an aromatic composition that works wonders in mince pie fillings, stews or to deglaze meat and vegetables. But this year, things have changed! I will celebrate the first anniversary of my blog on the 23rd November, a whole year of my own and some of my family's recipes written on the pages of eat in my kitchen. Here, I found my playground where I can write about all my culinary ideas and creations, my new finds and beloved traditions. I cook and eat the food in my kitchen but there are no words to describe how thankful I am for all the response and support I get from you. There are moments when it all feels so overwhelming and almost unreal. It's a great inspiration for me to stay creative and open in the kitchen!
As Nigella already came up with the best recipe for her wintery cinnamon and anise brandy, I started to think about a variation on it that would create a completely different taste without disturbing the quince. I wanted something more fresh and fruity but still powerful enough to refine all the various recipes that I'll need it for in the next few months (especially at Christmas time). The strong and dominant aroma of ginger and lemon peel seemed like the right choice to me. And although it's only been a few days since I prepared the jar, I can already say that the result is very satisfying. I think I'll use it soon for my first mince pies of this season and until then I'll just enjoy its amber coloured beauty on my kitchen top.

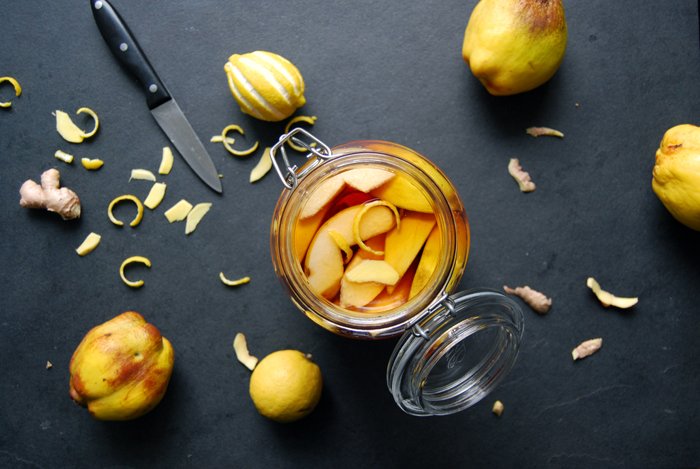
Ginger, Lemon and Quince Brandy
For a 1.8l / 4 pints jar you need
quinces, wiped and scrubbed dry, not rinsed, about 6
brandy 1l / 2 pints
ginger, peeled and cut into thin slices, 2 thumb-sized pieces
peel of 1 lemon, cut into long, thin strips
Fill half of the jar with brandy. Cut the quinces with the skin and core into 8 pieces and put them into the jars, layering them with the ginger and lemon peel. Fill with the remaining brandy to the top and wait patiently for about a week, shaking it every couple of days before you start to use it.


Crystallized Stem Ginger
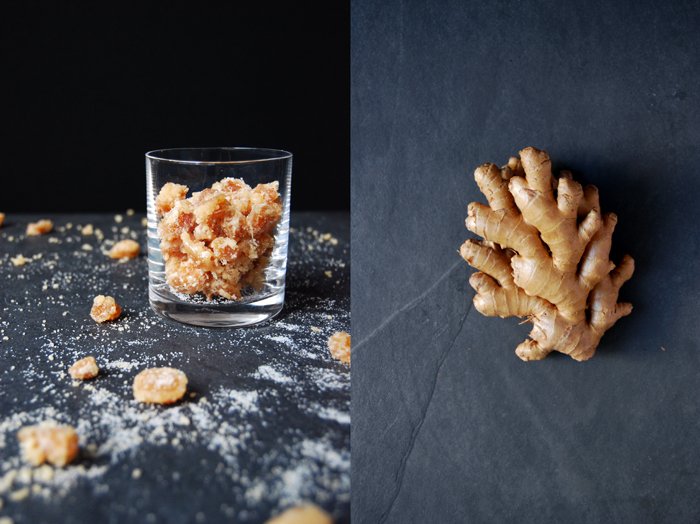
When Food52 asked me if I would like to contribute five recipes to their Halfway To Dinner column I was so excited that I went through my recipe collection on my blog right away. I had to choose one ingredient which would be featured in all dishes, not necessarily for dinner but also for desserts. It's October and I already mentioned that pumpkins are piling up in my kitchen constantly so what else would fit better than the whole range of winter squash featured in gnocchi with pesto, a spicy pumpkin soup with bittersweet chocolate and red hot chili peppers, golden Hokkaido spaghetti, a juicy Irish ginger brack for tea time and finally a pumpkin pie with coriander caramel. You can also find the whole collection on Food52!
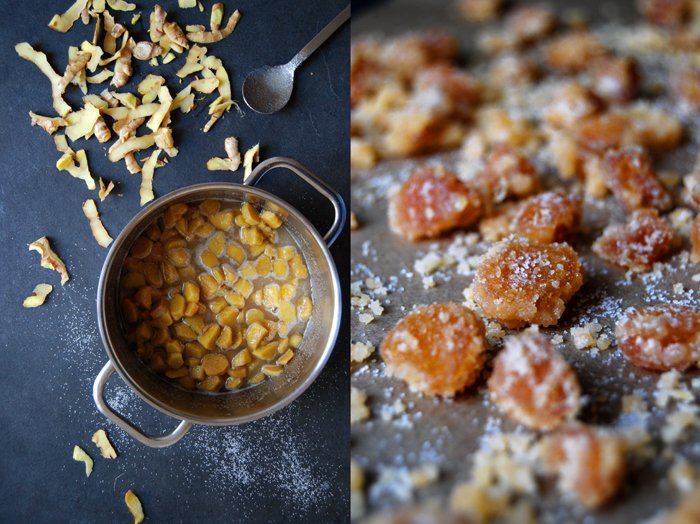
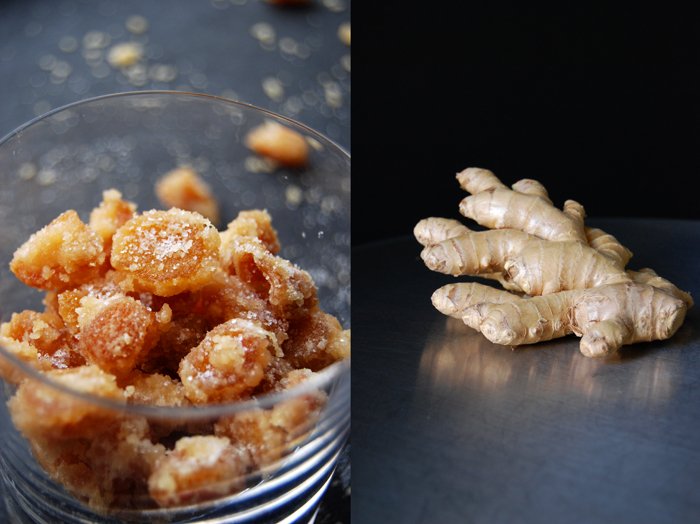
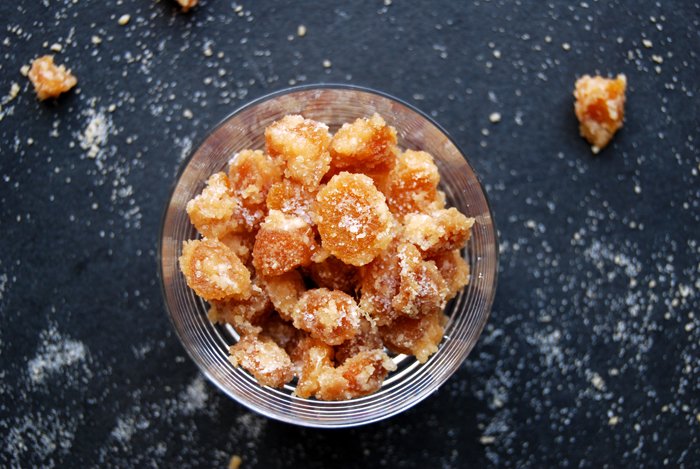
One of the recipes, the wonderful Irish tea cake is made with crystallized stem ginger which I usually buy from the store but a lady who commented on the column sparked an idea. She asked for a substitute which isn't really possible as the taste and texture of this kind of ginger is unique. It's like sweet and spicy candy, slightly soft but with bite. So if you can't buy it, you have to make it yourself and here's the recipe! I started this project the same morning as I was really curious to see if it would work out. After some research it took about an hour and a half as I had to cook it twice, once in water and then with sugar and water, but I was rewarded for my work with the tastiest stem ginger I ever had in my kitchen. It's spicier and stronger, exactly what I like! I used very fresh organic ginger, when I cut it the juices started to run out of the roots. The harder and older it is the longer it will take to soften and the taste won't be as good!
Crystallized Stem Ginger
For 1 medium sized jar you need
very fresh organic ginger roots, cut into 1.5cm / 0.5" cubes, 250g / 9 ounces
granulated sugar 250g / 9 ounces plus more to sprinkle the ginger
water
Cook the ginger in 350ml / 1.5 cups of water on medium-low heat (simmering) for about 50-60 minutes until the ginger is between soft and al dente. Cook it open for the first 15 minutes before you close the pot with a lid. When it's done, drain the ginger in case there is any liquid left. If the water evaporates before the ginger is done add a little more water.
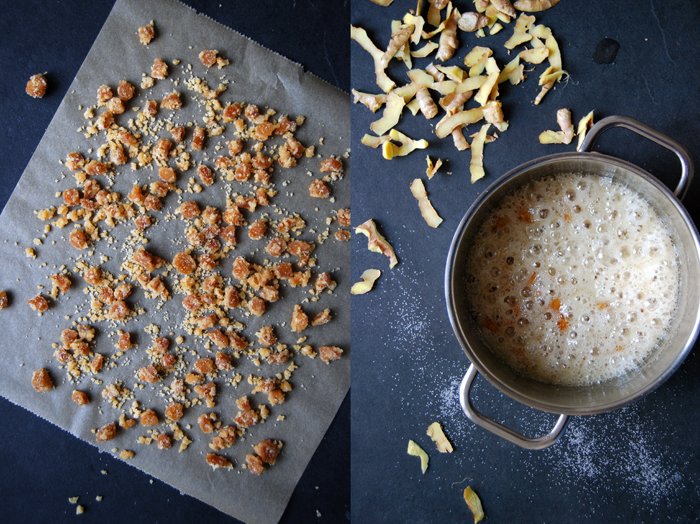
In a saucepan, bring the ginger and sugar in 30ml / 1 ounces of fresh water to the boil. Let it cook (bubbling) for about 30 minutes until the sugar starts to crystallize.
Take the ginger out with a slotted ladle immediately and spread it on parchment paper sprinkled with sugar. Separate the single pieces and put the crystallized ginger in one airtight box and the sugar pieces in another one using it for mint or lemon teas or your baking.

Spicy deep purple Plum Chutney

I'm running out of time! There are still so many plum recipes I want to write about but the local blue fruits are almost at the end of their season. This recipe is one of my classic preserves, a spicy deep purple plum chutney.
I prepare my chutneys all year round so that my pantry is always filled with plums, rhubarb and apples. I try a few others once in a while but these three are my standards, the ones that I can't, or don't want to, live without. I have special combinations with each of them and the plum chutney is my favourite for cold roasts or hard mountain cheese. The one that I cook with apples is the strongest of all and it can take even the ripest French camembert!
When I wrote about one of my early sandwiches, a hearty homemade mountain bun stuffed with ham, cheese and plum chutney, I got so many requests for this chutney. I felt a bit bad as I wrote about it in December not thinking that it would take another eight months for plums to be in season again. So here it is, get started and enjoy with whatever comes into your mind. That's great about chutneys, they taste so strong but they work so well in all kinds of unusual combinations!

Spicy Plum Chutney
For a 1 l / 2 pint jar and one small jar you need
ripe plums, pitted and quartered, 1kg / 2 1/4 pounds
sour apples, peeled, cored and roughly chopped, 3 (around 300g / 10.5 ounces)
small red onions, roughly chopped, 3
apple cider vinegar 350ml / 12 ounces
balsamic vinegar 50ml / 2 ounces
granulated sugar 200g /7 ounces
garlic, chopped, 1 big clove
fresh ginger, grated, 1 heaping tablespoon
fresh red hot chili pepper, without seeds, finely chopped, 1
small dried red chili peppers 2-3
ground turmeric 1/4 teaspoon
ground cinnamon 1 teaspoon
black peppercorns, ground in a mortar, 1/2 teaspoon
star anise, ground in a mortar, 3 single pieces
cloves, ground in the mortar, 20
fennel seeds, ground in a mortar, 1 teaspoon
spirit to sterilise the rims of the jars
Sterilise the jars in boiling water for 5 minutes.
In a large pot, bring all the ingredients to the boil. Cook the chutney (slightly bubbling) without a lid for about an hour on medium temperature until it thickens. After 30 minutes, check the spiciness, either take out the dried chilies or leave them in till the end if you prefer it more hot, but take them out before you fill the chutney into the jars.
Dip the rim of the sterilised jars in spirit and wash out the lids with the alcohol as well. Fill your jars with the chutney and close well immediately.
You can eat the chutney right away but I prefer to let it sit for at least 3 weeks. You should keep an open jar in the fridge (mine stays fresh for months) and the closed jars in your pantry.


Mary's fantastic Drunken Grapes in Anisette

After I visited Mary Licari in her old watch tower in Malta for one of my meet in your kitchen features, I came home with lots of inspiration and a long list of recipes which I couldn't wait to try in my kitchen! On that hot afternoon in August, she treated me to so many delicacies and one of them was red grapes in anisette which she made in 1985! She topped her homemade banana ice cream (which was also to die for!) with these amazing grapes that have been in the bottle for almost 30 years! I almost felt too shy to eat them, that's such a treasure, fruit soaked in three decades of aroma!
It was my second visit to her house, just a day before I left the island to go back to Berlin. As always when meeting Mary, you have to be prepared for food, lots of good food! We wanted to stop at her house to say a quick good bye but as soon as we got into the house, Mary got out the plates and treated us to an amazing three course meal, finished with these fantastic drunken fruits. They were sweet and strong, a bit wrinkled, enhanced with the strong flavour of anise. The texture was a bit like jelly, but not as soft, they still had some crunch. It was a special culinary experience that I will never forget!
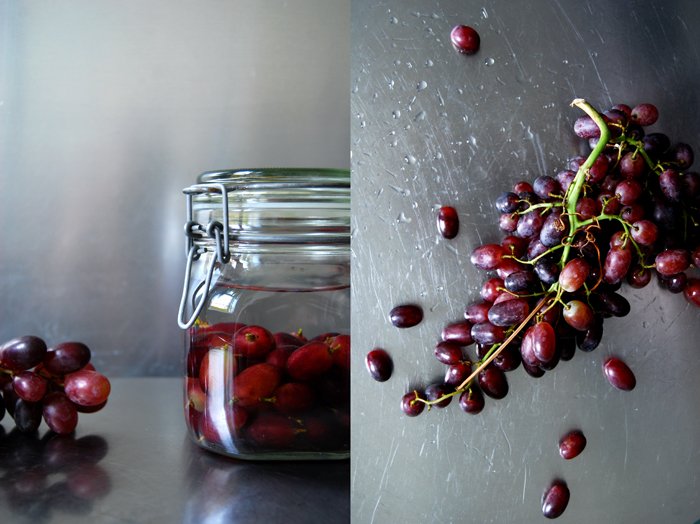
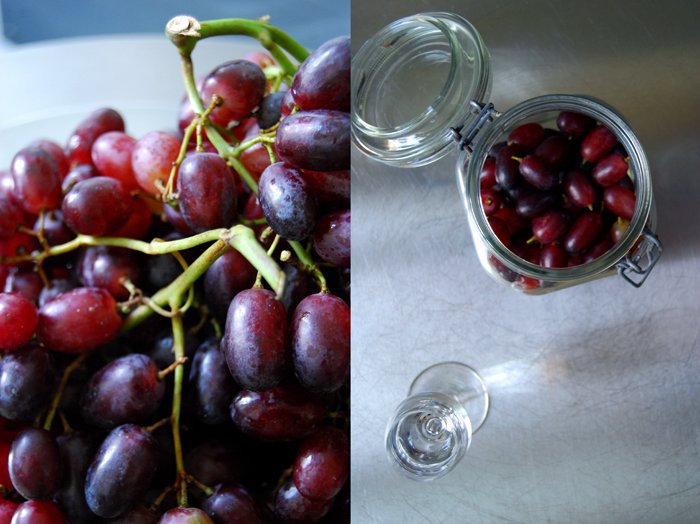
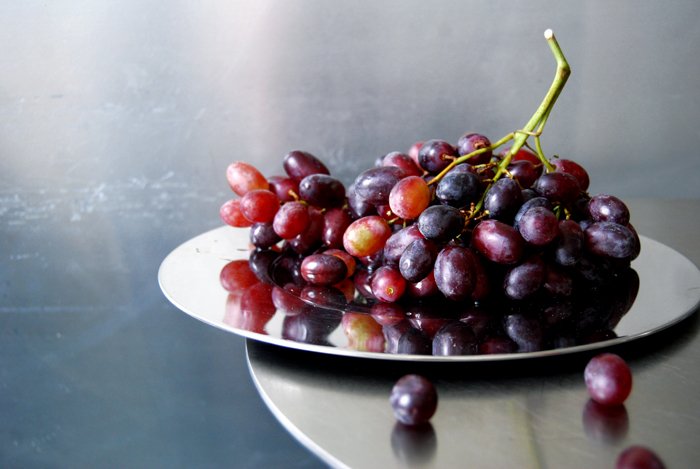
I've been back home for more than a month and I still can't get Mary's amazing grapes out of my head. There's no reason to wait any longer! The Italian grapes taste amazing at the moment and there's a bottle of Ouzo waiting to be emptied. I won't wait for 30 years to eat them (I'm too impatient!) but maybe I will keep some of them for a year or two.
Mary taught me to keep a little stalk on the grapes, that prevents the fruit from soaking up too much of the liquid!

Drunken Grapes in Anisette
For 1 large jar of grapes you need
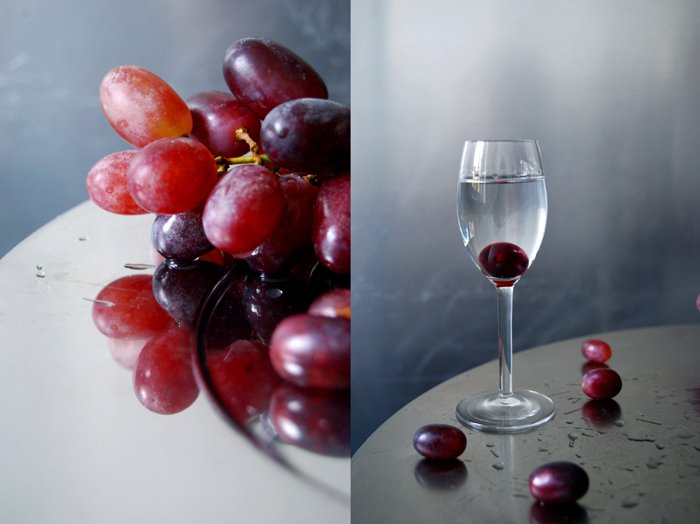
Ouzo (or any other anisette) 600ml / 1.5 pints
red grapes 200g / 7 ounces
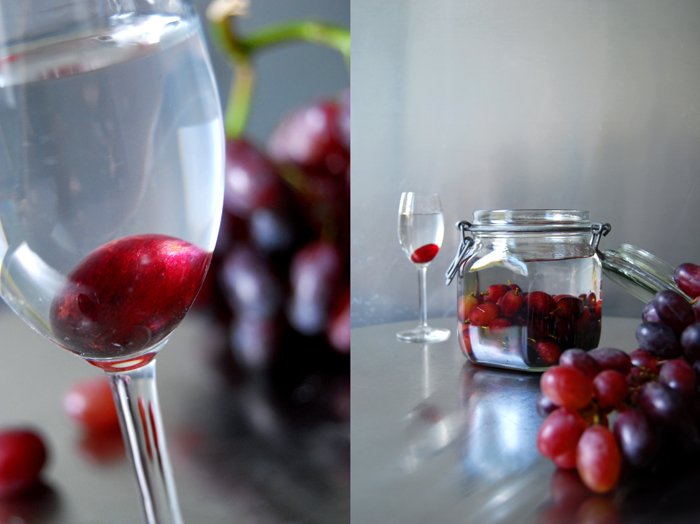
Cut the single grapes off the bunch. Don't pull them off, keep a short piece of stalk of about 1/2 cm / 1/4 " on each of them.
Put the grapes in a clean jar and fill with anisette until the fruits are covered. Let it sit for at least a month, or for years, like Mary. Serve with ice cream or cheese.
Tyrolean Plum Jam with Cinnamon and Star Anise

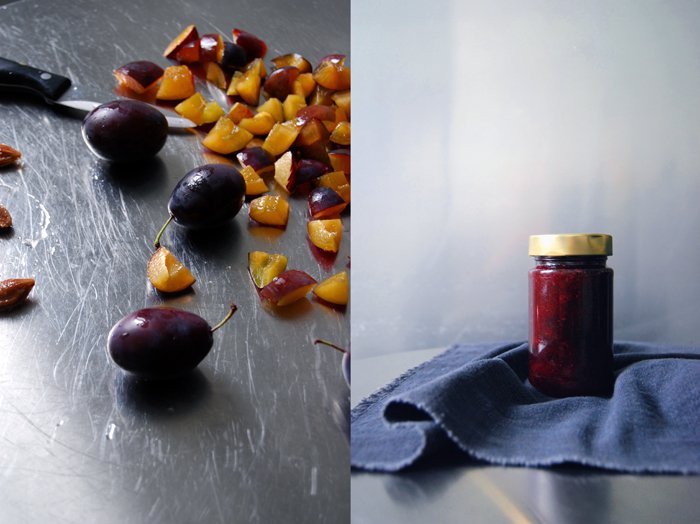
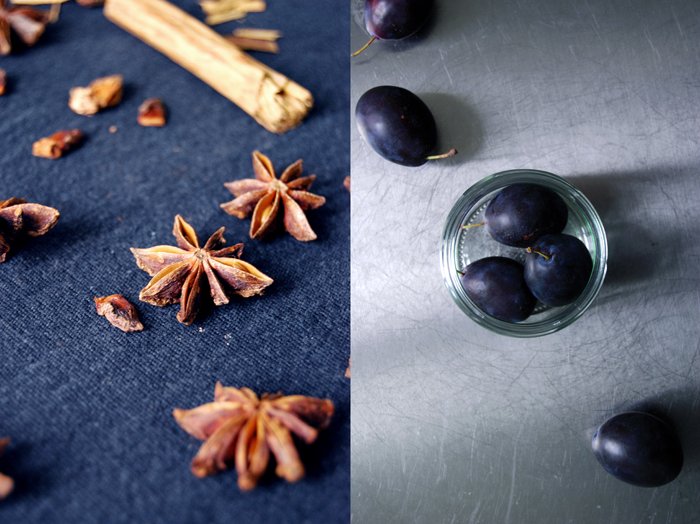
This is the kind of jam I would eat for breakfast in the mountains, in an old wooden hut, the morning table strewn with rustic delicacies, thick slices of a hearty loaf of bread, Tyrolean prosciutto, strong cheese, rich butter and this dark jam. It's very fruity and concentrated. The purple fruits cook for around 20 minutes with cinnamon and star anise which gives this thick spread a warm autumn touch (I don't really like to call it wintery yet, it's still too early in the year). The little pieces of the fruits' skin curl up and turn into caramelised fruit bites, delicious!
For my jams, spreads and chutneys, I always try to find the ripest fruits possible, it makes such a difference in taste! Especially when it comes to plums which develop the best side of their strong aromas when they start to soften. Natural sweetness, that's all you need! A hard and sour fruit won't develop its whole range of flavours in a jam.
I call this my Tyrolean Plum Jam as my mountain memories lie in Corvara in the Alta Badia region in South Tyrol. We used to spend many winter holidays in the Italian Dolomite Alps when I was a child, a time of hearty mountain food, aromatic cakes and strudels and some of the best breakfast tables I've ever had!
Tyrolean Plum Jam with Cinnamon and Star Anise
When you cook jam you should always use a tall pot to prevent the jam from boiling over. The fruits will be two to three times as high when they’ve reached boiling point! My pot is 24cm / 9.5″ high and 20cm / 8″ wide.
For 3-4 medium sized jars you need
ripe dark plums (preferably damson plums), pitted and chopped, 1kg/ 2 1/4 pounds
granulated sugar 600g / 1 1/4 pounds
star anise 4 single pieces
ground cinnamon 3 heaping teaspoons or 1 cinnamon stick
Sterilize the jars and lids in boiling water for 5 minutes. Dip the rims of the jars in spirit and wash out the lids, wash the ladle (you will use to fill the jars) with the alcohol as well. If you can get a thick foil for jam jars (thicker than cling film), cut out 3-4 circles roughly the size of the jars and put into the spirit as well.
Put the fruits, sugar and spices in a pot and bring to the boil, stirring with a long wooden spoon every now and then. When the boiling point is reached (you should see quite a few bubbles coming up), let the jam boil for 20 minutes, carefully stirring a couple times (without burning your hand, hence the long spoon!).
Take the pot off the heat and fill the prepared jars with the sterilized ladle almost to the top. Cover with the circles of foil and close tightly immediately. Let the jam sit for a day (or even a month) before you put it on your breakfast table and store the jars in your pantry.


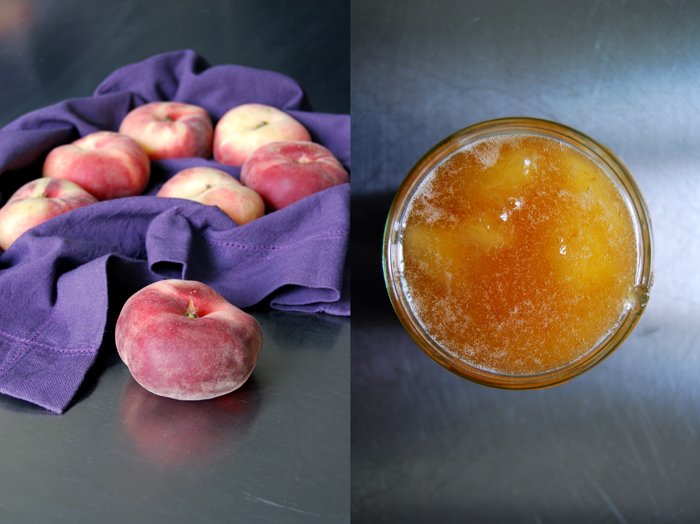
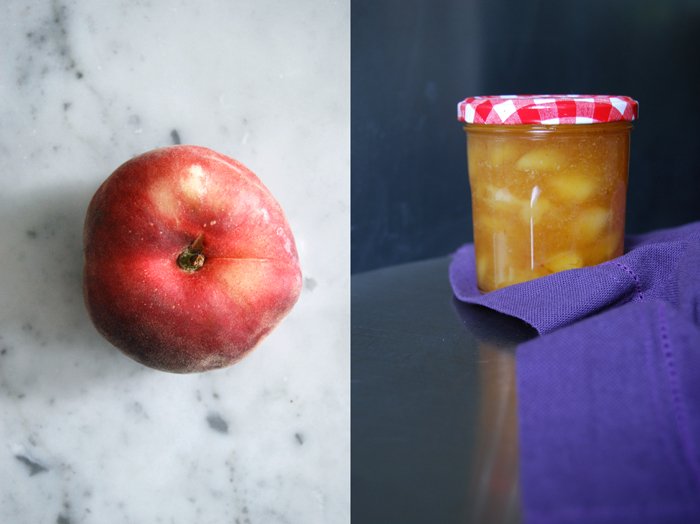
White Vineyard Peach Jam
The separation between a breakfast or dinner person doesn't exist with me, I am both! I can't function without my (late) breakfast and I don't want to end my day without a nice dinner. Although I don't start my day with a table full of bread, cheese, vegetables, jam, fruits and coffee early in the morning, I enjoy this treat at around eleven. Over the years I found that this is the best time for me to start eating, before that I just enjoy my big mug of green Sencha tea with lemon. Every day, that's my rhythm! I don't believe in universal eating rules, our bodies are unique, our personalities are and so are our eating habits. A vegan diet might work perfectly for one person but others feel the need to eat meat, or dairy products. It's best to listen to what your body tells you, if a certain food leaves you with a bad feeling or makes you tired, chuck it out. A slice of bread with butter calms me down and makes me feel good. This is definitely food that makes me happy, and at breakfast, I like to spread it with my homemade jam.
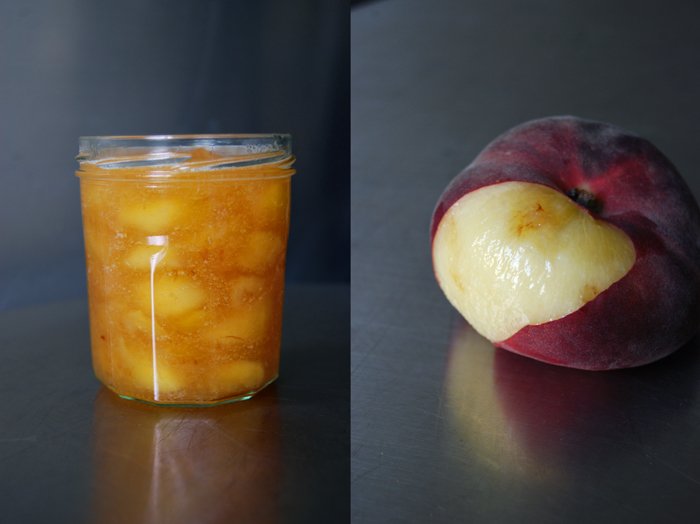
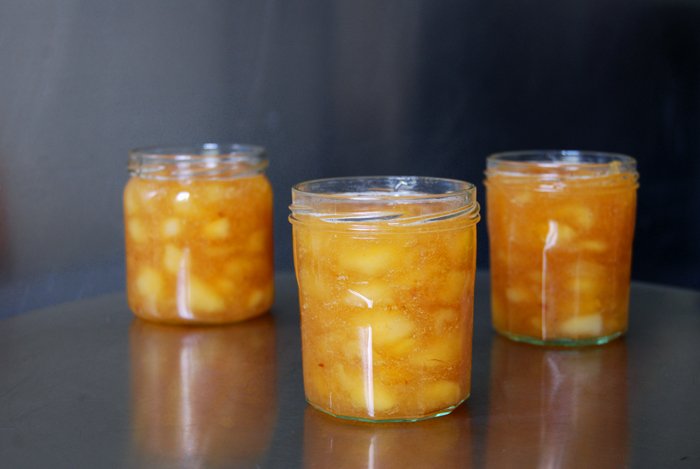
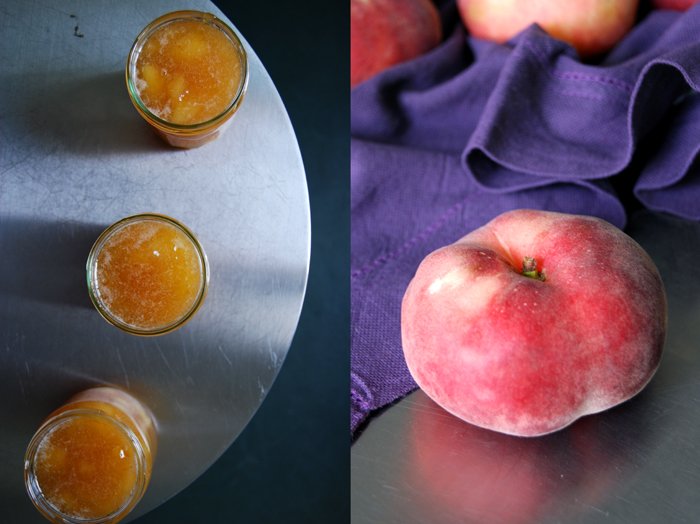
I have a big selection of jams in my pantry, jars filled with strawberries, tangerines, different kinds of orange and plum jam, blackberry jam and now there is a new one! I stocked up on peach jam which I made with white, flat vineyard (or galaxy) peaches. This jam is like honey, very peachy and aromatic, not thick and stiff but smooth and a bit runny with chunky pieces of fruits. You could also use yellow peaches but I find the white more intense in flavour and that's what a good jam needs, apart from very ripe fruits!
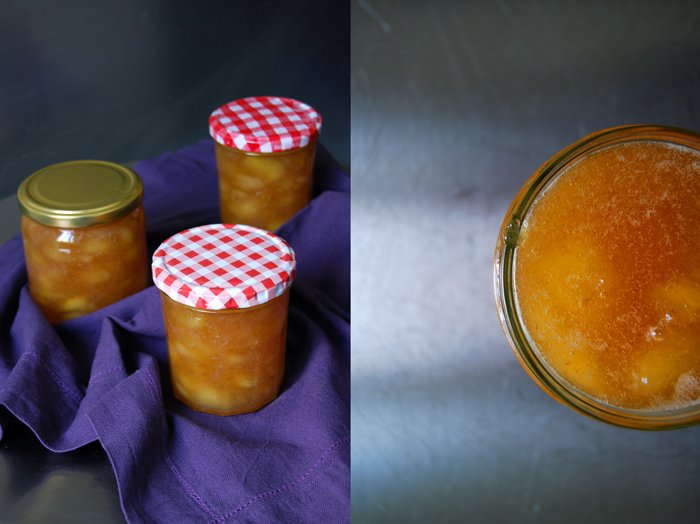
White Vineyard Peach Jam
When you cook jam you should always use a tall pot to prevent the jam from boiling over. The fruits will be two to three times as high when they’ve reached boiling point! My pot is 24cm / 9.5″ high and 20cm / 8″ wide.
For 3-4 medium sized jars you need
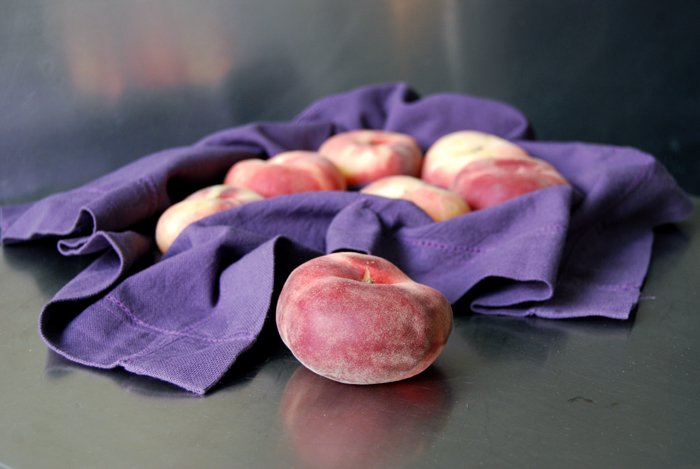
white, flat vineyard (or galaxy) peaches 1kg/ 2 1/4 pounds
granulated sugar 600g / 1 1/4 pounds
juice of 1/2 big lemon
a pinch of salt
Sterilize the jars and lids in boiling water for 5 minutes. Dunk the rims of the jars in spirit and wash out the lids, wash the ladle (you will use to fill the jars) with the alcohol as well. If you can get a thick foil (thicker than cling film), cut out 3-4 circles roughly the size of the jars and put into the spirit as well.
Put the fruits, sugar, lemon and salt in a pot and bring to the boil, stirring with a long wooden spoon every now and then. When the boiling point is reached (you should see quite a few bubbles coming up), let the jam boil for 20 minutes, carefully stirring a couple times (without burning your hand, hence the long spoon!).
Take the pot off the heat and fill the prepared jars with the sterilized ladle almost to the top. Cover with the circles of foil and close tightly immediately. Let the jam sit for a day (or even better for a month) before you put it on your breakfast table and store the jars in your pantry.
Chunky Strawberry Jam

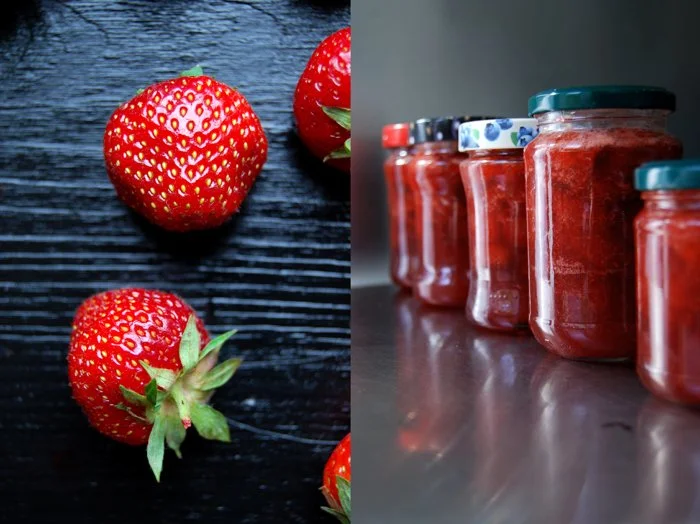
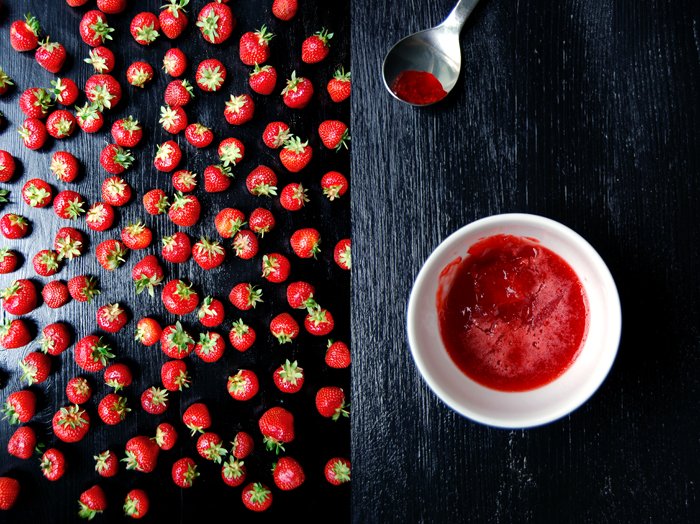
For my breakfast toast I like my jam chunky and fruity, thick, with skin, seeds and everything. I've never been a big fan of jellies, it's like something is missing, I need to feel those crunchy bites. Even blackberries, red or black currants, I always cook the whole fruit. When it comes to my favourite spread, sweet strawberries, I cut the fruit in half, it makes a very chunky jam, you can still taste and feel the berries.
In my family, we have always used jam sugar (also known as gelling or jelly sugar) when we make strawberry jam. It contains pectin made of apples and citrus fruits and you can also choose between three different types, either 3:1, 2:1 or 1:1. The numbers stand for the ratio between fruit and sugar, I prefer 2:1 which allows a less sweet jam, you only need 1 pound of sugar for 2 pounds of berries. I cook mine for 4 minutes to turn it into a concentrated fruit spread, I don't even need to test for the setting point. It works perfectly!
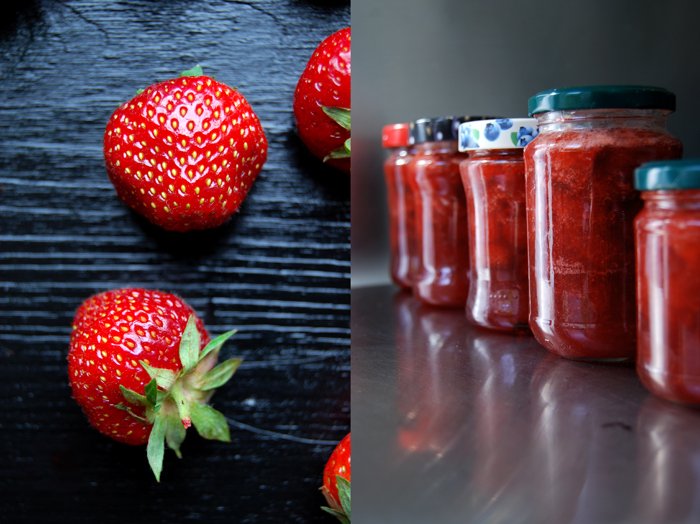
Since I was a child, I've always loved to cook jams. It was exciting, all those fruits to prepare, my mother would bring out her special tall jam pot and the long wooden spoon, both only came to use when it was jam time! The process of sterilizing the jars in boiling water and spirit felt like a science project to me. From my mother I also learnt to cover the jam in the jar with a circle cut out from thick plastic foil dunked in alcohol. It prevents the jam from molding and keeps it fresh for years!
Strawberry Jam
When you cook jam you should always use a tall pot to prevent the jam from boiling over. The fruits will be two to three times as high when they've reached boiling point! My pot is 24cm / 9.5" high and 20cm / 8" wide.
For 8 medium sized jars you need
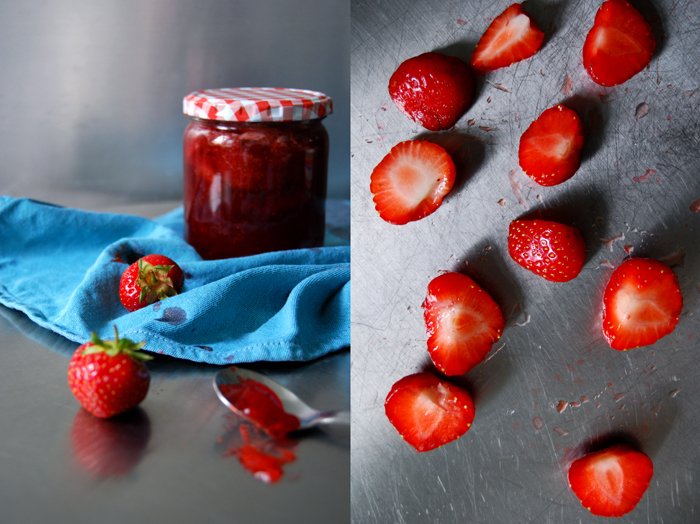
strawberries, rinsed and cut in half (you can quarter the big ones), 2kg / 4 1/2 pounds
jam sugar (gelling or jelly sugar), 2:1 or 1:1, 1kg / 2 1/4 pounds
Sterilize the jars and lids in boiling water for 5 minutes. Dunk the rims of the jars in spirit and wash out the lids and the ladle (you will use to fill the jars) with the alcohol. If you can get a thick foil (thicker than cling film), cut out 8 circles roughly the size of the jars and put into the spirit as well.
Put the fruits and sugar in a pot and bring to the boil, stirring with a long wooden spoon every now and then. When the boiling point is reached (you should see quite a few bubbles coming up), let the jam boil for 4 minutes, carefully stirring a couple times (without burning your hand, hence the long spoon!).
Take the pot of the heat and fill the prepared jars with the sterilized ladle almost to the top. Cover with the circles of foil and close tightly immediately. Let the jam sit for 1 day before you spread it on your first morning toast and store the jars in your pantry.


Elderflower Syrup and a Friday Hugo Cocktail
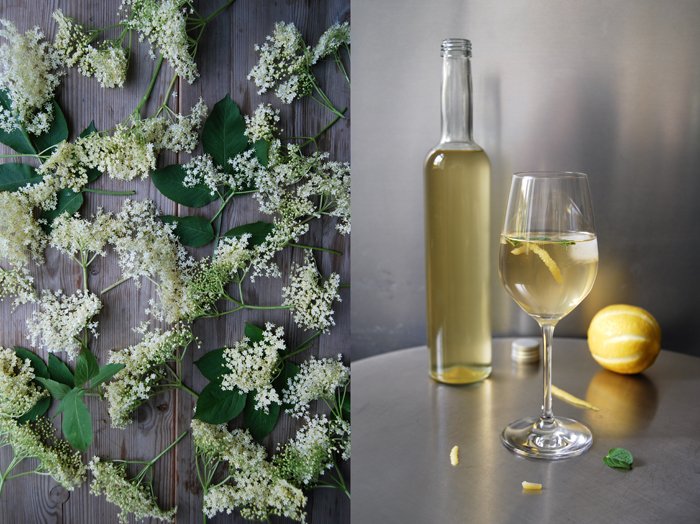
It's Friday, the weekend is near, the perfect day for a summery cocktail! I don't need something frilly, I prefer simple and light drinks like a Hugo. This fruity long drink is from the Tyrolean region, it is originally made with sparkling wine but I like it with fruity white wine. The drink is mixed with elderflower syrup, mint leaves and lemon peel, all ingredients I find in my fridge or on the balcony apart from the syrup and this had to change! Not only does it make a nice cocktail it's also deliciously refreshing in a glass of sparkling water with a slice of lemon, for those hot summer days ahead of us! That's reason enough to make my own syrup.
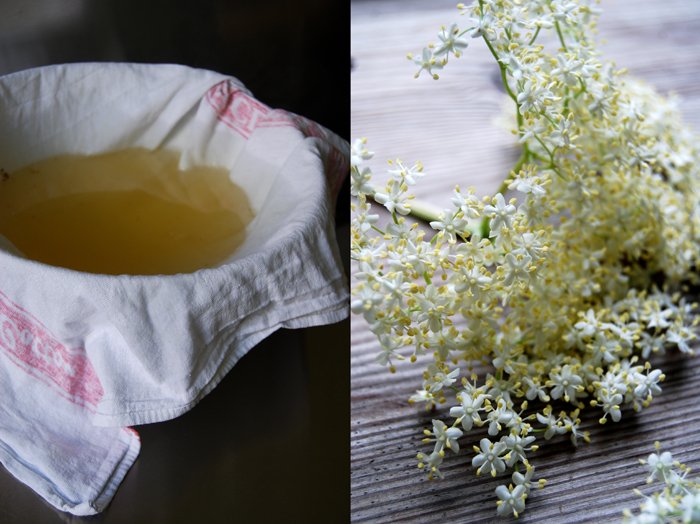
I jumped on my bike, went to the park and came home with 25 big elderflowers. They just started to blossom here last week, I noticed their sweet smell as I was jogging. I've been wanting to try this recipe by my mother for years, she has been making her own syrup since she first tried a Hugo. I was always too late to pick the flowers and didn't want to repeat this mistake again. When I came back home with the elderflowers I was stunned by their beauty which tends to fade into all the leaves and flowers in the park so I never gave them proper attention. Their smell is enchanting and they feel so fragile!
I rinsed them briefly before pouring hot water mixed with sugar and citric acid over them and then I had to be patient. They have to sit for 5 days, stirred once a day, they infuse the syrup slowly with their distinctive aroma.
Strained and bottled, I was happy about my work, and satisfied to be able to make a Hugo with my own elderflower syrup from now on!
For the syrup
For 2 bottles of elderflower syrup you need
fresh elderflower umbels, briefly rinsed, 25 (use the whole umbel, cut the thick green stem off, the white florets should have just opened)
granulated sugar 1kg / 2 pounds
water 1000ml / 2 pints
citric acid 30g / 1 ounce
organic lemon, thinly sliced, 1
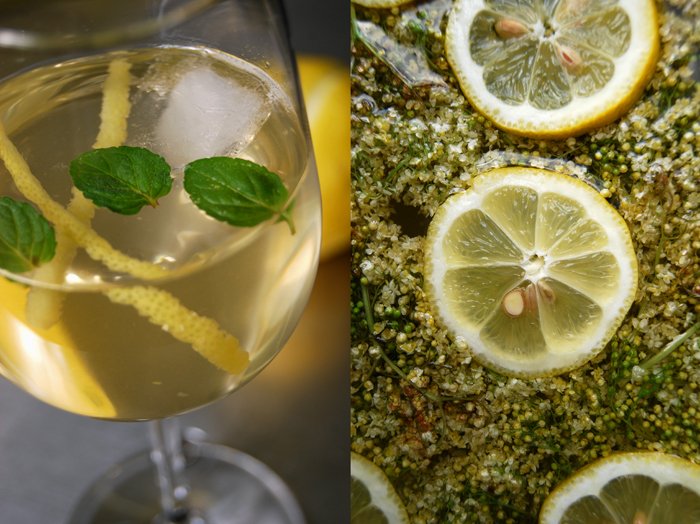
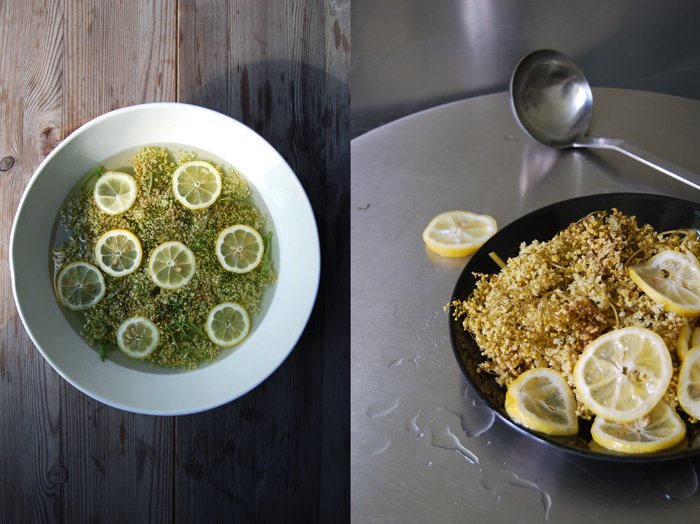
In a large pot, bring the water to a boil and dissolve the sugar and citric acid in it. Place the elderflower umbels in a large ceramic or glass bowl (not metal!), pour the hot water over them and put the lemon slices on top. Cover with a tea towel and let it sit for 5-6 days at room temperature, stirring once a day.
Sterilize glass bottles with spirit.
When the syrup is done, strain it through a cotton or linen kitchen towel and bring it to a boil. Strain through a towel a second time and fill in your sterilized bottles. Close well and put in your pantry. The syrup will last at least a year at room temperature, open bottles should be stored in the fridge.
For the Hugo cocktail
Fill a wine glass with sparkling wine or dry white wine. Pour in a dash of the elderflower syrup (to taste), add 1-2 ice cubes, stir and garnish with 2-3 strips of lemon peel and 3 mint leaves.


Sweet and spicy Rhubarb Chutney
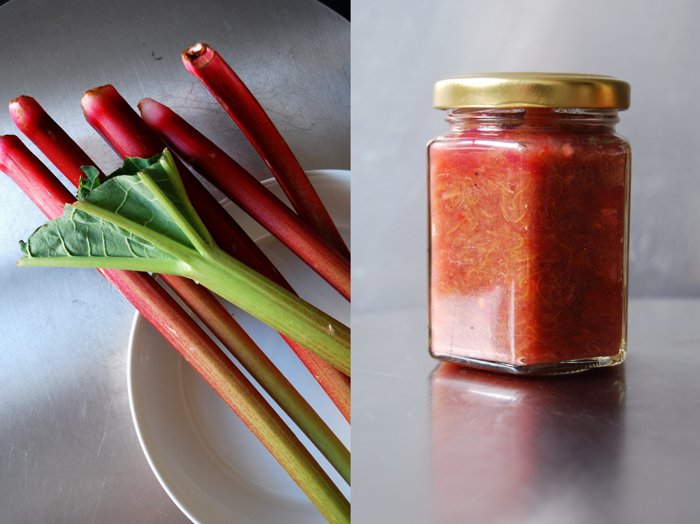
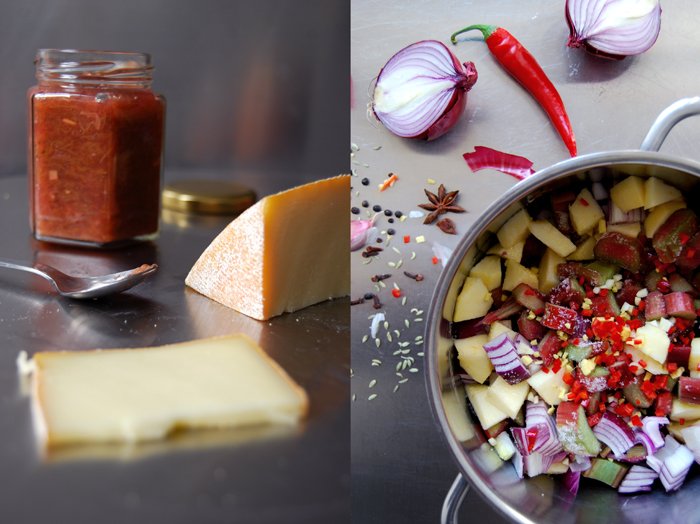
My love for chutney developed quite late, almost nine years ago while I lived in England for a couple months. One night I found out about the glorious combination of Yorkshire Wensleydale cheese and chutney. I knew about a similar duo, ripe cheese and fig mustard, a great alternative to a sweet dessert, heavenly when the cheese's milkiness unites with the spicy and fruity flavours in your mouth! When my dear friend Audrey, a lady who likes good cheese as much as I do, offered me this North Yorkshire delicacy I was taken after the first bite. My favourite was a young cheese, mildly flavoured with cranberries, a bit crumbly and just perfect together with sweet onion chutney. Sometimes, after we had been out, we used to chat in Audrey's kitchen, get out some jars of pickles, chutneys and a truckle of Wensleydale and we quite often ate more than just a midnight snack!
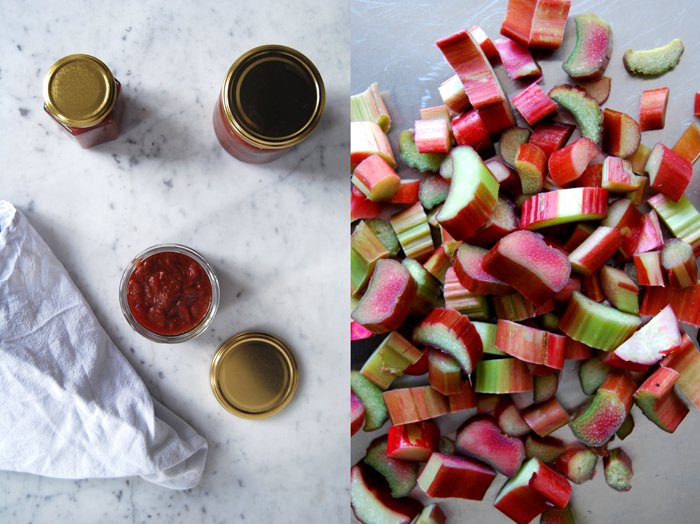
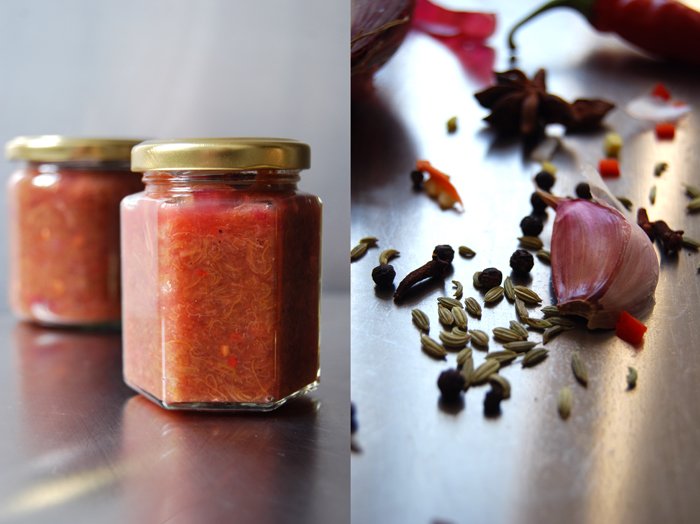
Not too long after this culinary discovery I started to make my own chutneys. I experimented for a while and came up with a recipe which I now use for all kinds of chutneys, plums, apples, onions or rhubarb. Depending on the fruit's taste I adjust the spices a little bit but the basic recipe remains untouched. Most of the time I mix in red onions and red hot chili peppers for the spiciness, a couple apples to thicken the texture and lots of spices, turmeric, cloves, star anise, fennel seeds, black pepper, garlic and ginger. Rhubarb is at its seasonal peak at the moment, the best time to turn it into a sweet and spicy chutney!
Cheese and chutney isn't the only way to enjoy chutney, you can also use it to flavour aromatic gravies, eat it with slices of warm or cold roast meat or spread it on sandwiches.
Rhubarb Chutney
For 3 medium sized jars you need
rhubarb, sliced 550g / 19 ounces
apple, peeled and roughly chopped, 125g / 4.5 ounces
red onion, medium sized, roughly chopped, 1
cider vinegar 220ml / 7.5 ounces
granulated sugar 150g /5.5 ounces
fresh hot chili pepper, without seeds, finely chopped, 1/2
garlic, chopped, 1 clove
fresh ginger, grated or chopped, 1 heaping teaspoon
For the spice mixture (makes 2 teaspoons, you might only need 1 1/2)
turmeric, ground, 1/8 teaspoon
cinnamon, ground, 1/2 teaspoon
cloves, ground in the mortar, 12
star anise, ground in a mortar, 2 single pieces
fennel seeds, ground in a mortar, 1/2 teaspoon
small dried chili, ground in a mortar, 2
spirit to sterilise the rims of the jars
Sterilise the jars in boiling water for 5 minutes.
In a large pot, bring all the ingredients together with 1 1/2 teaspoons of the spice mixture to the boil. Cook for about an hour on medium temperature until the chutney thickens. You can add more of the spice mixture if you like before you fill the chutney into the jars.
Dip the rim of your jars in spirit and wash out the lids with the alcohol as well. Fill your jars with the chutney and close well immediately.
You can eat the chutney right away but I prefer to let it sit for 3 weeks. You should keep an open jar in the fridge (mine stays fresh for months) and the closed jars in your pantry.
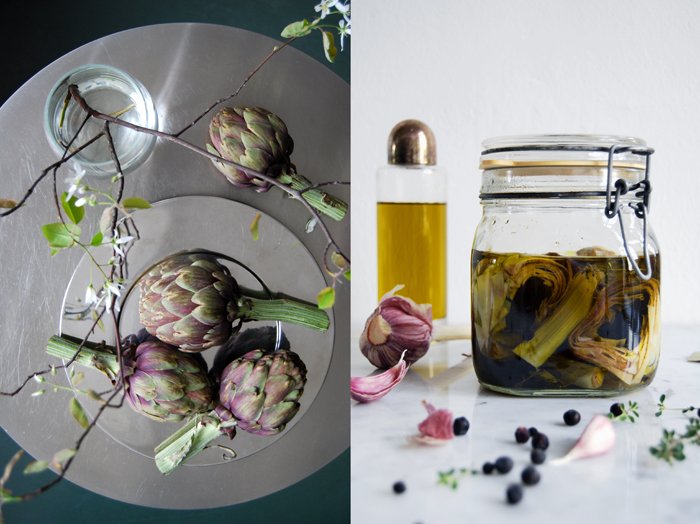
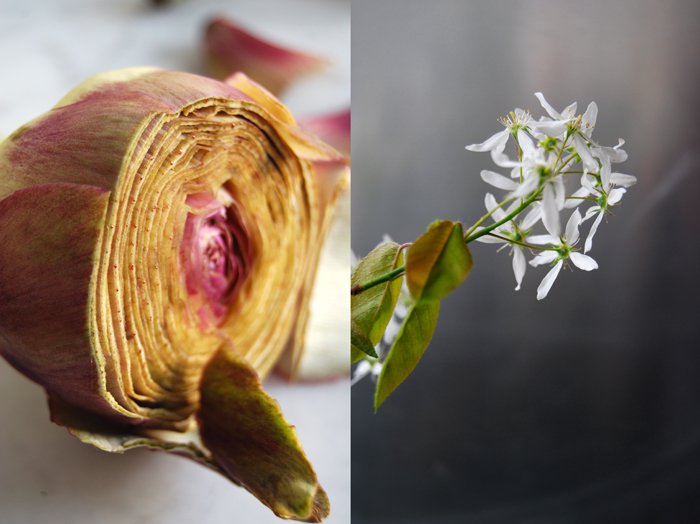
Preserved Artichoke Hearts with Spices and Thyme

I've been wanting to marinate artichokes for so long, ever since I had my own kitchen in fact, which is quite a while ago. I took my time and over the years I discovered the advantages of a pantry packed with jars of homemade jams, chutneys, preserved lemons and fruits but now I want to see some artichoke hearts cooked in wine and vinegar, with lots of spices on my shelves as well. I love to fill this space with all the jars that make my favourite food so handy and always available, I don't have to worry about industrial preservatives which are banned in my kitchen.
The process of preserving has a wonderful side effect, it's so relaxing! I understand why my grandmother used to have a room in her cellar packed to the ceiling with preserving jars and bottles, cherries, pears and plums, German apple purée, gherkin, jams, so much that even my big family didn't manage to eat everything that she produced. I imagine that she enjoyed preserving food as much as I do now, standing peacefully in her kitchen, keeping an eye on the bubbling and steaming food in the pots. When I'm done with cooking and have filled my culinary products into the jars and line them up on a table, I feel so satisfied and rewarded for the work I've done, it's truly therapeutical!
Artichoke hearts preserved in olive oil are great on bread sprinkled with parsley, on crostini or pizza, mixed with pasta or in a risotto. You could also fry them together with your omelet, mix them into a Mediterranean salad or enjoy them pure on a summery antipasti platter.
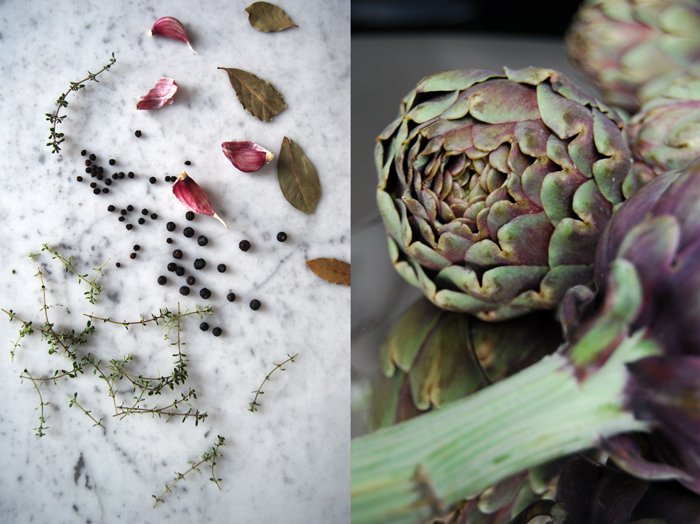
Preserved Artichokes Hearts
For 6 artichoke hearts preserved in an 800ml jar you need
baby artichokes 6
water 900ml
white wine 350ml
white wine vinegar 150ml
garlic, quartered, 2 cloves
bay leaves 2
black peppercorns 8
juniper berries 5
thyme 8 small sprigs
salt 1 teaspoon
lemon 1/2, to prevent the artichokes from turning brown
olive oil to fill the preserving jar
spirit to sterilise the rim of the jar
Peel the artichoke stems, if it isn't soft but woody you have to cut it off. Pluck the hard outer leaves and cut the artichoke's tip off (1/3 - 1/2 of the artichoke), just the soft parts of the leaves should be left. Loosen the hairy choke with a knife and scoop it out with a spoon. Keep the prepared artichoke heart in a bowl of cold water and the juice of half a lemon to avoid it discolouring while you're finishing the rest.
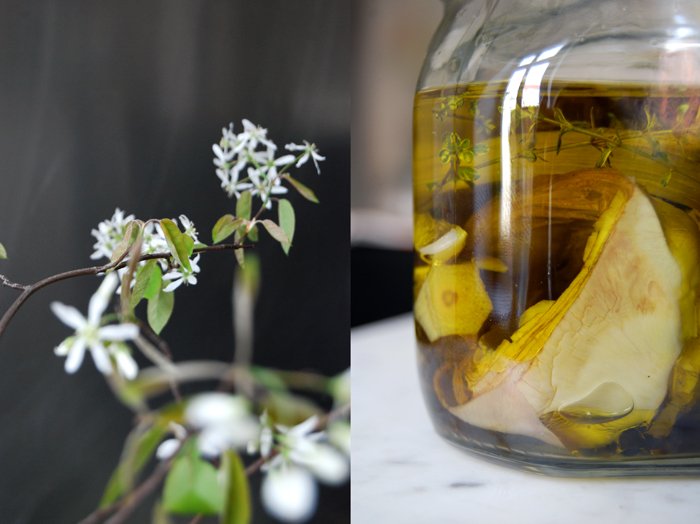
In a large pot, bring all the ingredients to a boil, add the artichoke hearts and cook for 10 minutes.
Sterilise the preserving jar in boiling water for 5 minutes. Take it out, let it dry for a few minutes and dip the rim of your jar in the spirit and wash out the lid with the alcohol as well.
Drain the artichokes and put them in the sterilised jar, fill with olive oil till covered and add some of the spices and thyme sprigs. The jar should be filled with oil to the top! Close the jar, keep in your pantry or enjoy immediately.

Moroccan Preserved Lemons in a Jar
My aunt collected a few recipes requiring Moroccan preserved lemons. I had never heard of this North African delicacy before and she told me that they are hard to find in stores but she was lucky enough to spot them in the gourmet section of a department store. Happy to have found them she nearly fell over when she saw the price! She bought a small jar and we tried a lemon together, it was wonderfully juicy, aromatic and sour! We decided that we would manage to make our own.
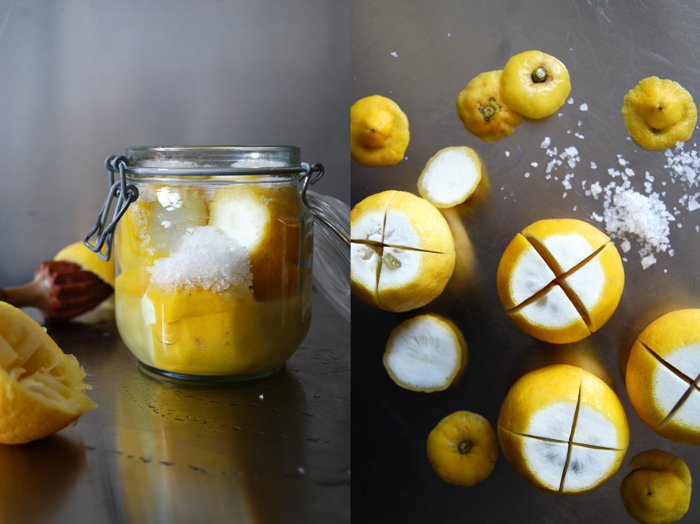
Unfortunately, the organic lemons on offer at the moment aren't perfect but they'll work with a trick. Ideally you would use very small citrus fruits with thin rind, they just need to be carved slightly, two long incisions along the sides. I wish I could pick the fruits off my mother in law's tree in her garden in Malta, ripened under the Mediterranean sun! For now, I have to work with what I've got but that's no problem. I just cut off both ends and quartered the fruit without cutting all the way through (as you can see in my photos).
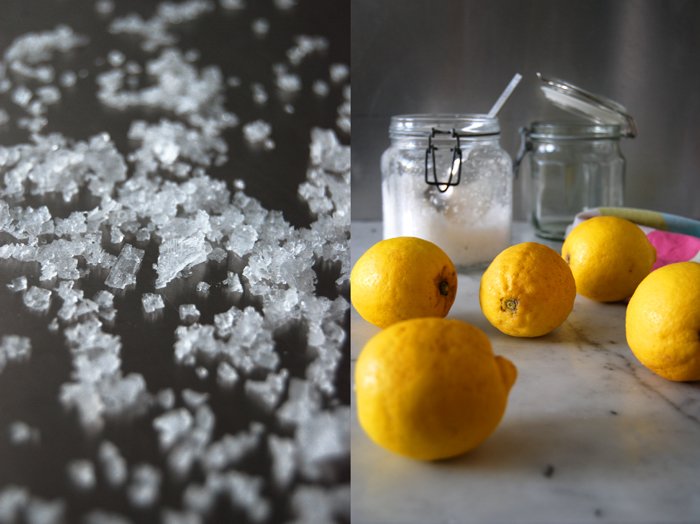
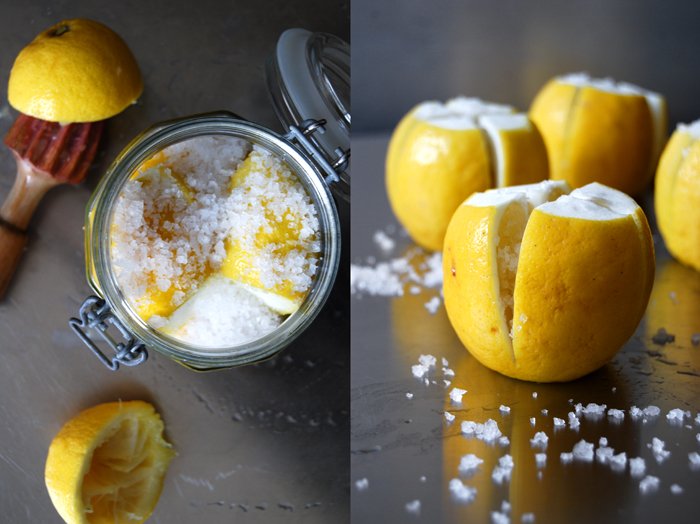
The next step is to rub lots of coarse sea salt into the lemons, Mr. Cini's sea salt from the Gozitan salt pans was called to use. After a few seconds the juices started running, I compressed the fruits and pushed them into the jar one after the other. I poured the juice of a lemon and some more salt on top before I closed it. 2 days later I had to compress the lemons again and check if they were covered in juice. Now they are sitting in my pantry and I'll have to wait for a month before I can enjoy them. My aunt told me that they taste delicious in salads and couscous, and with poultry and lamb. I can't wait!
Moroccan Preserved Lemons
For 5 lemons preserved in an 800ml jar you need
organic lemons, rinsed, 5 (small ones if possible)
coarse sea salt 70g / 2.5 ounces
juice of 2 big lemons
Sterilize a preserving jar for 5 minutes in boiling water.
Cut both ends off the lemons and quarter the fruits without cutting all the way through (as you can see in my photos). Rub a heaped teaspoon of salt into each lemon, compress them and push into your sterilized jar. Add the rest of the salt and the lemon juice, push everything down and close the jar.
After 2 days press down on the lemons again with a spoon and check if they are covered in liquid. Add the juice of another lemon if they aren't almost covered. Put the jar in a dark place and wait a month. When they are soft and ready to eat, rinse them quickly before you use them in an aromatic meal.


Sunset in a Jar - Blood Orange Marmalade
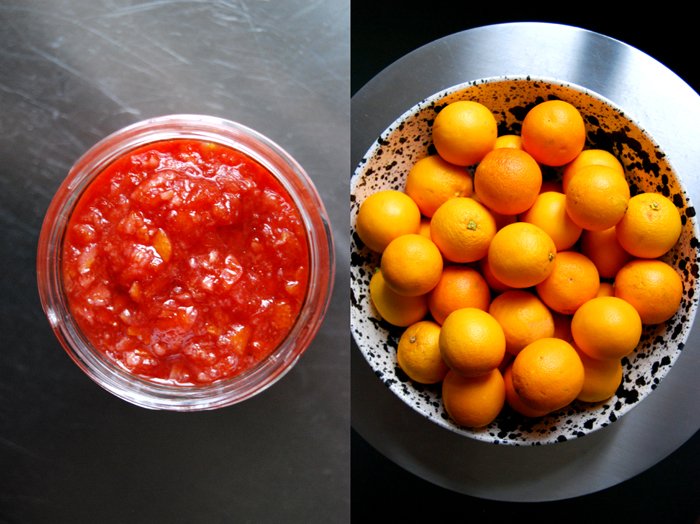
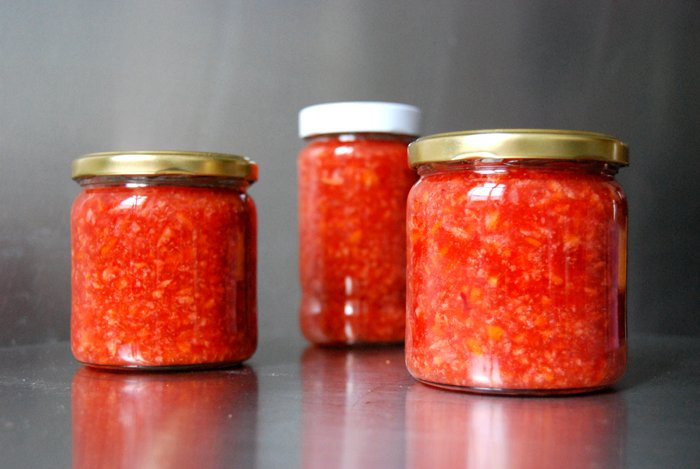
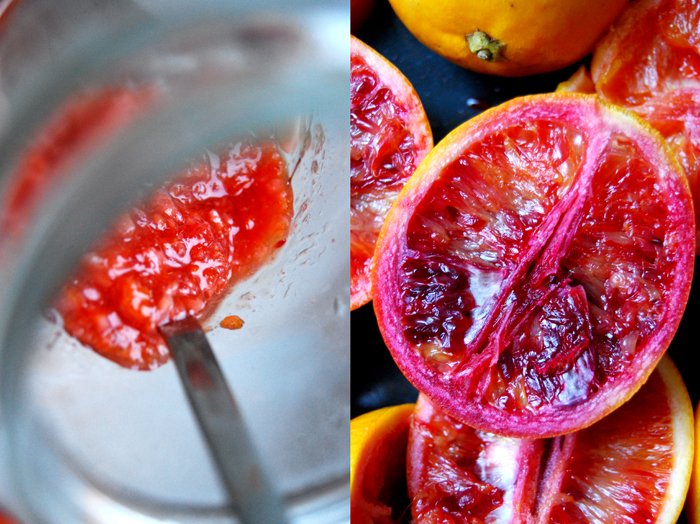
This red is just stunning. It's like the brightest red sunset caught in a jar! I'm hooked on blood oranges, I have them all the time, as a snack or as fresh juice. They are so sweet and juicy at the moment that I much prefer them to normal oranges or tangerines even. I buy huge bags of the Italian ones, now that they are in season, organic with thin skin, and I think I could live off them (for now).
All good but I want to bring some variety in, therefore I decide to put them in a jar and made some blood orange marmalade. I've never made it before but so far my marmalade recipe worked very well with Seville oranges and tangerines, so why not with blood oranges (I wrote about my tangerine marmalade in December)? It worked, and more than that, the result is amazing! This marmalade is so sweet, yet slightly bitter, it's just right! I spread it on a slice of white English bread, impatiently, it just finished cooking, and I couldn't stop smiling.
Blood Orange Marmalade
For 3-4 medium sized jam jars you need
organic blood oranges, rinsed, 1200g / 2 1/2 pounds
granulated sugar 600g / 1 1/4 pounds
juice and seeds of 2 lemons
spirit to sterilise the rims of the jars
Sterilise the 4 jam jars in boiling water for 5 minutes.
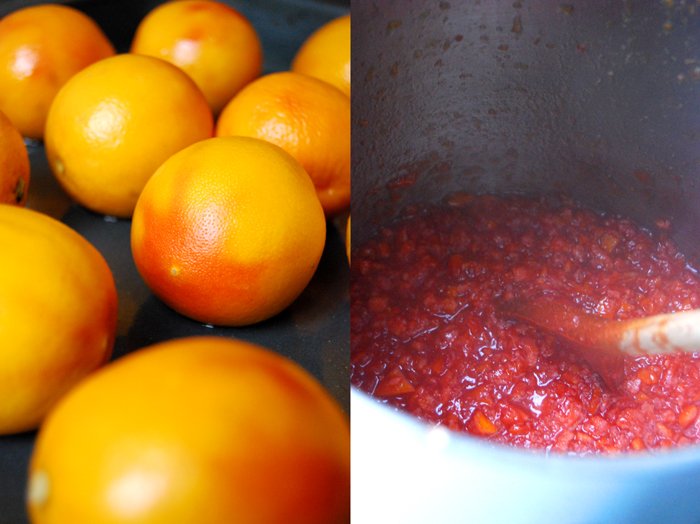
Fill a large pan with water and bring to the boil. Cook the oranges for 25 minutes or until soft (mine needed 25 minutes but they were small with thin skin). Take them out and keep some of the water.
Quarter the cooked oranges (don’t peel them, you use the whole orange!), take out their seeds and put them aside (you will need them). Cut the lemons in half and keep their seeds as well. In a small pan, heat up some of the blood orange cooking water (it should come up to 2cm / 3/4"), add the lemon seeds and orange seeds and let them cook for 5 minutes.
Shred the quartered oranges in a food processor for a few seconds. Put them in a large pan, add the sugar, the lemon juice and the water used to boil the seeds. Bring to the boil gently (the sugar has to dissolve first) and boil for 18-20 minutes.
Dip the rim of your jars in the spirit and wash out the lids of the jars with the alcohol as well. Fill your jars with the marmalade and close well immediately.

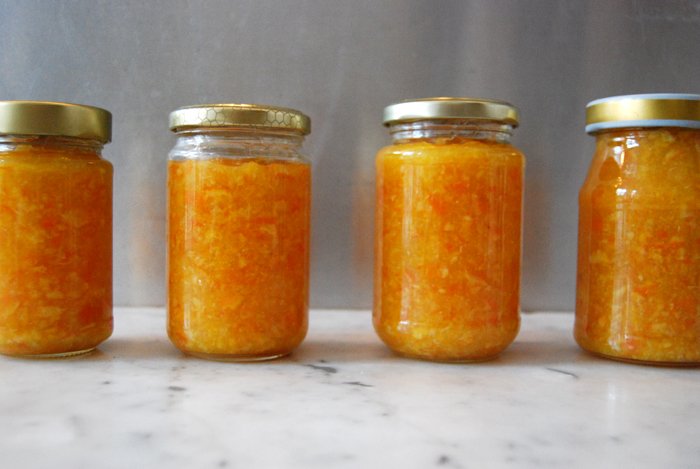
Sicilian Memories with my Tangerine Jam
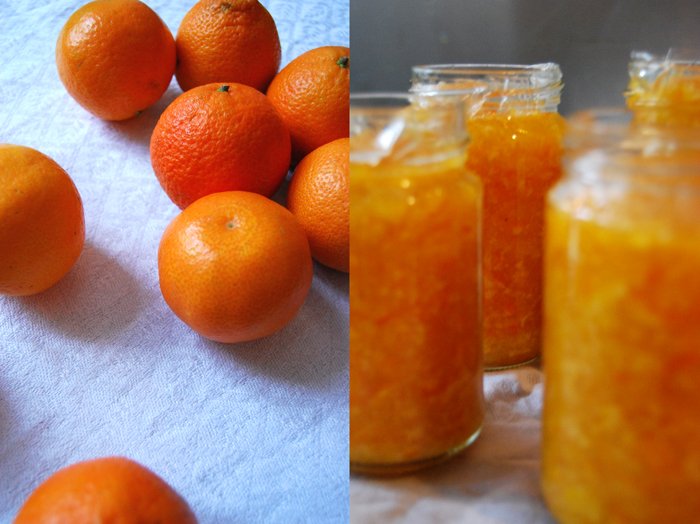
Last year I went to Sicily for the first time in my life. We stayed at a beautiful farm close to Noto located in soft hills between lemon, orange and tangerine trees. Every morning we got the most delicious breakfast served under pine trees with the old city of Noto in the distance. Freshly baked cakes, fruit, white bread fried in olive oil together with oregano (from the farm as well, the best oregano in the world!), it was heaven!
One of my many breakfast discoveries was a jam which looked like the golden sun and tasted so sweet and refreshing, with a hint of sourness and bitterness. Just divine! This jam was made of tangerines and I think I must have emptied jars of it during our holiday. As soon as I got home and tangerines were available I made my own! This year, I have to refill my pantry with my Sicilian jam.
Sicilian Tangerine Jam
For 4 medium sized jam jars you need
organic tangerines, rinsed, 1200g / 2 1/2 pounds
sugar 600g / 1 1/4 pounds
juice and seeds of 2 lemons
spirit to sterilise the rims of the jars
Sterilise the 4 jam jars in boiling water for 5 minutes.
Fill a large pan with water and bring to the boil. Put the tangerines in the water and let them boil for 20 minutes. Take the tangerines out and keep some of the water.
Quarter the cooked tangerines (don't peel them, you use the whole tangerine!), take out their seeds and put them aside. Cut the lemons in half and keep their seeds as well. Heat up some of the tangerine cooking water in a small pan (it should come up to 2cm / 3/4"), add the lemon and tangerine seeds and let them cook for 5 minutes.
Shred the quartered tangerines in a food processor for a few seconds. Put them in a large pan, add the sugar, the lemon juice and the water used to boil the seeds. Bring to the boil gently (the sugar has to dissolve first) and boil everything for 18-20 minutes.
Dip the rim of your jars in the spirit and wash out the lids of the jars with the alcohol as well. Fill your jars with the jam and close well immediately.
Let the jars cool off and enjoy their amazing color - and the taste after a day or two as the jam has to sit a bit!