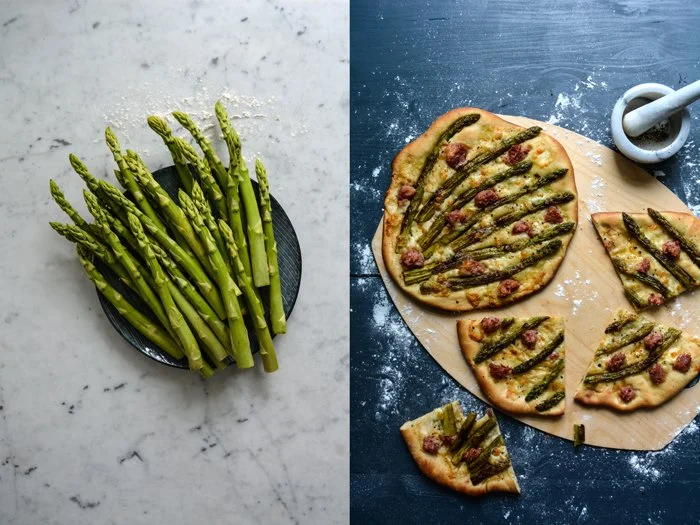
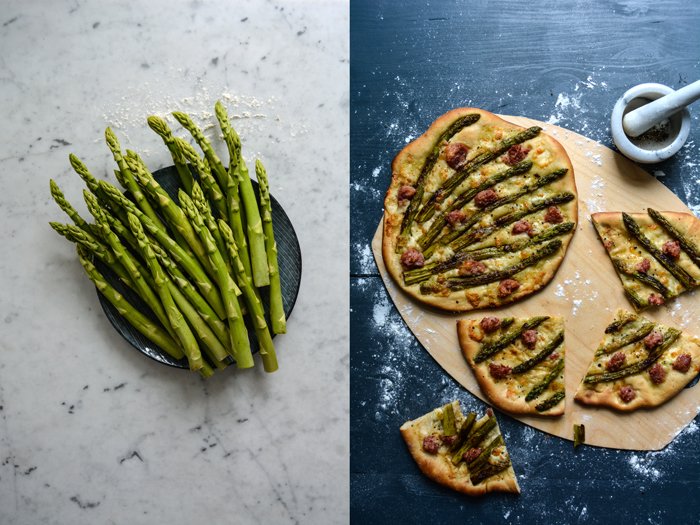
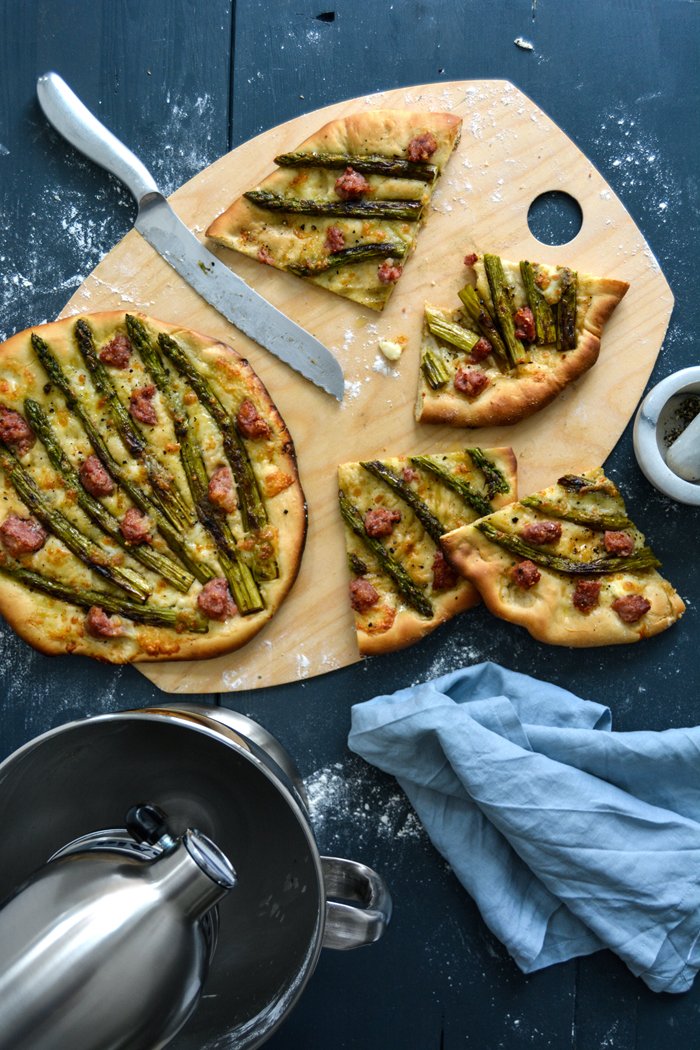
Pizza Bianca with Green Asparagus, Salsiccia, and Mozzarella di Bufala
I got my first KitchenAid and I feel like a little girl on Christmas Eve. To call the current mood in my kitchen excitement would be a serious understatement.
After years of seeing - and admiring - these sparkly, polished beauties in the kitchens of my friends and family (my sister has two!), the time had come to get my own. At a certain age, one deserves these special treats. I'm a strong believer that it's good to wait for things in life, it strengthens your character and makes you deeply appreciate what you have. But 20 years of waiting was more than enough, that's how long it took me to finally see this powerful stand mixer on my marble counter tops.
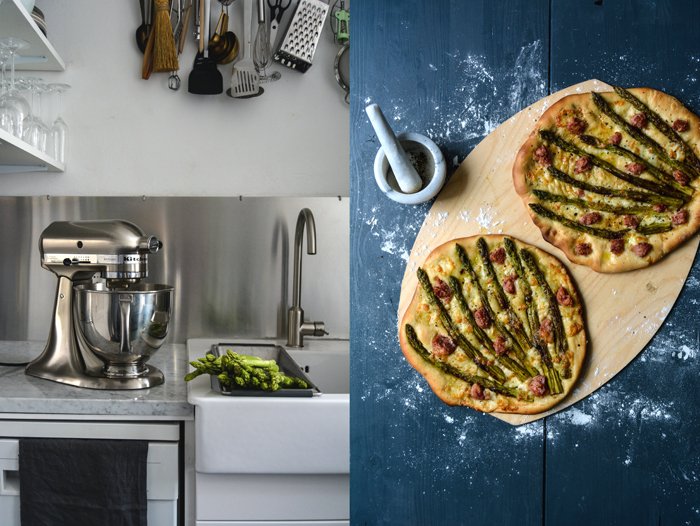
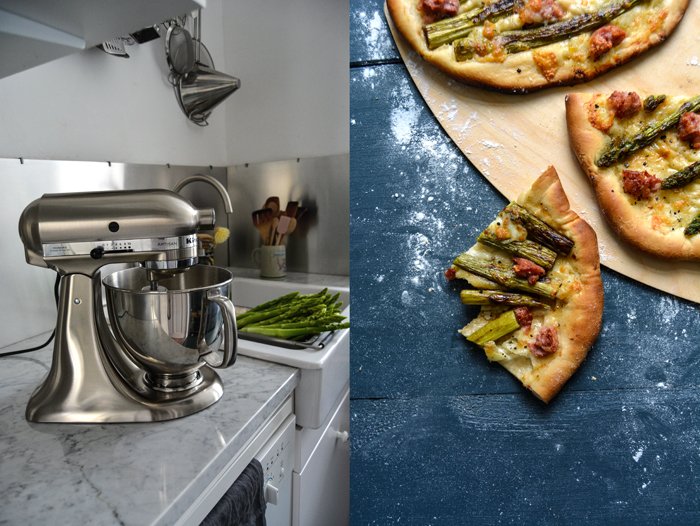
In various phases of my life, I always had my favourite KitchenAid colour. In my young twenties, I loved the creamy white surface, followed by a fascination for the 50s and its soft pastels. Light blue, mint, or pink, I would have taken any of them. Then I got into puristic minimalism and only a black mixer would have made it into my kitchen. In my thirties, I fell for light yellow, but now, all of a sudden, I had to make a decision and decide which colour I would finally get and see for the rest of my life. It wasn't easy and it took a few visits to various appliance shops. In the end, I had to weigh the advantages and disadvantages of cream, yellow, black, copper (which looks really hot), and brushed stainless steel. This process brought back lots of memories of the different eras of my life connected to each colour. After a couple weeks, my decision was made: brushed stainless steel is the winner! When the large package arrived I couldn't wait to see my object of desire on my counter tops - I was almost hysterical, which is excusable in my eyes, it's been 20 years after all. So here it is and it looks amazing. The mixer's metallic surface fits perfectly to my white marble and brushed aluminium wall panels. I'm totally in love and can't stop looking at it.
Testing its functionality was the next step, I had never used a KitchenAid before. My unbreakable hand mixer, a gift from my mother when I moved into my first flat two decades ago, has been a loyal partner during all my kitchen adventures. I was a little nervous and decided to start with two easy recipes - Sunday morning pancakes and Sunday evening pizza. This allowed me to get used to the three different attachments. My hand mixer only has two, but my new beauty offers a whisk, a paddle, and a hook - I needed a conference call with my sister to figure out when to use what.
Before I switched on the power, I had to call my boyfriend for this special moment. And this was our maiden voyage: I - rather the mixer - started beating the egg whites with such calm, persistence, and firm perfection that I thought I'd never touch my hand mixer ever again (sorry hand mixer). My next project - pizza dough - gave me the same satisfaction. The yeast dough was well mixed, smooth, and ready to be kneaded with my hands for a few minutes, which I always do to turn it into a soft and silky ball. I thought I'd use the time while the dough was getting mixed in the machine to prepare the toppings, however, I couldn't help but sit next to it with a glass of rosé wine in my hand and watch it work with elated enthusiasm.
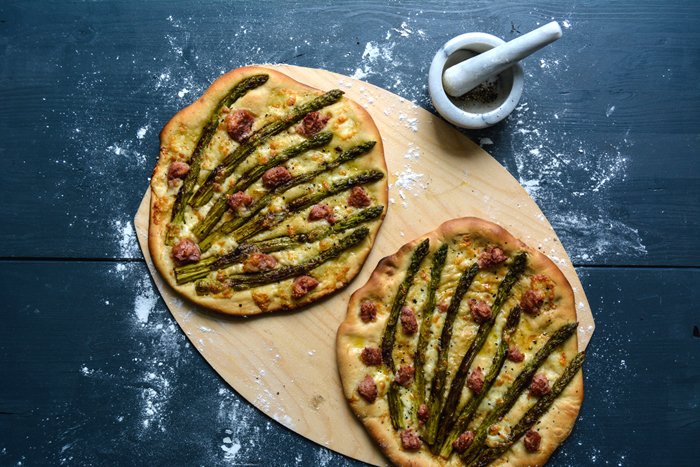
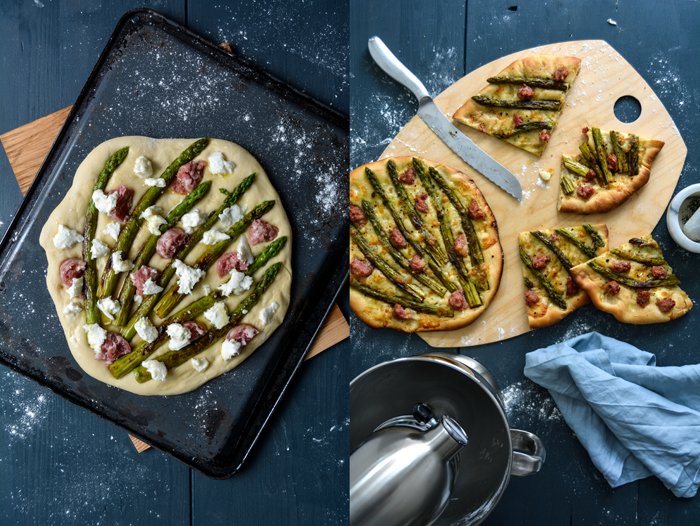
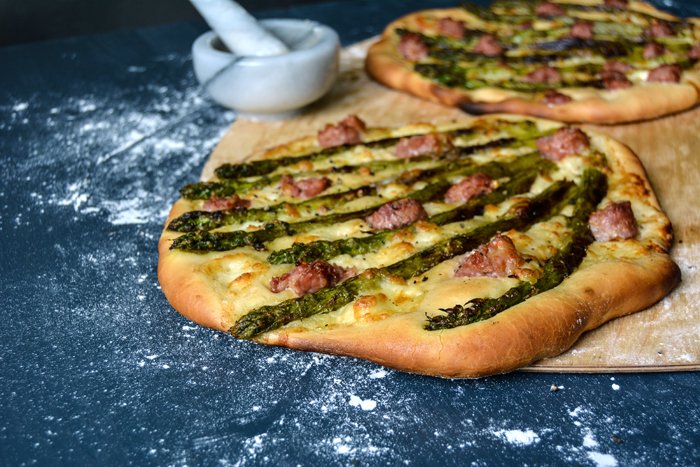
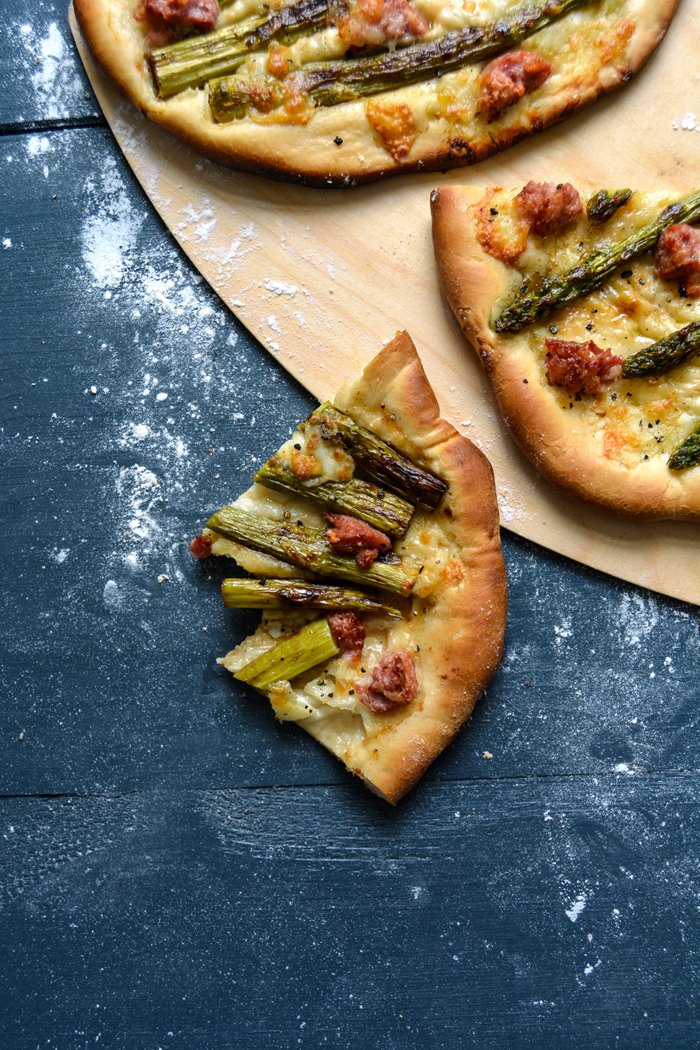
Our first KitchenAid pizza was such a great success that I made another one only three days later, but this time it was an oily pizza bianca topped with green asparagus, Italian salsiccia, and mozzarella di bufala. On our latest Saturday leisure trip, we went to the food market at Markthalle Neun in Kreuzberg in Berlin and enjoyed a luscious piece of very oily pizza bianca at Sironi. The baker, Mr. Sironi, went for a topping of broccoli, sausage, and mozzarella. It was very minimal and very good and a reminder that it's time for a white pizza in my kitchen. I find it lighter and quicker to prepare and it tastes just as good when it's cold, which makes it perfect for summer picnics or easy dinners on the balcony or in the garden. I'm really impressed by the simple combination of greens, mozzarella, and sausage. Asparagus is in season at the moment, but feel free to replace it with broccoli, leek, zucchini or whatever veg comes to your mind. You could also add a little garlic oil, which I don't find necessary. But we're talking about pizza, so everybody should just follow their personal preferences. Enjoy!
Click here for more pizza inspiration.
Thank you KitchenAid for helping me make my little kitchen dream come true!
Pizza Bianca with Green Asparagus, Salsiccia, and Mozzarella di Bufala
I start to prepare the dough 2 hours before I bake the pizza to give it enough time to rise and I bake it on a hot baking sheet, which has a similar effect to a pizza stone.
Makes 2 pizzas
For the dough
plain flour 350g / 2 2/3 cups
fast-acting yeast 1 (7g / 1/4 ounce) envelope
fine sea salt 1 teaspoon
water, lukewarm, 180ml / 3/4 cup
olive oil 6 tablespoons
For the topping
olive oil
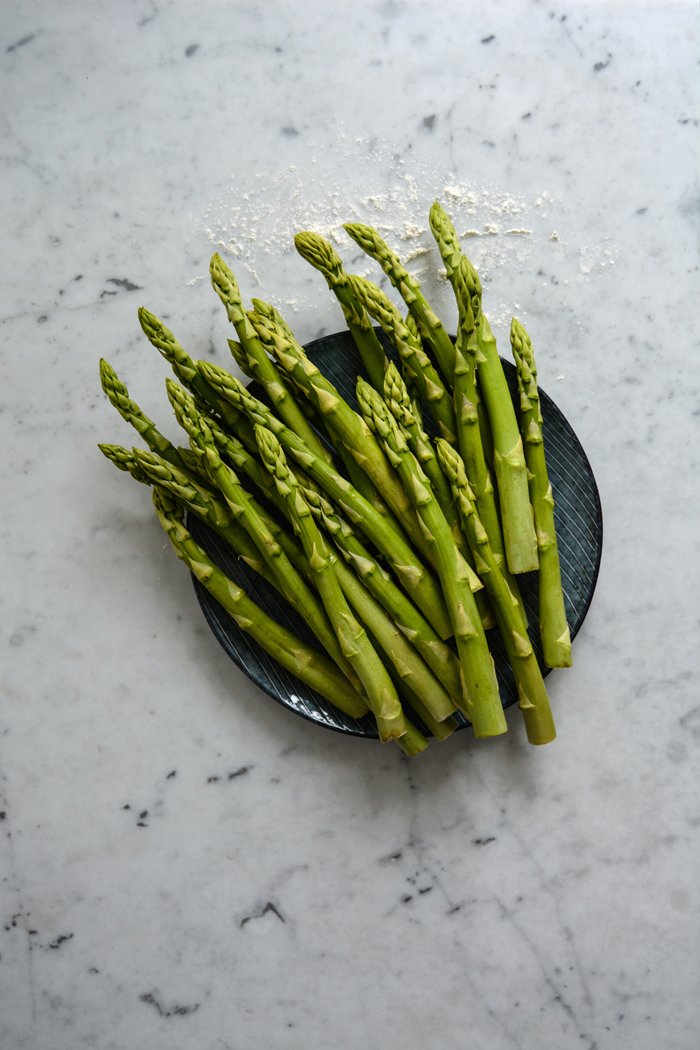
green asparagus, trimmed, 14 young stalks
flaky sea salt
black peppercorns, crushed in a mortar
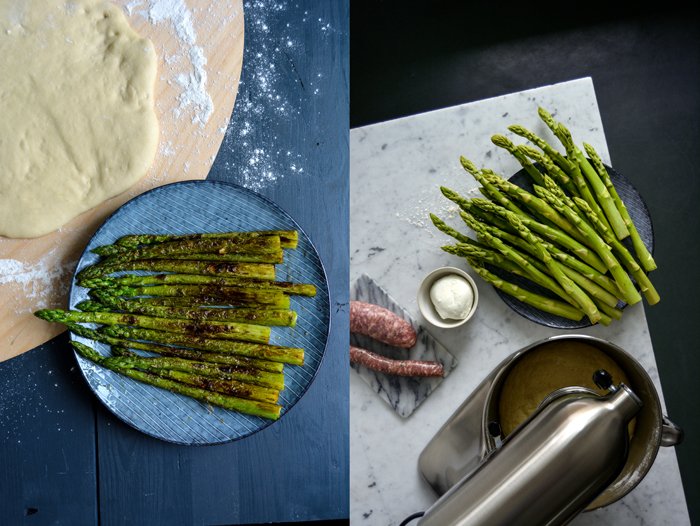
large Italian salsiccia sausage (or any other coarse sausage), skin removed and cut into chunks, 1
mozzarella di bufala, torn into chunks, 125 g / 4 1/5 ounces
For the dough, combine the flour, yeast, and salt in the bowl of a stand mixer fitted with the dough hook. Add the lukewarm water and olive oil and knead on medium-high speed for a few minutes until well combined. If the dough is too sticky, add more flour. Transfer the dough to a table or countertop and continue kneading and punching it down with your hands for about 4 minutes until you have a smooth and elastic ball of dough. Place the dough back in the mixer bowl, cover with a tea towel, and let rise in a warm place, or preferably in a 35°C / 100°F warm oven, for about 60 minutes or until doubled in size.
While the dough is rising, prepare the topping: Heat a generous splash of olive oil in a large, heavy pan and sauté the asparagus, turning occasionally, on medium-high heat for about 7 minutes. Season with flaky sea salt and crushed pepper to taste and set aside.
When the dough has doubled in size, punch it down, take it out of the bowl, and divide into 2 parts. On a well-floured work surface or pizza peel, stretch or roll each piece of dough into a 28cm / 11" disc. Cover with a tea towel and let rise for about 30 minutes or until puffy.
Place a baking sheet (or pizza stone) on the bottom of the oven and preheat the oven to the highest temperature, 260°C / 500°F or higher.
Once the baking sheet is hot, carefully take it out of the oven, flip it over, and place it on a trivet or other heat-safe surface. Arrange 1 of the risen dough discs on the baking sheet and spread half the asparagus, salsiccia, and mozzarella di bufala on top. Push the asparagus gently into the dough. Sprinkle with 1 tablespoon of olive oil, a little flaky sea salt, and crushed pepper and bake on the bottom of the oven for about 10 minutes or until the crust is golden brown and crisp and the mozzarella is golden. Repeat to make the second pizza and serve hot or cold.


Gozitan Pizza with Ricotta, Goat Cheese and Potatoes
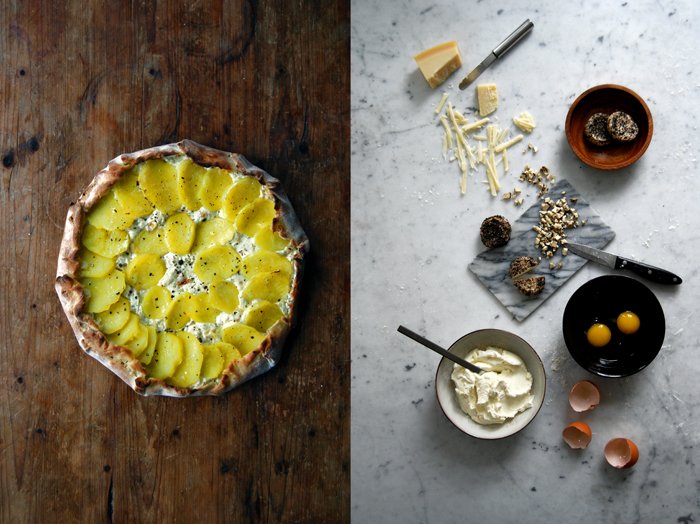
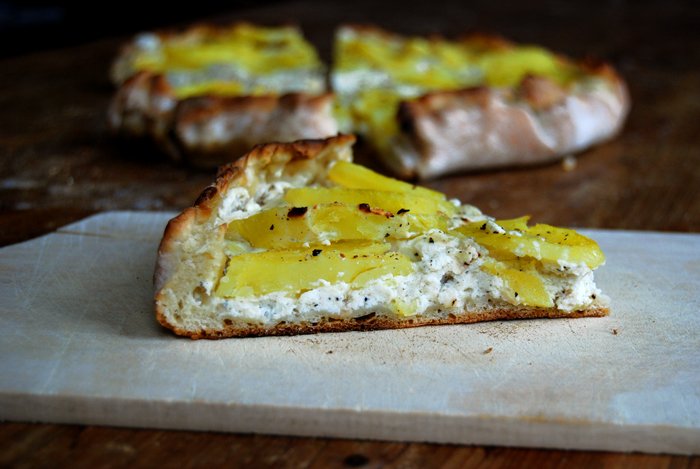
This is one of my favourite summer treats whenever we visit the island Gozo in the Mediterranean: the fabulous local pizza! It's shaped like an open galette, the rim fold up to hold the richest filling a pizza has ever seen: ricotta mixed with goat cheese and eggs, topped with potatoes and crushed black pepper. I love it!
Every year, when I pick up my first Gozitan pizza of the summer from my beloved Maxokk Bakery in Nadur I open the box with hungry impatience to start the feast. We always drive to a near-by park above San Blas beach to savour our pizzas, it's tiny but full of pine trees and oleander. The few wooden benches allow the most amazing view of the bay! While they others wait to get there, I'm often the only one nibbling on the first piece. No matter how hot is, it can be noon, the sun at its peak turning the inside of the jeep into a sauna, but nothing can stop me from enjoying this moment that I always long for like a child. The bakery calls this pizza a Ftira, not to be confused with the popular Maltese Ftira sandwich that I wrote about in July while we stayed on the islands. The bread for this sandwich and the pizza are made of the same dough, hence the same name.
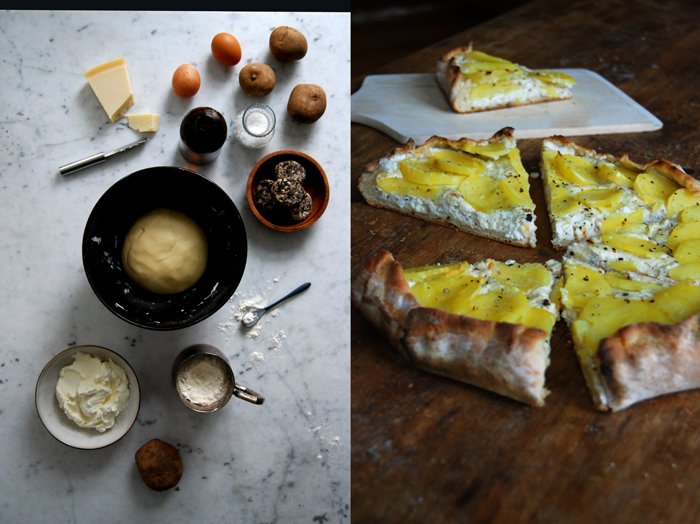
Back to the pizza, I decided that the time had come to give this recipe a try, here at my home, to have some sunshine on our plates at least - and it worked! I used my normal pizza dough and baking technique, I just folded up the sides for the authentic look and to hold it all together. The filling is rich, there is no way around it, it needs lots of ricotta and it doesn't make sense to spare on calories in the wrong situation (and here, it would be wrong!). Luckily, my Maltese sister Emma had just given us a package of Gozitan cheese while she was here to visit us, the strong peppered Gbejna made from local goat milk. As long as you don't live on the Islands of Malta, you will have to miss out on this treat but you can use any other strong, firm substitute.
If you get in the mood for pizza, here are some more recipes:

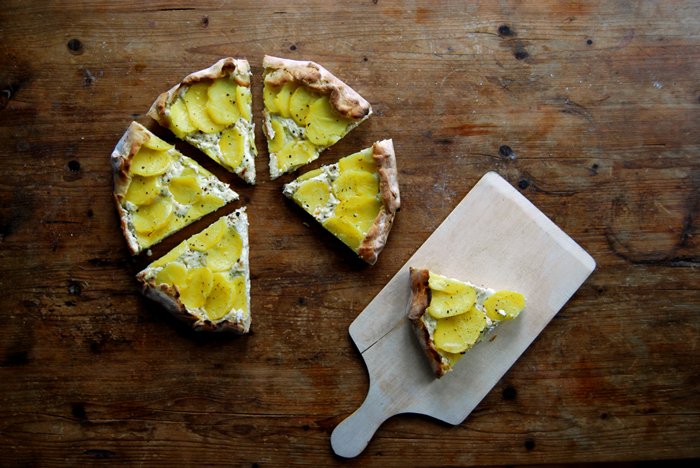
Gozitan Pizza with Ricotta, Goat Cheese and Potatoes
I start to prepare the dough 2 hours before I bake the pizza to give it enough time to rise and I bake it on a hot baking sheet which has a similar effect to a pizza stone.
For 2 round pizzas you need
For the dough
plain flour 350g / 12.5 ounces
dry yeast 1 sachet (7g / 1/4 ounce)
water, lukewarm, 190ml / 3/4 cup plus 1 tablespoon
olive oil 5 tablespoons
salt 1 teaspoon
Combine the flour with the yeast and salt, add the lukewarm water (you might not need all of it) and olive oil and mix with the dough hooks of the mixer for a few minutes. The dough shouldn’t be moist and sticky at all, more on the dry side. Continue kneading and punching with your hands until you have an elastic dough ball. Put the dough back into the bowl, cover with a tea towel and let it rise in the warm oven (35°C / 95°F) for 45 minutes (top/ bottom heat and not fan-assisted!).
When the dough is well risen, divide in two parts, and roll them out in two circles on a very well floured working surface. Each should fit on a baking sheet. Cover with a tea towel and let it rise for another 10-15 minutes.
For the topping
ricotta, 500g / 1 pound
firm, aromatic goat milk cheese (peppered Gbejna is best), finely chopped or grated, 150g / 5.5 ounces
Parmesan, grated, 70g / 2.5 ounces
organic eggs 2
black peppercorns, crushed in a mortar, to taste (if you don't use peppered cheese)
medium potatoes, boiled, peeled and thinly sliced, 6
olive oil
Whisk the ricotta, goat cheese and Parmesan and season with pepper to taste before you mix in the eggs. Add a little salt if necessary.
The pizza
Set your oven to 260°C / 500°F. My oven has a pizza setting but you can also use top / bottom heat. Put the baking sheet on the bottom of your oven to heat it (for about 10 minutes).
Take the hot baking sheet out of the oven, turn it around and place it carefully on two stable wooden boards or mats as it will be very hot. Quickly put one of the risen dough discs on the baking sheet, spread with half the ricotta filling leaving a rim around it. Arrange the potato slices on top and fold up the rim, gently pushing it onto the outer potatoes. Sprinkle with a little pepper and olive oil and bake for about 8 minutes or until the pastry is golden brown and the ricotta filling is set. Repeat with the second pizza.


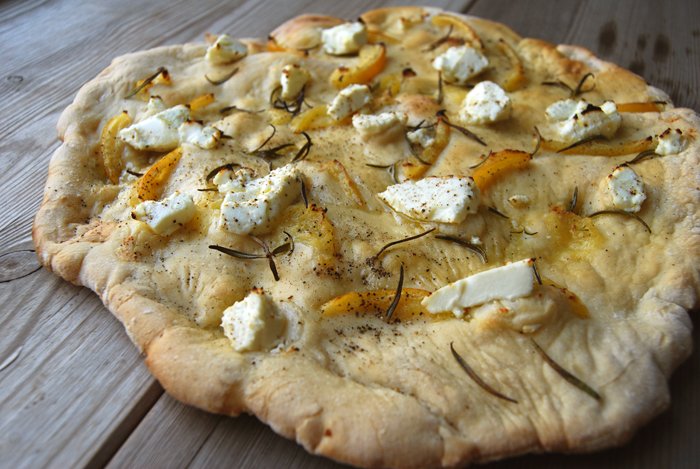
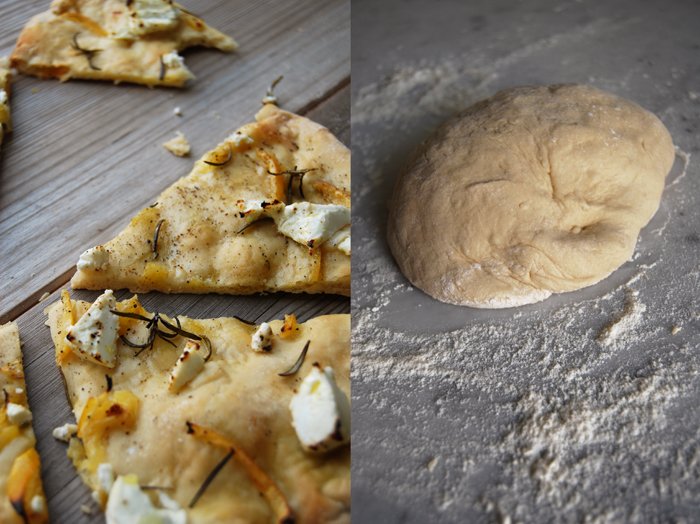
Pizza Bianca with Moroccan Lemons, Chèvre and Rosemary
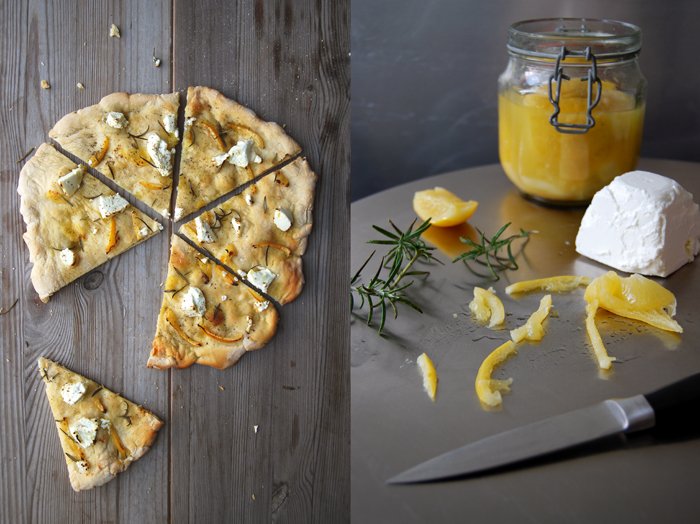
When I wrote about my Moroccan Preserved Lemons about a month ago, Kelly from My Soulfull Home got in touch. I met Kelly through a blog tour in February which she had organised. She asked me to join the tour together with 15 other bloggers, it was carnival and I shared my family's Berliner experience. A few weeks ago she told me about a delicious pizza bianca with lemons and rosemary which one of her friend's makes and she told me that I should give it a try as soon as my lemons were ready. Here they are, sour, soft and juicy!
When I had the first piece of my own preserved lemons in my mouth, I felt a bit excited! My aunt was with me in my kitchen, she was the one who inspired me to preserve lemons in the first place. The first bite was intense, a bit salty as I forgot to rinse the slice of lemon, too much excitement! When I let some water rinse off a bit of the saltiness (for 2-3 seconds), they were perfect! The preserving liquid, concentrated juices of all the lemons, tastes as good and is great for strong sauces and stews.
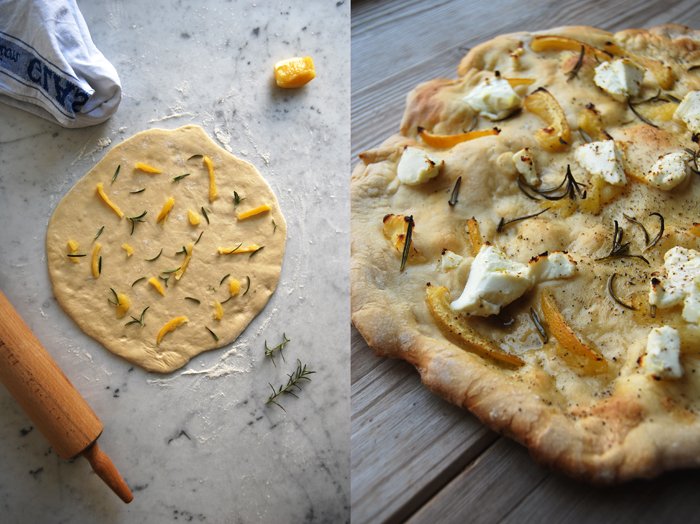
For my pizza bianca, I decided to add some chèvre to mix its smooth milkiness with the lemon's sourness and the woody rosemary. Ricotta would have worked too, but I wanted the strong aroma of this soft goat cheese. I sprinkled some olive oil on top which gave it a bit of a focaccia feeling, some sea salt and pepper and enjoyed this absolutely delicious summery snack. Thank you Kelly!
If you like pizza as much as I do, you can also try my Aubergine and Pecorino Pizza or my Spinach and Ricotta Pizza.
Pizza Bianca with Moroccan Lemons, Chevre and Rosemary
I always start to prepare the dough 2 hours before I bake it to give it enough time to rise. I bake my pizza on a hot baking sheet which has a similar effect to a pizza stone.
For 1 large pizza (size of 1 baking sheet) you need
For the topping
chèvre or ricotta, 200g / 7 ounces
preserved lemon, rinsed and thinly sliced, 1(you could also use lemon zest)
fresh rosemary, the needles of 5 sprigs
olive oil 4-6 tablespoons
salt and black pepper
For the dough
plain flour 350g / 12.5 ounces plus more for mixing
dry yeast 1 package (for 500g / 1 pound of flour)
water, lukewarm, 190ml
olive oil 3 tablespoons
salt 1 teaspoon
Combine the flour with the yeast and salt, add the lukewarm water (you might not need all of it) and olive oil. Mix with your dough hooks for a few minutes. The dough shouldn’t be moist and sticky at all, more on the dry side. Continue kneading and punching with your hands until you have an elastic dough ball, not too hard, not sticky. Put the dough back in the bowl, cover with a tea towel and let it rise in the warm oven (35°C / 95°F) for 40 minutes. This works really well but make sure that your oven is set to top/ bottom heat and not to fan.
When the dough is well risen, roll it out on a very well floured working surface (this is very important or you'll have problems taking it off again). It should be a bit smaller than the size of your baking sheet. Cover with a tea towel and let it rise for another 10-15 minutes.
The pizza
Set your oven to 260°C / 500°F. My oven has a special pizza setting but you can use top / bottom heat as well. Put the baking sheet on the bottom of your oven to heat it (for around 10 minutes).
Take the hot baking sheet out of the oven, turn it around and place it carefully on two stable wooden boards or mats as it will be very hot. Place your risen dough carefully but quickly (best done by two people) on the baking sheet, push it gently into place if necessary. Sprinkle with the slices of lemon, rosemary and olive oil and dollop the chèvre with a tea spoon on top.
Put the baking sheet back into the oven, on the bottom again, and bake for a few minutes until the pizza is golden, season with salt and pepper.